The spinning tackle must be correctly selected to solve specific problems, in other words, it must be harmonious and balanced. When choosing the model of reel, spinning rod, model and diameter of the fishing line (braided cord), many fishermen do not attach importance to the correct winding of the fishing line on the reel. This guide will discuss the nuances of winding fishing line, which will allow you to avoid unpleasant moments while fishing and disappointments from the gear (dropping loops, “beard”, casting range, shooting). You will also find here step-by-step instructions for winding, setting up the reel and a diagram of the nodes for tying the fishing line to the spool.
Many aspects have been discussed, so it wouldn’t hurt to share the outline of the article:
- Adjusting the winding profile (taper)
- Using Backing
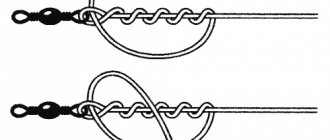
- Tying the fishing line to the spool
- How to spool fishing line correctly
Straight cone (Fig. 1a)
Laying with a variable winding pitch, in which the winding pitch decreases towards the spool wall. As a result, the closer to the spool wall, the more the line is wound and the laying takes on the shape of a cone tapering towards the side. This arrangement provides the least friction when the turns come off, since each far turn has a larger diameter than each near one and therefore the friction of the far turn on the near one when coming off is minimal.
In addition, most of the turns come off at an angle to the bead (angle “b”) close to 90*, which ensures minimal friction against the bead. As a result, the casting distance compared to the “cylinder” increases up to 15%, depending on the taper. On the other hand, the ease of winding, coupled with a small winding pitch, increases the likelihood of the turns laid closer to the wall being pulled off and the formation of a “beard”.
To reduce, so to speak, the “danger of beards,” spools with a straight cone profile are produced. Here the cone is formed not by changing the winding pitch, but by the shape of the spool. As a rule, such spools have manufacturer's marks, above which winding is not recommended.
If there are no marks, then the height of the winding near the wall should be at least 2 mm below the side. The “straight cone” laying is most widely used for casting relatively light loads over long distances. Especially in cases where monofilament is used as the main scaffold.
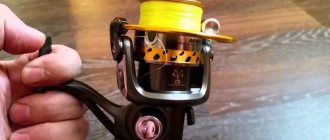
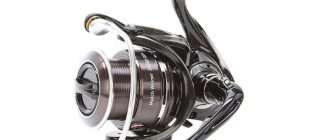
Winding adjustment on Daiwa Freams'11 size 2500 reel
Hi all! I’ll say right away that the 2500 reel size is my personal case, and of course, this material can be used for any size reel and spool!
Recently, new cords from Spider Wire appeared in my arsenal, in particular EZ Braid with a diameter of 0.12 mm, unwinding 137 meters, green. I decided that I would need this line now, in winter, for fishing on a warm river, and wind it on a Daiwa Freams'11 reel size 2500. I put the reel on the lower leg of the spinning rod, wound the whole braid, and the result turned out to be very average...
What to do? Even winding in the center, underwinding at the bottom and rewinding at the very top of the spool. The answer is very simple - adjust the winding with bobbin washers. I climbed many sites on the Internet in search of a solution. And everywhere everything is the same - rewind at the top - put a washer, rewind at the bottom - remove the washer. What kind of washers are these? Where can I get them? Where to put it? In general, two evenings of searching did not give an adequate result and I decided to make such material myself with all the explanations. So, we will need the reel itself, a cord that we will wind, and washers for adjustment. In my case, these are washers from Daiwa reels - you can find them in the box from your reel (if you bought a new or used one but the former owner gave the reel with everything that was there), ask your friends or buy it somewhere in stores. Actually, the washers themselves
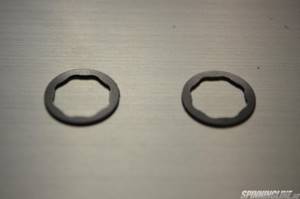
The washers are initially made of different thicknesses so that you can select the desired level to which the spool will rise. In my case, I started with one thin washer. I removed the spool and with a little effort put it on the axle
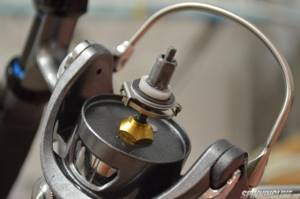
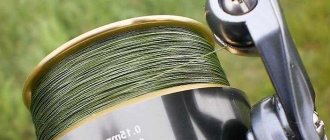
I put the spool back and rewinded the cord. This time the winding suited me
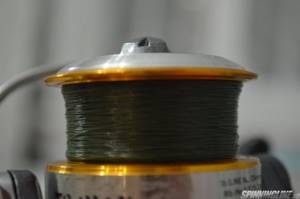
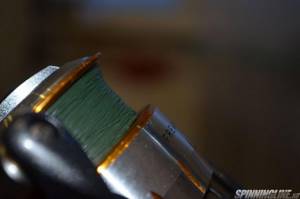
It has become noticeably better. Then I decided not to experiment and wind it up to the full volume of backing, after which I turned them over and finally wound everything in place, as it should be. A little about the cord itself - it is impregnated with something, very similar in type to FireLine, only a little softer. There is a little memory, but this is temporary - a few fishing trips and the excessive rigidity will disappear. To the touch, due to the impregnation, it is quite smooth, and the volatility should be fine. As a backing I used another cord with a diameter of 0.14 - here I know for sure that the diameter is too high, when rewinding in my hand I could clearly feel the difference in the diameter of the main cord and the backing. This means that the EZ Braid is thinner than the previous one, which means that the diameter is not much of a lie and it is really close to the stated 0.12mm. General photo after all rewinds

If you look closely, the problem with rewinding remains at the top, but it’s still better than it was originally. Then I decided not to change anything and fish for now with this setup. And winter fishing will be the most severe test for laying in general and for the new SpiderWire EZ Braid cord in particular!
Reverse cone (Fig. 1b)
Laying with variable pitch, in which the winding pitch decreases towards the side of the spool. It can be seen from the figure that the angle at which the line leaves the spool (angle “a”) for a reverse cone along the entire length of the spool will be less than for a straight cone. Consequently, the friction of the far turns of the scaffold against the near turns of the reverse cone is greater. At the same time, each far turn has a smaller diameter than the near one. This reduces the likelihood of spontaneous collapse of turns and the formation of a “beard”.
Let's look at angle "b". Most of the turns of a straight cone come off the wall at a larger angle “b”, which provides less friction against the side. And in a reverse cone, most of the turns come off at the side at a smaller angle “b” and, therefore, with greater friction. As a result, the total friction of the fishing line (flight friction + friction on the side) at the reverse cone is significantly greater. The casting range compared to the “cylinder” is reduced to 15% depending on the taper.
But every cloud has a silver lining. The reverse cone is the most beard-safe style. You have to try hard to make a “beard” with this styling. Therefore, winding can be done almost to the edge of the bead, leaving perhaps a microscopic gap of about 0.5 mm.
To reduce friction on the bead, spools with a reverse cone profile are produced. Here the cone is formed not by increasing the number of turns near the bead, but by the shape of the spool. This laying is widely used for uneven wiring, when the turns of the line are wound with different tensions, which increases the likelihood of the formation of a “beard” when casting.
Rules for winding fishing line on a reel
Winding fishing line onto a spool has a number of features and is carried out in several stages. After determining the required amount of material, you can begin winding. Below are step-by-step instructions:
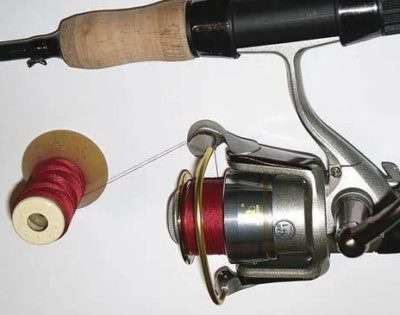
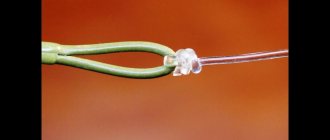
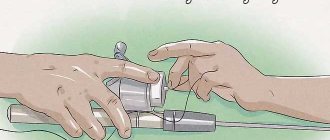
A reel is installed in the spinning reel seat. There is no need to assemble the rod completely; you can limit yourself to the first knee. The main line or backing is tied to the spool with one of the knots mentioned above with the line handle open.- It is important that during the winding process the fishing line comes off the vertically held, rotating bobbin, and does not fly off it in coils. For this purpose, there is a special hole in the reels. For example, you can ask someone to hold it on their finger or fix it in some other way. During winding, you need to hold the line over the first ring with one hand, thus adjusting the winding density. You need to hold it with the same force, without loosening the line or squeezing it too tightly. The free hand rotates the reel handle.
- You cannot gain too much volume, at which the line reaches the edge of the side of the spool, this is fraught with dropped loops and “beards”. Correct winding is 2-3 mm from the edge of the side.
- After winding, the end of the fishing line is inserted into a clip located on the side of the spool.
Cylindrical laying
Universal, most common laying with a constant winding pitch, with characteristics somewhere between a straight and reverse cone. Sufficiently beard-proof with relatively low derailment friction and bead friction. If there are no manufacturer's marks on the bobbin, the gap when winding is 1-1.5 mm.
A cylinder is the most optimal placement for a feeder reel when the weight of the thrown loads ranges from 50-150 grams. It can be used both in a match at close and possibly medium distances, and in spinning.
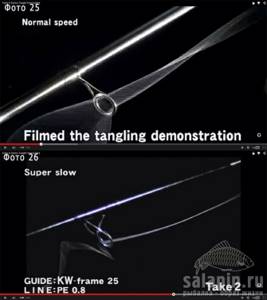
Video for beginners
Telling with words is good, but showing is better. I found a good training video in which the author simply and clearly explains how to properly wind the fishing line on a reel. I recommend you watch it so you don’t have any questions!
Friends, perhaps that's all. He told me that he knew about winding and styling! One could also mention inertial coils and multiplier coils, but I will pay special attention to this and write about it later. If I forgot to include something, please write about it in the comments! And also add your own ways as you do it.
Adjusting the spool
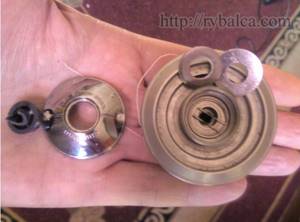
To make the styling we need, we need to move the spool along the reel rod. We move the spool forward - more turns are wound at the wall, back - more turns are wound at the side. In the first case we get a direct cone, in the second - a reverse one. Adjustment is carried out using washers (photos 1 and 2).
To move the spool of a reel with a front clutch forward, washers must be placed. To move the spool with the rear clutch forward, the washers must be removed. And vice versa. If there are no washers included with the reel, any stainless steel washers of suitable size will do, including plastic and polyethylene. The thickness and number of washers removed (placed) depends on the desired cone size and spool length.
Winding profile - what is it?
A profile is a conventional section of the spool along with the cord wound around it. There can be three options: straight cone, reverse cone and “camel mountains”. When the turns lie unevenly and lumps of fishing line form.
The last “bumpy” profile is the most problematic, and if you wind the cord on the spool and see these bumps, then there will definitely be “beards”. From experience, the most correct option is a reverse cone; it gives the least number of problems with dropping loops, or rather, there are practically none. With a straight cone, the situation is 50 to 50. If there are no loops, then nothing needs to be adjusted, if the coil is a no-no and drops a couple, then you need to adjust. How to do it?
Winding taper
On all models of spinning reels, it is possible and, often, even necessary to adjust the taper of the line winding. Many products, such as those from Daiwa and Shimano, do this by placing an additional plastic washer under the spool. This allows you to lay the line in a reverse cone, which is especially important when fishing with twitching, microjig and other methods where jerk animation is used. In addition, this position of the fishing line affects the casting distance, increasing it, since the thread can be wound almost close to the side of the spool.
In those models where it is not possible to install a washer, the taper is adjusted by first winding the required amount of electrical tape or adhesive tape onto the spool. Yes, this is not the best solution, but it is still a way out of the situation, especially when the reel lays the line unevenly with dips and humps.