Spinning today is the most popular tackle that has attracted millions of fans. Of course, because fishing with a spinning rod is an exciting game that gives the fisherman a lot of positive emotions and the joy of defeating a cautious and cunning opponent. The reward could be a huge catfish, a decent-sized pike, or a dozen or two decent perches. However, not everyone manages to return home with trophies.
Spinning fishing is a complex science that can take years to master. Only knowing all its nuances can you count on a positive fishing outcome. It’s not enough to just buy a rod, reel, fishing line, the first few baits you come across and go to the pond. At the initial stage, it is important to study the theory and do everything gradually, step by step. This is especially true for tool assembly. For example, the winding of the line on the spool is of utmost importance. How to properly wind fishing line on a spinning reel will be discussed below.
Basic moments
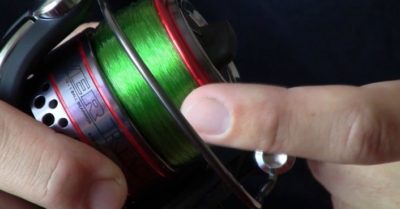
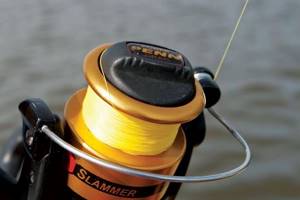
Before fixing the end of the fishing line on the spool and winding it, you need to clearly determine the amount of material. The coil should not be filled only to half or vice versa with a “slide”. In the first case, the line will not come off the spool well, which will negatively affect the casting distance, and in the second, dropping loops and the formation of so-called beards cannot be avoided.
Another factor that affects the comfort of fishing is the winding density. Professionals do not recommend reeling in with great force, that is, making the tension too strong, otherwise the same thing will happen as if the spool is not filled enough - when casting, the line will come out with difficulty.
Modern inertia-free reels are capable of rotating in both directions (clockwise and counterclockwise), so it is important not to make a mistake with the winding direction. It should coincide with the working rotation of the spool.
Options for winding fishing line on a spinning reel
There are many reels on the fishing market today, and each individual model has its own spool profile. It can be cylindrical, trapezoidal or chaotic. Let's look at each in more detail:
- Cylindrical (flat) winding is a universal and most common method among fans of feeder and spinning fishing. The friction of the fishing line during the descent and the friction against the side of the spool with this installation is relatively low. The formation of beards is not excluded, but if the equipment is handled correctly, such a nuisance rarely happens.
Winding with a slope is possible in two versions, namely a straight cone and a reverse one. The first involves laying the fishing line (cord) with a variable pitch, decreasing towards the spool wall. As a result, more fishing line is wound near the wall, and the profile becomes cone-shaped, tapering towards the side. This shape ensures minimal friction, since the diameter of each subsequent turn is larger than the previous one. With a reverse cone, the opposite is true - the steps decrease closer to the side of the spool. This increases friction and, as a result, casting range suffers. If we compare such a winding with a cylindrical one, the difference in range is approximately 15-20%, although, of course, a lot depends on the settings of other elements of the gear. The reverse cone still has its advantage - with this installation, spontaneous derailment almost never occurs. In other words, to tangle your beard, you need to try very hard.- Chaotic winding is a sign of poor quality coil. Beginners often purchase cheap Chinese products in order to get the hang of them, learn how to handle a spinning rod, and then switch to high-quality reels with proper styling. Therefore, this option also has a right to exist. Moreover, the reel is quite an expensive thing, and not everyone can afford a branded model. Chaotic winding, in which the turns “walk” haphazardly throughout the entire spool, can create many problems during the fishing process. Most often this is an involuntary derailment and tangling of the fishing line; breakages are also possible when casting due to a coil that is too clamped.
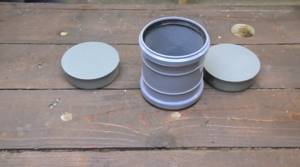
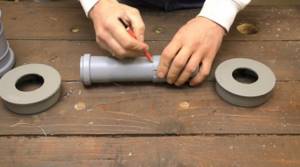
DIY compact cable reel made from PVC pipes
Hello, dear readers and DIYers! Anyone who has dealt with construction or installation work knows well how much time it takes to unwind and unwind wires to connect a tool. In this article, the author of the YouTube channel “Creates DIY” will tell you how quickly and easily you can make a cable carrier from PVC sewer pipes.
Materials. — Plug, socket — 5 m of cable 2X2.5 mm — PVC sewer pipes, plugs
— Self-tapping screws with a press washer — Handle — Sandpaper.
Tools used by the author. — Hacksaw, knife — Screwdriver — Gas torch — Crowns — Ruler, square, marker.
Manufacturing process. So, the master begins by preparing the stubs. Mark the center on them using a square and ruler. It is enough to draw a line along the ruler, rotate the workpiece, and mark the second line. This way you can quickly find the center of the circle. Drills the starting hole.
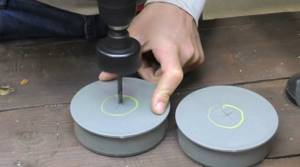
Then he turns the plug over and drills with a crown. Burrs are removed with a knife.
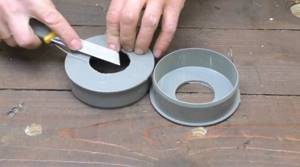
Try on a piece of 2 inch pipe, this will be the bushing. Puts on the cut piece of pipe and marks the cutting line.
Cuts off the required workpiece and cleans its end with sandpaper.
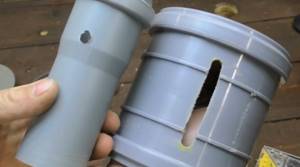
Marks the center on the 2-inch pipe plug, heats the pins on the handle, and melts them into the end of the sleeve. Additionally secured with a self-tapping screw.
This is such a compact carrying case.
Source
Become the author of the site, publish your own articles, descriptions of homemade products and pay for the text. Read more here.
Backing
What is backing and what is its function? This is a layer of some material designed to increase the diameter of the spool. Thanks to it, you can put the right amount of fishing line of a certain diameter on the reel without unwinding the entire reel in order to completely fill the spool. The backing can be a regular nylon thread, a used braided cord, fabric or PVC electrical tape. The material should be wound as tightly as possible so that the base has no gaps. When using nylon thread or cord, the main line is connected to the backing using any reliable knot. For example, a grinder or blood.

Many people calculate the volume of backing “by eye”, but in this case there is a high probability of making a mistake, as a result of which there is not enough main fishing line (cord) or, on the contrary, you have to wind too much. Experienced spinning players act differently. First, they wind the main line (the required volume) onto the spare spool, and then the backing. Then all that remains is to rewind it all in reverse order onto a working spool of the same capacity. This method is the most accurate.
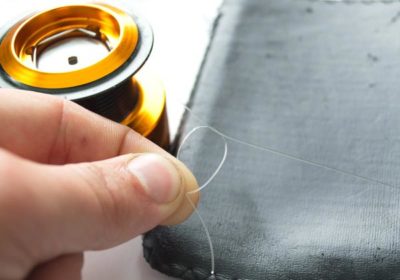
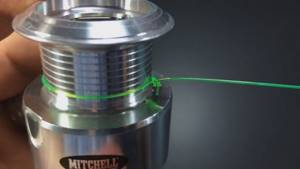
Fixing the fishing line on the spool
A fishing line, braided cord or backing must be tied to the spool. This is the first rule. Trophies are different. A large, strong fish can exhaust the entire stock during fishing, so with an unattached fishing line there will be no way to hold it.
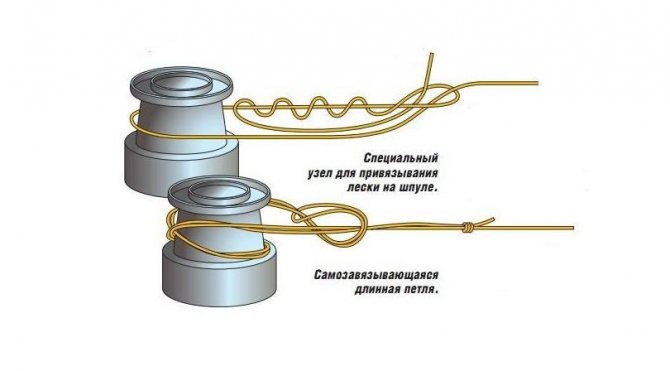
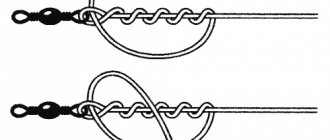
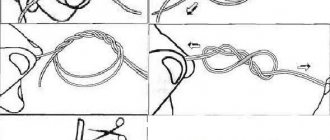
You can tie a fishing line (braid, backing) with any reliable self-tightening knot. The most popular among spinners are the clinch, double loop and arbor knot. The latter option is also called the axial node. For greater reliability, the first turn should be additionally secured with a piece of fabric insulating tape or medical plaster, securing it in the direction of winding. Thanks to it, even a poorly tightened loop will not spin on the spool. By the way, before tightening the knot, it is advisable to wet it. This applies to any fishing knots, no matter what elements of the gear they are tied on.
Photo tips on how to tie fishing line to a reel
Note!
How to tie a fishing line to a reel - methods, tips on how to tie correctly and an overview of the most reliable knots (85 photos and videos)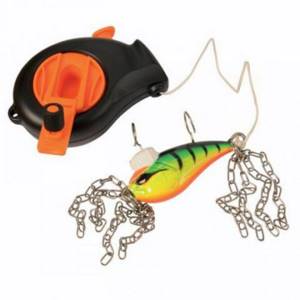
Cuts for wobblers and spinners - how to make a simple homemade cut. 110 photos and videos of practical tips
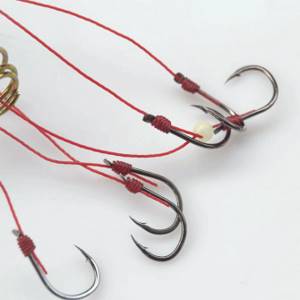
How to tie a hook to a fishing line - advice from professionals and the best patterns for beginners (115 photos and videos)
Read here Donkey equipment - varieties, main elements, installation and principle of operation (145 photos and videos)
Help the project, share on social networks 
0
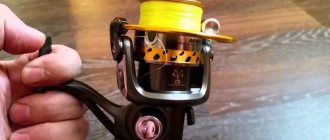
Rules for winding fishing line on a reel
Winding fishing line onto a spool has a number of features and is carried out in several stages. After determining the required amount of material, you can begin winding. Below are step-by-step instructions:

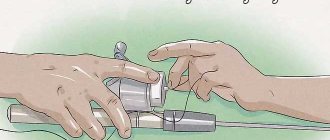
A reel is installed in the spinning reel seat. There is no need to assemble the rod completely; you can limit yourself to the first knee. The main line or backing is tied to the spool with one of the knots mentioned above with the line handle open.- It is important that during the winding process the fishing line comes off the vertically held, rotating bobbin, and does not fly off it in coils. For this purpose, there is a special hole in the reels. For example, you can ask someone to hold it on their finger or fix it in some other way. During winding, you need to hold the line over the first ring with one hand, thus adjusting the winding density. You need to hold it with the same force, without loosening the line or squeezing it too tightly. The free hand rotates the reel handle.
- You cannot gain too much volume, at which the line reaches the edge of the side of the spool, this is fraught with dropped loops and “beards”. Correct winding is 2-3 mm from the edge of the side.
- After winding, the end of the fishing line is inserted into a clip located on the side of the spool.
Useful tips
We recommend that you familiarize yourself with useful tips from experienced spinning players:
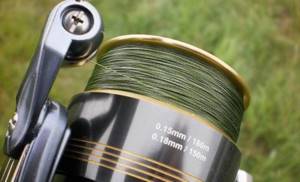
Markings on the spool will help you calculate the volume of fishing line. For example, on a 3000 spool it says 0.30/100. This means that you can use it to collect 100 meters of fishing line with a cross-section of 0.30 mm. But in spinning fishing such diameters are rarely used. What if the reel uses 0.15 mm cord? This is half the diameter, therefore, 200 meters of braid with a cross section of 0.15 mm will fit on the spool.- It is advisable to purchase reels from well-known brands; they are reliable, time-tested, and almost never fail when fishing. Beginners should pay attention to products that include spare spools. They greatly facilitate winding and allow you to quickly change equipment right on the pond.
- It is unacceptable to use various sewing threads (cotton and others) as backing. They accumulate moisture, which then spoils the fishing line.
- At the beginning of each season, it is recommended to install new fishing line or braided line, and the material used last year can be left as backing. If there is no financial opportunity to do this, the line is rewound in the opposite direction to remove the worn part deep into the spool.
Now the question has been answered with confidence - how to wind fishing line on a spinning rod’s inertia-free reel correctly.
Video on the topic:
How to wind fishing line on a reel?
05:59
How to properly wind the cord on an inertia-free reel. Backing winding
11:18
How to properly spool fishing line onto a HD reel
14:39
how to wind fishing line on a reel
04:58
narybalke
Winding technique
Before you begin winding the fishing line onto the spinning reel, you need to install the device itself on the spinning rod (or fishing rod), or secure it in the machine, if you have one. After securing, you need to stretch the fishing line or braid through the rod rings, starting from the last one and ending with the reel itself.
Before you start winding the line, you need to tie it to the reel. You can read about how to tie a fishing line to a reel in this article.
First method
- First you need to wrap the line around the reel spool (the same is done with braid).
- The working end of the fishing line needs to overlap with one of the veins, this is necessary to create a kind of loop.
- Then you need to twist the loop, which involves 4-6 turns.
- After this, you need to tighten the tip into the loop that is formed as a result of twisting, and tighten the knot.
- Now simply reel in the line using even movements of the reel handle.
Second method
- A loop of small diameter is formed at the end of a fishing line or braided cord.
- Now the main core is inserted into it to form a kind of loop with a large diameter.
- After this, a large loop is thrown onto the reel spool and tightened (you need to be careful, otherwise it is very easy to confuse the tightening direction).
- Then the process of evenly laying the line onto the reel begins.
Third method
- First, a double loop is formed, which is then put on the spool.
- After this, the working end of the fishing line is inserted into the loop.
- Then the knot needs to be wetted and tightened, you should get something similar to a clinch knot, but with an additional large diameter loop.
After winding the fishing line onto the spinning reel is completed, it is necessary to lay it evenly. For this process you need to create some tension on the cord or fishing line. For this process, various devices are used, or an assistant holds the blank with fishing line in his hands.
The assistant needs to hold some kind of rod in his hands; a pencil is best for this. This fall you need to put on a bobbin with fishing line or braid that you want to wind. Now all that remains is for one to turn the reel handle, and the other to hold the reel in such a way as to create the necessary tension in the fishing line.
Some fishermen use a small plastic bucket to carry out this process. The bobbin must be placed on the bottom of the bucket, while holding it between the legs. This way you can constantly monitor the reel and it will not leave your field of vision. You can create additional tension using the fingers of the hand in which the spinning rod is located during winding.
Easel method
To make winding fishing line onto a spinning reel easier, you can use a special machine that is sold in a store or made by yourself. Today there are a lot of such devices, they differ in modifications and appearance, but their operating principle remains standard.
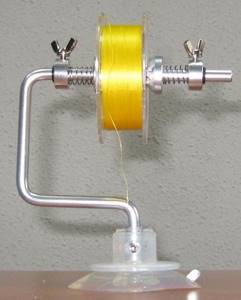
- The machine is rigidly fixed on a flat surface (usually a table), using a suction cup or a special clamp.
- The bracket is equipped with one or two axles, which have springs with clamping mechanisms.
- After this, you need to install the bobbin on it and firmly clamp it.
- Increasing or decreasing the pressure on the springs allows you to change the tension force during winding.