The efficiency and convenience of fishing depends on the correct winding of the fishing line on the reel. It is a mistake to think that the fishing line can be tied in any convenient way. There are several options for how to properly tie a fishing line to a reel. The main thing is that the node is as reliable as possible.
It is also important to eliminate all factors that may cause inconvenience during the fishing process, since this directly affects the result.
Node requirements
When choosing which knot to tie the fishing line to the reel, you should consider several factors:
- maximum strength;
- eliminating the risk of line damage due to kinks;
- no obstacles for the free release of line when casting equipment;
- tensile strength when casting the entire length of the line.
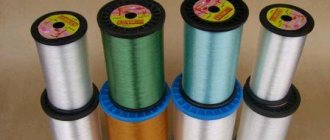
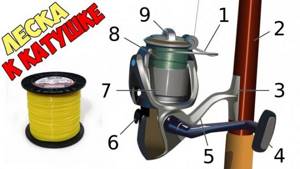
How much line should you reel in?
Don't put too much line on the reel. The principle “the more the better” does not apply here.
The ideal situation is when the fishing line fills the entire spool, forming a slightly convex or concave cylinder, the diameter of which is 3 mm less than the diameter of the spool side.
Excess fishing line, when tangled, can create unnecessary obstacles during fishing (dropping rings, beards). Otherwise, when there is not enough fishing line, when unwinding, friction occurs on the side of the spool and the line wears out faster.
Self-tightening loop
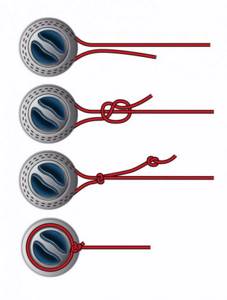
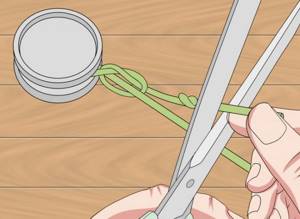
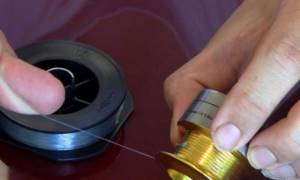
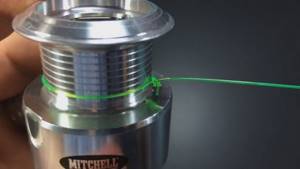
The simplest and most effective way to tie a fishing line to a fishing rod reel is to make a self-tightening loop. Since the knot is self-tightening, it guarantees perfect strength.
Knitting principle:
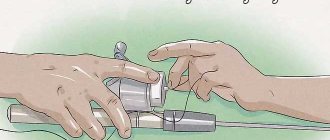
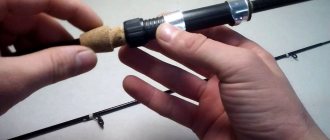
- To make the knot more convenient to knit, it is better to remove the spool from the reel. The fishing line must first be threaded through the rings of the rod. Such preparation must be carried out when tying the fishing line with any knot.
- Make a loop at the tip of the fishing line. It can be classic or figure eight shaped (surgical loop).
- Thread the main line into the resulting loop. The size of the second loop that is formed depends on the length of the threaded fishing line.
- Throw the resulting large loop onto the spool.
- Tighten the loop. During the installation process, it is extremely important to correctly determine the side on which the loop is thrown. You need to tighten the loop from the side where it will tighten itself during the operation of the coil.
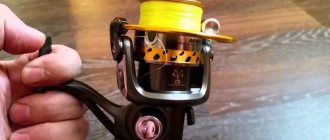
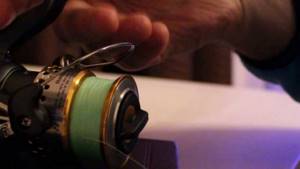
Adhesive plate in fishing
Spinning reels usually come with a special adhesive plate that can be used to provide additional strength to the connection between the line and the spool. This is necessary so that if the line is completely unwinded, the loop does not slip during winding back.
It is very easy to secure the knot with an adhesive plate. Just stick it on top of the knot. Instead of an adhesive sheet, you can use a regular patch.
Now you have discovered some secrets and subtleties of fishing skills that will help you protect yourself from returning home empty-handed.
Arbor knot
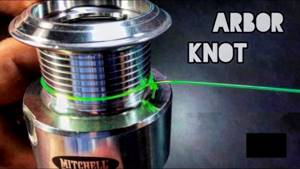
The simplest method for tying fishing line to a winter reel or any spinning reel is to make an Arbor knot.
In fact, it is also self-tightening, which ensures high reliability, but it is knitted somewhat easier compared to the previous version.
This is done as follows:
Wrap the line around the spool. Leave the tip long enough to make tying a knot easy.
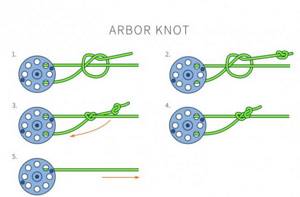
Make a knot at the tip. Before doing this, you need to wrap the line towards the spool. It is necessary to achieve an effect in which the tip of the fishing line with a knot will slide along the main cord directed towards the spool.
Tie a second knot at the end of the fishing line. But, it should not be wrapped around the main line. This unit serves for fixation (stopper). It prevents the risk of the first loop unwinding.
Wet the line and tighten the knots. Cut off the excess part. You should always remove excess line, as it will interfere with the free flow when casting.
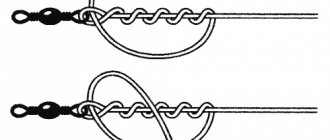
Grinner's universal method
Among professional fishermen and amateurs, the Grinner knot is often used, which is characterized by a high degree of reliability. This type has gained popularity due to its versatility. The situation is such that it can be used not only when tying a line to the reel spool, but also for attaching hooks, spinners and even two different fishing lines.
To quickly and correctly create a Grinner knot, you need to do the following movements:
- Create a tail by moving 10 cm from the edge of the fishing line.
- Wrap the coil several times.
- We direct the tail in the opposite direction from the winding, forming a longitudinal loop.
- Holding the loop with your finger, we wrap parallel lines around ourselves.
- After making at least five turns, we gradually release the loop.
- Increase the tension, release the loop completely and tighten the knot.
- The remainder of the ponytail must be cut off at the base of the knot.
It is necessary to note the only drawback - it is no longer possible to untie the knot. To convert the spinning rod, you will need to use a knife or scissors. The Grinner method can be used with material of any thickness.
Clinch
A very good way to tie a fishing line to a fishing reel. It is especially effective on girders, although it is quite suitable for any other types of gear.
- Wrap the tip of the line around the spool.
- Step back a little from the spool and wrap the tip around the main line.
- Make 4-6 turns with the tip. You need to wrap the main line towards the spool. This creates a loop around the main line.
- Thread the tip of the fishing line into the formed loop. The base also passes through the same loop.
- Wet the fishing line with water and tighten the formed loop.
On a spinning rod
If you want to know how to tie a fishing line to the spool of a spinning reel, then you should think a little about whether you will use additional winding. I think that since such a reel only fits a small amount of fishing line or braid, it is of no use at all.
There are also many nuances in the technique of winding cord and fishing line onto a reel, but we will make a separate article about them to show you everything and not miss important details. Now I think we can move on to the binding technique:
- Take the reel spool in your hand and wrap it with fishing line;
- The end of the fishing line must be wrapped around the entire base and made into a loop;
- Now you need to make several turns around the base and pass the free end of the fishing line through the loop;
- Tighten the knot and you're done.
I recommend everyone to watch the video below.
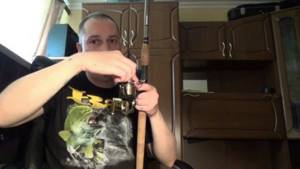
Photo tips on how to tie fishing line to a reel
Note!
How to tie a fishing line to a reel - methods, tips on how to tie correctly and an overview of the most reliable knots (85 photos and videos)
Cuts for wobblers and spinners - how to make a simple homemade cut. 110 photos and videos of practical tips
How to tie a hook to a fishing line - advice from professionals and the best patterns for beginners (115 photos and videos)
Read here Crucian carp killer tackle: basic elements, methods of application and tips on how to make it yourself (125 photos and videos)
Help the project, share on social networks 
0
Winter fishing with flags and supplies
Gear fishing in winter, despite the apparent simplicity of the gear, is full of small features and nuances that ultimately determine the quantity and quality of the catch. We discussed the secrets of the correct tactics and technique of zher fishing in winter in the article: https://berlogakarelia.ru/lovlya_zimoj/zherlicy/zimnyaya-rybalka-na-zherlicy
Attention should be paid to the design of the flags themselves, striving for maximum simplicity and reliability. Girder equipment for winter fishing is selected based on the following factors:
- Type of predatory fish, its estimated size.
- The size of the fish or other bait, the method of attaching the live bait to the hook.
- The nature of the tactics is active fishing with flags or setting up supplies at night.
- Conditions of the reservoir - depth, snags and vegetation, absence or presence of current and its strength.
- Winter period - in the dead of winter, a passive predator needs thinner equipment.
How to properly equip a winter vent
The main condition is that the equipment needs to be simple and reliable. Any complication leads to inconvenience in using gear on ice. At one time, winter tires with a rubber shock absorber were in trend. But over time, fishing has shown that this does not provide any advantages, it only adds fuss. The simpler the better. The equipment is selected depending on the conditions in which you have to fish, and for each predator according to the type of fish.
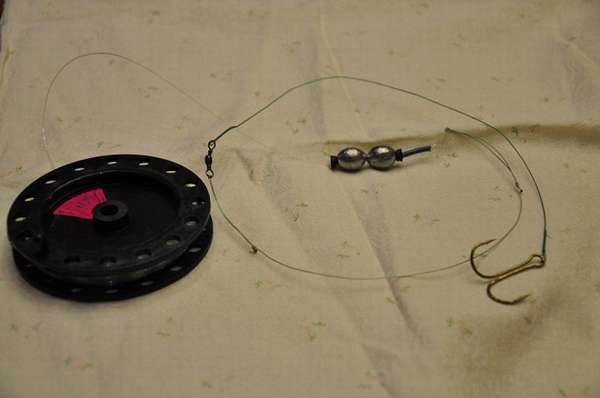
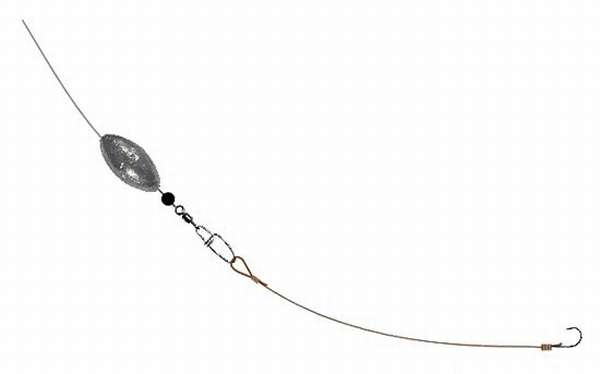
Regular montages
Standard installation - a sliding sinker on a fishing line, a rubber stopper under it (not necessary, but desirable), a metal leash (if we are fishing for pike) and a tee (double). The caliber depends on what the angler is hunting. For perch, the line is thinner and the hook is smaller; small fry are used. For pike - fishing line from 0.3 mm, medium-sized hooks. Live bait is placed behind the back (under the fin) or through the gill slit by unfastening the hook or leash. This equipment is used in most cases, in places without strong currents and on a clean bottom.
Fine equipment for deep-winter or capricious fish
When the predator is passive, it is better to use a thinner installation. In extreme cases of capriciousness of the fish, even a thinner monofilament can be tied to the main fishing line. The working line itself is also used thinner - for example, not about 35, but 0.28 mm. The metal leash is replaced with another:
- Dual fluorocarbon.
- One thick flurry.
- Special fluorocarbon leader.
- Homemade leashes made from transparent materials.
- Twists or braids from fishing line.
Behavior of passive pike under ice (underwater filming):
When the bite is weak, it is better to raise the sinker at half-water to give the bait fish more room to maneuver. The hook clings directly to the loop of the leash, without a fastener - so that the predator, when sluggishly biting, does not feel the additional inedible element. You can put an additional small-sized tee on the leash in a sliding version. In this case, the live bait clings to the lip with the first hook, and the back with the second. The distance between the hooks is selected so that it matches the size of the baitfish. Such equipment reduces idle bites to nothing, the probability of hooking increases, even if the angler did not make it in time.