general information
Among the main equipment that will have to be connected are the following devices:
- rod, reel;
- backing - thin synthetic cable;
- leash and leader;
- fly and fly line.
Among the greatest difficulties in handling for beginners, fly fishing is distinguished by the fact that it can be quite difficult to link one flexible part of the element to another. This is especially noticeable when you compare fly fishing with conventional fishing rods, spinning rods, etc., where there is one or at most two fishing lines. In general, such fishing devices are quite simple, which cannot be said about fly fishing. In addition, the complexity of this entire structure is due to the specific fishing technique.
Before you start tying fly fishing knots and assembling other elements, it is very important to make sure that all parts belong to the same class. Differences in equipment classes are not allowed, since in the case of such fishing, a clear balance of all fishing tools is very important.
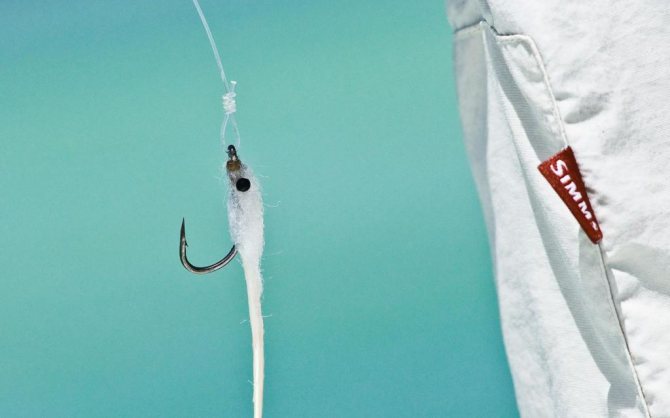
The fly fishing knot, the photo of which is attached, will hold the gear perfectly.
Tying fly fishing knots correctly and securely is very important, since it generally consists of several cords that have different thicknesses and different physical properties. Special knots were developed so that the tackle could maintain its strength when casting and fishing for fish. This is an extremely important requirement when catching particularly large fish. Two different elements are essentially attached to each other with fly fishing knots.
These nodes are used to connect all parts of the gear to each other. In addition, their purpose is to attach small baits. They can be used not only in fly fishing, but also in ultralight fishing. In other words, with the help of knots you can firmly attach a small bait to the end of the tackle. The main purpose of any node in the tackle is to reliably connect two elements to each other. If the knot is tied poorly, there is a high chance that the prey will break, tearing the gear together in this place.
How to wind fishing line on a reel - a detailed guide
Just now, while fishing, an interesting incident arose: I was catching a predator with a spinning rod on the river. There are bites on almost every cast, and perch and pike perch delight with their activity. However, the neighboring fisherman is completely calm. I decided to take a closer look and understand why this situation is happening. At first I thought it was a matter of bait or a bad presentation. In reality, it turned out that everything is much simpler...
No matter how hard the neighbor tried to reach the fish, he couldn’t. Although, the weights used were approximately the same, and there were no obvious errors in the technique itself. So the reason is obvious - the braided cord is wound incorrectly.
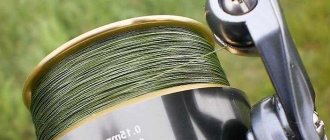
In general, I started a conversation with him, looked at the reel and was convinced that my theory was correct: the distance between the whip and the upper edge of the spool is gigantic. In addition, everything was full of bumps and hollows.
We invite you to read: Rating of reels for ultralight 2019: the best reels for light spinning rods
It was then that I had this idea, to collect material and write a short article on this topic, addressed to beginners. I myself am, in fact, a novice fisherman, but curious!
Before you get ready to wind fishing line or braided cord onto a reel, you need to decide what type of laying you need. This choice determines such parameters as: the probability of loops being dropped (the cause of the “beard”) and the maximum possible casting distance. It just so happens that there are only three types, so I suggest you pay attention to each one.
Laying the cord in a “reverse cone”.
They say that this method of laying has recently been considered the most common among experienced spinning players.
Whether this is true or not, we will see in the reservoirs, but this form of styling should be given its due, the likelihood of a beard actually decreasing. And we will have to pay for such luxury in terms of casting range.
If the reel is not cheap, then thanks to the high-quality polished spool and other technologies that the reel is stuffed with, the fee will not be so high.
This effect is achieved by reducing the winding pitch to the side of the spool. Pay attention to the photo. You've probably seen this form before.
Laying the cord in a “simple cone”
In the previous case, we reduced the likelihood of a beard and sacrificed casting distance. And now we will do everything exactly the opposite.
With this installation, when the winding pitch increases from the top edge of the spool to the base, our cast in theory can be further by 15%; of course, these are approximate calculations.
And, perhaps, it is possible to comfortably use such an advantage only in the case of ideal winding, and when other requirements are met that minimize the possibility of loops being reset.
“Cylindrical” cord laying
When purchasing a new reel from the factory, most likely it will be configured specifically for a cylindrical shape, i.e. straight, with a uniform step from the top edge of the spool to its base.
Perhaps this is an excellent compromise between casting range and the ability to “catch a beard”. I don’t know why many people write that the “reverse cone” is considered the most popular.
It seems to me that “cylinder” should occupy the top line of the chart.
Actually, now we know how the types of styling differ from each other, their advantages and disadvantages, and we can choose the option that is more suitable. That is, to focus on casting distance or reduce the likelihood of “catching a beard,” or even settle on the golden mean.
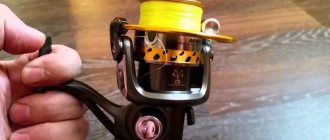
To obtain one or another type of installation, it is enough to add or remove an adjusting washer (sometimes even several) from the rod. Usually a set comes with 3 to 5 of these things. To understand how your coil is initially configured, you need to make the first winding.
Surely your reel comes with some kind of instruction, in which everything is clearly drawn. And, of course, it is unlikely that you will be able to achieve the desired result the first time. Because each reel is unique, you will have to experiment with the number of shims, rewinding the braided line 5 times until you come to your ideal.
So, we have chosen one of the types of laying, configured the spool as needed, and now all that remains is to wind it correctly.
And before we get down to business, I would like to note some fundamentally important points: the winding should be tight, without sagging, bumps and depressions.
Otherwise, the “beard” cannot be avoided, and with it, as you know, fishing turns from relaxation into torture. And if the wicker is also expensive, then it’s no time for jokes.
Backing. What is it and what is it for?
As a winding, they usually use old braid or fishing line similar in diameter to the main one. If you don't have them, you can buy them in the cheapest price range.
In the end, you can't fish on backing, so quality plays the most important role here.
They also say that they use electrical tape. However, I am skeptical about this alternative for one simple reason: I have seen what happens to such materials in the heat. But sewing thread, on the contrary, is a very interesting option and is recognized among many fishermen. Well, let's finally get to the point?
We invite you to familiarize yourself with: Multiplier reels for spinning: instructions: how to choose the right one and how to use it
So, let's go in order. What we need to wind the cord onto a reel:
- The reel itself and the main braid or line;
- Spare spool (there is one);
- Volume “War and Peace” (no matter which one);
- Backing (winding: sewing thread, fishing line, cord);
- A comrade or a basin, but a comrade is still better;
- Patience.
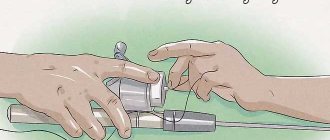
If all of the above is available, then you can proceed. However, first of all, I would like to pay attention to the following point - how to tie the fishing line to the reel. It just so happens that without this fastening nothing good will definitely happen.
In expensive reels, some manufacturers have a special recess on the working surface of the spool, where you can easily hook the cord and continue winding.
But this is the exception rather than the rule, because most models do not have this option, so you will have to tie it the old fashioned way. Yes, so that the braid does not slip, but holds relatively tightly.
Perhaps this is the only requirement for the node.
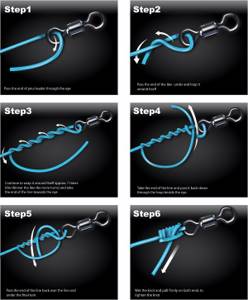
Look at the photo, there is a diagram here. Everything should be clear, and most importantly, reliable. I prefer the top knot, it just so happens.
Let's assume that we have tied the main line to the spool. Next, we take out “War and Peace” (or any other thick book), open it somewhere in the middle and put fishing line between the pages.
We safely close the reading and move on to the next stage. By the way, the book is needed so that the fishing line or cord is wound under uniform tension.
You can also press the whip against the rod with your finger, just be sure to wet the cloth so as not to damage the skin.
If you have a friend next to you, you can ask him to hold the reel, exactly opposite the reel, in the same plane as the direction of the fishing line (mirror it). This way we can avoid excessive curling, which can later turn into a “beard”. The cord will simply twist to a critical value and a fiasco will inevitably happen, a matter of time.
But if there is no friend, some kind of container, basin or deep cup will do. Just put the bobbin there and it will not jump out, preventing you from doing normal winding. It’s not as convenient, of course, as with the help of a friend, but you can manage!
So, now everything is ready to begin the actual winding. The line (or lash) is under tension, the reel is also fixed, we begin to twist the reel.
As soon as the main line runs out, you need to tie the backing to it and reel it in until there is 1 - 2 mm left to the edge of the spool. If everything turns out smoothly and you are satisfied with the type of installation, we rewind the result back to the spare spool.
However, it is advisable to hide all the knots at the very edges so that they do not protrude anywhere, I mean the connection of the backing with the main winding. After all, we do it “to the finish”.
If there is no spare spool, you will have to tinker longer. And the principle itself changes a little. We also tie the main fishing line or cord to the spool, wind it to the end (until it runs out), and finish off the remaining capacity of the reel with backing.
Using this scheme, we will accurately determine the required amount of backing the first time and our winding will be to the very edge of the spool.
Backing and coil connection
What is backing? This is a cable or cord that is made of synthetic materials. It is wound directly onto the reel under the fly line itself. To properly attach it in the right place, you need to take the following few steps.
- First you need to take the end of the backing and tie a regular single knot on it.
- The next step is to thread the synthetic cable onto the spool of the reel. In this case, the tip with the knot must be at the bottom.
- Next, the entire main part of the backing is tied with a cable. At the same time, you need to make a tightening loop, in which the main cord will be able to slide freely. The knot will be tightened with a small knot, and the entire loop will then be tightened. Fly tying in this case should end with the knot tied at the very beginning remaining outside. Its role is as a stopper to prevent the loop from unwinding.
Backing and cord
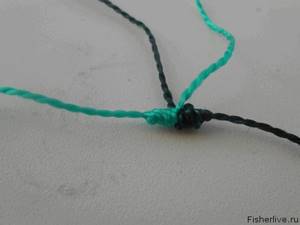
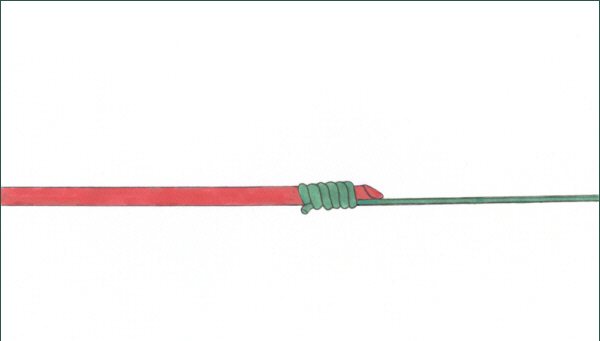
Then there is a special method of tying a knot, which in fly fishing is intended to connect the backing and the cord. It’s worth noting right away that attaching a synthetic cable to the main cord will be more difficult. The main problem is the thinner synthetics. It is worth saying that usually the cords have special signatures. The tying process begins by taking the end of the cord with the following inscription: End line. Sometimes instead of it there is the inscription Flyline end. After this, you can proceed to the following steps:
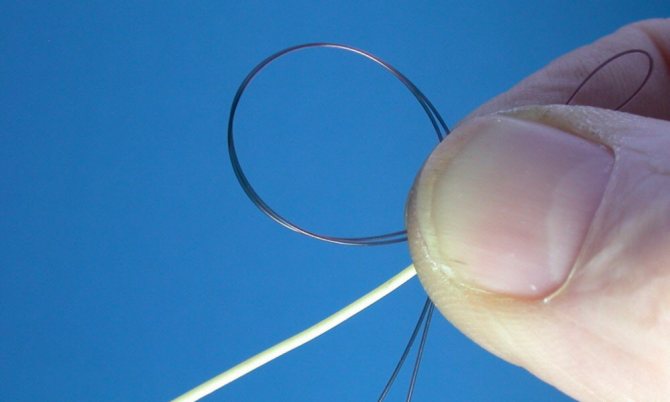
- You need to bend a loop, without tying a knot, from the end of a cord 5-7 cm long. The loop is held with your thumb and forefinger, and then you need to insert about 20-30 cm of synthetic backing into it.
- You still need to hold the loop, and with the other hand, at this time, wind the doubled backing cord around it in a spiral. The direction of winding is from the ends of the cord to the loop itself. As a result, the spiral should wrap around both the main cord and the cable.
- Usually 8 to 12 tight turns are made. The exact quantity depends on the thickness of the backing. After tying such a knot, there is usually a small amount of cable left. It must be threaded through the loop again, parallel to the first.
- The last point is tightening the knot. To do this, both ends of the cord are clamped with your fingers and the backing is pulled.
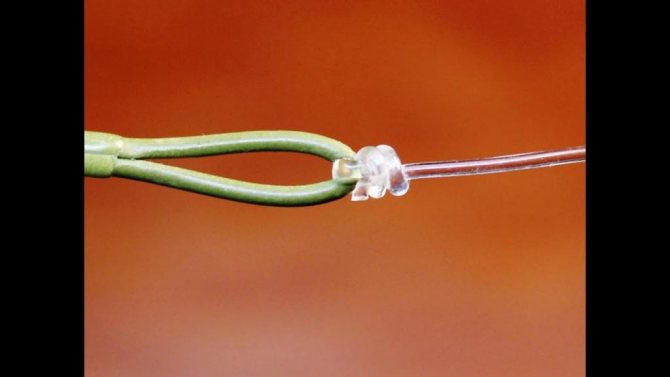
Connecting the cord to the undergrowth
The cord and undergrowth should be connected by the most reliable knots, which facilitate a smooth transition from one gear to another. The connection should not be clumsy and rough. One tackle should flow into another.
Some cords already have a loop, others do not. If there is no loop, then you need to purchase it, buy it. This loop is called a connector. The connector number must match the cord number. To connect, the cord must be inserted into the connector tube. Heat it and squeeze it. The tube, which has the property of shrinking under the influence of heat, will tightly wrap around the cord. You will get an excellent connection. You can put a small drop of “Superglue” on the connector loop itself for strength. But not much, otherwise the loop will stiffen and may break. There is a similar loop in the undergrowth. One loop is inserted into the other, an eyelet is formed. The underbrush threads through it. The resulting knot is tightened. This knot is easy to untie if the undergrowth needs to be changed. There is no need for glue on the assembly. It tightens itself well.
Perfection Loop - This method can be used to make a loop on a monofilament or fluorocarbon leash.
Perfection loop
Needle knot - knitted using a sewing needle. The needle is needed so that the cord does not move while knitting, and after you pull out the needle, there should be a place between the turns where you will lead the end of the undergrowth. In order for the underbrush to poke through freely, the coils do not need to be wound tightly.
The through Nail knot is a variation of the first knot. Only in this case, a needle is used to pierce the polymer part of the cord from the core. Then turns are made, as in a Needle knot. This connection gives greater strength.
Watch the video on how to knit a joint:
Improving node quality
To increase the reliability of the structure, experts recommend wetting the knot before tightening it. Once it dries, it will tighten several times stronger. Another important point is that this unit is subject to increased requirements for strength and slip, since it will constantly be wound in and out of the reel. Therefore, there is another little tip from the professionals: you can carefully fill the knot with elastic glue. But here it is very important to accurately calculate the amount of glue so that it does not interfere with the bond.
Connecting the backing to the coil
Backing can be attached to the reel spool in several ways.
The Arbor knot is a simple connection. It's very easy to master. If you tie the backing in this way, it will not spin around the spool when the line is completely stripped, for example, when a large fish bites.
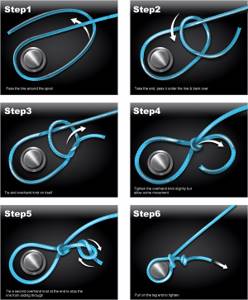
"Arbor"
Dunkan loop - used for thin monofilament lines and for tying small flies. In the same way, you can tie the backing to the reel. Look at the video how to form this loop:
Cord and undergrowth
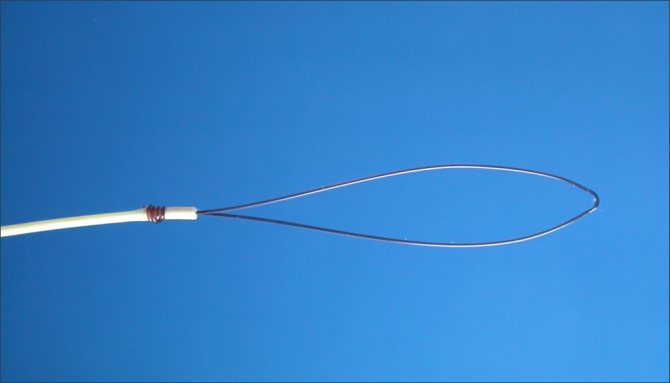
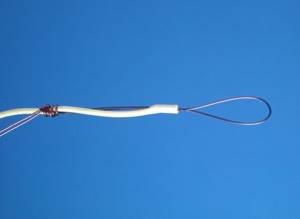
How to tie leader to a fly line? Also one of the most common questions. It is worth saying that sometimes the undergrowth is called the “leader”. To successfully bind, you will need a thin tube. You can even use a gel pen refill, for example, as such an element. A length of 3-5 cm will be sufficient.
- You need to take a tube, a cord and the thick end of the undergrowth, arrange all the elements in a vertical plane, holding them with your fingers. The tube should be slightly lower than the cord itself and the leader.
- The entire structure should be tied with underbrush in 5-6 turns in a spiral.
- This will leave a small tip. It will need to be threaded into the tube from right to left, in the direction of the rod of the device.
- Next, you need to very carefully tighten the cord. It is important that the coils do not fall apart, but it is possible to pull out the tube.
- After removing the rod, you need to hold the undergrowth and tighten the knot by pulling the cord. All excess must be trimmed off after this.
It is worth adding here that the knots used to connect the backing and the cord, the leader and the cord, are interchangeable. In the second case, the rod is used only to facilitate the process of tying the knot.

Assembling fly fishing gear
Mastering fly fishing should begin with assembling the gear. Harmoniously assembled tackle will allow you to cast the fly far and accurately and ensure reliable landing of fish.
Rod
The rod is one of the main elements of the tackle, responsible for the quality of casting and helping in landing fish. When choosing a fishing rod, you need to pay attention to the material from which it is made. You should not buy the cheapest fishing rods made of fiberglass materials. Such rods are overweight and will quickly strain the angler’s hand while fishing. Modern fly fishing rods are made of high-modulus graphite and have minimal weight.
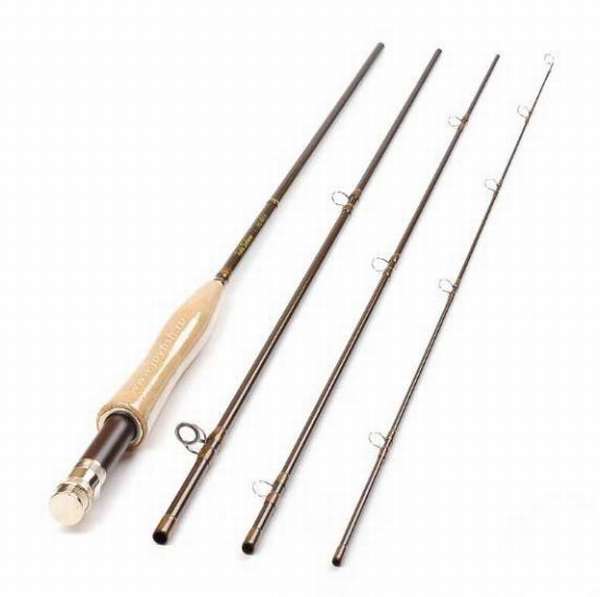
When assembled, fly fishing rods are quite compact.
Fly fishing rods are divided into one-handed and two-handed. Beginner fly fishers are better off using a one-handed option, which allows them to easily cast small and medium-sized flies. Two-handed rods are used for casting large flies and catching predatory fish:
- pike,
- Lenka,
- taimen,
- Atlantic salmon.
Class is the most important criterion that determines the power of a fishing rod. For fishing on streams and small rivers up to 7 m wide, you should use class 1–3 fishing rods, which have a length of no more than 2.3 m. If fishing is carried out on a river 10–15 m wide, then you need to use a class 3–5 fishing rod , 2.4–2.7 m long, with which you can throw a bulky bait quite far and confidently fight with medium-sized fish. Fishing rods of grades 7–12, with a length of up to 4.5 m, are used when fishing for predatory fish at long distances. More powerful classes are used for sea fishing.
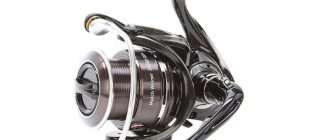
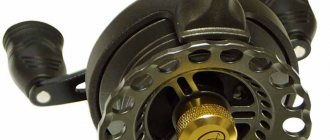
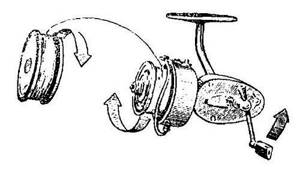
Coil
All fly fishing reels are straight draft and are of the inertial type. The coil performs several main functions:
- balances the tackle,
- serves as storage for backing and cord,
- helps when landing large fish.
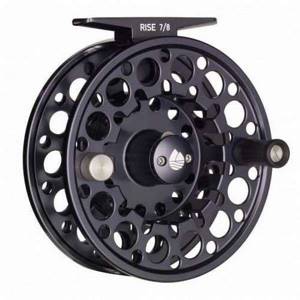
A fly reel is a simple but well-oiled mechanism.
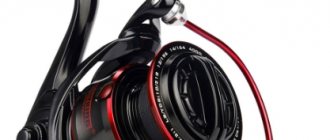
The reel can be made of either metal or plastic. The plastic version is much cheaper, but does not have very good impact resistance characteristics. It is better to use plastic products on reservoirs with soft soil and the absence of stones that could damage the reel. Metal has increased strength, so it can be used on reservoirs flowing on rocky shores.
A good reel should have a sealed mechanism that prevents sand and other small particles from getting inside that interfere with the operation of the “inertia”. Even after a long stay in the water, the “inertia” should work properly and maintain a smooth ride.
Backing and cord
Backing is a soft synthetic cord with a length of 10 to 40 m. This element of gear performs the following functions:
- protects the cord from damage on the rigid frame of the reel,
- absorbs excess moisture from the cord while fishing,
- helps in the fight against large fish.
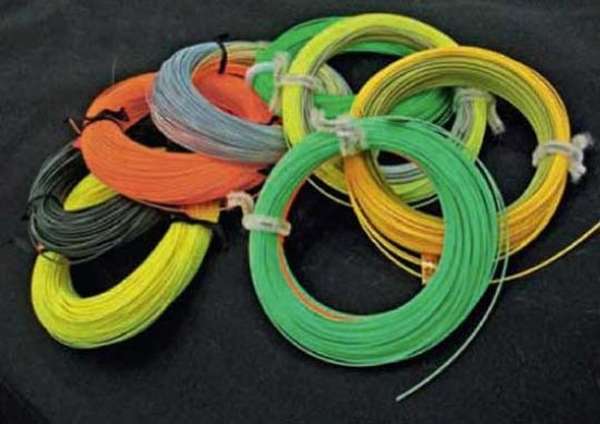
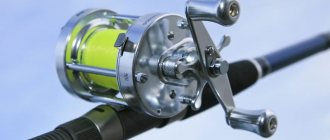
The color of the cord should be bright and clearly visible to the fisherman.
Fly fishing lines have varying degrees of buoyancy and vary in shape. Floating models are more common and are used in reservoirs with depths of up to 3 m. Sinking modifications are more often used for deep fishing and allow you to deepen the fly to 7–10 m. For fishing with dry flies and edgers, cords are often used that hang under the surface film of water, which ensures their maximum invisibility for fish.
To master fly casting, it is better for a beginner to use a line marked (DT). This cord has a simple geometry and is easy to control. Having mastered the basics of casting technique, you can move on to modifications with markings (WF), which will ensure the most accurate casting of the bait.
To tie the backing and the cord, you will need to moisten the ends of these elements with quick-drying glue, connect them together and wrap them with a mounting thread designed for tying flies. This method of fastening is very reliable and allows you to avoid tying unnecessary knots that would prevent the backing from moving freely when biting a large fish.
To attach the undergrowth, a small loop is formed at the end of the cord. Before forming a loop, the plastic sheath must be removed from the end of the cord.
Connecting the leash with the undergrowth
You need to be able to tie another type of fly knot to connect the leader and leader. To connect these two components, a knot is used, which is often used in surgery. It’s called double surgical.
- The first step is to fold the thin ends of both elements together for a length of about 15-20 cm, while they should face in different directions and overlap each other.
- The second step is to make one knot, for which you need to thread the entire leash and part of the undergrowth into a loop. At the same time, it is not delayed, but the first step is repeated again.
- The third step is tightening, but before doing this you need to wet the cables.
Additional nodes
There are several ways to further secure the thick end of the undergrowth, which is quite important. You can make a loop on the “leader” with your own hands, and there are two ways to do this. The first one is the following:
- to begin with, the thick end of the cord is folded in half to make a loop;
- in the same area where the loop is formed, a regular double knot is tied;
- holding the loop with your fingers and the resulting “tails”, you can tighten the knot, but before that you need to wet it.
There is another way, which is as follows:
- a wide loop is still made, and the tip is retracted behind the main part of the cord;
- After this, another loop is wrapped around the main part, and the short tip is thrown over the gap formed by two loops, and at the intersection you need to hold the entire structure with your fingers;
- The last step is to pull the smaller loop through the larger one and tighten, after which the knot is considered complete.
Last fastener element
The last two parts that need to be connected are the front sight and the leader. To do this, you can tie a “blind” or “free” knot.
To make the first version of the knot, you need to follow these instructions. The idea is to pass the end of the leader through the fly ring. Next, you need to leave a small loop near the ring itself. Wrap the shank of the leash around the main part about 5-6 times. The main difference from all other methods is that here all subsequent nodes must be at a distance from each other. The final touch is that the remaining free “tail” is threaded into the loop left at the ring, and the knot can be tightened.
As for knitting a “loose knot”, it is done in a very similar way, with only a few differences. After pulling through the ring, the end of the leash must be pulled out strongly and bent into a ring, which should be 4-5 cm in diameter. Next, you also need to make 5-6 turns, but each of them must pass through the ring. Only after this can the knot be tightened.
We tie the front sight
Fly fishing involves tying a fly to a leader. This can be done through the following nodes:
Clinch knot - easy to tie, and easy to untie when changing bait. The fastening strength ensures a large number of revolutions. The number of turns depends on the thickness of the leash. On a thin leash you will need to screw 7-8 turns, on a thick one - 3-4 turns. Its improved version is considered Improved Clinch.
Improved Clinch
George Harvey is used for tying dry flies.
Rapala is a Finnish invention, designed for tying streamers and heavy flies, easy to learn even for a beginner. The video shows how to do this:
Palomar - durable used in fly fishing for tying braided lines to lures. Due to the fact that the line is wrapped twice through the eye, the knot is strengthened.
Watch the Palomar knot video
The Dunkan loop is used for thin monofilament lines and for tying small flies. The same knot can be used to tie the backing to the reel.
For perfect dry fly installation, use the Turle Knot.
conclusions
In the end, it is worth noting that the number of knots that you need to be able to tie in order to use fly fishing gear is quite large. However, sometimes questions arise, for example, how to untie the “stubborn knot” of fly fishing.
Experienced fishermen know that time is of the essence when fishing. Therefore, being able to untie a knot quickly is just as important as knowing how to tie it. First, you need to pry up part of the knot to make a loop. To do this, specialists very often use the simplest devices, for example, a sewing needle. She is very helpful in such matters. Once the loop is large enough to pull, it will be very easy to untie the knot. You need to look exactly where the cord or wire goes and pull it out.
Fly fishing knots are a staple, so knowing how to tie and untie them is very important.
How to wind fishing line onto a reel? Winding and backing methods
Backing may also be needed if you do not need long casting or if you want to put part of the line on another reel.
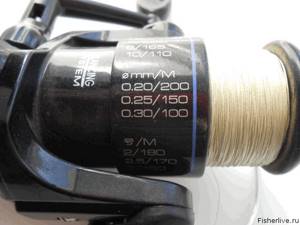
Backing is a fishing line or an old cord designed to fill excess space on the spool, in other words, winding under the main fishing line. The backing should be stronger than the main line, but at the same time not differ much in diameter from it, then the winding will be smoother.
All fishermen know that the line should be wound almost under the side of the spool, namely not reaching the edge 1-1.5mm. Everyone achieves this in different ways, some use electrical tape, others use regular thread, others come up with other methods, but the only correct option is backing.
In order to correctly calculate the reel length, it is advisable to have a spare spool, which you need to install on the reel. If you don't have one, you'll need two free spools of fishing line.
First of all, we take our reel, put a spare spool (if available) and snap the free end of the line into the clip.
Now you need to create tension. You can do this in several ways:
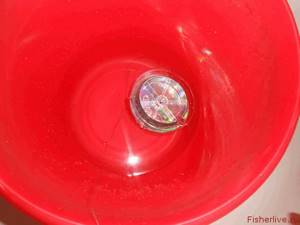
- Place the spool of fishing line in a bucket of water
- Ask a second person to hold the bobbin on a pencil while adjusting the tension
- Using a special winding device (machine)
- Clamping the fishing line between the sheets of any book (this method is not suitable for braided lines)
I will use a bucket of water. We throw the reel with fishing line into the bucket and start reeling.
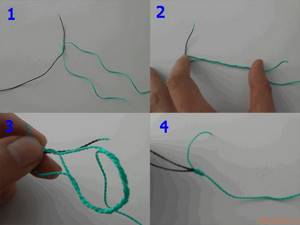
When the main line runs out, we need to tie the backing. You can connect the braid and backing using any knot for connecting two lines, for example a gripping one, for this:
- We go around one of the fishing lines with the second
- We make 5-7 turns with the short end of the fishing line around the long one
- Thread the short end under the twist
- Tighten the knot
After connecting, throw the reel with backing into the water and continue winding until there is about 1-1.5mm left to the side of the spool. Depending on the rigidity of the fishing line, this distance can be increased or decreased. If the fishing line is rigid, the distance must be increased to prevent the loops from coming off when the bow is opened.
Now we need to tie the end of the backing to the spool that we will use for fishing. I have a spare spool so it will save a lot of time. If you don’t have a bobbin, you will have to first rewind all the equipment onto one bobbin, then onto the second, and only then start tying the backing to the main (working) bobbin.
Winding
Let's move on to the most crucial moment - winding the fishing line. Place the reel on the rod, and then thread the line through the guides and tie it to the spool.
The most correct option would be to use a self-tightening knot. In order not to learn a new knot, we use the same gripping knot:
- First we form a loop
- Next, we bend the line around the free end and begin to form a gripping knot
- Now all that remains is to thread the short end of the fishing line into the loop under the twist and tighten the knot
- All that remains is to put the loop on the spool and tighten
Every experienced angler knows that careful preparation for fishing increases the chances of success. Quite often this preparation must include backing the reel.
Properly wound fishing line can, in certain cases, play an important role, both when casting baits and when fishing for prey. Few novice fishermen are able to appreciate the importance of this element of gear; understanding this comes with experience. Let us consider in more detail in what cases, how and from what it is made.
Not everyone knows and understands what backing is. In simple words, backing is a special lining made on the reel spool, which serves to increase its diameter.
This is primarily necessary when the amount of main line is not enough to completely fill the spool, as well as to use it more economically.
If you use backing for the reel, it will be much easier for you to wind it exactly to the desired level.
In addition to achieving savings, this element allows you to slightly reduce the weight of the equipped reel, which is especially important when fishing with light and ultra-light gear.
This is especially true when working with spinning-type reels, since the quality of the line coming off the spool very much depends on the distance at which its upper layer is located from the upper border of the side.
It is believed that this value should be within 1-2 mm.
If this parameter exceeds 4 mm, long-distance casting will be difficult, and when the cord is wound flush with the sides, there is a high probability of it getting tangled. Therefore, experienced spinning players who know what backing is on a reel always monitor this indicator.
Despite the apparent simplicity of this element, to achieve maximum efficiency when using it, backing on a spinning reel must be carried out in accordance with certain rules, using suitable materials.
We suggest you read: How to choose a spinning reel: for a beginner, for pike and perch
Not so long ago it was believed that winding the required thickness onto a reel spool was quite possible using ordinary electrical tape, nylon cord or a suitable thickness of rubber. Now professional fishermen, who know well what backing is in fishing, do not consider these materials for its manufacture.
Modern technologies make it possible to produce increasingly thinner fishing lines with high strength, allowing you to catch large fish.
In addition, new generation reels and blanks are more sensitive and balanced.
Fishing is a really exciting activity that brings a lot of positive emotions and experiences. But, even with high-class gear, you can turn it into a painful process if you don’t know how to wind the fishing line onto the reel. The result is “shootings” of the equipment or numerous “beards” with which you have to tinker for a long time. How to wind a cord or fishing line correctly?
The quality of winding does not always depend on the performer; for example, on cheap Chinese reels it is produced chaotically, and weakened turns often occur. In such places, getting caught by a falling fishing line or cord happens quite often with predictable consequences. An incorrectly wound cord or line can ruin any fishing trip.
Types of winding
- There are several ways to properly wind fishing line into a reel, giving different results.
- The first option for laying fishing line is usually used for float fishing rods.
- Reverse conical winding is used when fishing with medium and heavy gear, such as a donka or a feeder.
- When fishing with a spinning rod, the preferred winding pattern is a reverse cone, since the cast tackle is often very light, and such winding makes it easier for the line to come off the reel.
The formation of winding is determined by the number of adjusting washers under the spool.
Typically, a coil comes with 2-6 such products; if they are not in the box, it means they are already installed in the device.
Increasing the number of washers under the spool leads to the formation of a conical winding, and decreasing the number of washers accordingly forms a reverse cone winding.
If the winding shape changes from cast to cast, then the position of the spool on the axis is unstable. You need to remove the spool and tighten the locking nut.
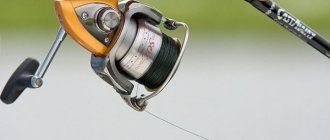
Both the quality of casting and the durability of the spinning reel itself depend on the degree to which the spool is filled with line or cord.
The falling line exerts a significant force on the spool, leading to accelerated wear of its edge. A reel overfilled with wood will randomly shed turns, which, when passing through the rings, become entangled in a “beard.”
To properly wind the cord on a spinning reel, you need to take into account the degree of filling of the spool.
To avoid this phenomenon, an additional one is wound under the main line to increase the winding diameter (backing). The line should be at a distance of 1.5 - 3.0 mm from the edge of the spool. To make backing, electrical tape is sometimes used, but this method cannot be considered successful - it is pressed through, weakening the winding, and the adhesive layer is able to penetrate to the main fishing line.
Photo 1. Backing made of nylon thread.
Winding
Let's consider a way to correctly wind the fishing line onto a reel and at the same time form a wound backing of the required size.
How to properly wind the cord onto the bobbin is shown below:
- Attach the reel to the butt part of the rod at its normal location.
- Pass the end of the fishing line through the rings.
- The reel is attached to a rod through a hole with the possibility of free rotation.
- Secure the rod in a convenient way. Photo 2. Screwdriver as an axis.
- Rotate the handle to wind the line onto the spool with a slight tension, passing it through your fingers. It is recommended to wear gloves or protect your fingers in any way possible. It is convenient to use a book for this, skipping the line between the pages.
- If the spool is not completely filled, you need to tie up the material that forms the backing and wind it until the required spool filling is obtained.
Read about how to secure the fishing line to the spool here. A caveat is necessary here. Usually the reel is equipped with two spools - one of them is made of metal and is intended for braided cord, the second is made of carbon fiber - for regular fishing line. Depending on the type of main line, rewinding is done in the opposite order:
- for regular fishing line - on a metal spool;
- for braiding - on plastic.
When the backing with the required filling of the spool is formed during the initial rewinding, it must be removed from the reel and the second one from the set must be installed. By rewinding the line onto the desired reel, we get a correctly filled spool with the desired type of winding, obtained by adjusting with washers. Backing, as it should be, is located at the bottom of the winding.
To get high-quality backing, you need to use a cheap, even if not very strong, fishing line with a diameter of 0.2 - 0.25 mm. The use of other materials, such as cotton or nylon threads, is undesirable - they get wet and dry out slowly, which is undesirable.
Backing made from thicker wood will have an uneven surface, deforming the main winding.