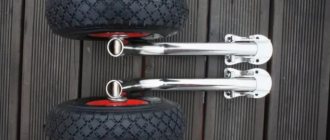
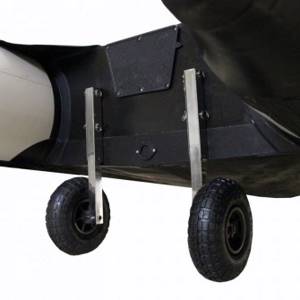
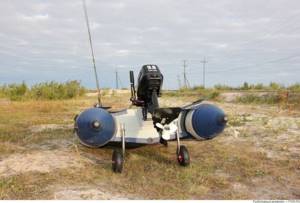
What are transom wheels used on a boat?
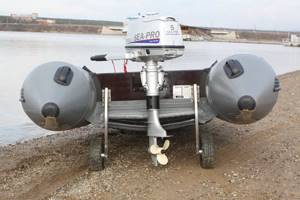
Transom wheels for a boat are a compact and convenient transport chassis, consisting of two parts and designed to move a watercraft over a short distance (from a car to a body of water).
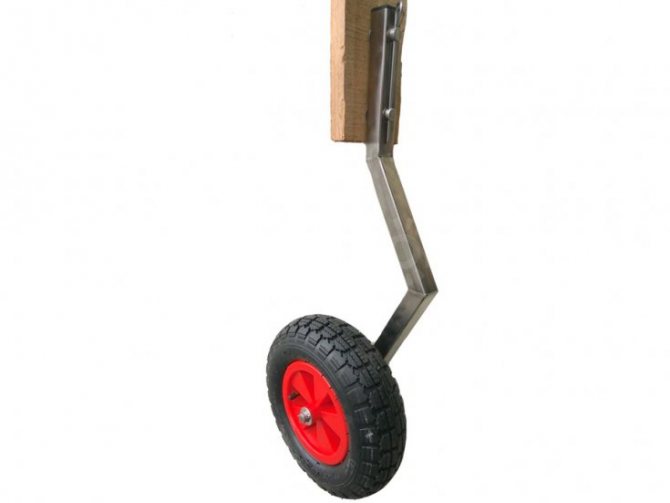
Each part of the transport chassis consists of the following elements:
- straight or curved stand made of round or square profile pipe;
- an axle with a bearing or bushing mounted on a stand;
- an inflatable or cast wheel mounted on an axle.
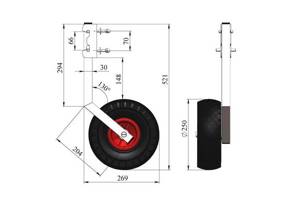
Drawing of homemade transom wheels with dimensions.
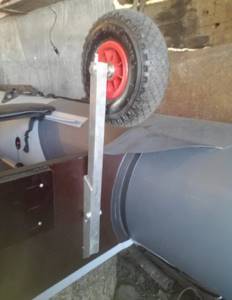
The racks are fixed to the transom using special brackets, studs or clamps.
Prices and where to buy?
Transom wheels can be purchased at many fishing stores, as well as points of sale of goods for swimming equipment.
Prices for some of the models discussed in the article are given below:
- Sun Marine costs 4000-4500 rubles.
- Laker Transom Wheels costs 2800-3400 rubles.
- Horizon KN-260 costs 4000-4200 rubles.
- Horizon KNU-330 costs 6000-6500 rubles.
- TKM wheels for PVC boats cost 5000-5500 rubles.
Main varieties
Depending on the design features, transom wheels come in the following varieties:
- Reversible - this transport chassis differs from analogues of other varieties by a special bracket with a spring-loaded mechanism, which is attached to the transom of the boat and allows, if necessary, to lift the wheels, moving them from the transport position to the non-working one.
- Quick-release - the racks of such wheels are fixed in special brackets mounted on the transom of the boat. If necessary, the racks can be removed from these fastenings very quickly and without unnecessary effort and placed in the boat.
- On clamps - the upper parts of the racks of such wheels are reliable clamps with the help of which the transport chassis is securely and quickly attached to the transom board of the boat.
- On studs - to secure a transport chassis of this design, 4 metal studs are screwed into the transom. The process of installing transom wheels is quite simple: each of the racks is put on two studs, after which the entire structure is fixed in the desired position using cotter pins.
Advantages
Do-it-yourself transport wheels for PVC boats have a fairly large number of advantages:
Read here - How to make a zherlitsa with your own hands - features of making winter and summer gear (110 photos and videos)
Unlimited service life. These devices can last for a very long time, you just need to take care of them. Try not to run into screws or other sharp objects, otherwise the tires will require replacement. Typically, such structures last quite a long time.
Comfort. Naturally, this advantage is one of the most important. Many people simply love it when everything goes smoothly and without difficulties. These wheels allow you to do everything perfectly.
Mobility. Such wheels, as a rule, take up extremely little space, which allows them to be considered mobile. They can be stacked on top of each other, then you won’t even notice that they are in the trunk.
Check it out here too!
Do-it-yourself winter fishing rod - an overview of the best options. Instructions for creating an unusual winter fishing rod from different materials
DIY boat anchor: making a homemade anchor for PVC boats (95 photos and videos)
- How to make a zherlitsa with your own hands - features of making winter and summer gear (110 photos and videos)
Comfortable handling of the boat. The transport wheels have very good controllability, which makes it easy to turn and radically change the direction of the boat.
Ease of construction. If you look at the drawings of boat wheels, which, fortunately, are abundant on the Internet, you can be convinced that the design is quite simple to manufacture and does not require any special skills.
How to make wheels with your own hands
The most commonly made do-it-yourself types of transom wheels are quick-release, reversible, and chassis with clamps.
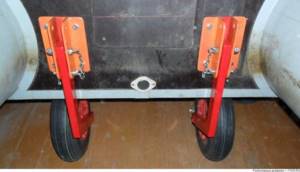
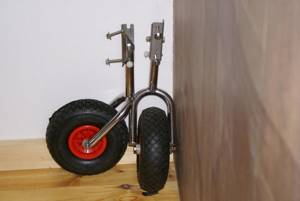
On clamps
The assembly of the simplest homemade transport chassis on clamps is carried out as follows:
Transom wheels (with clamps)
- 2 blanks for the landing gear are cut from the profile pipe.
- Axles with threaded threads for attaching wheels are welded to the end of each of the blanks.
- A cut is made at the end of the other end of the pipe, the thickness of which should be such that the frame of a G-shaped clamp can be inserted into it.
- Two holes are drilled perpendicular to the cut.
- Insert the frame into the cut at the end of the pipe.
- Marks are made on the clamp frame through the holes with a marker or core.
- Two holes are drilled along the marks on the frame.
- Remove the flat area from the clamp screw.
- Unscrew the clamping screw from the clamp.
- Having inserted the clamp into the cut and secured it with two bolts, use a marker opposite the threaded hole in the clamp to make a mark on the pipe.
- A through hole with a diameter slightly larger than that of the clamp screw is drilled along the mark.
- The clamp frame is inserted into the pipe cut and finally secured with bolts and nuts.
- The clamping screw is screwed into the thread on the clamp and threaded through the pipe.
- A spherical patch with a rubber pad is screwed onto the end of the clamping pin.
- A platform with a rubber pad is also attached to the sponge of the frame.
- Having departed from the center of the pressure screw at a distance equal to the height of the transom, an L-shaped frame is attached to the rack. A piece of rubber is attached to the part of the frame that will come into contact with the transom and bottom of the boat.
- The wheel is secured to each rack using a thread, washer, and nut cut into the axle.
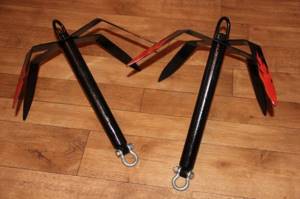
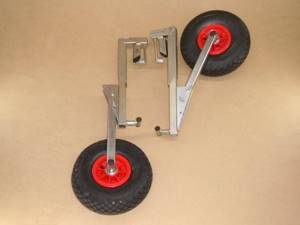
Reversible
The racks for reversible wheels are made the same as those for quick-release wheels, making not two, but 3 holes in their upper part with a pitch of 25 mm. The outer holes are designed to fix the chassis in a working or transport position, and the middle one is for the axle.
Transom wheels (reversible)
Fastenings for this design are made as follows:
- A base plate 120 mm long and 65-70 mm wide is cut out of stainless metal.
- Four holes are drilled in the corners of the base.
- Cut out two side plates 120 mm long and 35-40 mm wide.
- The plates are welded to the base at a distance of 30 mm.
- The stand is inserted between the plates.
- An axle is inserted through the central holes on the side plates and the stand, securing it on one side with a cotter pin.
In order to fix the landing gear in the working position, a pre-prepared finger is inserted into the lower hole.
To move the landing gear to the non-working (transport) position, remove the finger from the lower hole, lift the strut up and insert the finger into the upper hole.
A cotter pin is used to secure the finger.
Quick release
The assembly process of such transom wheels consists of the following manipulations:
- Two pieces 400 mm long are cut from a pipe or square profile.
- Using a pipe bender, the blanks for the racks are bent at an angle of 450.
- Sections of a round profile are welded to the end of each workpiece.
- At the end of the rack that will be attached to the transom of the boat, two holes are drilled, the distance between which should be 75-80 mm. A pin with a diameter of 8 mm is inserted into the lower hole and fixed by welding. The upper hole is drilled out, making an oval groove 20-25 mm long.
- Another through hole is drilled perpendicular to the bottom hole.
- An M8 thread is cut into the drilled hole.
- A screw with a countersunk head is screwed into the thread.
- A round spring is inserted inside the rack, fixing it with one end on the threaded part of the screw.
- A second pin is cut out of a round piece with a diameter of 12 mm. On a lathe, a small groove 15-20 mm long is made in the middle of the pin.
- The pin is inserted into an oval groove at the top of the post.
- The second end of the spring is fixed in the groove of the pin.
- The mounting base is cut out of stainless steel sheet - a plate 100 mm long and 60 mm wide.
- Holes with a diameter of 6 mm are drilled in the corners of the cut plate.
- Two side plates 30 mm wide and 100 mm long are made from the same stainless steel.
- Two grooves are made in each plate with an interaxial distance of 75 mm.
- The plates are welded perpendicular to the base at a distance of 25-30 mm.
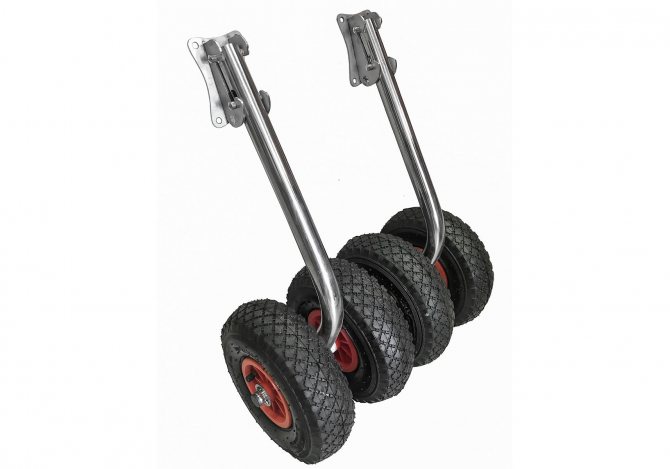
Transom wheels (quick-release)
These transom wheels are attached to the PVC boat using furniture screws.
We collect the necessary material and tools
So, have you decided to make the wheels that will be installed on the hinged transom yourself? Quite commendable. Thus, you can save not only several thousand rubles, but also make wheels with mounts exactly what you need - length, width and wheel size.
All you need to get the job done is:
- A pair of wheels with a diameter of about 35-35 centimeters and a width of 60-80 millimeters;
- Square profile with a cross section of 25x25 millimeters;
- Tube of diameter suitable for wheel mounting;
- Set of bolts, washers, nuts, cotter pins.
Of course, both the profile and fasteners must be made of stainless steel. You will have to overpay a little, but the wheels will last for many years, not just one season. In addition, you will need a hacksaw, an electric drill, and pliers or wrenches.
It will also not be possible without the help of a welder - but the work here is only for a few minutes, so you will have to pay at most a hundred rubles. The total cost of materials is unlikely to exceed 1-1.5 thousand rubles.
Installation Features
Installation of quick-release and reversible transom wheels on the transom is carried out as follows:
- The boat is placed on two supports.
- The transport chassis brackets are applied to the boat transom so that the wheels touch the ground.
- Using a level, the brackets are aligned in one plane.
- Using a white marker, make 8 marks through the mounting holes in the brackets on the transom of the boat.
- Holes are drilled according to the marks.
- The brackets are secured with furniture screws.
The transport chassis with clamps is attached to the transom by smooth rotation of the clamping screw handle.
Useful tips
The main and undoubted advantage of homemade transom wheels is significant cost savings. Another advantage is the ability to completely customize the system to suit your needs, because owners of boats of non-standard sizes often have difficulty finding the optimal wheels. If you decide to do everything yourself, you can easily get rid of this problem. It is enough to make all the accurate measurements, after which it will not be difficult to design an ideal transportation system.
A significant part of the recommendations regarding the independent production of transom wheels is inextricably linked with fastening methods.
- Do not neglect pencil marks. This makes the process much easier. For example, when the mount is placed on the transom, you can make special marks along the holes, and then drill holes of the required size.
- It makes more sense to install the bolts from the inside of the boat. In this case, the nuts will be on the front side.
- Use washers, nuts and bolts to secure the transom wheels.
- Important notes can be made using sheets of durable materials such as aluminum or textolite, on which holes are drilled. After this, the sheet must be placed on the inside of the transom and all holes must be marked.
- Also, do not overload the boat with excess cargo. Even reliably assembled structures do not always cope - after all, these are modified rubber boats, not cargo lifts.
- After each fishing trip, you need to thoroughly rinse the boat to remove any stuck dirt and algae. After drying, it would be a good idea to treat all metal elements with lubricant.
We suggest you familiarize yourself with: Do-it-yourself feeder bait for bream
The further operation of a boat with transom wheels has its own nuances, which you should not forget about either. Despite the relatively strong nature of the structure, under no circumstances should the boat be used as a trailer for a car. Such an undertaking will almost certainly end in failure, and a huge number of hours spent on creating the system will be wasted.
You should carefully consider using the boat after it has been stored folded for a long time, for example, in the cold season.
In the next video you will find yourself making transom wheels with your own hands.