Every self-respecting fisherman takes care of his fishing tool, be it a spinning rod or ordinary float tackle. To preserve the original appearance of the fishing rod, fishermen purchase or make tubes and covers for fishing rods with their own hands. In this article we will look at this topic in detail and teach you how to make them yourself.
Classification of fishing rod cases
Fishing rod covers are divided into two types:
- Hard – durable tubes that can protect fishing tackle from external environmental influences and accidental collisions;
- Soft - made of fabric that protects from moisture and dirt, is inferior in strength to hard cases, but is more compact than them.
Let's celebrate! The presence of straps, as well as the volume and length of the cover are considered regardless of its type.
Why are tubes and cases needed?
Tubes and covers for fishing rods are needed to:
- To protect the joints of fishing rods from any dust.
- To prevent dirt from getting on the fishing rods.
- To protect fishing rods from breakage, minor scratches or cracks.
It often happens that after fishing the fishing rod is simply thrown into the sand, onto rocks, etc., which can damage the fishing rod. When transporting, you can also get your fishing rod caught in the trunk or door, and the expensive tackle will be broken.
In addition, even at home, if the fishing rod is stored without a special case, then over time dust will begin to collect at its joints, which will ultimately lead to the creaking of the fishing rod and its rapid wear.
It is dust, dirt and particles of sand that can get from the shore that will unceremoniously scratch the surface of the joints from the inside and outside all the time. Over time, moisture will penetrate into these same scratches, and the joint will quickly lose its strength.
Ultimately, at the most inopportune moment (when casting or hooking), the fishing rod may burst at the joint, which will lead to the end of the entire fishing trip.
In order to avoid such troubles, you need to use special cases and tubes for storing and transporting fishing rods and other gear. Today, such things can be bought in a store or made with your own hands, which will be much cheaper and more interesting.
We make soft cases for fishing rods and spinning rods
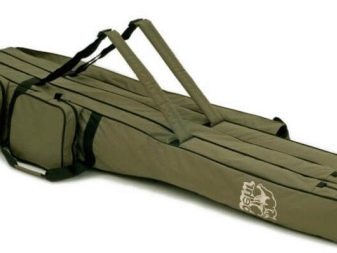
Soft cases will ensure reliable storage of the fishing rod and convenient transportation. They are made from waterproof and durable fabrics; you can additionally sew on pockets for various fishing items.
Materials for production
To create, you will need materials that need to be purchased:
- Waterproof bolognese fabric – 2 meters (canvas, tar are suitable);
- Adhesive dublerin – 2 meters;
- Lightning – one piece – 1.6 meters and two pieces half-meter;
- Corsage ribbon – 2.0 meters;
- Dense thread;
- Sewing tools.
Step-by-step manufacturing process
- Creating a pattern - First of all, you need to fold the material in half, measure 13 and 24 cm from the fold, and sew it together. The length will be about one and a half meters.
- Attaching to the dublerin - On the dublerin (it should be uncut) we apply the fabric that we cut out earlier and iron it. We sew a piece along the edges and in the center: this way the dublerin will not come off if it comes off.
- Pockets – Choose the size of the pocket as needed (use the same fabric with duplerin), sew the zipper to the edges of the workpiece and stitch it with a zig-zag stitch. We sew the pockets to the place of the soft case marked on the blank. Please note that the pockets are sewn at the bottom.
- Handles – You need to make two handles from grosgrain ribbon for easy carrying. They need to be sewn on with a stitch of thick thread in the middle of the cover. The straps should be sewn to the top and bottom of the cover.
- Locks – This is the final stage of sewing (note that you only need to sew from the wrong side). The zipper should be sewn in the direction from the narrow part of the cover to the wide one. Sew the edges together with a thick thread. Do not forget to process all the holes and corners on the front side of the workpiece. Ready!
Making a cover for fishing rods with your own hands
Scratches, microcracks and even ordinary dust can cause a breakdown of a fisherman’s main tool at the most inopportune moment. A special protective bag will help you avoid trouble. It’s easy to make a case for fishing rods with your own hands. The accessory can be soft or hard. A hard case (tube) is better able to withstand mechanical stress. The soft version is more compact.
How to sew a soft case: materials, pattern, tips
Sewing a soft cover for fishing rods begins with making a pattern. The figure shows the simplest option in the form of a rectangle.
The length of the product is adjusted individually according to the length of the rod, but it is usually not recommended to make a case longer than 1.5 meters
For sewing you will need:
- 2 meters of waterproof fabric (Oxford, Taslan, Avisent, Tafetta). Its standard width is usually 140 cm, so to reduce material waste it is more profitable to sew two covers at once;
- 2 meters of dublerin (material with an adhesive layer). It comes in several types; for a cover it is better to choose one based on dense fabric, this will give the finished product additional strength and wear resistance;
- 3 meters of corsage or belt tape for one handle or 6 meters for two (it is better to take with a small margin);
- 3 “zippers”: two 40 cm each (they will go on pockets), one – 1.5 meters.
It is better to choose synthetic threads, marked “100% polyester”. They are characterized by high strength and elasticity.
There are two most common ways to make a fishing accessory.
1. Lay out the fabric on the table or floor, use a marker or chalk to transfer the pattern onto the material, cut the fabric along the lines. You can do it easier by making marks directly on the fabric. To do this, fold the fabric in half, from the wrong side of the fold, measure 12 cm on one side, 23 cm on the other and connect the resulting segments. We will get a truncated cone 150 cm long with a wider lower part.
2. Place the dublerin on the main fabric with the adhesive side down, put on top an auxiliary material that is usually used for ironing (for example, gauze). Iron the surface evenly with a hot iron.
Note! Over time, dublerin can peel off from the main fabric. Additional stitching of the material in the middle and problem areas (edges, folds) will help to avoid this.
3. Sew ready-made pockets to the bottom (wide) part of the future cover. They are made from the remnants of the main fabric, with a zipper or Velcro fastener sewn along the edge.
4. Sew 2 handles from grosgrain ribbon across the entire length of the workpiece, along the bottom.
5.Attach straps to the bottom part to tie the rods together (you can buy ready-made ones or make them yourself by sewing Velcro to a strip of fabric).
6.In the direction from the narrow side of the cover to the wide side, sew a long zipper. Then sew the side edges of the cover.
Note! Sewing is done from the reverse side of the product. After completing the work, turn the cover right side out.
The inside of the case can be additionally equipped with protective liners, wide elastic bands or Velcro for fixing fishing rods
Option 2
The pattern is made in the form of a rectangle. To do this, 50 cm is cut from the base material reinforced with dublerin (the fabric will be used for pockets). After this you can start sewing the cover:
- cut the fabric lengthwise into 2 equal parts (you will get 2 pieces of 70*150 cm)
- sew pockets and handle;
- sew the zipper in the direction from bottom to top. Advice! You can take two zippers of 75 cm each and sew them towards each other.
Case for fishing rods and reels: sewing nuances
The cover for fishing rods and reels is cut according to the same principle as conventional soft models, but an additional recess pocket is attached to the outside of the lower part where the reel will be inserted.
When making a reel chamber, it is important to consider the size of the fishing tackle. In addition to the width, you need to measure the length from the tip of the fishing rod to the reel and apply the corresponding marks on the fabric.
The pocket is made according to the size of the coil. It can be soft or hard. In the first case, the compartment must be reinforced with a piece of foam rubber or polyurethane to additionally protect the reel from mechanical damage.
The hard pocket is made from a plastic box lined with waterproof fabric.
The pocket is sewn to the base of the cover in such a way that when laying the gear, the reel fits exactly into the slot intended for it.
Some anglers do it easier. They buy round insulation for pipes made of foamed polyethylene of the required diameter in specialized stores and put it under a heavy press for several hours. The pipe takes on an oval shape, after which it is inserted into a soft case. According to reviews, a fishing rod and reel are protected in such a bag no worse than in a hard tube.
Feeders, large wobblers, a box with hooks - these and many other bulky fishing gear are advisable to store in a large pocket. To make it, we take pieces of fabric measuring 35*35 cm and get to work:
- Fold the side edges about 1 cm and stitch;
- Sew an insert made of folded material to both sides, its width depends on the desired volume, usually 1.5–2 cm is enough;
- The bottom of the pocket should be turned up 3 cm and stitched with a double seam.
Note! The pocket is sewn to the cover according to the following pattern: first the bottom, then the sides, and lastly the top.
Using these instructions, you can sew a separate bag for the feeder if the tackle is large in size.
The fabric pattern is made according to the size of the feeder, adding 10 cm on each side. The insert is stitched on the sides and bottom. A zipper is sewn on top. You can equip the fishing bag with a handle or attach it at the bottom on the outside of the case.
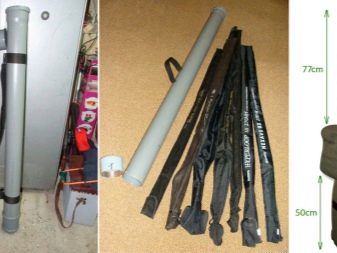
Making a hard case: step-by-step instructions
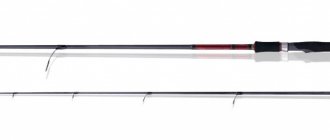
The presence of fragile tips and a large number of guide rings on spinning and feeder rods make the gear especially vulnerable. Fans of these fishing methods prefer to use a hard case to transport gear.
Review of leashes from Aliexpress
We will need:
- plastic plumbing pipe;
- 2 plugs with a diameter equal to the diameter of the pipe (you can purchase special plumbing plugs or use a low plastic jar). A piece of foam rubber must be glued to their bottom in advance; it will serve as additional protection for the rods;
- a piece of foam rubber 2 cm thick or polystyrene foam;
- special glue for plastic or epoxy resin;
- accessories (bolts, handles, zipper);
- hacksaw for metal.
Note! The length of the tube should correspond to the length of the longest leg of the rod plus 20 cm (a tube of 1.4–1.5 m is considered the most convenient). The diameter is selected so that the rod and reel fit freely inside the pipe and there is a gap (about 4 cm) for gluing the seal.
Operating procedure:
- Use a hacksaw to cut a piece of pipe. Note! The sawing location will be the bottom of the cover;
- Glue a plug to the bottom of the tube so that the side with foam rubber is inside the tube;
- Glue foam rubber inside the case (it’s more convenient to work with polystyrene) to protect the rods from impacts against the walls of the tube;
- Drill holes at the top and bottom of the pipe and attach the handle using bolts. You can take it from an old bag or make it yourself from a corsage or belt ribbon.
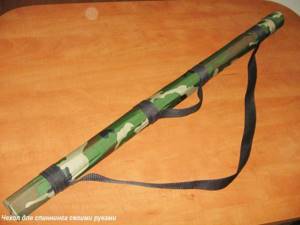
If desired, the cover for the spinning rod can be covered with waterproof fabric. The length of the material should be 10 cm greater than the length of the tube, and the width should be equal to the diameter of the pipe.
Note! If a stretch fabric is chosen for work, then its width should be 3–5 cm less than the diameter.
The bottom and longitudinal part are sewn in a straight line. The width of the seams should not be more than 1 cm. The finished cover must be turned right side out and the tube inserted into it (the process is quite labor-intensive).
The outer cover should fit the pipe very tightly. For aesthetics, protruding corners of the fabric can be tucked inside
The final stage of work is making the top cover.
It can be made from leather 5 mm thick. To do this, several overlays are cut out: one with a diameter 3 mm larger than the diameter of the upper part of the tube, 2-3 others - 1.5 mm larger than the diameter of the tube.
Leather blanks are glued or riveted together so that the largest one is on top.
The lid is ready. All that remains is to adjust it with a sharp knife so that it fits tightly, but without unnecessary effort, into the tube. To make it easy to remove the cover (and at the same time not to lose it), a loop is attached to it, which is tied to the edge of the cover.
If the tube was covered with fabric, the lid can be made from the same material: cut a circle along the diameter of the pipe and sew or glue a piece of foam rubber on the underside. The lid will be connected to the main product using a zipper. The photograph clearly shows the principle of fastening.
One part of the zipper is sewn to the soft edge of the outer cover, the other - to the fabric of the plug. A self-made spinning cover has a number of advantages over factory-made analogues. It is made in accordance with the dimensions of a specific gear; additional partitions, compartments and pockets increase the functionality and protective properties of the accessory. Homemade hard cases do not have the two main disadvantages of branded tubes: heavy weight and high cost.
Source: https://intellifishing.ru/snaryazhenie/izgotovlenie-chehla-udochek-svoimi-rukami
Making a case for fishing rods and reels
Necessary materials
- 2 meters of raincoat fabric;
- Adhesive dublerin;
- Zippers – 1 piece 1.9 meters, 2 pieces 40-50 cm;
- Grosgrain ribbon – 3 meters;
- Sewing materials.
Step-by-step manufacturing process
- First stage, pattern - From the middle of the fabric folded in half, measure and cut out 12 and 24 cm from one end and the other, after which we sew the pieces together. The length should be 1.7 meters. Pocket cutting was discussed earlier;
- Cutting out pockets – We sew 30 cm long locks to the pockets, zig-zag the edges and sew them to the workpiece;
- Spool compartment – We take measurements of the fabric to create a pattern that fits the size of the spool, and then glue the pattern onto the double sheet. The resulting blank should be sewn to the edge of the base, where the bottom of the case is located. Please note that the size of the fishing rod and reel fits exactly, take measurements very accurately;
- Handles - their manufacture was discussed earlier;
- Zippers – Sew a long zipper to the base, so that the cover is convex, leaving room for the spool. Sew the zipper along the edges, and then sew the base.
How to sew a voluminous pocket
Feeders, large wobblers, a box with hooks - these and many other bulky fishing gear are advisable to store in a large pocket. To make it, we take pieces of fabric measuring 35*35 cm and get to work:
- fold the side edges about 1 cm and sew,
- Sew an insert made of folded material to both sides, its width depends on the desired volume, usually 1.5–2 cm is enough,
- The bottom of the pocket should be turned up 3 cm and stitched with a double seam.
Note! The pocket is sewn to the cover according to the following pattern: first the bottom, then the sides, and lastly the top.
Using these instructions, you can sew a separate bag for the feeder if the tackle is large in size.
The fabric pattern is made according to the size of the feeder, adding 10 cm on each side. The insert is stitched on the sides and bottom. A zipper is sewn on top. You can equip the fishing bag with a handle or attach it at the bottom on the outside of the case.
Jeans case
A simple option would be to make a cover from denim pants; this option will be more decorative. The cover should be about one and a half meters long.
Step-by-step manufacturing process
- Measure and cut large denim pants in half;
- Sew pockets and straps (you can use a belt as a strap);
- Sew up the bottom of the trouser leg - this will be the bottom;
- As a finishing touch, pull the cord into the drawstring where the belt used to be, and your jeans fishing rod case is ready.
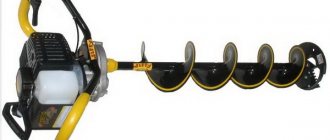
Fishing cage with feeder
A cage for feeder fishing is not just a metal frame covered with a fine mesh. With the desire to preserve the ichthyofauna of water bodies and ensure that future generations also have a place to fish, many fishermen adhere to the “catch and release” principle.
In amateur fishing, you can, of course, immediately release every trophy you catch into its native element, but what is still interesting is the overall result of the fishing or the weight of the catch. It is determined at the end of the session, and until this time it is necessary to keep the caught fish alive and the fishing cage is responsible for this.
When choosing a cage, consider:
- length;
- shape;
- size;
- fastening method;
- mesh quality.
If fishing is carried out in a reservoir where the depth begins immediately near the shore, then a cage that is too long does not seem to be needed. But there are few such reservoirs, so you need a universal product that can ensure the safety of caught trophies in any conditions.
Expert opinion
Evgeny Zhirkov
Feeder fishing expert
Sports feeder cages are made 4–10 meters long, and for recreational fishing, fish storage facilities 3–7 meters long are suitable. A long fish tank is also needed because its neck should be at arm's length from the angler. This makes it more convenient to fold trophies and the length should be appropriate.
The longer the cage, the higher its cost, and amateur fishermen prefer to save money by buying products 2–5 meters long. If when fishing, the cage is mounted on a stand in the water, then this length is enough, it will simply be inconvenient to get up from the chair after each fish and put it in the net.
The shapes of feeder cages are:
- round;
- rectangular;
- triangular;
- semicircular.
The shape of the cage affects its drift in water and stability. In addition, during the current, the cages with fish spin and this causes the death of the catch. Therefore, a rectangular or square shape of the cage is the most preferable; it is better located in the water and provides the fish with complete freedom.
After installation on the stand, the cage must be straightened along its entire length, so a weight is tied to its bottom, or a stone is placed inside.
To catch small fish, you don’t need a very large cage, but if you plan to fish for grass carp, silver carp or carp, which reach significant sizes, then the storage facility is selected in accordance with the tasks set.
That is, the size of the cage is selected depending on the size of the expected catch , although a supply would not hurt. Large feeder cages for carp, with a wide neck and durable mesh, cost a lot, but every feeder who hunts for large fish should have one.
For those who go to reservoirs without a car, the compactness and weight of the cage when folded are also important. When carrying gear by hand, every extra pound creates a problem, so be sure to pay attention to these characteristics when purchasing.
The netting of the cage is necessary to prevent the fish from escaping, but at the same time it should not cause injury to aquatic inhabitants. Even if you do not release the fish, you need to keep it fresh and therefore alive until the end of fishing.
A rigid mesh cage made from monofilament, and even tied with knots, should not even be considered when purchasing feeder equipment. Only a soft mesh with a fine mesh (0.5-1.0 cm), woven without knots, will cope with the task of preserving the catch over a long fishing session.
After fishing, you need to thoroughly dry the fish tank and transport it in your bag only in a separate plastic bag so that it does not smell of fish.
When fishing using a feeder station, the cage is rigidly mounted on a rod and the angler spends very little time removing the fish from the hook and sending it into the net.
Homemade feeder cages and their storage
A fish tank is an element of equipment that, if desired, you can make with your own hands. To make the frame, rigid steel wire is used, joined by cold welding or soldering. Bend the wire into a rectangle shape and make several ribs, as well as covering them with mesh.
To attach the mesh to the ribs, plastic “noose” clamps are used, which hold the material well and are cheap. By spending a couple of hours making a homemade feeder cage, you will not only save money, but also customize an important piece of equipment to your own specifications.
The same applies to making a cover for a homemade fish tank, which is sewn from an old raincoat or oilcloth. The shape of the cover matches the shape of the fish tank, and the zipper will help maintain compact dimensions during transportation.
DIY hard case (tube) for fishing rods and spinning rods
A tube is a good option for protecting fisherman's fishing rods. This is a plastic pipe covered with thick fabric with a foam lining inside.
Necessary materials
- Pipes (Regular plumbing pipes or any other plastic pipe will do)
- Adhesive tape
- Belts
- Washers
- Stubs
- Bolts
Step-by-step manufacturing process
- Preparing the pipe - Before manufacturing, wrap the pipe with linoleum - it will protect it from the effects of water. Cut the pipe so that its size exceeds the length of the fishing rod by a couple of centimeters;
- Adhesive tape – Cover the pipe with tape, leaving the ends a few centimeters uncovered on both sides;
- Attaching the plugs – The plug must be firmly seated on one edge of the tube. If the plug is not tight, wrap the edges of the pipe with adhesive tape. The end with the plug will be the bottom;
- Drill holes and tighten the bolts – You need to drill a hole 19 centimeters from the bottom, then tighten the bolt. Near the other end you need to retreat 3 cm and drill two parallel holes. Screw the bolt into one of the holes with the thread facing outwards (this will be needed to fix the cover, use a smaller bolt);
- Belt and plug – Attach the belt holder and the belt itself. Before installing the top plug, you need to make holes that correspond to the tightened bolts;
The tube is ready for use. This option is easy to make and does not require unnecessary fuss with making the tube cap.
Hard case
This type will keep the rod safe and sound. The material for manufacturing is predominantly plastic, of a solid type. The top is lined with thick fabric that is resistant to wear and weather conditions.
On the inside, a layer of soft foam is added, along with clamps for the reel and all kinds of gear. A purchased or homemade hard case will be convenient to carry with the help of handles or straps sewn on top from an old backpack.
Additional recommendations
- Selection of materials - do not skimp when choosing materials for sewing, choose moisture-resistant fabrics - a good, high-quality case or tube will guarantee you the safety of your expensive fishing equipment;
- Additional boxes in the pockets – for more convenient storage, you can equip the pockets with additional compartments in which you can store useful little things;
- Place for sewing - try not to work on the floor in the house or garage, choose a convenient place for sewing (for example, a large, flat table);
- Safety precautions - when manufacturing, follow safety precautions, work carefully and do not rush in vain;
Good to know! The appearance is not as important as the reliability and quality of your storage for fishing rods and spinning rods.
It is important to make a case according to the size of the gear so that it does not dangle in it. With a good case, your fishing rods will last you much longer than without it.
Case idea
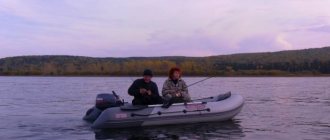
The task of making convenient storage for large, albeit telescopic, gear did not arise immediately, but was formed gradually. When going on another fishing trip to a new body of water, each time I had to take into account the type of transport, the method of safely transporting fishing rods and a landing net.
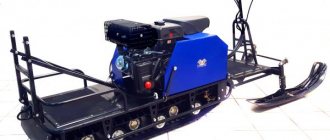
Even a simple walk on foot is not convenient if you have to hold fishing gear in your hands. What can we say about a bicycle or scooter? Fishing rods must be protected from damage and at the same time securely located on the body.
A good solution to the problem was suggested by biathlon competitions and their techniques for handling weapons.

During the race, the athlete constantly carries a rifle on his body, runs with it the entire distance, and at the firing line in a short moment he transfers it from the transport position to the combat position and performs high-speed shooting.
So the fisherman’s fishing rod should be secured according to this principle:
- when going fishing, hang from the straps behind your shoulders, providing freedom for your hands;
- At the fishing site, you can quickly remove it from the case and conveniently fold it into it.
And for those who like to carry rods horizontally, you can sew one handle in the center of gravity or simply in the middle of the case. Everyone does what is most convenient for them.
Pros and cons of homemade cases
Among the disadvantages of homemade covers, it can be noted that they are not so beautiful, and their production will require time and a certain diligence.
But at the same time:
- They are reliable, because the material is selected personally.
- They are purely individual and you can be proud of them, because you sewed them yourself, without outside help.
- Making homemade covers will help you save a lot of money.
- They can be made for a feeder, a spinning rod or a fishing rod with a reel. And each case will fit perfectly, as it was made according to the size of your gear.
Fishing rod covers are a convenient and necessary device, and anyone with enough patience and perseverance can make them. The result will justify all the efforts expended and will delight you with its service for a long time.
Making a tube
The tube is a cylindrical product with a hard coating. With its help, your fishing rod or spinning rod will not be damaged.
Manufacturers make tubes from hard materials. The outer covering is made of plastic or other hard material, and the inner covering is made of foam. A fishing rod is placed inside the case, so the tube will protect the accessories in it as much as possible, and its service life is very long.
A do-it-yourself rod tube is made from any materials available at hand, for example, from sewer or water pipes. Every homeowner can find such plumbing accessories. Material is often left behind after a water line has been installed. To make a hard case you will need the following:
- epoxy adhesive,
- plastic cover - it is desirable that it matches the diameter of the pipe,
- a handle from any bag, for example, from an old briefcase,
- plastic pipe 170 cm long, but it all depends on the size of the spinning rod,
- metal hacksaw with fine teeth.
You will also need a container for stirring the glue, gloves and water.
First, the rod itself is measured. The resulting dimensions are recorded in a notepad. A plastic pipe is being prepared. The dimensions from the fishing rod are transferred to the workpiece. Now the master must begin the main work:
- The resin and hardener are mixed in a saucepan with a ratio of 10 to 1. If you add more hardener than required, the drying process of the glue will speed up, but the quality of the parts being glued will decrease.
- The end of the plastic pipe is sanded with sandpaper, and the plastic dust after cutting the material is washed off with water. The surface must be smooth and free of burrs. The plastic cover is cleaned from various contaminants.
- The end side of the pipe is coated with mixed glue. The lid is placed tightly on the cut and pressed with maximum force. The glue will reach its greatest strength only after drying for a day. The prepared mixture should be used as quickly as possible, otherwise it will become unusable after 90 minutes. The bottom of the homemade case is ready.
- The next step is to cut off the handle from the old briefcase and attach it to the case with glue. It is advisable to use a strap on which the length is adjustable. It wouldn’t hurt to make two handles and carry the tube behind your back, putting the straps on your shoulders.
- If you wish, you can spend a little money and purchase a special plumbing plug for pipes. It is glued in the same way as the lid. All that remains is to make a removable cover from the plug. To do this, a hole is made in the center of the part, a small bolt is inserted there and tightened with nuts. Now a thin elastic band with a thickness of 2 mm is made; its length should be enough to cover the entire inner circumference of the pipe. This material adheres firmly to rounded walls. The plug is purchased so that its diameter is slightly smaller than the internal cross-section of the pipe. All that remains is to check the work by inserting the plug into the pipe, but with force so that it does not fall out.
All that remains is to decorate the product in your own way or use stickers with images of fish.
How to sew a bag for rods and reels?
It’s nice when you come fishing, lay out your gear, and it’s ready for use. Because the size and shape of the bag allows you to pack your fishing rod and reel. We will tell you how to sew a roomy soft or semi-hard case for a fishing rod with your own hands, providing a separate compartment for the reel. Sewing a special case is no different from making a regular soft case for a fishing rod, with the only difference being that this model has a special section.
We will describe how to sew a soft case in the next chapter, but now let’s talk about the method of making an additional pocket. It is located at the bottom of the case.
First, measure the fishing rod, taking into account the volume of the product, the total length and the size of the rod to the reel. Then markings are made on the fabric. The pocket should clearly fit into the location of the coil.
The compartment can be made in two ways - make it soft or hard. The first option must be supplemented with foam rubber to protect the important part of the equipment from damage during transportation.
To make the pocket rigid, a plastic box of the required size is placed in it and lined with water-repellent fabric. By fitting, the compartment is aligned with the coil with maximum accuracy. With this addition, the fishing rod can not be disassembled, but can be easily transported assembled to the fishing spot.