Shcherbakov’s winter balance nod, although not factory-produced, has gained significant popularity among fishermen because of its simplicity and sensitivity. On Avito you can find private advertisements selling homemade models, the price of which varies between 120-700 rubles. However, why pay if you can do it yourself. Plus it's so simple. Let's consider options with a bearing, an alarm, electronic and without a bearing, the advantages and disadvantages of this equipment, as well as how to make a balancing nod for fishing with your own hands.
For what conditions is it suitable?
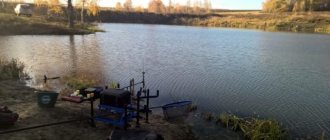
This gear can be used for bottom winter fishing. This should be stationary fishing designed for fish that feed from the bottom, such as bream, perch, crucian carp, roach. In essence, the nod acts as a float. It compensates for the weight of the jig. This is important because the fish, feeling the weight of the resistance, may spit out the bait. In this case, you may simply not have time to make the hook.
The balancing nod has a large angle of action. The range between the upper and lower positions of the guard can reach 20 cm, which makes it similar to the nod of a crossbow. Such a large run-up is 3 times greater than that of ordinary gatehouses. The principle of weight compensation becomes especially relevant in the dead of winter, when the fish bite very carefully.
Question about the need for a nod
There are two opposing opinions regarding whether a nod is needed when fishing with a balance beam. Some fishermen consider this element superfluous, in some cases even harmful for proper play, arguing that a well-chosen rod already gives back to the hand when biting.
However, most professionals still use the nod. This tackle greatly simplifies the ability to perceive the slightest bite and allows you to quickly respond to the situation.
Even with the ideal combination of rod and weight of the bait used, there is a high probability of missing a careful bite. When using a well-chosen nod, such a situation is practically excluded.
Flaws
The main disadvantage of using a guard when fishing with a balance beam is the unnecessary vibrations that interfere with proper fishing. But such vibrations are only possible if you use a too elastic nod that is not adjusted to the weight of the load.
According to some fishermen, the use of this element of equipment makes the fishing rod unnecessarily bulky and even clumsy when sharply hooked. However, usually these statements are subjective and based on personal negative experience, which does not always reflect the real situation. In reality, the nod is not capable of influencing hooking, and its small dimensions and weight do not greatly affect the overall weight of the fishing tool.
Advantages
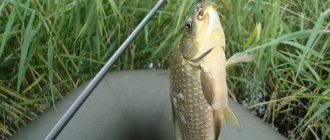
The lack of high sensitivity of the fishing rod to weak bites is not so critical when catching pike, which actively grabs the bait and moves to the side with force. However, in the case of perch fishing, most bites will be more accurate. Perhaps an experienced angler with a well-chosen whip will be able to determine the bite without nodding. But a beginner in this situation may encounter difficulties. Especially when fishing in winter, when the predator is most careful.
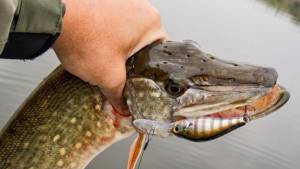
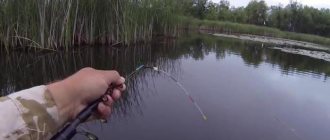
Pike caught on a balance beam with a nod
A properly selected guard does not require the angler to constantly be in a state of tension in order to understand in time when the fish has caught the bait. It is enough just to look at the gatehouse and react to its movement.
The principle of operation of Shcherbakov's nod
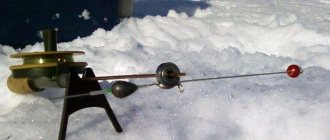
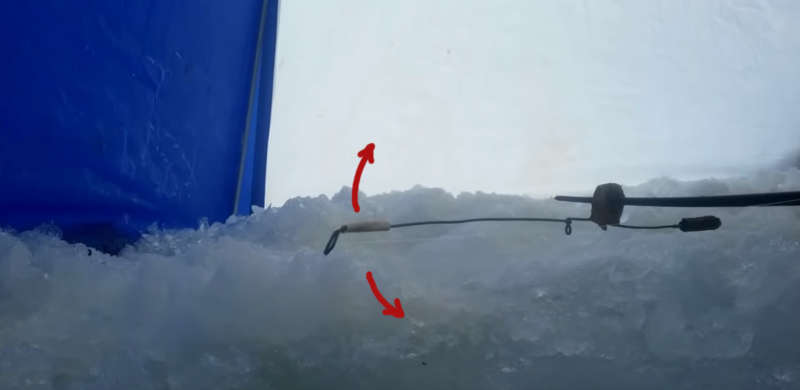
When a bite occurs on the rise, all the equipment will rise upward due to the nod, which determines the unloading. The fish will not sense the catch and will not spit out the bait.
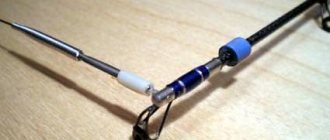
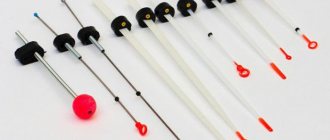
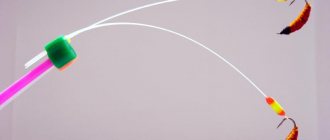
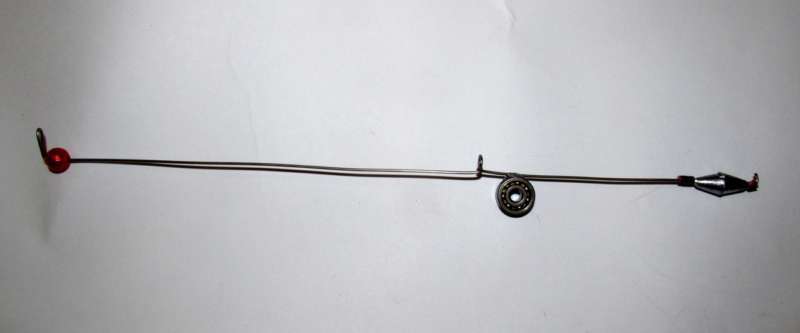
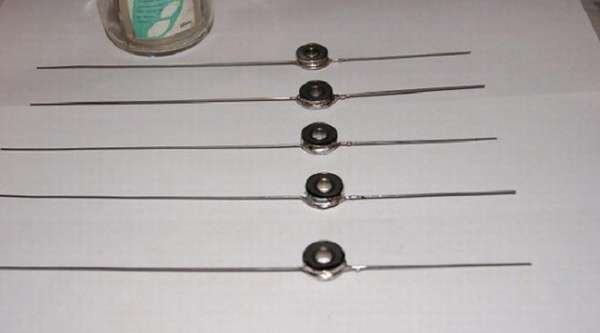
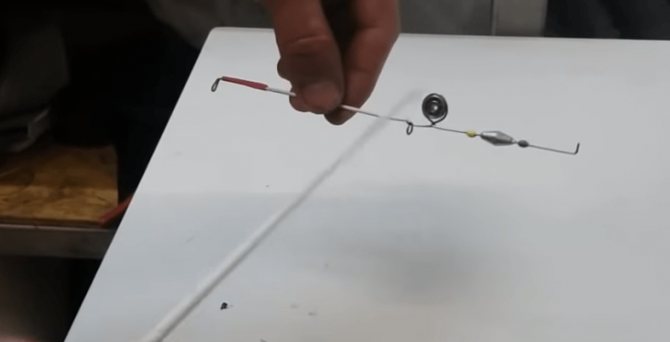
Shcherbakov's nod consists of the following main parts. Firstly, a metal wire up to 20 cm long. Secondly, a small bearing to which the entire structure is attached. Thirdly, a weight for balancing.
The quality of the bearing will greatly affect the effectiveness of the gear. To produce Shcherbakov's balancing nods, it is better to use a closed type bearing so that moisture does not get in there. If the bearing rusts even just a little, it will invariably affect the sensitivity of the gear.
The operating principle of Shcherbakov's balancing nod can be compared to scales. A weight placed at the back of the nod is used to balance its own weight and the weight of the jig. The weight can be moved, thereby more accurately adjusting the sensitivity of the gear. In the opposite part of the nod, an eyelet is made to pass the fishing line to which the jig or hook is attached. Balancer nods essentially act as a float.
As already noted, the fish, lifting the bait from the bottom, sets the entire system in motion and the guard signals a bite. But the sinker located on the nod compensates for the weight of the bait, thereby deceiving the fish. She doesn't feel the weight and swallows the hook more boldly. To allow the weight to move along the nod, sliding weights are used.
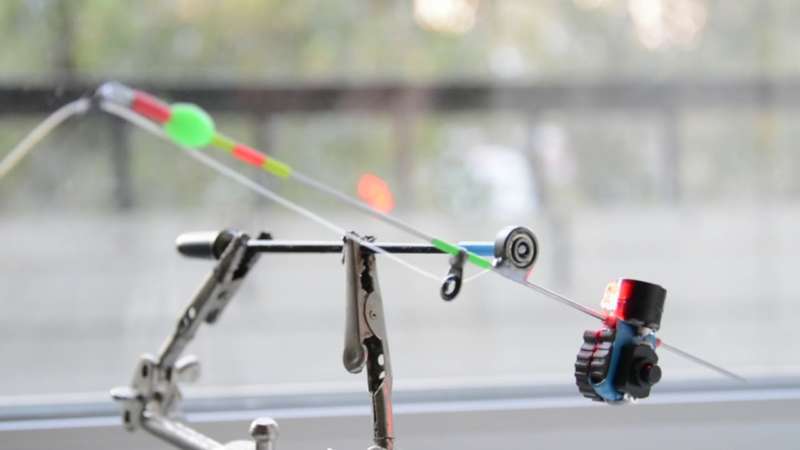
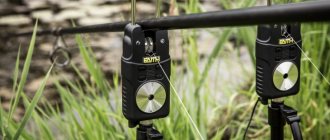
Shcherbakov's electronic nod with signaling device
You can take a whole set of weights with you. These sliding weights are designed for match gear. They can be used on balancing nods. Just as you select the appropriate weights on the scales, you can balance the tackle by selecting the right weight. They catch it with this nod in the parking lot or by slowly lowering the bait to the bottom
Electronic alarm
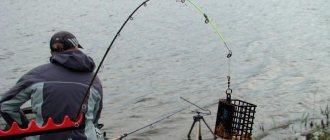
This device is great for night fishing for bream, which bites well at this time of day. Both sound and light electronic bite alarms are used, which are located in place of the counterweight sinker and are triggered when lifting.
Balancing and equipment
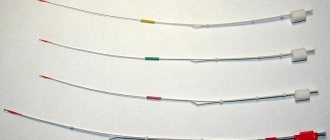
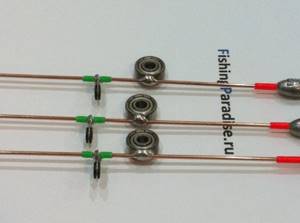
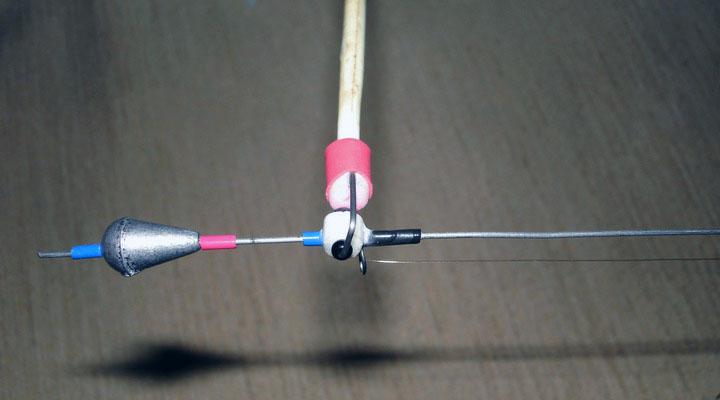
A counterweight is placed on the short lever. Its mass depends on the length of the arms and is selected experimentally. It is not recommended to use a counterweight that is too heavy on a very short lever. A lighter sinker on a long lever is better (but still this arm is shorter than the main one). The sinker is selected and installed so that with some effort it can be moved along the axis to adjust the balance. A limiter is mounted at the end of the arrow to prevent the load from jumping off the lever. Rings or silicone cambrics are attached to the working part of the arrow to allow the fishing line to pass through. You can color it for better visibility against the background of ice.
How to set up Shcherbakov's nod? Everything is very simple - the counterweight moves along its lever to a position in which the jig outweighs. When it rises from the bottom, the counterweight pulls the lever down and raises the nod. Therefore, a longer counterweight lever with a light weight compensator is more convenient - a larger stroke for adjustment is possible.
Attaching to a fishing rod
You can attach the balance nod in different ways, depending on the type of equipment. A balancing nod is attached to the bearing perpendicular to the whip. But the axial fastening is connected in parallel. A tulip is attached to the edge of the nod. The line is passed through it and through the cambrics. The tulip can be soldered to the wire.
You can also make a tulip yourself
Hinge Design Options
The key element of the balancing system is the hinge joint. The more ideally it is made (without side play), the more sensitive the nod will be. At the same time, the hinge must provide uniform and easy sliding around the axis, without friction losses, for the shoulders to work up and down. The ideal technical option is to use small bearings. On the other hand, it is easier to manufacture and maintain - simple mounting on an axle. The bearing connection ensures even and smooth sliding without play, but the element itself is vulnerable in the cold. The butt connection is simpler - but it cannot be made technically ideal, as in a bearing. The sensitivity of such a guard is less due to losses due to friction and backlash.
Set of possible tools:
- Soldering kit (soldering iron with thin tip),
- Pliers, thin drills and drills, screwdrivers,
- Knife, blade, sandpaper, etc.
- Hacksaw for metal.
- Lubricant (graphite or lithol),
- Glue or epoxy resin.
- Materials - wire, bearings, fluoroplastic, rings - depending on the manufacturing option.
Balancer nod on bearing
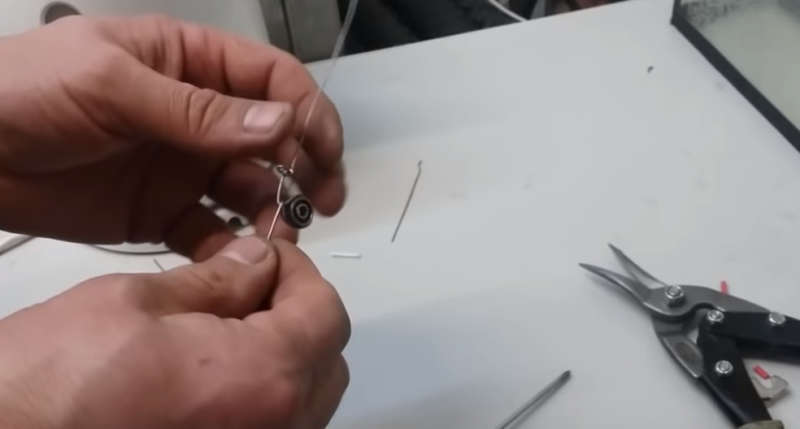
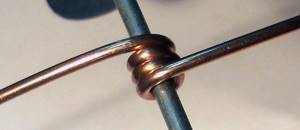
For the Shcherbakov balance nod, any small ball bearing with an internal diameter that allows you to fit it tightly onto the rod of the fishing rod is suitable. The soldering method is used to attach the pointer to the bearing. More often on the Internet you can find a method of circular soldering, when the wire is wrapped around a bearing. This method requires scrupulousness and accuracy. As a result of the work, you do not need to solder the gaps of the bearing itself, but bend the arms so that they are located on the same line. It is much easier to solder an already even arrow at one point (this side in the working position of the nod will be from below. Both methods require careful tinning and precise application of solder. Such a do-it-yourself nod by Shcherbakov provides maximum sensitivity. However, there are also disadvantages:
- The bearing itself needs to work, without any complaints about the smoothness of rotation,
- When fishing, do not allow water to get in and freeze - it will stop working,
- It is necessary to constantly monitor the technical condition and lubricate it with lithol. The smell of the lubricant can get on your hands and bait, which the fish will not like.
- Overall labor intensity of the work.
Such a nod will come in handy when weak and gentle bites of bream are a stumbling block, and are not visible to ordinary nods or a crossbow. Or because of the angler’s personal preferences or love for using this particular design. Next, we’ll look at how to make Shcherbakov’s nod technically simpler, on an axle without a bearing.
Balancer nod on axial mount
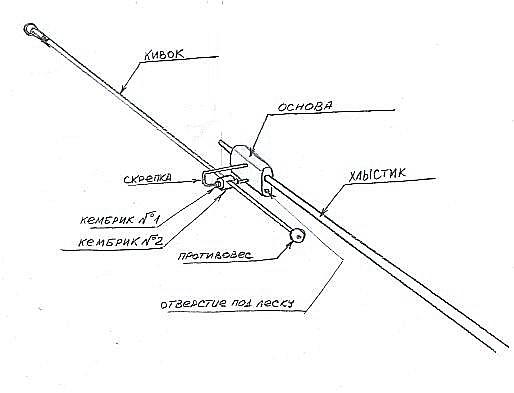
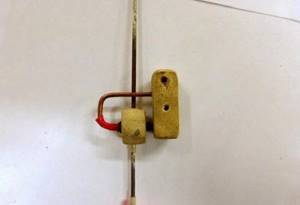
This fastening method is easier to manufacture and does not require careful maintenance, like a bearing. However, the joint must be lubricated for better sliding and also prevent moisture and freezing. If carefully manufactured, such a hinge will have sufficient sensitivity for fishing. Shcherbakov's nod for winter fishing on an axial mount can be made in various variations. The simplest hinge is a tube inserted into a piece of foam. A wire axle is inserted into the tube and attached to the fishing rod. An arrow also passes through the same piece of foam plastic, at one end of which there is a stationary counterweight. Adjustment is carried out by pulling the entire arrow through the foam to a certain position.
- Use any available hinge that is suitable in size. For example, a piece of tube and an axis on which it rotates well. We solder the arrow arms to the corresponding sides.
- A circular bend in the arrow wire that fits directly onto the axle.
- Combined options using plastics, fluoroplastic, etc.
- Feeder quivertip with a ring bent perpendicular to the direction - we also put it directly on the axle. It turns out a kind of nod-yoke from the feeder tip.
Limiters are mounted on the axle using any technical method so that the nod does not fly off it. The result is a do-it-yourself balancing nod on an axial mount. The entire structure on the fishing rod can be placed directly or sideways, as the master wishes. The main thing is that the counterweight system works.
Advantages and disadvantages of Shcherbakov's nod
Option for rough soldering of the bearing to the nod.
The advantages of this equipment include:
- The long stroke of the nod is clearly visible at a great distance, so you don’t have to sit directly above the hole to watch for a bite. For greater visibility, part of the nod can be painted in a bright color.
- The gear is light, simple and can be adjusted directly while fishing.
- High sensitivity of the balancing nod.
- Since the fish does not feel the weight of the sinker, it takes the bait more confidently.
But there are also some disadvantages to this gear:
- Active bites can upset the balance and the tackle will need to be adjusted again.
- You need a good bearing. Chinese analogues can often jam in the cold or rust from water.
- Wind gusts can throw off the balance of the gear.
Water freezing on the fishing line can make its own unwanted adjustments. Because of this, it becomes heavier and balance is lost.
Using a balance nod will require some skill. This type of gear is not suitable for all fishing conditions. But if there is no wind, if fishing occurs during the thaw period or in a tent, then such tackle will turn out to be very practical and convenient. And its catchability can cover its shortcomings.
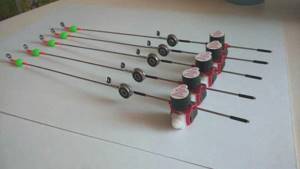
How to make it yourself
All balancing nods available on the market are produced by local “Kulibins”. These gears are not produced on an industrial scale. Therefore, we have to be content with the artisanal production method. You can buy a finished product made by hand using the garage method. Not everyone likes the quality of such products. You can also try to make this device yourself. It's not as difficult as it seems. In addition, there are two fundamentally different modifications of this device. One uses a bearing and the other does not. So you can assemble working gear without a bearing.
Required Tools
The tools you will need for the job include:
- Pliers and wire cutters for working with wire.
- Vise.
- Soldering iron, solder and flux for soldering the bearing and tulip.
- Fine sandpaper, sharp knife, hacksaw.
The materials required for assembly are as follows:
- Small bearing (bearings from old hard drives are actively used; they are closed and of fairly high quality.
- The wire is 1 mm in diameter and slightly thicker.
- Winter float.
- Tulip and intermediate ring from the fishing rod.
- Cambrics and stoppers.
- A piece of plastic.
Step-by-step instructions for the nod option with a bearing
First you need to hold the screwdriver in a vice. Its diameter should be smaller than the outer diameter of the bearing. A wire up to 20 long is bent around this screwdriver to form a ring. It should be located in the middle of the wire so that there are equal lengths on both sides.
The bearing is sanded and degreased. This is necessary so that the metal on the bearing can be tinned well and wire can be soldered to it. Then the ring is slightly unclenched and put on the bearing. When luring the wire, it is important to maintain the alignment of the product.
From experience, it won’t be possible to solder the entire circumference at once. This will have to be done gradually. Therefore, it is important not to overheat the bearing so that the already soldered areas do not fall behind again.
After the solder has cooled, you should straighten the wire using pliers and wire cutters. The right and left sides must be the same. After soldering the bearing, the length of the wire should be adjusted. Another option for the ratio of the right and left parts, for the signaling device 90 mm, for the counterweight 80 mm. The cut is sanded. You can consider the hardest part of the job done.
Then comes the necessary accessories. A ring is used to thread the line through. It is soldered to the wire on which the cambric was previously put on. There should be at least 15 mm from the ring to the bearing. The ring and bearing are located perpendicularly. To make soldering more convenient, the workpiece can be clamped in a vice. After the ring, a couple more cambrics are put on, and then a prepared small bright float. Its purpose is to make the nod noticeable from afar. The very last equating the tulip to the pre-deserved tip.
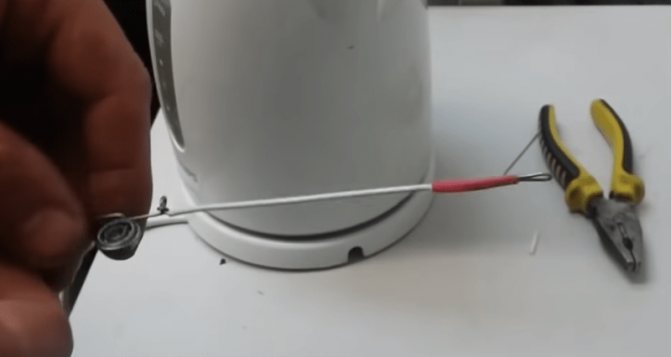
Balance check
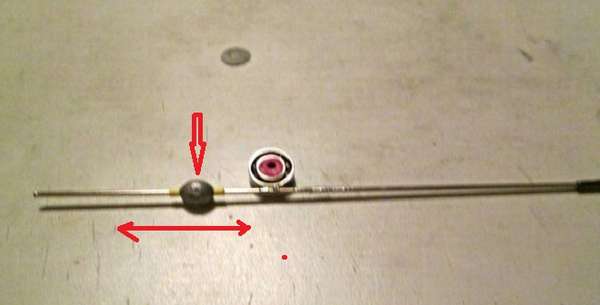
A sliding weight is placed on the opposite side. Its movement is limited by two silicone stoppers. Due to the fact that the load moves, it will be possible to adjust the tackle as accurately as possible.
Making a nod with a bearing yourself, video:
Without bearing (with axial mounting)
The principle of operation is the same, although instead of a bearing, a metal axis, for example, a rivet, is used.
As with the bearing, the same materials are used: wire, cambrics, float. You will also need plastic 2.5 cm long, 1 mm high and 0.5 cm wide.
around the rivet clamped in a vice. A large number of turns is not needed, it will be enough. Using pliers, the wire is trimmed and, if necessary, shortened to the required length. The signaling part is produced similarly to the previous version. The cambrics are put on, a ring is soldered, a couple more cambrics, a float and a tulip are soldered. And on the other side of the nod, a load of the required weight is attached.
Mounting option
Second option
Third
Fourth
Now you need to move on to attaching the nod . Since the bearing is not used, you need to choose something else. Fluoroplastic is well suited for this purpose; it lends itself well to processing. The plastic part is clamped in a vice and a through hole is made at one end for the whip. Hole diameter 2.5 mm. On the other side of the part, two cuts are made. The distance between them should be equal to the distance between the turns of wire.
Part of the plastic that is between the cuts can be safely removed. You need to try on whether the wire rings fit freely. Two more holes are drilled through the sides. At the same time, they are located perpendicular to the previous hole. The rivet should fit in this place quite tightly. If the drill is the same diameter, this will be the best option. This completes the manufacture of the mount, and it can be connected to the nod. You just need to place it in the plastic recess. But the axis is inserted parallel to the axis of the fastening. This concludes the creation of Shcherbakov’s homemade balancing nod.
An option for making a nod in 10 minutes using stationery pens: