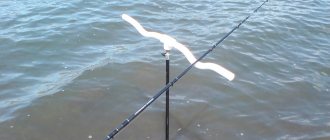
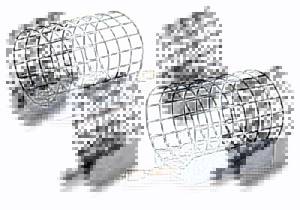
Feeder fishing is quite popular among anglers; many prefer to put out their rods and, while enjoying the sun, wait for a bite. You can also fish at night with the feeder; this tackle is suitable for the nocturnal inhabitants of our reservoirs.
Assembling feeder gear is not difficult; every self-respecting fisherman knows the basics. A rod, reel, fishing line - all this is selected individually, but with feeders you should not rush and buy what you like visually. This issue is worth studying in more detail, since a correctly selected feeder for the feeder is the basis for successful fishing.
Feeders for ponds and lakes
Standing water will require lighter equipment; for this, spring-shaped feeders are often used. Depending on how much bait you need to throw, the following types are used:
- “watermelon” or “pear”;
- a regular coil spring;
- flat method.
“Watermelons” and “pears” are often used to catch large carp and silver carp; these types of fish require a large amount of bait. A twisted spring is rarely used alone; most often, three such feeders are used to form a floating “crucian carp killer” tackle. This method is often used to equip feeders for catching carp and large crucian carp, but such fishing requires preliminary feeding.
The three-rib feeder is used less often by fishermen; carp catchers prefer it because no matter how the cast is made, the bait always ends up on top. This product is perfect for creating equipment for boilies.
For boilie rigs, do not use flat-method feeders; there is not enough bait in them, and constant casting can spook the fish.
Victoria Leshchenko
I've been working hard in the fishing tackle department for the past six years. I can help you assemble almost any gear.
Ask a Question
For standing water, they are collected into a sliding tackle, which is secured with special beads.
Do-it-yourself feeders for currents
Materials:
- Galvanized mesh, from a heavy equipment filter, with diamond-shaped holes measuring 11x6 mm.
- Wire Ø 1.5 mm.
- Swivel.
- Lead plate. Plate thickness 1-3 mm.
- 9 tin pimples.
Option 1
Manufacturing instructions:
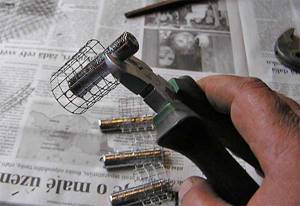
- The feeder is manufactured using the technology described in the second version of casting a metal feeder for the feeder. The shape is hollowed out in the board, and the hardened wire is bent into a triangle.
- This technology successfully produces feeders weighing 70 grams. and more.
- A rectangular depression 4x2.5x0.4 cm is cut out of a birch board.
- Drill 9 shallow holes for the lugs. Drilling depth up to 3 mm. Drill Ø 3 mm.
- A swivel is passed into the frame frame.
- Stretch the frame into the mesh.
- A frame with a frame and a swivel is placed in the recess.
- Fill it with lead.
Option 2
Manufacturing instructions:
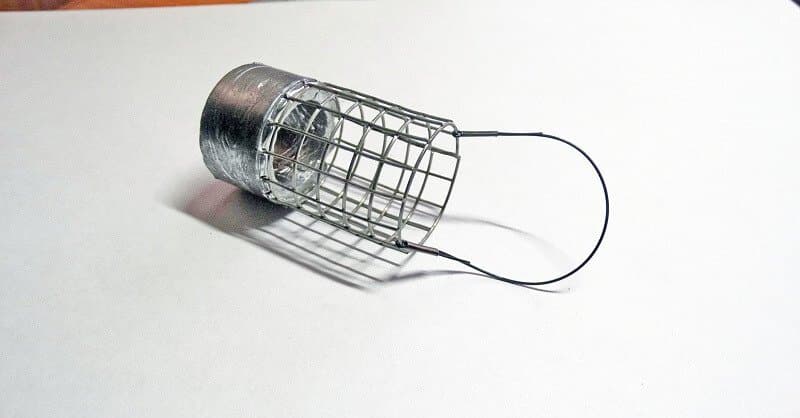
- Cut a blank into 3×12 cells from the mesh.
- Sharp edges must be blunted and bent into the body.
- The mesh must be bent into the shape of a cut French loaf of bread. With this shape, the feeder will fall quickly, but it will also rise better from the bottom with fast wiring. By the way, then when fishing, such a feeder can be changed a little. To do this, just slightly flatten or round the shape of the mesh. A flattened feeder will fall more slowly, while a cylindrical one will fall faster. The listed round shapes are used in weak currents. If you plan to fish in fast waters, then the net is bent into a pyramid.
- A frame is made from wire.
- Install the swivel.
- Now a base of 4.3 x 2.5 cm is cut out of the lead plate.
- The ends of the plate are bent outward. In other words, towards the shoe of the feeder.
- An awl is used to pierce holes for the frame.
- Pass the frame through the mesh.
- Place the ends of the frame along the base (bottom) of the feeder and use pliers to clamp the plate together with the frame.
- Solder the junction of the plate and the frame at the base of the feeder.
- Tin pimples are soldered on the back side of the base (shoe). They will be lugs. It is better to choose cylindrical pimples Ø 3 mm and 2-3 mm high for the role of lugs. By the way, tin lugs are more durable than lead lugs.
Recommendations:
- You need to work with liquid lead in a well-ventilated area.
- For feeders weighing 90 g. and more use feeder line Ø 0.3 mm. For light feeders (up to 45 g), a cord Ø 0.12 mm is also suitable.
- The cord must be new. Otherwise, a relatively large frictional force will act on it. This is due to the fact that due to long-term use, the cord will become frayed, twist around its longitudinal axis and be flattened.
- Additionally, you can equip the feeder with removable plugs at the ends. This regulates the speed of feed unloading. Also, to prolong the unloading of complementary foods, you can install a bandage with electrical tape or heat-shrink tubing in one or two rows.
- Some fishermen additionally secure the load in front of the feeder structure. This provides a good flight range when casting gear, as well as quick release of bait.
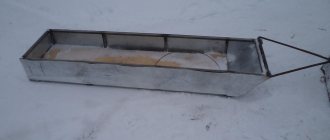
Feeding trough
Feeders for feeding are used as auxiliary ones; sometimes additional rods are used to cast them. Most fishermen shape their gear so that they can easily change the feeders they use.
To add a large amount of feed, it must have the following characteristics:
- big sizes;
- metal mesh;
- lack of bottom;
- rare rods.
It is these indicators that will allow you to add the required amount of bait to the right place and quickly leave it there. Often feeding options are made with your own hands from old unnecessary household items.
In England, where feeder fishing is very popular, in practice a special method is used for feeding. A special design has been invented in which, after contacting the bottom, the structure squeezes out the food.
To feed animals with food, cork feeders of closed, open and semi-closed types are used. They differ from the rest by large holes throughout the body, through which the contents are washed out.
Let’s take a closer look at each type of feeder and find out their advantages and disadvantages.
DIY feeder for long-distance casting
The requirements for such feeder feeders are as follows:
- Good aerodynamic characteristics. This is related to the accuracy and range of the throw.
- Easy ascent when applying water. If this does not happen, then the leashes will cling in difficult fishing areas.
- Yes, there are bullet feeders, but such feeders do not float up well when exhausted.
- The number of leashes in the rig also affects the flight range. The most suitable leashes are made of rigid fishing line made from a classic asymmetrical loop.
Materials:
- Monofilament line 70 cm long and Ø 0.3–0.35 mm.
- A plastic tube 7-10 cm long. Boxes of food for aquarium fish are also suitable. Anyway, look around and find a suitable box and cut off the bottom and other edge.
- A 1.5 cm piece of heat shrink tube Ø 1.25 mm to “shrink” and another 6-7 cm and Ø 2.5 mm.
- Several swivels, a carabiner, a bead and a shock absorber ball.
Manufacturing instructions:
- You need to fold the fishing line in half and tie a figure eight knot, making a loop measuring 1.5 cm.
- Next, the ends of the fishing line are “braided” 10-12 times. For convenience, you will have to hold one end of the loop with your teeth.
- Stepping back 5 cm from the knot, make a new figure eight knot. A leash is then attached to this twist-out.
- A swivel is attached to the end of the tube.
- On the other side of the tube, place a piece of thermal tube Ø 2.5 mm and move it to the swivel ring. After which the thermotube is “seated”.
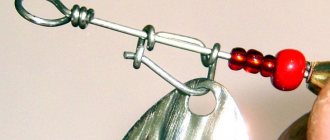
- The ends of the tube need to be slightly melted. The following is threaded onto the end of the fishing line in the following order: bead - shock absorber ball - tube secured with a swivel and clasp.
- Now you need to align the ends of the fishing line so that when suspended, the tube is horizontal.
- A 1.5-centimeter piece of thermal tube is threaded onto the free ends of the fishing line and fixed to the swivel.
- The thermal tube is moved through the assembly towards the swivel and “seated”.
- A “seated” thermal tube is put on the leash.
- Attach a leash to the outlet, and a feeder to the fastener.
- Move the thermotube to the outlet.
Recommendations:
- If the feeder was made of steel wire, then place it in Cillit liquid for 30 minutes.
- Start fishing with 50 cm leashes. Then follow the rule: the weaker the bite, the larger the leash and vice versa.
- If the fish swallows the hook deeply, then shorten the length of the leash. The appropriate leash length will be when the hook is caught behind the lip.
Rectangular feeders with soldered weights
Feeders made of rectangular or square metal mesh are used for feeder fishing on the river. Their bottom is flat, and there is a soldered weight of different weights on it. Previously, it was believed that this particular feeder was most suitable for the current; it supposedly did not get carried away by water. Additionally, spikes were made on the bottom, which sink into the ground and thereby better hold the feeder in place. It has now been proven that spikes do not allow achieving the desired result; in a strong current, a feeder with a small weight will still be carried away.
Among the disadvantages of metal rectangular feeders, it is worth noting the following:
- after washing out the food, they rarely float up due to the sinker;
- when casting, after contact with water, they produce a strong slap, which can scare away the fish;
- when pulled out, they often cling to bottom irregularities, the process is slowed down by water.
But for some, this view is still the best. The classic is more in demand among experienced fishermen.
Do-it-yourself shooting feeder “Shotgun” under the feeder
Materials:
- Case for color film. It will serve as a housing for the feeder.
- Double strip spring.
- Helium pen.
Manufacturing instructions:
- Using round-nose pliers, bend the ends of the spring up to 6 mm.
- Remove the plastic spacer from the metal plug and vertically wedge and center the spring into the plug.
- Now lead is poured into the cork in a layer of 6-8 mm. The lead will firmly fix the spring, while the piston will slide freely inside the housing.
- Next, in the center of the piston, you need to drill a hole with the diameter of the handle rod.
- The tube is inserted into a spring with a piston.
- Melt the end of the tube on the back side of the piston.
- Clean the tube. After all, the fishing line will pass through it.
- At the bottom of the container, make a hole with a slightly larger diameter beyond the diameter of the tube.
- A piston is installed in the container so that the level of the piston coincides with the end of the container, and the tube protrudes at least 5 mm above the container. The excess is cut off.
- Press down on the piston and the tube comes out larger. After which the free end is melted. As a result, the roller should be equally distributed over the entire section of the tube.
- The piston is pressed into the container until it stops.
- To hold the spring compressed in the container, two holes Ø 7-8 mm are drilled on opposite sides of the piston.
Recommendations:
- You can make a “Shotagan” from a Kinder box, but such a feeder is enough for a couple of fishing trips.
"Bullet" or "rocket"
This type of feeder feeder is increasingly attracting fishermen, although previously it was considered impractical to use “bullets” in the current. Recently, the views of even fishermen with experience in this matter have changed; increasingly, the “bullet” is used to equip a feeder for the river. These feeders are characterized by:
- plastic case;
- the presence of wings on the sides;
- cone-shaped body;
- weight at the very end of the feeder.
Among the disadvantages, rapid wear and tear is noted; plastic, when exposed to water and sun, quickly loses its structure and becomes more fragile.
But there are more positive qualities:
- after washing out the bait, the feeders float up perfectly;
- thanks to their shape they fly further and better;
- when in contact with water they do not create unnecessary noise.
The equipment turns out to be dull, but when you wind up the fishing line or cord, due to its shape, the feeder glides perfectly in the water column and practically does not cling to anything.
Store products
Manufacturers also understand the whole point, and many manufacturers make “bullet” feeders, many subtypes, depending on weight and even material (plastic, PVC or metal). The presence of TOP relevant accessories only shows that the demand for such feeders is great. The most popular bullets are:
How to make a feeder tackle for bream
- Preston Black Bullet Feeder. This container weighs 40 grams and has a metal body. The sinker rests on legs, the body is mesh. The weight is drop-shaped, the entire product is painted black;
- Browning Easy Speed Feeder - the same design, differs from the previous representative by the presence of a spherical sinker and the absence of paint. 40 g;
- AXC is very good for bream. These fish are suspicious; it is worth choosing more camouflaged equipment for them. The feeder is khaki color and made of plastic. The body is mesh, the load itself resembles a bullet. Weight – 35, the sinker is securely attached to part of the body, fixed with a special frame;
- Feeder-sport is an interesting design. The fishing line clings to a special arc that resembles the handle of a bucket. The load is supported on legs fused with the body, the ends of which are connected by a frame. It is also camouflaged, the material is plastic. Forty grams, there are stabilizers - rounded “wings” on four sides on the sides of the “barrel”. It is considered the most accurate bullet-type feed container.
Triangular feeders
This type of feeder is considered a relic of the past; many fishermen have abandoned their use. The main reason for this was the small capacity of the feeder body, and the food was washed out of it quite quickly. In addition, due to its shape, the feeder falls heavily into the water and comes out of it the same way.
Characteristic features are:
- triangular shape;
- metal carcass;
- There is a soldered weight on one of the planes.
Previously, it was believed that such models held best in the current, but now they no longer argue about this.
DIY bullet feeder
Such feeders are called “bullets” or “missiles”. They can be thrown over distances of close to 100 m with excellent accuracy (scatter of about 1 m). They enter the water quietly.
Materials:
- A 200 mm piece of high pressure polyethylene pipe with a diameter of 50 mm and a wall thickness of 4 mm.
- A piece of fine-grained foam.
Manufacturing instructions:
- Smooth out all burrs and sharp edges with sandpaper.
- Drill 16 holes Ø 10 mm in the tube, 4 in a row.
- A piece of foam is processed on an emery wheel. Finally, it is finished with No. 0 sandpaper. This will be the top of the float tackle.
- “Superglue” is used to connect the foam to the tube.
- Use a waterproof orange marker to paint the float and drill 5 mm Ø holes along the edge of the “bullet” body.
- Pass the winding rings and tie the slings to them. The ends of the slings are connected to a carabiner tied to them (withstanding 25 kg).
Recommendations:
- It is better to use monofilament line Ø 0.45 mm.
- By the way, fishermen call such feeders “rockets” because of the 4 stabilizers attached at the end. They can be either flat or slightly curved to the side. There is an opinion that the range of an accurate throw increases.
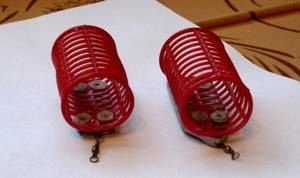
"Watermelon" or "pear"
Anglers who prefer to fish for carp use these feeders for still water. The equipment for this type of fishing is usually made sliding, with one to four hooks on leashes if desired. Such products are rarely used for boilie equipment, more often for puffies or polystyrene foam.
Watermelon design:
- the weight of the feeders ranges from 15 to 60 grams;
- metal ribs, located quite sparsely;
- There is a through tube inside.
The equipment is collected from one feeder; it is not recommended to pair them.
What weight is suitable for a river and a lake?
The weight of the feeder is not chosen arbitrarily. You should be guided by two considerations:
- How far do you intend to throw the load?
- What is the depth of the reservoir and the speed of the current.
Determine the casting distance by testing the rod. If you plan to fish from the lake shore, take a pickerel with a weight of up to 60 g. For long-distance casting into the river, Heavy and Extra Heavy class fishing rods weighing 90 grams or more are suitable. The most common are the medium variants of Medium rods. Follow the rule: the weight of the equipped feeder should be 70-80% of the feeder test.
The relationship between the mass of the feed and the flow speed is as follows:
- for weak water, use containers weighing up to 40 g;
- moderate flow rate – up to 60 g;
- on a strong watercourse - 120 g or more.
Miniature, heavy feed containers are held at the bottom better than large, but lightweight products.
Coil spring
The most primitive and easy-to-make feeder, which is used only for ponds with standing water. The equipment can use either one or several feeders at once. Usually they are not shipped, so the final link is a sinker, which is tightly tied to the tackle.
The coil spring cannot be confused with other types due to the following characteristics:
- simple spiral shape;
- a through tube is usually installed inside;
- made from copper-clad wire or painted afterwards.
The “crucian carp killer” is considered a classic rig; it consists of three small feeders. A leash with a hook is tied over each of them; it is advisable to do this through a small outlet, then the hooks will not get tangled with the main fishing line.
There is a tackle consisting of two feeders, they call it the “carp killer”. For this type, the twisted spirals should be larger in size, leashes and hooks are placed in the same way as in the “crucian carp killer”, only their size should be larger.
Tackle with one feeder is used the least often; little bait will fit into such a tackle, and few people want to re-throw it often. The formation of equipment is carried out along one line:
- feeder;
- leash;
- hook.
Some fishermen place a sliding weight in front of the feeder, which is secured with beads or float stoppers. But more often they attach the sinker to a swivel, which will complete this simple tackle.
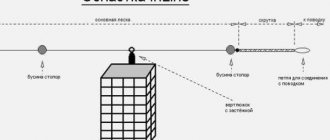
How to attach a feeder to a feeder
There are many ways to mount a cormak to a fishing rod. But the main division is between blind and sliding fastenings. In the first option, use all kinds of knots (“Clinch”, “Loop to Loop”, “Surgical”), loops (Gardner, symmetrical and asymmetrical), as well as a swivel with a clasp.
However, even in loops, installing a feeder feeder with your own hands can be done in two ways: you let the container move along the cord or firmly attach the accessory. In sliding installations, the fishing line must be passed through a hollow rod, allowing the equipment element to move along the thread. You can limit movement with stoppers (beads, rubber tubes, knots on the fishing line).
An excellent way to attach the feeder to the feeder is through a swivel with a carabiner. In this case, you will easily manipulate the containers in accordance with the fishing conditions.