Tie a fishing line on a hook: a simple tag knot
Indeed, the outcome of the fishing depends on the correct choice of option and method of tying the fishing line on the hook.
When choosing the wrong knot, very often the fish can break off or this leads to the loss of the hook itself. Therefore, a correctly chosen knot is the key to a large amount of catch. In order to choose the right knot, it is necessary to characterize the fish being hunted, the thickness of the fishing line, and the width of the eye. The simplest option is the Palomar knot. This is an option that is often recommended by manufacturers of thin monofilament lines. That is, it is made with individual hairs, without the use of weaving. The main advantage is that even an inexperienced fisherman who has just begun to advance in this matter can tie this kind of knot.
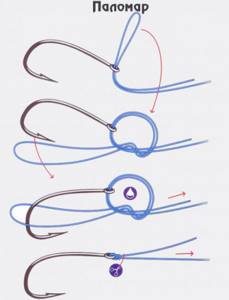
How to tie a fishing line on a hook, Palomar knot diagram:
- In order to make such a knot, you need to fold regular sewing thread in half so that you get a small loop.
- Now this thread, folded in half, must be passed through the hole in the hook and tied with a regular knot on the fishing line, just like laces are tied.
- After this, the edge with the fishing line, which resembles a loop, is threaded through the arc of the hook itself and tightened. Now you need to cut off the excess end of the fishing line.
Simple Palomar
This knot is mainly used not for tying a hook, but for attaching a spoon or sinker. But this option is also quite popular, as it is the easiest to knit.
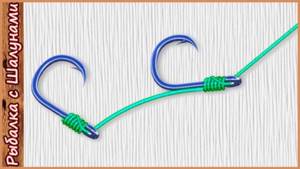
Tie a fishing line on a hook, a simple tag knot:
- It is necessary to fold the regular thread twice and thread it through the hole of the hook.
- Next, you need to insert the resulting 2 protruding threads into the loop and tighten. This will create one of the simplest knots.
- The main advantage is that it can be simply untied without cutting the line.
- The main disadvantage is that it has a very weak load, so it is not used for fishing.
Scheme
Content
- You can't argue with science...
- The secret is in tension
- Minimize rod tip movements
- Self-control
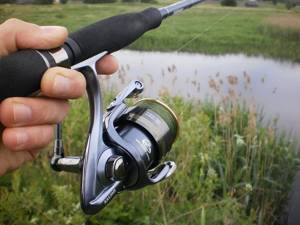
- How to wind a reel correctly - video
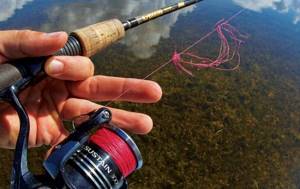
We've been fishing for months without any problems when suddenly the 0.08mm diameter braided line flies off the spool and turns into an ugly tangle that resembles a bird's nest. Did you know that 90% of the blame for this lies with you?
The trick of experienced fishermen when tightening a knot on a fishing line
In fishing there is no way without knots - a knot is necessary for tying:
- Leash to the main line,
- hook,
- Spoons,
- swivel,
- Etc.
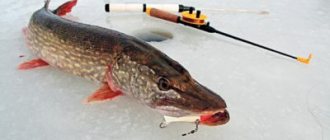
We suggest you familiarize yourself with: Fishing for pike with a spinning rod in spring and autumn.
In such circumstances, experienced fishermen resort to a little trick.
After they have prepared the necessary element of fishing tackle for installation, tightening the knot, they lower their hands together with the tackle into the water. And in this water they just finish tightening the knot on the fishing line.
A prerequisite is that the water must be cold.
It has been experimentally proven that with this method of installation and tying fishing knots, the fishing line often does not break and retains its strength an order of magnitude higher than any other method.
A knot tied using this method is actually stronger than a traditional one.
And you can be sure and not worry when fishing that such a knot can come undone or break at the most inopportune moment.
Convince yourself of the effectiveness of this method!
How to properly tie a fishing line on a salmon hook?
One of the universal options is the bloody knot. Based on this method, other options have been developed that can be used with both thin threads and braids. This knot is not suitable for use on braid, but is ideal for using thick and thin threads. It can be called universal, the strength is quite good and is 70% tensile strength.
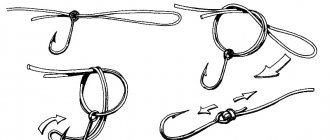
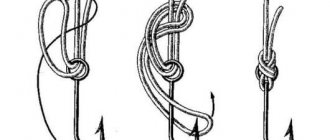
How to properly tie a fishing line on a hook with a bloody knot:
- In order to make such a fastening, you need to pull the short tip of the fishing line into the eye of the hook.
- Next, you need to rotate the metal product around its axis until you get turns.
- It is necessary to get about five to six turns.
- Now you need to lower the fishing line down, and then pull it out at the very top, through the loop formed after bending the fishing line.
- Next, the knot is tightened and the excess line is cut off.
Bloody Knot
This option is ideal for catching sturgeon. The main advantage is that it has high tensile strength as well as versatility.
We suggest you read: Which Line Is Best For Catching Crucian Carp
How to properly tie a fishing line on a salmon hook:
- This option can be used both on thin threads and thick, braided ones. Ideal for synthetic thread.
- In order to secure the thread to the hook, you must follow the diagram presented below.
- Mainly used on hooks where there is no eye, but only a blade.
- Using this option, you can catch even a fairly large individual, and it will not fall off.
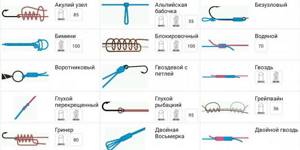
Node diagrams
The most reliable knots for braiding
Although some manufacturers recommend one or two options for their products, it is generally accepted that there are some that can be applied to almost all types of braids . Let's talk about some of them.
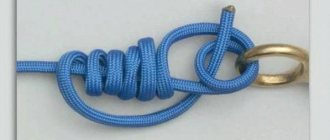
Palomar knot
Tying this knot should not pose any problem for the fisherman. It is as simple as it is effective.
- First you need to fold the tip of the braid in half.
- The double end must be threaded through the loop of the swivel.
- Now you need to tie, without tightening, a simple knot.
- The swivel must be threaded through the double end of the braid .
- We tighten it.

Uni (Uni knot, Grinner knot)
Another popular knot that has good strength characteristics.
- We thread the tip of the braid into the eye of the fishing hook . In this case, we leave a free end of the fishing line several tens of centimeters long.
- Then we thread this tip into the eye of the hook again.
- the resulting tip, several tens of centimeters , back, ten centimeters, then we stretch the remaining part to the hook.
- Using the rest of the fishing line, we wrap the fishing line several times (four to five times) in the opposite direction.
- Thread the end into a large loop.
- We tighten it.

Don't forget to moisten before tightening.
Clinch (Improved Clinch)
- It is tied in a similar way.
- First, we thread the fishing line through the eye of the fishing hook.
- Then we wrap the main part of the braid several times in the opposite direction.
- Then the free tip will need to be threaded into the eye of the fishing hook again .
- After that, we thread it through a large loop and tighten it.
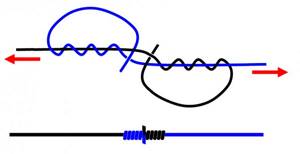
Bloody knot
This knot is considered one of the most durable.
It got its name for historical reasons. It is believed that once upon a time, sailors in the sailing fleet were punished using whips with such knots. This was done to make the blows more painful. It's hard to say how true this is.
No matter how it once was, now this knot is used for fishing and is considered very durable. Among other things, it is suitable for tying fishing lines of different diameters and is quite reliable.
- First of all, you need to fold two fishing lines towards each other . It should extend beyond the edge by several tens of centimeters.
- Then we wrap the tip of one of them several times around the main part of the other fishing line. You can, for example, make five to seven turns.
- We repeat the same for the other part of the fishing line.
- Then we pass the tip between two fishing lines at the base of the winding. We do the same for the tip of the other piece of fishing line.
- Tighten the knot , not forgetting to wet it first.
How to tie braid with fluorocarbon?
Nowadays, a fluorocarbon leash is a good solution for various fishing methods. One of its main advantages is the almost complete invisibility of a leash made from it for fish. This is because its refractive index is very close to that of water.
Even a shy fish will most likely not be able to notice it. In addition, this material is quite rigid. This reduces the likelihood that the fish will bite or chew it. There are two main options for such lines. They can be thick or thin.
The first of them are used not only for their invisibility in water, but also due to their increased strength and rigidity. The latter are used where it is especially important that the fish does not see the leash and is not afraid.
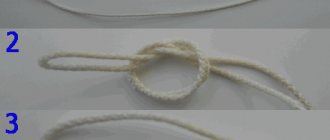
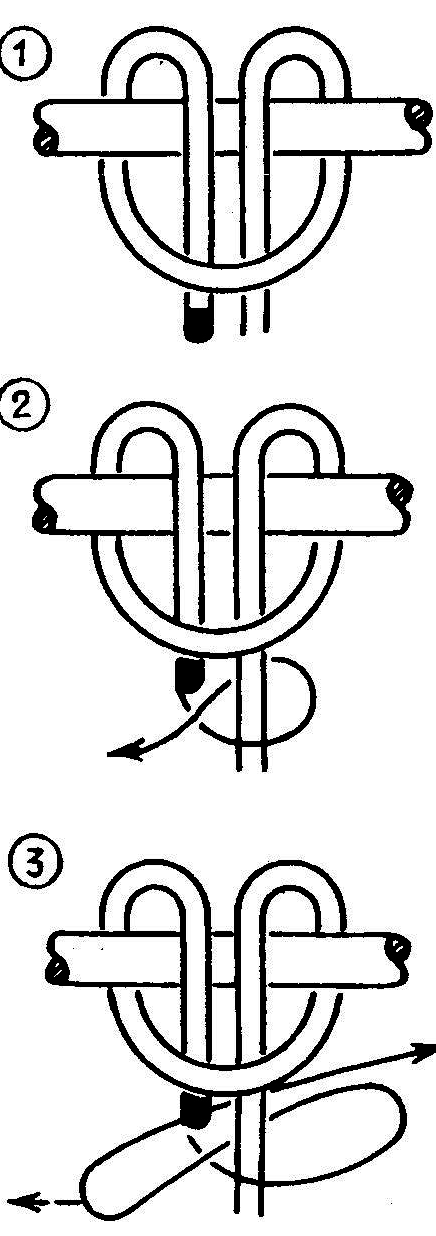
The “carrot” knot is widely used to tie braided line to fluorocarbon fishing line. Despite its name, this knot has proven itself well among fishermen. Its name refers to the appearance of a properly tied and well-tightened knot.
We'll tell you how to tie it correctly:
- First we make a simple loop , but do not tighten it. (1).
- Then we pass the other part of the fishing line towards , threading it inside this loop. You need to stretch it about thirty centimeters. (1) .
- the last part about seven to eight times.(2).
- Then we wrap it back the same number of times (3).
- After this, we thread the tip into the original loop , which has not yet been tightened. (3)
- Then tighten the original loop.(4).
- After this, tighten the entire knot . We try to do this evenly so that it tightens correctly. (4).
Note that that piece of fishing line where one small knot is (in this case) fluorocarbon, and the second, which turns around many times, is braided.
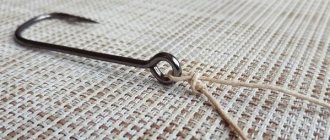
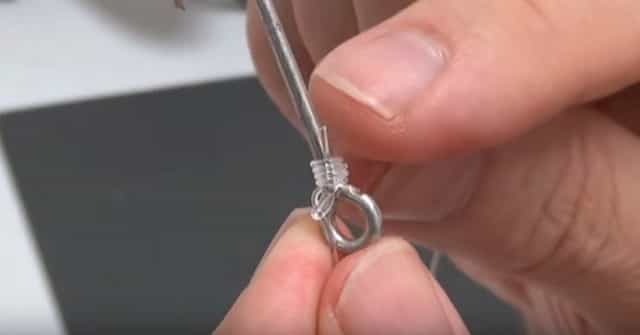
Method of tying fishing line on a hook using a step knot
It is mainly suitable for use in hooks that are used to catch predatory fish. Most often, they are not equipped with an eye, and the tip is a thickened spatula. That is why other options for fastening the fishing line are not suitable.
Method for tying fishing line on a hook with a step knot:
- The stepped knot allows you to very tightly and reliably fix the fishing line on the hook so that it does not slip through the thickening. Most often, this option is used when fishing for catfish and pike, which are large in size and often break off during fishing.
- Such a node will not allow this to happen. Knitting is quite simple, despite the complex description. It is necessary to fold the thread in half and lay it along the hook, in the direction of the head.
- Next, you need to wind the short tip around the blade, and then fold it up and wrap the turns. Next, the tip of the thread must be drawn upward on the lower turn. It is necessary to tighten the resulting knot and cut off the excess.
How to tie a fishing line on two hooks at once?
Experienced fishermen, in order to increase their chances of a decent catch, will come up with a variety of interesting methods that allow them to catch a huge amount of fish with a minimum set of gear and rods.
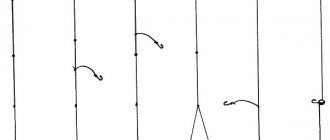
How to tie a fishing line on two hooks:
- To do this, they often use the option of using an additional leash, or tying another hook on the main fishing line. The first method involves knitting on the main thread; for this, an additional hook is initially made, and then the main hook is made from the remaining fishing line. It is necessary to initially measure the required length by which the hook should hang below the first option. Most often, loop knots are used for this, as well as bloody ones.
On one thread - The second option is often used with the use of an additional leash. In order to secure two hooks, they are knitted separately on each fishing line, one of which is additional, and the second is the main one. After that they simply communicate with each other. In order to connect them, a method called loop-to-loop is usually used. Below is a diagram with which you can tie two hooks together.
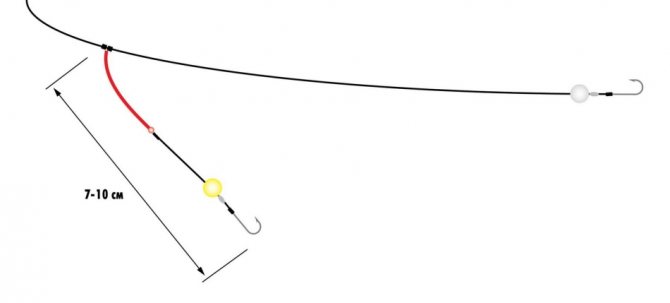
Leash with two hooks
Using the diagrams, it’s quite easy to figure out the nodes. The main thing is to choose the right fishing line and its thickness.
You can't argue with science...
Experts from companies that produce braided cords openly admit that there is no technical solution to the problem of loops falling off.
“The main reason for the formation of loops is the lack of memory in braided cords,” says Ben Miller, manager of there are pros and cons.”
One solution to the problem of the “cord” falling off is to replace the old braided fishing line with a new, stiffer and heavier one.
Loops occur in places where the cord is not tightly laid on the spool. When casting, the line randomly flies off the spool in this place and forms a loop, which inevitably leads to tangling.
“Loop shedding is a by-product of spinning the spool of a spinning reel. On baitcasting reels, a similar effect occurs when you don’t slow down the spool in time when casting.”
Guided by various considerations, manufacturers often coat the cord with special compounds. One of the reasons is that the special coating imparts some rigidity, thereby reducing the likelihood of loops. However, these coatings wear out during use, and the risk of loops increases again.
"I'm not a fan of coated cords," said Joe Meyer of .