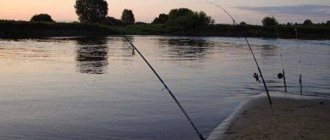
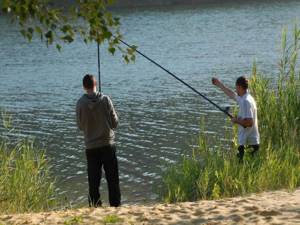
The journey of many fishermen began with the most popular classic tackle - a float rod. And now, despite the many specialized types of sports and amateur fishing, the fly rod is the simplest and most affordable tackle.
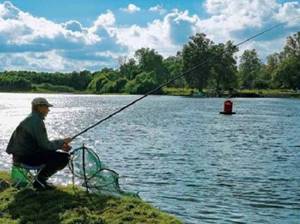
Many fishermen want to relax in nature after the bustle of the city, sit in a chair on the shore of a pond with a fishing rod in hand, and watch the float.
Modern float rods are represented by various types of telescopic, Bolognese or plug-in gear. It is not easy to equip rods with high-tech materials and types of rod tips. Each option has its own method of tying the fishing line.
The connection between the fishing line and the blank must perform the following functions:
- ensure the sensitivity of the gear. Any action of the bait or fish must be clearly transmitted from the fishing line along the form to the hand. Otherwise, you can lose the fish if you do it incorrectly and not get the pleasure of fishing.
- Possibility of quick equipment by simple manipulations.
- reliability .
Attaching the fishing line to the fishing rod using a connector
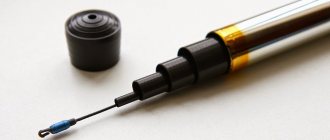
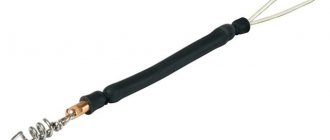
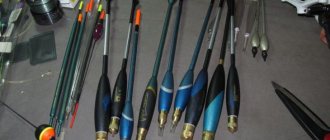
Fly fishing rods from most branded manufacturers have a tip without a built-in ring. It is assumed that the only and correct way to attach the fishing line will be through a special connector, which can be purchased separately at any fishing store.
The size of the connector is selected depending on the diameter (thickness) of the tip. The connector also differs in type of construction depending on whether the tip of the last bend is hollow or not. The inner one is inserted inside the tip, and the outer one is placed on top. Attach it with simple glue.
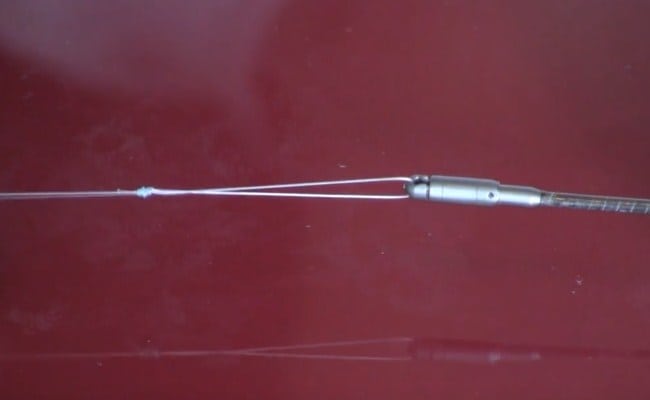
The connection is made using a loop on a fishing line, which is threaded into a special fastener. To prevent the line from slipping off, there is a special protective cap that covers the hook of the connector.
When purchasing it, you need to pay attention to the quality of workmanship. The entire surface should be perfectly smooth, without any sagging or burrs that will cause the line to fray.
The cap must tightly close the hook, otherwise during fishing it will be annoying to lose all the equipment, including when biting a trophy fish. Most connectors are made of plastic. It is more fragile and can break if handled carelessly.
Metal products are more reliable, but if they come into contact with water, they can become rusty over time.
The connector is the most popular compared to other fastening methods because it is reliable and allows you to easily change equipment.
How to remove a glued connector
For what? Several reasons can be identified:
- Change to another model.
- Broken.
- Initially not seen marriage.
- Just wanted.
To be honest, in my practice there were only two cases when it was necessary to remove the connector from the fishing rod. Once while fishing, when a friend, due to inattention and negligence, got a notch on the body of the latch and the fishing line broke. And the second when replacing the plastic latch with a rope fastening. It seemed most suitable to me then and I decided to conduct an experiment.
So, ways to remove the installed connector.
Method one . Carefully, so as not to damage the form, be sure to cut it off with a sharp knife or razor blade . Then we remove the remains with sandpaper and glue in a new one.
Method two . We light a candle if the “operation” is carried out alone. We take the rod of the fishing rod in one hand, the pliers in the other and, holding the tip of the connector, apply a small force to break it.
Holding it over the fire, we begin to warm it. Preferably from all sides. At the same time, without weakening the stretch. When the temperature reaches the optimal value, the plastic body of the connector slides off the tip of the whip. We remove the remaining glue and attach a new fastener.
Advice to cut off a section of the whip, saying that one centimeter for a fishing rod is not a loss, I immediately reject. Do not injure the tackle. There are better options. They are described in the first and second methods.
I suggest visually familiarizing yourself with the entire installation procedure. In his video, an expert from Flagman will tell and show how to attach the connector to a fly rod.
Thick fishing line loop
This is one of the simplest and long-used methods of tying fishing line.
To implement it you will need:
- a piece of thick fishing line, 3 or 4 mm in diameter. and 10 – 12 cm in length.
- nylon thread.
- glue moment.
The loop making process is as follows:
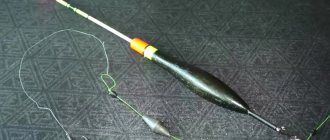
- A piece of fishing line is bent in half and overlapped to the tip of the last leg of the rod. The length of the protruding loop should be 2 - 3 cm. The remaining length of the ends of the fishing line should overlap the tip.
- The ends of the bent fishing line are pressed to the tip with several turns of nylon thread . The pitch of the turns can be large, since this is a rough winding to keep the line stationary relative to the tip.
- From the end of the tip, a neat thread wrapping of the pressed ends of the loop begins . For reliability and aesthetics, each turn is laid next to the previous turn.
- The laid coils are impregnated with Moment glue.
The main line is connected to the loop on the fishing rod using the loop-to-loop method. This option has some disadvantages. During fishing, the knot is tightened. To disconnect, you have to spend a lot of time untying the loop or cutting off the main line.
In this case, the main equipment will be shortened each time. In addition, thick fishing line is subject to wear and aging over time under ultraviolet light.
What is a fly rod
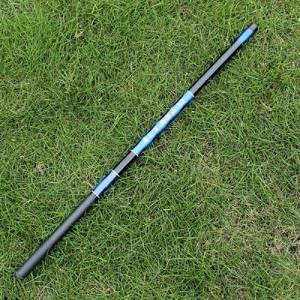
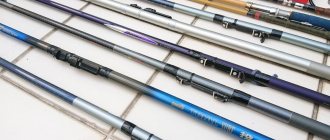
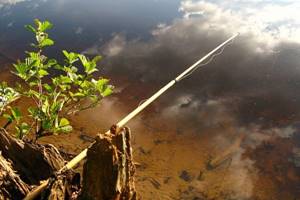
The prototype of the swing was once an ordinary stick, which made it possible to deliver bait to a certain fishing zone using a thread attached to the tip of the device. In the modern fishing world, with the advent of innovative materials that have both high strength and the same high flexibility parameters, the rod began to look like a telescopic lightweight structure with a length of 3 to 11 meters. The whip of the tackle is smooth, without the addition of folding elbows with passage rings. The fishing line with the installation is wound onto a reel, where it is stored until the next fishing trip. To assemble this type of gear into working condition, you will need to tie the fishing line to the fly rod, and with changes in fishing conditions, you may need to change the equipment during fishing to a completely different type.
Important! The material used to make a fishing rod varies from fiberglass, which is a heavy version of the tackle, to carbon fiber and carbon fiber blanks, which are a lightweight option.
One of the varieties of swing also includes plug fishing rods, the assembly principle of which is based on connecting parts of the fishing rod into a glass, and the main core of the cord is attached to the tip of the tackle through a shock-absorbing device called a feeder. The plugs differ from the ordinary swing by their significant length, which can reach values from 9 to 20 meters. The whips are made of carbon fiber and even with such a huge size, the tackle rarely exceeds the weight of 1.5 kg. Tests of both types of fishing rods do not exceed the value of 70 grams, but in terms of their structure, manufacturers try to produce lines of blanks with medium and slow parameters.
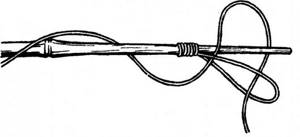
How to tie a fishing line with a rope?
The essence of the connection is the presence of a rope as an intermediate material between the fishing line and the tip.
For installation you will need:
- a rope 5-8 cm long. It should be a kind of braided winding with a cavity inside.
- glue Moment.
Connection process:
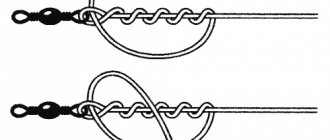
- The rope is pulled over the tip of the whip. It is enough to insert the tip 2-3 cm inside the rope.
- The part of the string stretched over the end of the rod is soaked in superglue.
- A regular knot is tied at the free end. You can tie a double knot to make it larger. The free end is melted with fire so that the edge does not unravel and the knot does not unravel.
- At the end of the main fishing line, a loop is knitted , with the help of which a noose is made for throwing over the rope knot.
The connection method is simple and convenient. You can replace the main line very quickly. But there are several disadvantages to this option. During the fishing process, a noose made from a thick fishing line may become loose if the fishing line is not tensioned. Therefore, it is necessary to periodically check the node connection so as not to lose all the equipment.
For lines with a diameter of more than 0.16 mm, it is recommended to use other types of installation.
How to choose the right one
Connectors made of duralumin alloys are considered more reliable elements and are used when catching large and powerful fish, carp, barbel, ide and chub. Plastic varieties of products are only suitable for fishing conditions for small fish, roach, bleak, ruff, gudgeon and small crucian carp. The advantages of connectors are the speed of changing the main lines and the reliability of its fastening. In addition, this device is inexpensive, durable and easy to use, and, apart from glue, does not require additional materials for installation on the fishing rod.
Important! The method of mounting the device on a fishing rod depends on the design of the tip of the tackle.
If the tip has an internal cavity, then the product is purchased with a sleeve for internal installation. If the tip of the rod is solid, purchase a connector with a hollow shank. To accurately select a connector, you will also need to know exactly the outer or inner diameter of the last bend of the form. The easiest way is to measure the rod with a compass and use this tool to select the required accessory option in the store. But it’s safer to take the rod itself to a retail outlet and select a device by directly connecting the parts in a trial . Having chosen the option required for the configuration, the device is glued to the tip of the fishing rod blank with glue and after the joint has dried, the tackle is completely ready for installation of the cord.
Attaching the fishing line to the tip of the tip using cambrics
To connect, you will need two cambrics, each 1 cm long. The size of the internal diameter should be such that it can fit onto the tip of the tip with interference.
Installation process:
- 2 cambrics are put on the main line of the equipment in succession.
- A loop (knot) is knitted on the outermost cambric so that the cambric and fishing line are connected to each other.
- The cambric with a tied knot is put on the top and advanced from the edge by 20 - 30 cm.
- A couple of dozen turns of the main fishing line are made around the end of the tip.
- A second cambric is pulled onto the edge of the tip.
Despite the general reliability of this tethering method, there are several disadvantages. Over time, the fishing line can fray the cambrics, as a result of which the entire equipment can be lost when casting.
Line selection
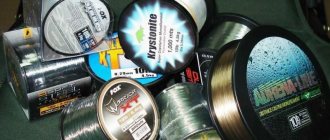
Monofilament fishing line is used for the fly rod. When choosing, the following are taken into account: diameter, i.e. thickness, rigidity, ability to stretch, presence or absence of memory. You will learn about all these parameters by reading the label or asking the seller.
One piece of advice: don’t always trust what manufacturers write on the label; be prepared that the stated parameters will not correspond to the truth. Inexpensive, budget fishing lines always suffer from overestimated parameters.
The choice of fishing line is also influenced by the weight of the equipment. You won't be able to cast a light tackle on a thick line, especially if there is wind.
If you are using a soft line, then after fishing you should not wind the wet line tightly on the reel. It will stretch, and after drying it can break the plastic reel. Therefore, when reeling in, give some slack.
Folk sign: Sultry June - don't give a damn about fishing!
Loop on the second knee
The last leg of the fly rod is the thinnest. This means it is the most fragile, that is, the probability of its breakage is very high. This is confirmed by real cases in practice. Experienced fishermen use the option of tying the fishing line not to the first knee, but to the second.
If the tip breaks, the tackle remains tied to the other knee and is not lost.
For installation you will need the following materials:
- a piece of thick fishing line (8-10 cm).
- cambric.
- Super glue.
- nylon thread.
Connection installation:
- A piece of thick fishing line is folded in half and applied to the second knee. The ends of the fishing line are wrapped with nylon thread to secure the thick monofilament.
- The turns are carefully placed next to each other using nylon thread . Laying should be with a slight tension so as not to crush the hollow knee. The laid coils are coated and impregnated with super glue.
- at the end of the main line .
- The fishing line with a loop is threaded into the cambric.
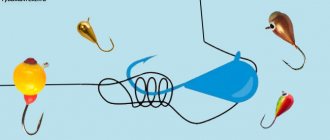
- Next, the loop on the fishing line is threaded into the loop on the second knee , then draped over the top of the first knee, and then shifted back to the loop on the second knee.
- Having pulled the main line, it must be wrapped around the first knee.
- on the end of the tip .
The option of connecting the fishing line to the second knee is somewhat complicated and requires more time to equip the fly rod. The presence of a cambric on the tip also has a disadvantage inherent in the connection option using two cambrics. Over time, wear occurs and the cambric at the tip is cut through by fishing line.
This is why it is recommended to use a new cambric with each installation.
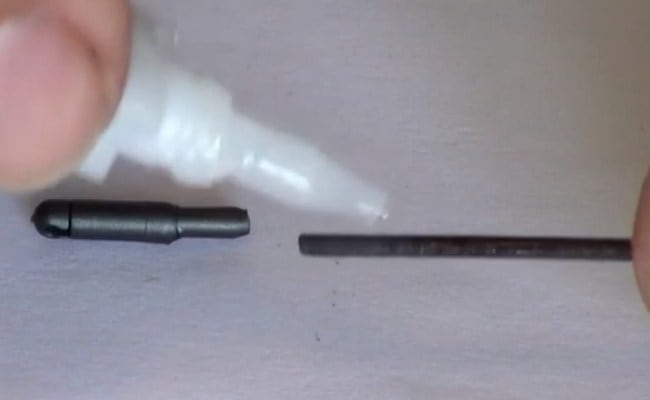
How to attach a connector to a fishing rod
To equip you will need:
- A small piece of fine sandpaper.
- Fast drying glue. Super glue “Moment” is quite suitable.
- And the connector itself.
First, take sandpaper and carefully, effortlessly clean the joint.
Apply a few drops of glue to the surface. If required, spread with a piece of paper over the entire surface.
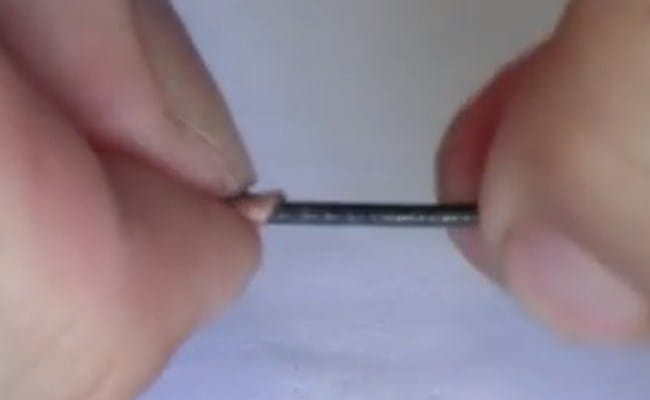
We put the latch on tightly.
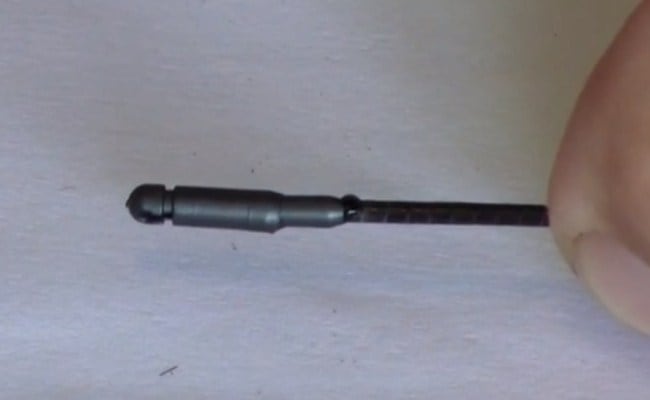
Remains of glue that can be squeezed out are removed with a cloth or paper and wait until the glue dries completely.
As you can see, attaching the connector to the fly rod requires a minimum of time. But now, when you come fishing, without any extra hassle, you can get a reel with the prepared equipment and securely fasten the fishing line.
Hunting and fishing
It is not good. We will lose mobility. You need either fly tackle or match tackle, as it is. “We are not a peahen, but we are not a crow either.” But other fishermen are too conservative and do not want to give up old habits. Remember the old bamboo fishing rods with line reels on them? This is how these fishermen do it: they attach all sorts of winter reels and other “stuff” to lightweight fly rods intended for float fishing, just to reel in the fishing line somewhere.
But! So today they don’t catch fish with a fly rod! The fishing line is attached directly to the tip of the fly rod (using a special connector) and that’s the only way! And it doesn't go anywhere. This is the best option and there are many reasons for this. We will now talk about the features of attaching the fishing line to the fly rod.
Plastic connectors are used for this. When fishing with a fly rod, the fishing line should not be wound onto a reel, reel (“built-in” in the rod) or anything else. Firstly, in fact, you cannot attach a reel, a reel, or anything else to the fly rod - these rods are not designed for this. And for good reason. Because: secondly, this way we will greatly deteriorate our tackle: we will make it slower, more complex, and clumsy. If we attach some kind of reel to a fly fishing rod, then the line will constantly sag, and a significant part of it will lie on the water, and we will be late with hooking. Fishing will not be so simple, fast and easy. Fishing with a float is fishing for small and exciting fish. And every now and then she will leave us with our noses. Therefore, on a fly rod, the line is attached to the tip. And only so.
For this purpose, there are special plastic connectors on sale - connectors for fly rods. These are the kind of plazas thanks to which we can “connect” the end of our fishing line (our fly (float) equipment: with a float, weight, hook) with the tip of our fly rod. As a result, we will get a very simple and practical tackle, without all the unnecessary things. Our fishing line is attached to the tip of the rod, and on it is the equipment we need. Just throw it in and take it out. By the way, we can change these equipment “like gloves”: take off one, pick up another. This is also a reason not to use all sorts of coils.
Plastic connectors are purchased taking into account the thickness (diameter) of the tip of our rod. Let's say, if it is 0.6 cm, then we need to buy a connector with the same, but narrower inner diameter. The connectors are easy to use. We drop a drop of superglue onto the tip of the rod, put the connector on it, let it set for a couple of minutes - and voila! The connector is attached to the tip of the rod. Now we open the special “latch” in the connector, put the loop of our fishing line there (you need to tie a loop at the end of our equipment (the main fishing line) in advance) and close the latch. All. The line is attached to the tip of the rod. We can safely fish.
There is no need to be afraid: the fishing line will not jump out of such a connector. This is practically impossible. The fastener is designed in such a way that it opens on the side of the connector that is closer to the angler (and not to the fish). That is, no matter how much we (or the fish) pull the line toward ourselves (in the opposite direction from the rod), it will not jump out of the connector. Well. unless we pull the line in the opposite direction (towards the angler), and even use force, then we will pull the line out of the connector. But you can escape with a self-tightening loop on the fishing line. Or many knots
Connectors are bought in the store! Again, the easiest way to get such a connector is to simply buy it at the store. There is no need to use your imagination and try to make something like this with your own hands. Firstly, the psychological moment is important. The fly rod should be very simple. Extremely simple. Only then will she get a kick out of it. Why do you need to complicate anything and fill your head with something else? Connect your fishing line to your rod, and catch!
And, secondly, we still can’t make such a compact, simple and functional product at home. The result will be something complicated, understandable to us alone, but still greatly complicating (and therefore coarsening) our gear.
Did you like the article? Subscribe to the channel to stay up to date with the most interesting materials
Safety pin
This method also involves a quick change of the main line.
- A safety pin with a ring is tied to the rod so that only the ring sticks out.
- Wrapping with nylon thread is done only up to half of the pin, leaving the tip free.
- Impregnated with glue.
- The loop at the end of the main line is passed through the ring of the pin and put on its free sharp end.
The only downside is that the pin may rust over time, but replacing it is not difficult.
This small and very inexpensive device can be used with any fishing rod, the main thing is to accurately select it according to the thickness of the whip. When choosing a connector, you should consider what type of connector you will need: an external one, which is put on the tip of the rod, or an internal one, which is inserted into a hollow whip. In both cases, no matter how tightly it is put on, it wouldn’t hurt to add a drop of quick-drying glue.
The second necessary condition when purchasing a connector is to carefully inspect it for unevenness, burrs, cracks and other defects. You can also squeeze it forcefully between your fingers to determine its fragility.
It’s better to choose a connector in a store, having with you the rod to which it will be attached, and try putting it on the whip right there. This will help you choose the size more accurately.
The fishing line is attached and removed from the connector using a special lock. When moved down, it opens a slot where the loop of the main line is inserted. In the closed position it prevents the loop from falling off.
If you purchased a steel connector, you will have to use fishing rod stands. Attaching it is no different, but even such a small weight on the tip of a 10-11-meter rod will very quickly make itself felt.
You can choose the method of attaching the fishing line to the fly-float rod at home. However, all of the methods described above are quite feasible right on the reservoir, if certain components are present. After this, all that remains is to hang a float on the fishing line, if you need to attach a leash with a hook, or just a hook, feed a promising place and enjoy fishing.
Connector reliability test method
Whether you secured the connector yourself, or already purchased a fishing rod with a mount, you probably have some doubts about the reliability of such a small latch. Reasonable. Moreover, novice floaters often have to use products from China. The verification method is simple.
- Pour water into a plastic bottle with a volume of at least 4 liters. You can use a dumbbell or weight. Why such weight? 4 kg is the minimum weight for a plastic connector.
- A fishing line with a breaking load of more than 4 kilograms is taken. It is tied to the bottle and attached to the connector through a loop.
- Taking hold of the vertically (!) located whip, we begin to lift it. When you lift the bottle off the floor, you can even shake it slightly.
- If everything is in order, we are happy. If there are problems, we re-glue it.
That's all. How to attach a connector to a fly fishing rod - we've sorted it out. We checked the reliability, and now it’s time to go fishing.
We secure the fishing line
For complete preparation, it is necessary to secure the fishing line, because without it fishing is impossible.
- At one end of the fishing line we make a loop and tighten it, but not to the point of a knot. At the second end we knit a leash, a hook, and don’t forget about the float and sinkers.
- Open the connector lock and insert the loop into the hook.
- We tighten the loop and secure everything with a lock.
Done, you can throw the tackle.
Photo 2. Closed connector.