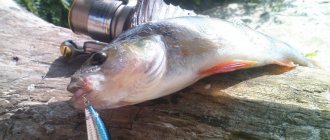
Yuri 11/13/2020 256

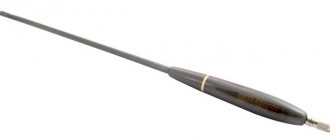
The method of catching trophies on a match rod is determined by the design of the corresponding float - this is a fundamental element of the tackle. Since match fishing involves casting over a long distance, it is necessary to choose the right float. Their appearance is similar to a dart, characterized by an elongated body and an elongated tail. Thanks to this shape, excellent aerodynamics are achieved during the casting process. A float for catching a match has an average length of 25-35 cm.
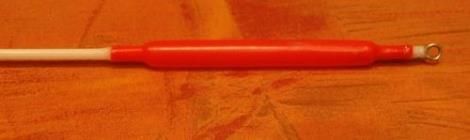
The most common among Astrakhan fishermen is the Wagler float for match fishing.
Design of floats for match fishing
Basically, a match float consists of three parts:
- body (body);
- signaling antenna;
- keel;
The float body is responsible for its buoyancy and carrying capacity.
A keel is used to give the hull stability in the water. The keel of the float helps to increase the parameters of the entire device, thereby increasing its resistance. The main indicator of the keel is its length, and weight does not in any way affect the sensitivity of the alarm, it only reduces the carrying capacity. That is why the keel is made primarily of rigid material.
The antenna of the fishing float helps to increase its visibility on the water. This makes it possible to instantly react to a bite. Since the antenna is located above the water surface, it is not capable of influencing the sensitivity of the float, but it may well reduce its carrying capacity. There are exceptions: antennas with high density (thick) and with positive buoyancy, which slightly reduces the sensitivity of the alarm.
The density of the antenna directly depends on the distance over which the tackle is thrown, as well as on the vigilance of the fisherman himself. As a rule, for every 5 meters its diameter increases by 0.5 mm. As for the weight of the antenna and its windage, these indicators significantly affect the stability of the float. Often, to prevent deterioration, the rod is brought into balance with a keel.
The size, shape, and location of the main elements in relation to each other determine the shape of the model, on which the main qualities of the float depend - its sensitivity and stability. These two poorly combined and sometimes antagonistic properties ultimately determine the purpose of the model, especially since when making a model, not only the resistance that occurs when biting should be taken into account (for now it does not matter whether the float works for lifting or diving). The float is primarily a bite alarm; it must be noticeable.
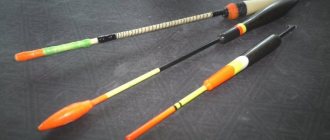
Floats for match
The performance qualities of Still Water Blue floats are excellent only when fishing is carried out quite close to the shore, at a depth of 3-3.5 m, in calm, windless weather. If gusty winds begin to annoy you and surface currents and ripples occur, then it is better to use other models, for example, DRENNAN Double Peacock (photo 6) - “Double ostrich feather”. Thanks to its long narrow body, elongated antenna and solid weight at the base, this float is able to withstand gusty winds and surface drift. Naturally, the line between the bottom point of the float and the tip of the rod must be recessed.
The body and antenna of the float, as the name implies, are made of high-quality straight ostrich feathers of different thicknesses. With Double Peacock you can fish in still water and in small currents. The only way this installation scheme differs from the previous one is the presence of a micro-swivel (No. 20) for attaching the leash. With these lightest models of floats and a thin main line of 0.12 - 0.14 mm, I use TRABUCCO Energiy rods 3 m 90 cm long with a test of 5-15 g paired with a SHIMANO Stradic X - 3000 reel.
Knowing the specifics of fishing on carp ponds, the peculiarities of fishing for bream in standing reservoirs, Peter Drennan created another model - Drift beater - “Beating Drift” (photo 7). For carp and bream, the most important factor influencing the bite is the absolute immobility of the bait on the bottom. Thanks to the spindle-shaped balsa body, the thinnest long antenna and a bright “bump” that will remain on the surface of the water, this float allows the bait not to move from the feeding point during surface currents and the strongest gusts of wind.
The installation of equipment with this float is very specific (Fig. 8). The main load, which includes a metal weighting barrel and several large “pellets,” can be concentrated both on the float itself and near it. Near the swivel, to which a leash 15-20 cm long is attached, an anchor “shot” from No. 0 to No. 3 is fixed on the main line.
When loading the Drift beater, all the upper “pellets” and one intermediate one - between the float and the leash - are selected so that only the spindle-shaped body of the float is under water. And only the anchor “shot” will sink the entire thin long antenna to the “bump”. It is clear that with such an installation, the bites on the rise will become clearly defined.
To attach the Drift beater to the fishing line, I use a special connector from STONFO. Photo 9 shows two models for fixed floats: on the left - for the lightest ones, on the right - for heavier ones. Such connectors (on the right) do not move along the line even a millimeter during powerful casts of even the heaviest floats. Two thick-walled silicone tubes, put on the main line, are pulled tightly onto the ends of the wire protruding to the sides, only after two turns of the line have been made around the Teflon body of the connector.
The heaviest Drift beater floats have a total load capacity of 5 g. With a side wind or blowing at the back, they can be used for fishing at a distance of up to 20-25 m. On lakes and reservoirs, where at such a distance from the shore the depth can reach 5-6 m, it makes sense use 6-7-meter “lapdogs”, since the Drift beater is rigidly fixed to the fishing line, and therefore the length of the fishing rod should be at least half a meter greater than the depth at the fishing point.
The anchor “shot” attached near the swivel with a leash should lie on the bottom. With test casts it is necessary to very accurately set the working depth on the equipment. The baited point is remembered using a landmark on the opposite bank, and the casting distance will always be the same if you make a mark on the line between the reel and the first ring on the rod with a special marker. Even though the white mark is very noticeable on a sinking dark line, it should be updated after a few casts.
Having cast beyond the feeding area, I lower the tip of the rod a little under the water and reel in the line to the white mark. After that, I sharply, with a splash, pull the tip of the rod out of the water. Thus, the entire line between the fishing rod and the float is submerged, and no wind will move the equipment from the baited place.
A main line of 0.16-0.18 mm will be quite suitable for catching bream. We attach hook No. 18-14 to a short leash made of fishing line with a thickness of 0.10 to 0.14 mm.
On a carp pond, the main line should be 0.2-0.22 mm thick. A leash made of 0.16-0.18 mm fishing line with hooks No. 14-10 will allow you to use fairly large baits, such as canned corn, worms, pellets, etc. If the carp is capricious, it is justified to catch it with a more delicate equipment with a small hook and maggots or bloodworms as bait.
For fishing with a Drift beater float, I usually use a TRABUCCO Grand Turnament rod 4.5 m long with a test of 10-30 g. Thanks to the excellent action and a very flexible blank, a 5-gram waggler flies perfectly at 25 m. And for a large one - up to 6.5 m - depths I use a Bologna COLMIC Corvet rod with a length of 7 m and a test weight of up to 20 g.
The next pair of floats that I use to fish at a distance of 20-25 m are made by the French company SENSAS. The development and introduction into production of models of floats, baits, and various auxiliary equipment is carried out by the titled float athlete Jean Desquet.
The Elliot float (photo 10) is similar to the Double Peacock, but thanks to the 4-feather plastic stabilizer it has noticeably better flight characteristics. A plastic adapter with an internal diameter of 3 mm is built into the upper part of the peacock feather body, into which very thin, replaceable antennas are inserted for super-delicate fishing.
The so-called “whistle” antennas have no less high sensitivity. They are a thin cut plastic rigid tube.
You need to load the float with additional “pellets” to the middle of the antenna, then bites both on the dive and on the rise will be clearly visible.
Trevor float (photo 11) is a typical bream float. Its main advantages are resistance to drift and clear registration of bites on the rise. To fish with it, you will need a light rod 3.9-4.2 m long with up to 15 g of dough, a main line of 0.12-0.14 m and a leash of 0.08-0.10 mm.
They load it in almost the same way as the Drift beater float, with the only difference being that the anchor “pellet” does not lie on the bottom, but is located a few centimeters from it. The total carrying capacity of Trevor floats when fishing at a distance of up to 15 m ranges from 4-6 g.
To catch bream at a distance of 15 to 25 m in difficult weather conditions - with strong or gusty winds - you will need heavier Trevor floats, weighing 8 and 10 g.
In crosswinds I use Andrew and James floats (photo 12) from SENSAS. I outfitted the 7 gram Andrew floats with 4-feather plastic stabilizers from COLMIC, which I pulled tightly onto elongated balsa bodies. By the way, the Trevor and Andrew floats are made entirely of balsa with a thin carbon fiber antenna and a replaceable top made of bright plastic, and the James float is made of peacock feathers with a thickened balsa body.
It is better to catch active white fish with rigs with James floats, as they are designed for high-speed fishing. Weight 6 or 8 g, a flight stabilizer and a 3-mm antenna in the form of a hollow, bright elongated cylinder - this is what a float should be like when catching good-biting fish at a short distance.
These three floats - Trevor, Andrew and James - are distinguished from the previously described models by a slightly larger weight for fishing in windy weather at close range and the ability to change the float's own load. To do this, I install on it the required number of metal washers of different weights and a metal back, into the body of which a freely rotating wire ring is inserted for connection with the equipment.
By varying the weight of the weight mounted in the float, it is possible to ensure that all the floats are correctly loaded along the waterline under the same set of “pellets” on the main line. Depending on the changing conditions during fishing, using the same swivel, a set of pellets and a connector for attaching a float, I can change the float to any other one, for example, a light one to a heavier one.
In all my rigs with “wind” floats for close range, the fishing line is equipped with a locking connector from STONFO, a micro swivel No. 20, two “pellets” No. 4 and two No. 6 from SENSAS.
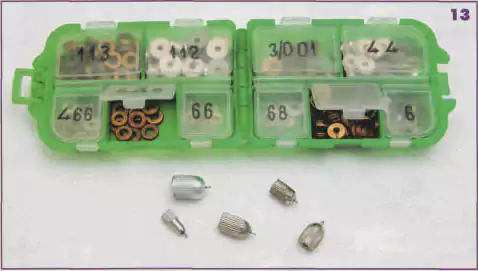
Different washers for loading floats should be systematically placed on scales in a multi-section plastic box with transparent lids (photo 13). It is very important to know which set of pellet weights will correspond to which loading washer from your collection. On the lids of the compartments of your box, you need to make inscriptions with the numbers of the “pellets” with a thin permanent marker - this will make it much easier to find the one you need.
If, for example, while fishing, the ubiquitous bleak begins to bother me, which does not allow the bait to pass the middle layer of water, I can remove one or two weight washers from the weight of the float itself and clamp a few additional “pellets” of the corresponding weight on the main line closer to the catch and swivel . After this, the bait with a hook will reach the bottom layer much faster.
But you shouldn’t lighten the float too much and make the equipment heavier so that the line doesn’t get tangled during casting, so you can get rid of bleak bites by using heavier floats and heavier equipment.
Some sports anglers jokingly call floats for long-distance fishing (from 30 to 80 m) “Pershings” or “cruise missiles,” since they are all necessarily equipped with a 4-feather plastic stabilizer. Thanks to the plumage, these models resemble a heavy dart thrown by a strong hand directly at the target. They are surprisingly stable in flight and can withstand strong side winds. And the accuracy of the equipment when casting to the baited point is what makes fishing successful. With the help of weight washers, I also brought each of my long-range floats to a single rig load indicator, regardless of its weight category.
A fixing connector from STONFO, a micro-swivel No. 20, three “pellets” No. 4 and three No. 6, one or two of which are moved closely to the swivel with a leash and act as a grapple - this is the “gentleman’s set” of equipment that is capable of settling the float along the waterline , make it super sensitive when fishing at any distance.
For fishing far from the shore in relatively calm weather and small ripples on the water, I use floats of different sensitivity, with a thin 3-mm bright plastic replaceable antenna. This is the same SENSAS Andrew weighing 9 g for ultra-careful bites of capricious fish. For more active biting, when high sensitivity is not so important, I equip my rods with Multicolor floats from the Italian company COLMIC (photo 14), which weigh 8, 10,12 or 14 g.
By changing bright, multi-colored caps, I make the float antenna more visible over a long distance when the light changes.
It also happens that a large ripple or a small wave, raised by an increasing wind, makes the 3 mm antenna barely noticeable at a great distance. In order not to break my eyes, I install SENSAS James floats weighing from 10 to 20 g with a 0.7 mm hollow cylindrical “whistle” antenna or a float from the English float master John Vincent weighing 10-16 g with a 5 mm cylindrical hollow nozzle on the top of the float. Thick tips allow you to notice the most careful bite at any distance in any weather (photo 15).
Again, the James floats are made from peacock feathers with a balsa body, while the Vincent floats are made entirely from balsa. If for fishing at a distance of 30-40 m you need floats weighing 10-12 or 14 g, then for a distance of 50 m or more you will need wagglers 16-18 and even 20 g.
Equipment with extra-heavy floats for ultra-long casts must be mounted using an 8-10-meter shock leader made of 0.2 mm fishing line connected to the main fishing line of 0.12-0.14 mm. Without a shock leader, it is impossible to avoid heavy floats breaking off during power casts.
Super-heavy floats are needed not only to throw bait under the shore of a reed island located 60-70 m from the shore on some carp pond. When there is a delicate bloodworm or a sticky semolina on the hook, only a soft, smooth cast can throw this bait 25-30 m. If you use an 8- or 10-gram float that seems acceptable for this distance, you will need a fairly sharp cast, and then the weak bait will definitely fly off the hook.
For fishing with long-range floats, I use TRABUCCO Grand Turnament rods 4.5 m long with 10-30 g test and a SHIMANO Stradic X - 4000 reel. At depths from 4 to 6.5 m I fish with COLMIC Meridia lapdogs 7 m long with that the same coil.
<<<previous ||
Author: V. Bogachev
<<<Return to section
Materials
Previously, floats were made from natural materials, trying to use the lightest ones. Popular floats were made from wood (linden, pine), from cork and tree bark, from dry plants (kuga, reeds, cattails), from the feathers of large birds (geese), and from porcupine thorns. With the advent of plastics, floats began to be made from the lightest material - polystyrene foam or hollow from heavy plastics, which significantly reduced their weight. Balsa floats have also become very popular recently.
In many match floats, the body is not made of balsa, but of molded foam. This is due to the fact that during flight, the sinkers often hit the body of the float. The balsa body is easily damaged, the float begins to “drink water” and sink, but nothing is done to the foam. The general design of the match float - large length and load at the attachment point - allows the use of relatively dense material for the manufacture of the float body: the distance of the center of gravity from the attachment point is insignificant. It is much more important that the use of polystyrene foam allows you to avoid troubles with a sinking float.
The best antennas for match floats are made from the stems of peacock tail feathers. No worthy artificial analogue that can completely replace peacock feathers has yet been invented. In most cases, the antennas of the floats of leading Italian companies are made from peacock feathers.
The shaft of the peacock's tail feather is quite functional - light, durable, long. But there is one drawback - the rods are not calibrated, so even for floats from the same company, within the same model range, the thickness of the antenna varies slightly. This complicates the selection of antenna attachments if they look like tubes that fit onto the antenna. Although branded antenna attachments are usually produced in increments of half a millimeter in diameter, it is quite difficult to select a tube so that it fits tightly onto the pen shaft and does not fly off. The need for selection is eliminated when using similar tubes, but with a glued pin, which is inserted into a special socket on the top of the antenna.
Some companies use other materials instead of peacock feathers to make the antenna of match floats. For example, balsa. But if the balsa antenna is thin, then it is too fragile; if it is thick, it is not functional. More durable types of wood make antennas too heavy. Antennas are also made from plastic tubes, but there are relatively few good floats with such antennas.
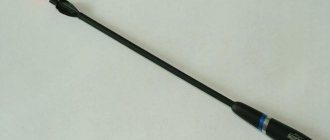
What is a waggler
The classic waggler has a heavy, olive-shaped body, a short keel and a long, thick antenna. This is exactly how most anglers imagine it. However, this is not quite true. In Western Europe, any float with one attachment point is often called a waggler.
Just like all floats, the waggler consists of a body, an antenna and a short keel. The body of the float, depending on the model, can be small, massive, like an olive, or long, straight, turning into an antenna.
The antenna of this bite indicator, depending on the model, can have a small (up to 1 mm), medium (up to 5 mm) and large (up to 1 cm) diameter.
The length of the antenna has almost no relation to its diameter. It can be short (about 4 cm), medium (10 – 15 cm), maximum (up to 25 cm). The main role in the antenna of this bite alarm is played by the tip of its antenna.
Designers are trying to make it as visible as possible from a long distance. Therefore, the top of the antenna in floats with a straight body always has a bright color (red or orange). In other models, the top of the antenna is always thicker.
The keel of such floats is short and can be made of metal or plastic. Wagglers with a metal keel usually have a variable load. Inside the metal container there are small weights in the form of metal washers, the number of which can be increased or decreased depending on the fishing conditions.
Simpler models have a different system for changing the float load. A special replaceable sinker is inserted into the lower part of the keel. Simple straight models of wagglers do not have sinkers in their design. This float is a simple hollow tube made of transparent plastic, sealed on both sides. The keel in such wagglers is also made of plastic.
Shape of floats for match fishing
The smaller the cross-section of the float body, the less drag, and, therefore, the farther the float can fly when casting. A good aerodynamic shape - a cigar-shaped body with rounded ends and a relatively small cross-sectional area in the middle - distinguishes, for example, all Italian floats.
There are wagglers without a pronounced body, formed by a single antenna. In this case, in order for the float to have the necessary load-carrying capacity, it has to be made very long. The aerodynamics of such floats is not very good, but this is not so important, since they are usually used at fishing distances of up to 15 meters, which corresponds to the small top antennas of these floats. Waggler antennas work very well, but their large length can create certain difficulties during transportation.
Floats for match fishing - color
The color of fishing floats, with the exception of the addition of new light-reflecting dyes, has remained virtually unchanged over the past three decades. The body and keel of the float are painted with neutral shades so as not to attract curious small fish that like to attack everything bright and shiny.
The float's antenna should be painted a bright (usually red, orange or yellow) color, although in some cases black is also allowed - for example, when fishing at sunset. However, with side lighting or if the sun is located behind the angler’s back, then bright light colors are more visible against the background of dark water.
Loading capacity of floats for match fishing
The body of the float, the dimensions of which must correspond to the weight of the sinkers and bait, determines its carrying capacity. It is calculated in the following arithmetic way: the difference between its volume and weight. With the same size, but with different material densities, the float has a different load capacity (the higher the material density, the lower the load capacity). Floats with variable load capacity are available for sale.
Thus, the choice of a float used for certain fishing conditions depends not only on the shape of its body, but also on the carrying capacity. When choosing a float, the following conditions should be taken into account:
- type of fish;
- the diameter of the fishing line on which the equipment will be installed;
- depth at the fishing site;
- level of fishing gear, as well as fishing method;
- presence of current;
- weight and size of the bait (for example, when fishing with live bait).
Making a match float at home
This article will describe in detail and show in photographs the process of making a match float at home, using available materials.
In order to find out how you can make a float for long casting with your own hands, which will satisfy any fisherman with its characteristics, read below.
Homemade match float.
Match fishing is kept separately, along with numerous methods and types of fishing. This may be due to the fact that fishing with this gear is not always effective and successful. But there are still fishermen who prefer to fish with match floats. Such fishermen can be found quite often fishing in reservoirs.
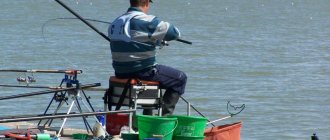
Surely everyone knows that catching fish for a match means fishing “with a long cast.” To cast heavy or light match floats, you need to have a rod that is equipped with an appropriate match reel, and which will also have a suitable action. It is necessary to equip match tackle with the appropriate equipment (float, hook, sinker or set of sinkers that will correspond to the weight).
At first glance, everything is quite clear and simple, but there are certain tricks and subtleties, both in the use of tackle and in the use of hooks, match equipment and floats. Of course, in the match all fishermen knit, make and assemble equipment with their own hands. Many people use purchased floats (slider, waggler, etc.), but there are still real fans of this type of fishing. Such fishermen make their own match floats, which they are very pleased with.
Match float. Manufacturing.
Today, store shelves are filled with a variety of floats for match fishing at varying prices. However, the coming economic crisis simply forces us to pick up tools and start making the necessary attributes for float fishing with our own hands.
First you need to determine for yourself the goal of what kind of float you need to make, heavy or light, slider or waggler.
Below, using the example of making a float, we will show how you can make a match float yourself. This float is made very easily and quickly.
So, for manufacturing you will need to prepare the following materials: - The top of the antenna. — Heat-shrinkable tube 6mm. (To shape the body). — A piece of steel wire. (To form a fastening loop). — Heat-shrinkable tube 3.2 mm. (For fastening the antenna parts). — Ear sticks 4 pcs. (For antenna).
Once you get started, the first thing you need to do is remove the cotton wool from the ear sticks. After removing the cotton wool, you get tubes that have a very small weight and diameter. The strength of the resulting tubes will be sufficient for such a float.
Now you need to open two pieces of thermophyte (20 millimeters long from the tube and 3.2 millimeters in diameter). Thermofit must be placed on the tips of the ear sticks. Heat it over low heat and connect the parts of the antenna into one. When connecting parts, you need to ensure that the connections are very precise. Next, you need to take another piece of thermofit, as well as a three-millimeter drill and heat it to form the upper part of the antenna. In this case, the top of the antenna must be crimped with a heat-shrink tube. The resulting part of the antenna blank must be glued with Moment glue. Now you can start shaping the body. For this work you will need a piece of heat shrink (6 millimeters in diameter and 80 millimeters long.). First you need to burn one side, and then the other. Then you can glue in the antenna.
The attachment point must be made from a piece of wire and a piece of tube from an ear stick (20 millimeters long). Before the wire is inserted into the tube, you need to pour a little glue inside. After the work has been done, it is necessary to bend and cut the ends of the wire. Next you need to glue it all into the second hole in the body. Afterwards, this area needs to be further strengthened with layers of glue. To do this, you can use Secunda glue. Just under no circumstances should it be a liquid version; for strengthening it is necessary to use Secunda gel glue. This is necessary in order to make this connection stronger, even despite the small weight of the float.
If you do everything in order and according to the instructions, you can get a float with a load capacity of about two kilograms. However, if you increase the diameter of the float body (for example, take a heat-shrinkable tube with a diameter of 8-10 millimeters), its carrying capacity will also increase. If desired, you can make the fastening unit heavier with lead and get a waggler with a low additional load and a large dead weight. In any case, thanks to the adjustment, you can get a float with the desired parameters. Source
Become the author of the site, publish your own articles, descriptions of homemade products and pay for the text. Read more here.
Attaching floats for match fishing
In match fishing, two types of float mounting are used: blind and sliding. We remember that the length of a match rod rarely exceeds 4 m. Accordingly, if the depth at the fishing spot is UP to 2-3m, you can safely use a blind mount. If the depth is 4-5m or more, use only a sliding one. In addition, at shallower depths, in order to increase casting range, sliding installation is sometimes used.
Blind match mount . The float is attached to the fishing line thanks to the cambric. Below there is a load: an olive or a set of pellets. Below, at the place where the leash is attached, there is another small pellet - a sub-grass. The feeder is needed for more sensitive detection of bites. The leash is attached to the main line using a loop-to-loop method, or through a small swivel. Leash length 10-20cm. The hook is as thin and small as possible, depending on the type of bait.
The blind fastening ensures a permanent location for the fastening unit on the fishing line - it cannot move spontaneously and can be moved with difficulty. The design of the unit consists of a cambric, put on a fishing line, and a rod, with which the fishing line is clamped in the cambric. The rod is connected to the float. The connection between the rod and the float can be rigid and hinged.
When hard
When connected, the float and fishing line form one whole - the float is motionless relative to the fishing line. The fastening of floats without rings is rigid. For example, a fishing line passes through the body of a float and is secured by a rod. When attaching a float with a keel that does not have a ring, the keel is used as a rod that clamps the fishing line. Usually, on a smooth keel, the line is attached with two cambrics - one cambric at the end of the keel, the second - under the body of the float. This results in a rigid mount.
When hinged
connection, the float hangs freely on the attachment point to the fishing line. This is usually how floats are attached with a ring at the bottom. The fastening unit is made of wire. The wire is threaded into the ring of the float, bent, and its ends are twisted. The cambric is selected according to the diameter of the twist. To attach heavy floats, a loop is made in the middle of the rod, which is passed into the ring on the float. Cambrics are put on the ends of the rod, through which the fishing line passes.
The rigidly fixed float is well controlled - when pulled up with a rod or released in the current, it maintains a vertical position. Casting such a float requires care. At the beginning of casting, when the line is behind the angler’s back, the position of the float is with the antenna towards the tip of the rod. After the cast is completed, the float flies with its antenna forward, the float antenna is directed away from the rod. Before splashdown, when the fishing line is pulled, the float is turned over by the antenna towards the rod. When the float is turned over, the antenna may get caught on the fishing line, and, as a result, the antenna may become loose and fall out.
Sliding mount for match float . The float is put on through a loop, and it moves freely along the line. At the bottom it can rest against a bead or directly against the main load. Then everything is the same: pad, leash, hook.
At the top, the depth of the float release is regulated by a locking unit. In both rigging options, a sinking weight is needed to capture thin bites.
The sliding mount allows the float to move freely along the line. A sliding float is used in cases where the depth exceeds the length of the rod. It is an indispensable condition for equipping a fishing rod for fishing in a reservoir. The disadvantage of a tackle with a sliding float is that the bait sinks to the bottom very slowly. For this reason, it is not suitable for fishing in fast currents. In this case, it is better to use a long rod with a fixed float. Typically, the slip joint is the ring on the float through which the line passes. With this type of fastening, the float can only be removed or replaced by removing the weights. To disconnect the float, a ring with a latch is put on the fishing line, to which the float is attached.
The movement of the float along the fishing line with a sliding fastening is limited by stoppers. The upper stopper, located above the float, sets the fishing depth. The location for the lower stop is chosen so that when casting, the equipment below the float cannot catch on the float. This distance is usually taken a little more than the distance from the top sinker to the hook. Stopper - a knot on a fishing line is knitted from fishing line or thread. Hard rubber balls and even small pellets of sinkers can be used as a stopper. The stoppers must move along the line with force.
What is a match float used for?
Floats for match fishing have many responsibilities, they must:
1. Good visibility both on the water and when casting,
2. Let them know even about a minor bite,
3. Lie exactly in the place specified by the fisherman,
4. Do not lose bait during the summer to a given target,
5. Don’t get lost, stay on the surface of the water during gusts of wind and when waves appear.
Match floats from the point of view of loading can be:
Float with constant weight . When fishing, you should keep several of these floats in your supply, which will allow you to adapt to changing fishing conditions.
Float with the ability to adjust the load . This option is the most universal. Adjusting the device will allow you to adjust to the depth and speed of the current in the reservoir.
Float for match fishing without weight . They are installed during strong currents and great depths.
It would be useful to evaluate the tail of the float. At short distances, a thin tail will be enough, and for long distances, a thick tail is selected for better visibility.
All floats designed for long distances are painted in bright colors. Some have an additional tail unit for better flight. It is important that the color of the antenna helps your fishing. In bright sunny weather it is better to choose a dark antenna, and when it is cloudy - a bright antenna. There are match floats with a removable tail.
Please note that for match fishing, the appropriate equipment is selected for each float. In particular, the required weight of the load is indicated on the float body.
Blind fixation and sliding float
The fixation of the float varies. A fixed fixation is called a “blind” one, and if it can move along the line, it is a “sliding” one.
Deaf fixation of the float is used for shallow depths, which are no more than the length of the fishing rod itself. For a 4-meter fishing rod with a blind mount, the most suitable depth of the reservoir will be 3.5 meters. To ensure the immobility of the float, it is fixed with a stopper. It is located above the float attachment point.
If the depth of the intended casting location is greater than the length of the fishing rod, only movable equipment is used - a sliding float . The blind rig of the float makes casting and further fishing somewhat difficult.
Loading floats for match fishing
A good modern match float must have a weight built into the body of the float. The load can be of two different designs - constant and variable. In turn, the variable built-in load comes in two types: either removable washers on a screw, or a cavity container. By unscrewing the screw, you can remove or, less commonly, add weight washers, and by opening the container, you can remove part of the weight or, conversely, add additional weight. Usually the container is additionally loaded with small lead shot.
All match floats are marked with a marking indicating the weight of the built-in weight and how much weight can be added to the line to make the float sink to normal weight. For example, markings like: “3 g”, “8 g”, “14 g” - indicate that most of the weight is built-in, and the supply of weight to be placed on the fishing line is small. Another type of marking: “3+1″, “5+2.5″, “8+1″” means that by adding the appropriate weight to the line, you can sink the float to an ordinary level.
By the markings on the float and taking into account whether the load is constant or variable, you can find out for which fishing method it is suitable. However, it should be borne in mind that the markings on the float are not always absolutely accurate. For example, the marking “4+1″ may actually correspond to the load distributions “4+1.5″, “4.2+0.8″, “3.8+1.3″, etc. All these seemingly minor deviations in one direction or another are very significant in determining whether the float can be used as a sliding float, or only as a fixed one. But more on that a little later.