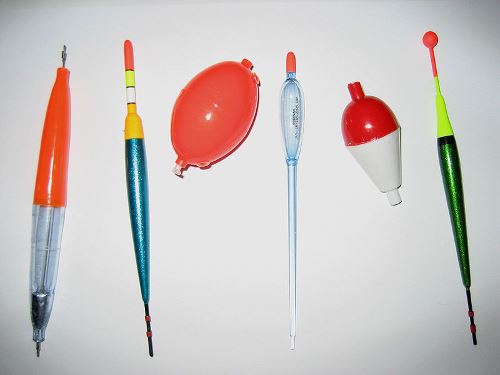
TOP popular products for fishing
— buy with good discounts for personal use and as a gift to friends and acquaintances.
Buy quality products at affordable prices in the best fishing online stores
. Give gifts to yourself and your loved ones!
we are in social networks
— subscribe to us on Facebook, Youtube, VKontakte and Instagram. Stay up to date with the latest site news.
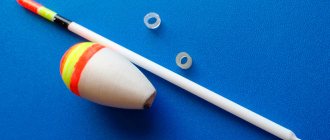
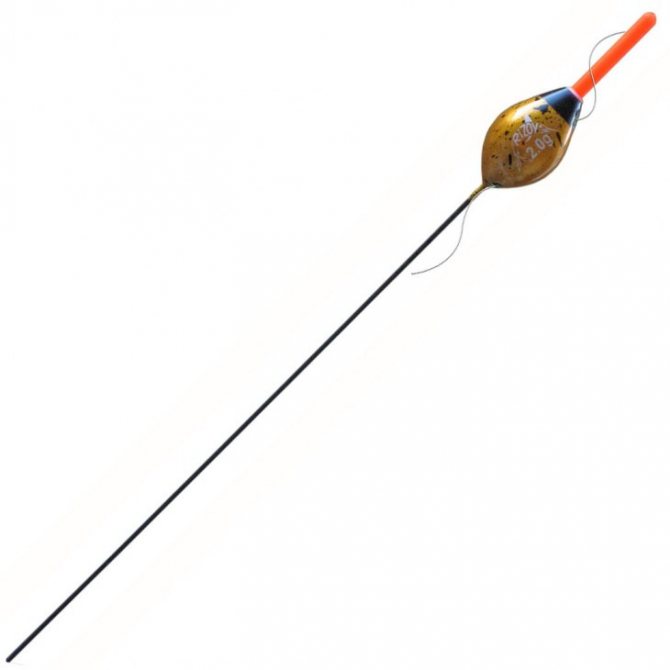
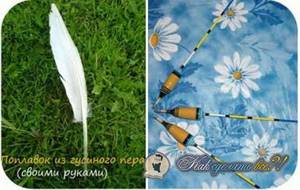
Fans of float fishing know well what properties a float should have. First of all, it is good sensitivity and stability. There are many high-quality blind and sliding floats in fishing stores. However, classic goose feather floats do not disappear from sales. And this is by no means accidental.
Experienced fishermen know well that if you find a feather with the necessary parameters and carefully trim the fluff and remove roughness, leaving only the shaft, you will get a very sensitive float. Nature itself has created an excellent bite indicator for anglers. It will show even a timid touch of roach, crucian carp and other fish to the bait. In this article we will tell you how to make a goose float with your own hands.
Search for a feather and the process of making a float from it
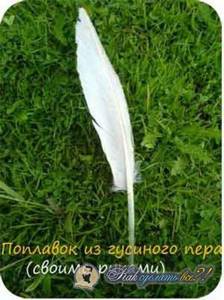
First we need to find feathers. If there is a body of water nearby, then geese or other birds are probably swimming in it. You can get several feathers for free from these beautiful birds:
In places where these birds are concentrated, large feathers can often be found flying into their bodies. You can probably find 3-4 suitable blanks. Their sizes are approximately as follows:
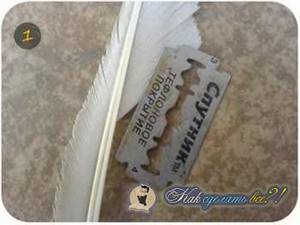
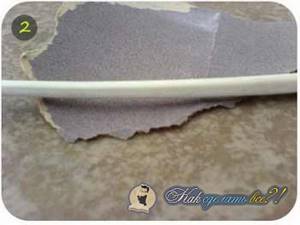
Find feathers and take them home. There is no need to remove the soft part along the way. This may damage the rod. At home, take a replacement knife blade and carefully cut off the fluff. You should cut in the direction of the fibers so as not to tear off excess from the feather and not to break the seal of the product.
Remove the soft part from both sides. After this, you need to remove the remaining fluff. It is best to take matches or a lighter and carefully burn out the remaining elements. It is enough to walk along the body of the float several times. The main thing is not to overdo it, so as not to burn the rod.
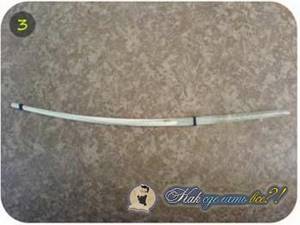
It happens that the float is very crooked. To level it, you should hold it slightly above the burner at a certain distance.
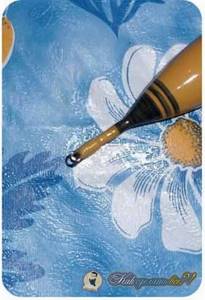
The next stage of manufacturing is the treatment of vulnerable areas with varnish. Coat the areas indicated by the arrows:
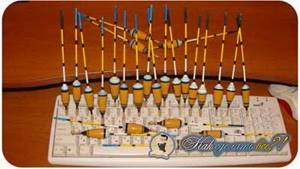
Before processing, rinse the float well so that there are no dirty places. Next, take the varnish and carefully apply all the indicated places with a brush.
This way we will extend the life of the float and it will not absorb water. After covering all areas, we begin painting the top of the float. You can use regular nail polish or waterproof paint. Carefully coat the thickest part of the float so that it looks something like this:
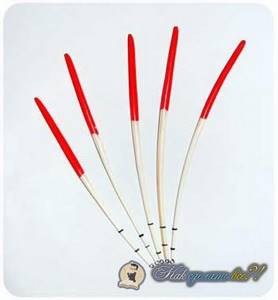
After this, we put two or three cambrics on the float. The cambrics can be cut from braided wire or from a transparent tube for a dropper. It is necessary that the cambrics are difficult to fit onto the float. As a result, we get a rigid fixation of the float to the fishing line.
After threading several cambrics, we will get ready-made floats for fishing.
Many anglers make several types of gooseneck floats. For fishing in lakes and ponds, and in places without current, floats with a low carrying capacity, short length and a thin body are used. Such floats are the most sensitive and will show the bite of even small perch or gudgeon.
For fishing on a reservoir or river, longer and more massive floats are used. They are quite stable and will show a bite even on a wave.
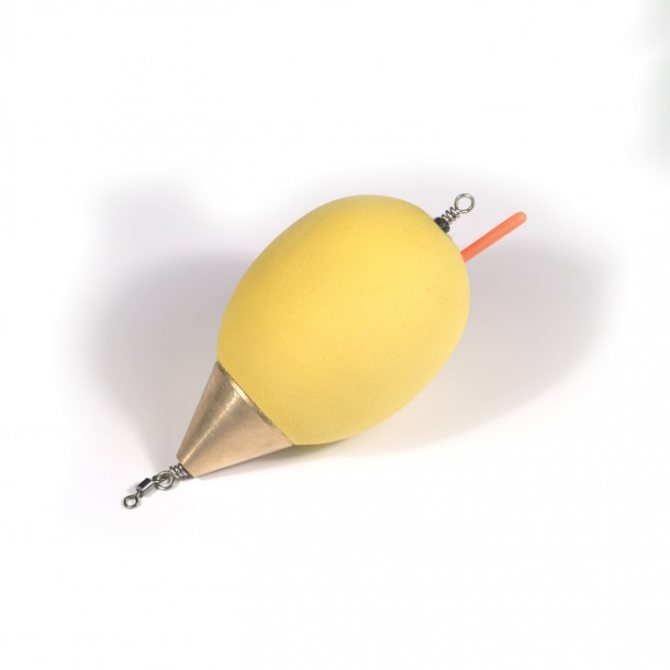
If the weather outside is windy and there is a strong wave, then for such conditions floats with threaded foam are used. Simply take a wine cork and make a hole of the required diameter inside it using a drill. Next, the float is inserted into the barrel and fishing line. The foam is installed approximately in the middle of the float. It turns out something like this:
A ring and thin wire are attached to the end of the float. Coat it with ordinary rubber glue and insert it inside. A fishing line is threaded through the ring. You can do without a ring. This makes it faster to change floats while fishing without disassembling the gear.
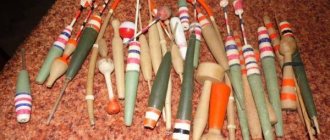
Homemade goose feather float
- VK
As children, many of us made very sensitive, but, alas, equally short-lived goose feather floats. For several centuries, goose feathers have been an indispensable material for their manufacture. And only with the advent of modern technologies and polymer materials, goose feather floats began to lose their once wide popularity. But many fishermen still prefer only them.
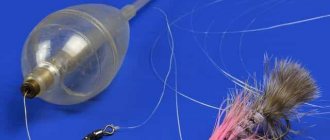
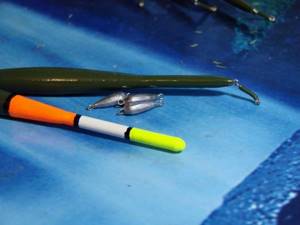
There is no need to throw away the plastic tubes on which gift balloons were placed - this is an excellent material for a future float. All materials that may be needed for its manufacture (photo 1).
It will take only a few minutes to make such a float, because the main element - the strongest body of the float - is already ready. Thanks to this remarkable quality, you can even accidentally step on such a float - it will not suffer at all. Its antenna or fin will not break off, because there are none. It will not pick up oxen like a goose feather.
Tube floats are truly universal; they can be used for fishing both in still water and in the current, in windy weather and in complete calm, close to the shore or with long casting.
When biting carefully, when the fish takes it carefully, slightly touching, or when fishing in a retrieve, lower it like a Stick so that only 3-4 mm rises above the water, and if you need a long cast, you can leave 2-3 cm above the water - and be sure , the bite will be clearly visible.
The arrow-shaped body of the float during flight has less resistance than the teardrop-shaped one, so it flies further than, for example, a waggler of the same carrying capacity, and it is seen better.
Making a float
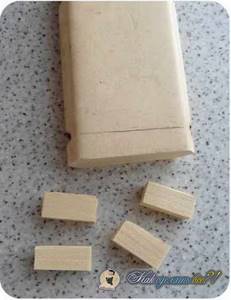
I cut the plastic tube from the balloon with a knife into several pieces of suitable length. Let one float be longer and the other shorter: when fishing, floats of different lengths and different carrying capacities (from 0.8 to 5 g) are useful. I make plugs from a wooden stick (photo 2).
It is better to choose light, soft wood, for example, use a piece of balsa window cornice (photo 3).
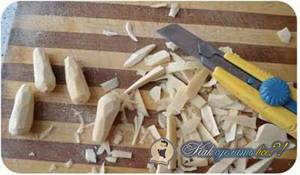
I clamp the end of the stick in the chuck of an electric drill, take a piece of fairly large emery cloth in my other hand, lightly squeeze the stick with it (so that it doesn’t catch when rotating) and turn on the drill (photo 4).
After 3-4 minutes I get a perfectly round stick of the required diameter for corks. With the top plug everything is simple: after lubricating the stick with Superglue, I stick it into the tube about 2 cm - this will be the top of the float.
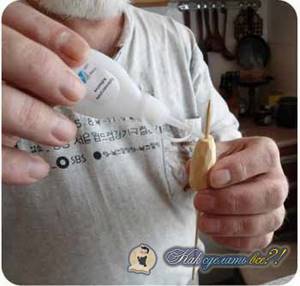
I assemble the lower part of the float a little differently - first, cut off a centimeter plug from the stick, and, smeared with glue, push it about 4 cm inside the tube. Then we place 1 or 2 lead “pellets” inside and only then, after smearing it with glue, insert the bottom plug (photo 5).
The lower part does not need to be painted, the fish is not afraid of white, and can be caught even in shallow waters.
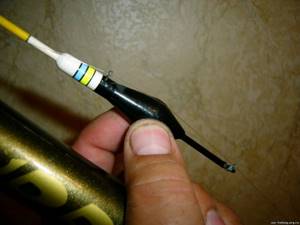
The finished floats are marked (photo 6): one “pellet” - one strip, two “pellets” - two strips, no pellets - no stripes.
An unloaded float, even with two “pellets,” should lie horizontally on the water, then the “rising” bite will be clearly visible.
When the glue dries after a few minutes, you can glue a piece of a pin with a ring into the bottom plug. After the glue has completely dried, in order for the paint to adhere well, you need to lightly “sand” the glossy surface at the top of the float.
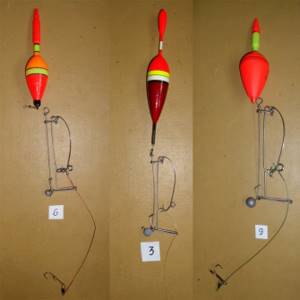
A rig with two “shots” in the float and a catch near the hook is used for fishing in calm conditions; with one “pellet” in the float and a sinker with a catch - in a light breeze, with a float without “pellets” and with all the weight on the main line - for fishing in windy weather. In any case, I try to use the lightest equipment that can be fished in specific conditions.
When fishing in a current, you need two attachment points for the float; to do this, just put a rubber (silicone) ring of a suitable diameter on the main line and insert the upper part of the float into it. The thin body of the float provides minimal resistance to the flow of water and is very reminiscent of that same goose feather, only its quality is higher and its strength is much greater. This is how a float for blind equipment is made.
For sliding equipment, I don’t put any “pellets” inside, but insert a fastener into the float ring. In this case, the entire weight should be located on the main line to make it easier for the sinkers to pull the line through the fastener ring. All floats are equipped with fasteners so that they can be easily and quickly changed in accordance with fishing conditions, or removed when transporting the rods. An ordinary standard fastener needs to be slightly bent so that the fishing line does not come out of the ring of the fastener.
Related articles:
Installation of pass rings
Making a homemade winter spinner
Homemade balancer
Homemade feeder for feeder
Proper float loading
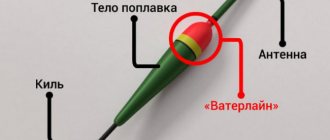
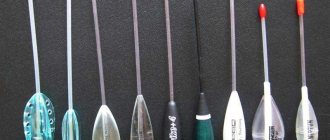
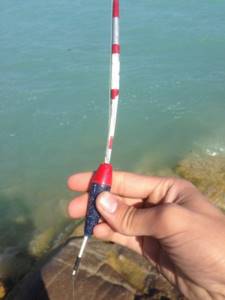
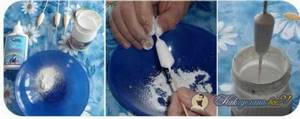
The next stage is loading the float. A properly loaded float has a painted part sticking out of the water. Usually it is 1/4 -1/3 of the entire float. Each floater has sets of weights:
Using pellets of different weights, you can easily load. Goose floats are quite sensitive, so light pellets should be used. With their help you will sink the float to the desired level.
Be sure to take this box with you when you go fishing. It is desirable that the pellets are made of soft lead. They bend and straighten with their fingers. It happens that the bites of the same crucian carp are so gentle that the float only sways a little. In such cases, it is surrounded so that only the tip, 3-4 mm long, is visible. Such a thin load will allow you to see all the bites and make hooks in time.
ribalka-vsem.ru
Loading a float from a feather
The smaller the surface part, the more sensitive the equipment. Amateur fishermen usually leave about 1/4 of the feather above the water. But if you want the float to react to the most careful bite, you need to leave only the tip above the water, which you will only be able to see.
A simplified version of making a goose feather float is shown in the following video:
Catching crucian carp using simple gear with a feather float:
The sensitivity and versatility of a goose float
The current industry produces floats from balsa, foam plastic and other “high-tech materials”, but none of them even comes close in their “abilities” to a goose float (or, in general, to any float made from the flight feather of a large bird). And the reason here is not only the lightness of the element of bird wings. The very shape of the feather turned out to be such that the float made from it has phenomenal sensitivity. It is capable of showing the most careful bite, moreover, with the correct load, even the touch of a fish on the fishing line will not go unnoticed by the fisherman. This is especially true for floats made of small flight feathers, because the lower the load capacity, the greater the sensitivity.
And if we take into account the fact that the “materials” for a goose float can be found in almost any village, and also that the simplest version will take a few minutes, a couple of feathers and a sharp knife to make, then it will become clear that the goose float has there are no competitors, because this is a good old classic, universal, proven over the centuries. And even to this day it has not lost its significance.
Loading the float
The only thing that is required of an angler when building a tackle with a goose float is to load it correctly. Approximately as shown in the picture below.
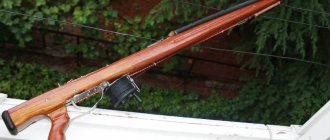
From time immemorial, the Ural grandfathers fished with a fishing rod made of a tree whip, equipped with a feather float. In ponds and rivers - on still water and in currents. They fully revealed the potential of their gear, and learned to fish with it not only in mid-water, but also from the bottom (that’s what a backup is for!).
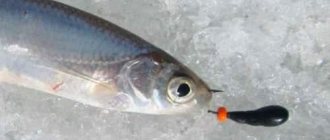
The sensitivity, as I said above, is phenomenal! Even a particularly fastidious crucian carp, which prefers to stand still and suck on the bait, barely lifting the hook above the bottom will already provoke the float to rise, very noticeable from the shore. And if a fish grabs and drags the bait, the float will immediately disappear under the water.
urochishe.ru
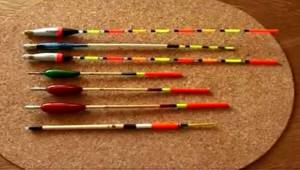
Homemade floats
Often, fishermen prefer to make floats with their own hands rather than buy these fishing devices in stores.
And this is not at all surprising, since the use of homemade floats is beneficial for two simple reasons:
You save personal money; Based on your personal fishing considerations and needs, you can get a float of almost any shape, color, or design. Next we will talk about the manufacture of several types of floats.
During the work you may need some tools and a number of different materials.
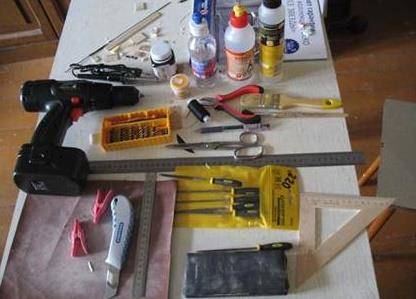
Tools:
- Vise;
- Pliers;
- Drill;
- Calipers;
- Chisel.
Materials:
- A piece of foam;
- Goose feather;
- Bottle stopper;
- Plastic tube;
- Wire of different sections.
Also bring epoxy glue, a few pieces of sandpaper, and quality, waterproof paints.
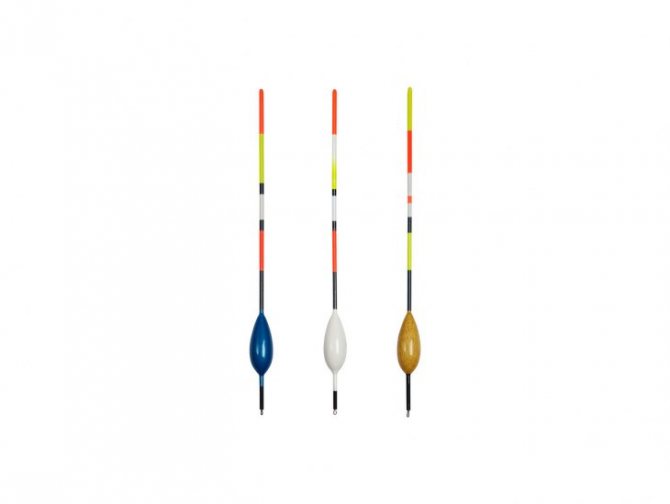
Match float
Making a match float with your own hands is quite simple, but this will require certain materials:
- 4 ear sticks.
- Heat-shrinkable tubing (shrinked diameter should be approximately 3 millimeters).
- Heat shrink tube with a diameter of 6 millimeters.
- A piece of wire with a cross section of about 1 millimeter.
- A wooden stick about 15 centimeters long (for the float antenna).
First you need to remove the cotton from the ear sticks. After this, two pieces (about 15 centimeters long) need to be cut off from the first (the diameter of which is about 3 mm) shrink tube. These sections need to be put on ear sticks and heated to form a monolithic long antenna.
This will be the main rod of the float; to make it completely ready for fishing, all that remains is to install the antenna for centering. It is best to attach a plastic cone-shaped form to the top; its weight should not exceed 0.5 grams.
Now you need to make the body of the float, it can be flat or cylindrical, it’s up to you. For this, foam or any other material that has positive buoyancy is best suited.
All that remains is to make a small hole in the base, fill it with waterproof glue and insert the antenna there. To make a sliding float, you need to attach a small swivel to the bottom of the base.
It is best to paint the float in a bright color that will be visible at long distances, since the finished product will have a fairly large mass and the possibility of long casts is not excluded. If you need to use a float during night fishing, you should use paint with phosphorus elements.
Video
Would you like to watch a video that provides step-by-step and clear instructions for making a match float? Then you are welcome to watch. Just repeat all the steps after the leader and you will get an excellent product.
How to make a float from foam plastic
Foam floats are characterized by a high level of sensitivity. The most common are homemade spherical models, drop-shaped or olive-shaped floats.
To begin with, small square or rectangular blanks are cut out of a piece of foam plastic. Next, using a sharp utility knife, the float is given the desired shape and cleaned with sandpaper. Instead of a knife, you can use a drill with an appropriate attachment.
After cleaning the float from dust, we paint its body in the desired color or combination of colors. When the paint has dried, coat the foam float with varnish and again give the workpiece time to dry. Next, drill a small longitudinal hole in the center of the workpiece and insert a core (feather or wood) into it. The length of the core can reach 6-7 cm, the thickness on average is 1-1.5 mm. You can also slightly change the design by gluing a thin feather element only into the upper part, and in the lower part making a small loop for fishing line from thin wire.
Instead of wire, you can use an eye from a hook. Most often, a single sinker is used in the tackle, when using it, only part of the float rod is visible to the fisherman. Foam floats are quite sensitive, so they will notify the fisherman even of weak bites. For effective operation of the float, a fishing line with a thickness of up to 0.16 mm is required.
Polystyrene foam is a great option for creating a float
A foam float is most often made by hand. This species is considered the most famous among fishing enthusiasts. Unlike other homemade products, it is quite easy to make. A minimum of material is required for its production.
Thanks to its special sensitivity, it is easy to determine from the float whether a fish has bitten. As a rule, such a fishing device is used for catching perch or pike.
It will be useful for you to know how to make a float with your own hands. Let's note the necessary tools for work:
- high-quality foam;
- kernel;
- nipple;
- sanding paper;
- colorful base of not bright tones with increased water resistance.
Read here Numbering of hooks - size table, numbers, quality assessment and selection tips (110 photos)
«>
First of all, you should prepare the product. We cut an oval shape from a piece of foam plastic, then sand it with sanding paper to obtain an attractive shape.
Next, you need to make a small hole in the center of the workpiece. We thread a thin stick through it and place a nipple on top. Below you can watch a video of making a foam float with your own hands.
At your discretion, you can cover the homemade product with your chosen colorful shade, or use regular nail polish.
When painting, you should refrain from using bright colors, as they can scare the fish. Mostly blue or red colors are used. The upper part of the float is painted with it.
The bottom of the product, which is under water, is painted dark. After complete drying, the float is secured to the gear.
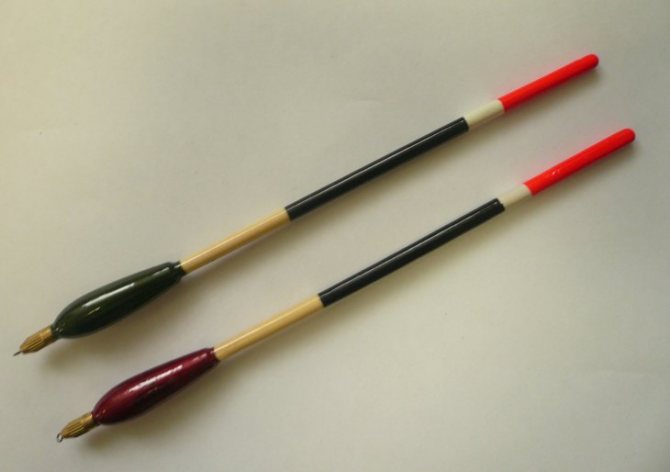
Goose feather float
Most fishermen are also well aware of goose floats, which are distinguished by their excellent performance on the wave, good sensitivity and ease of manufacture. To make a float of this type, no complicated procedures are required. The only delicate point is removing the spine from a goose feather, since it is important not to damage its integrity. If everything went well, cut off the thinner part of the feather diagonally and bend it into a loop.
We insert a wire ring and a tongue from below, wrap it to the rod and coat it with varnish. The upper part is painted in the desired color if necessary.
DIY cork float
According to the manufacturing scheme, this float is similar to the previous one. However, it must be remembered that the cork material is porous and gradually becomes heavier when in water. In this regard, all large holes in the workpiece must be closed using waterproof putty or alternative means. After this, the float is treated with sandpaper, degreased and painted. A rod with a loop is inserted into the longitudinal hole made. At the end of the loop, an eyelet from a large hook is put on.
Such a float is fixed using a tube that is put on a fishing line. It is shipped with 2-3 weights to approximately half the rod of the upper part of the float body.
Underwater float
An underwater float has many differences from the products described above, which are designed for surface fishing. The task of the underwater float is not to signal a bite, but to raise the leash with bait above the bottom.
Making such a float is quite easy. You will need to find a material that is lightweight and floats; it is best to use high-density foam for this purpose. Take a piece about 10 millimeters wide and about 40 millimeters long.
Now you need to give the workpiece a certain shape; it is selected depending on the fishing conditions and the fish you plan to catch. For example, an oval or round shape is better suited for catching catfish. After giving the workpiece the required shape, it needs to be sanded with sandpaper.
Now you need to make a through hole through the entire body of the float. The purpose of this hole is to fix the float on the fishing line. You can fix it in one position using silicone or rubber stoppers.
It is very important to completely paint the float and its entire interior to protect it from moisture ingress and accumulation. After all, he will constantly be in the water.
Video
Well, now the most interesting thing - a video about making an underwater float with your own hands at home. Clear, simple and understandable step-by-step instructions from a well-known presenter - Pal Palych.
Plastic tube float
Floats of this type are also highly sensitive and durable. The manufacturing process is simple. You will need a regular plastic tube that can be used as a holder for flags, balloons or cotton candy.
Take the tube and shorten it to the desired length. Next, you need to seal the edges to prevent water from getting inside. Using a lighter or a regular candle, heat the tube around the edges. When the plastic softens and swells a little, twist the heated end of the tube into a kind of pigtail. Next, we wait until the heated parts cool down and a reliable seal is obtained.
Once again, slightly heat one of the edges of the tube, after which you need to flatten it using pliers to make a small hole. This hole is needed for a thin wire on which the nipple will be put on and the fishing line will be threaded. All that remains is to trim off the excess, clean and paint the surface of the float. In just an hour you can make a whole set of sensitive and reliable floats of different colors without spending money in stores.
fisher-book.ru
Finishing up the float
Despite its long history in the fishing world, the technology for making floats from bird feathers has not made much progress. If earlier the feathers were cut off from the feather, the edges were sanded, painted and supplied with a wire eyelet and a crimping tube from the wire insulation for attaching the fishing line, now they do the same. The only innovation: insulation and wire were replaced by cambrics and needles with a ring eye. This is the weak point of the floats. Therefore, if you decide to try to “touch the origins,” Pike.by advises strengthening the most important float nodes.
The lower part of the feather is quite thin and the eyelet does not hold securely in it (the one who made this float even regretted adding a drop of glue ). It's not difficult to fix this. Carefully remove the needle from the float. It happens that this part already has a crack, so without sparing we cut off the tip 0.5-1 cm. We dip the needle in glue and install it in its original place. For reliability, we put a bandage of nylon threads on top, which we also glue. By the way, it would not be superfluous to coat the entire float with a thin layer of glue or transparent varnish - this will prevent it from drinking water through the cracks.
An important feature: the bandage must be applied not only to the feather, but also to the eye of the needle. If you don't do this, you may break the line and get stuck in the wire crevice.
Instead of the thin cambric with which the float is sold, we install a model elastic band. We make 2 turns under tension, tie it in a knot and glue it. How to thread a fishing line under it? A toothpick will help! Carefully push it under the elastic band and pass the fishing line into the resulting gap. The float is now ready for loading.
Simple DIY floats
Winter this year turned out to be warm, to the great regret of ice fishing lovers.
In addition, the new year has already passed, which means spring is not far away. It makes sense to prepare for float fishing. In this article, we'll look at simple ways to make cool floats.
Let's start with probably the most ancient, classic and many-loved technology, making goose feather floats! It was on these floats that our grandfathers and fathers caught fish, and some of us have probably already experienced this miracle of technology.
Fishing with such a float is much more interesting than with store-bought ones; it’s a completely different psychological mood. It’s one thing to stare for hours at a plastic pin sticking out of the water, and another thing if it’s a goose feather, painted and made by hand. The feather float is very sensitive, it shudders at the slightest touch of the fish, as it is thin, long and has low bite resistance. In addition, when you cast a fishing rod, the slave is not afraid of the sound of the float falling on the water, plus the fish perceives this float as something natural.
Materials and tools for making a goose feather float: - goose feathers (large, from the wings); - scissors; - blade; - cambrics or rubber band from the nipple; — varnish or paint (waterproof); - sandpaper.
The process of making a feather float:
Step one. Cutting off excess plumage
To make the float, you will only need the central part of the feather, so you can immediately cut off all the “fluff” with scissors or a blade. Do not rip it off as this risks damaging the air chamber.
The pen shaft consists of two parts, a white part and also a chamber. Due to the chamber, the float floats, since there is air in it. When making a float, try not to damage the chamber, as water will fill into the float and it will sink.
Cut the float to the required length, only cut off the white part!
Step two. Float processing
When you cut off the fluff, sand the central part with fine sandpaper so that nothing sticks out. You can also carefully burn the remaining parts.
Step three.
Attaching the float To attach the float to the fishing line, just cut two rings from a nipple elastic band or other suitable one. We put the rings on the fishing line and insert the float.
Some hobbyists also make a hinged mount, which can be made from thin copper wire.
Step four. Protection and painting If desired, you can paint the float in any color. Although white is already clearly visible, this is especially true in the evening. It is enough just to apply a couple of strips of contrasting paint so that you can see the degree of immersion of the float when biting.
It is important to take care to protect the float from water. With prolonged use, the float will sooner or later begin to absorb water if no measures are taken. It is advisable to paint or varnish the entire float. You can also coat it with epoxy glue; this will generally be a strong and durable coating.
That's all, the feather float is ready, now let's look at how to make a foam float!
The float is made from foam plastic a little more complicated, but it turns out to be more massive, such tackle can be thrown further and catch larger fish. These floats also look quite interesting. You can use wine corks as the starting material. By the way, goose feather floats are sometimes combined with foam plastic.
Materials and tools for making foam floats:
- hacksaw; - stationery knife; - Styrofoam; - round nose pliers; - drill; - sandpaper; - wooden skewers; - Super glue; - baby powder and emulsion; - paint and varnish; - wire or thin spring.
Float manufacturing process:
Step one. Cut off the required pieces of foam
Decide on the size of the float and use a hacksaw to cut the pieces to the required size.
Step two.
Drilling holes You need to drill holes along the workpieces. Their diameter should be such that wooden skewers can fit into them. The skewers should go in with some effort. You can buy them in a store that sells various things for the kitchen.

Step three.
Rough shaping Now take a utility knife and roughly cut out the profile of the future float.
Step four.
Insert and fasten the skewers Carefully insert the skewers into the previously drilled holes. When inserted, take second glue and drip it into the places where the skewers enter the holes. The glue is liquid, it will fit into the gap and securely fix the skewer.
Step five.
Sanding Once the glue has dried, the fun part comes - sanding. In this case, the float receives its finished look and is practically no different in quality from the store-bought one. We clamp the end of the skewer into the drill chuck, turn it on and carefully use sandpaper to form the float profile. You will need to process not only the foam part, but also the wooden skewer.
Step six. Preparing for painting
Before painting, the author rubs baby powder into the foam, for what purpose, I personally don’t understand. Then the float is dipped into a jar of emulsion paint, which is diluted with water. Wait until the whole thing is completely dry.
Step seven.
Painting What colors to paint the float in is up to everyone to decide for themselves. The author paints the lower part of the float, which will be under water, light brown. Simply dip the float into the paint to the desired level.
As for the mast, it can also be painted. The author here alternates three colors, yellow, blue and white.
If you want to put stripes on the float, this will allow you to clearly see the degree of immersion, clamp the float back into the drill chuck and turn it on at low speed. Using a thin brush, apply paint in the right places and you will get excellent, even rings.
When the paint is completely dry, be sure to apply a layer of varnish on top. It will protect the paint and also prevent the wooden skewer from absorbing water. With varnish, the float will last much longer and retain its original appearance.
Step eight. Fastener
The varnish should dry within 24 hours, after which you can begin making the fastener. Thanks to it, the float can be hung on a fishing line. You will need to secure the ring at the bottom of the float on a skewer; for this purpose the author uses a small steel spring. We make a loop at the end, cut it to the desired length and put it on a skewer.
But finding such a spring will be quite problematic; it is best to find a piece of copper wire; it can be obtained from the cable by removing the insulation.
We form a ring in the same way, and wrap the remaining edges around the tip of a skewer. Finally, we cover this place with varnish or impregnate it with “super glue”. To secure the fishing line, you will need to make another piece on which the cambric is put. It can also be made from wire. In principle, the cambric can be put on the top of the skewer and the fishing line can be pulled through two points.
If desired, the float can be made sliding, this will allow you to conveniently fish over a long distance. This float works especially well when you need to break through duckweed. That's all, the floats are ready, they look beautiful, they are easy to make, if you wish, you can “rivet” as many of them as you like. No tail, no scales!
Source
Become the author of the site, publish your own articles, descriptions of homemade products and pay for the text. Read more here.
Properties of a quality float
A float made from bird feathers has a number of significant advantages over many modern designs. This is why the goose float has become so popular among avid fishermen.
His positive qualities:
- Demonstrates a high level of sensitivity to bites at the slightest touch of the fish.
- Guarantees maximum stability in a vertical position regardless of weather conditions.
- It is resistant to temperature changes, does not get wet in water, and is easy to attach to a fishing line.
- Almost invisible to fish in the water, but visible to anglers at any time of the year.
- Does not require funds to purchase, easy to do yourself.
Very often, experienced anglers note another property of such a float: it has almost zero resistance when trying to hook a fish, which has a positive effect on the comfort of fishing. And the vertical, elongated shape will always signal the fisherman about a bite, even in a noticeably strong wind.
Correct loading
You will need to place 2 weights on the fishing line:
- basic;
- lighter undercut (located closer to the hook).
This allows you to correctly distribute the weight and load, which has a positive effect on the sensitivity of the float as a whole. In some cases, experienced anglers load it themselves, leaving 3-4 centimeters of length on the surface.
In the Urals, the described method of loading with under-plowing has long been used, using a wooden whip as a fishing rod. In this case, the goose feather was suitable for fishing in rivers and reservoirs, even with a fairly strong current.
Thanks to the phenomenal sensitivity of the latter, it was possible to timely hook the finicky crucian carp, which loves to savor the bait from the bottom of the lake.