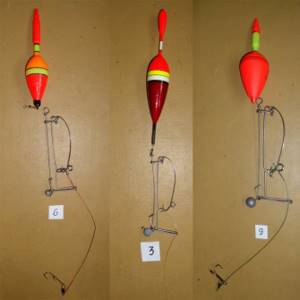
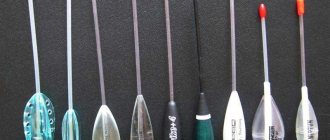
Homemade floats, made by a fisherman to suit his own needs, which are the result of experience gained through the practice of fishing, are distinguished not only by their originality and uniqueness, but also bring indescribable pleasure to its owner through the direct manufacturing process. After all, the soul invested in this production subsequently brings a lot of unforgettable and vivid impressions from the fishing session, in which homemade fishing floats play a primary role, bringing the mystery of the biting process into a visual show.
Making floats with your own hands, knowing the essence of how the accessory works and imagining the conditions that will exist on a pond in reality is not so difficult and expensive. Fortunately, today in our daily life there are many materials suitable for making a high-quality product, and for this work you do not need a specific tool. A suitable arsenal of technical means can be found in every household.
About the processes of manufacturing bite alarms for various fishing conditions from all kinds of available means, information will be presented to the fisherman, which will help solve the problem of obtaining an effective fishing accessory and will give pleasure to the fisherman when solving it rationally.
What to make a float from
Looking around, the inquisitive mind of the fisherman will immediately identify a lot of materials suitable for performing work on making a float at home. For those just beginning their steps into fishing skills, it will also be no secret that the properties of suitable options for production should have high buoyancy qualities, low density of the substance and relatively low, preferably its complete absence, water absorption.
Important! The main float materials include foam blanks, a feather from the wing of any waterfowl, reed and wood, including one of its varieties, balsa, which is most suitable for the role of an alarm.
From products used for household needs, all kinds of plastic tubes can be used for floats, for example, an empty ballpoint pen or a candy holder such as a lollipop, a medical disposable syringe, a wine stopper and even a container from used plastic shoe covers.
To give the blanks an attractive look, you need to stock up on acrylic paints in bright colors; sometimes instead of paint, nail polish can also be used. Have steel wire available, preferably alloyed stainless steel with a diameter of no more than 1.5 mm, and quick-setting waterproof glue. Toothpicks or thin bamboo sticks, which can be obtained from a discarded kitchen table napkin or rug, would be useful.
Most of the above options for blanks do not even require a special purchase from the fisherman, because they are either a by-product when consuming the main product or container packaging and a banal bottle cap. Therefore, making floats at home will not require large material costs, but will only require free time, imagination and the desire of the fisherman to engage in this exciting and interesting activity.
Water-filling float
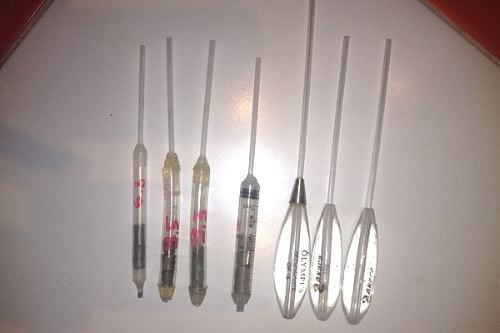
Has everyone ever bought shoe covers at a pharmacy and paid attention to the container in which they were packaged? From this plastic container you can easily make a water-filled float at home. It is transparent and has a rounded shape, which makes it an ideal material for such purposes.
The container even has a lid that allows you to easily change its load using water or lead directly on the pond while fishing. Even externally, this container is very similar to the well-known bombard, and they perform the same functions.
All that remains is to adapt the container for fishing. To do this, you need to make two holes on its bottom; it is best to make them parallel. Now you need to thread the winding ring through the holes on which the swivel is attached.
Since the container must be sealed, it is necessary to carefully treat the holes with waterproof glue.
You can load such a float directly while fishing, fortunately there is plenty of water there. For convenience, you can paint the product in any color using nail polish or any other waterproof material.
Video
And of course, a video about making a sbirulino liquid float at home. The truth here is not really about the container for shoe covers, but the principle is similar, so I recommend everyone to watch it.
How to make a float
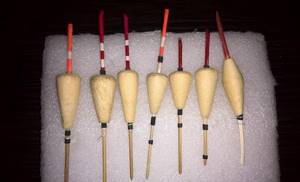
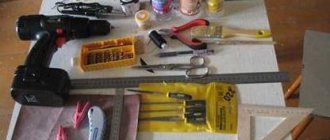
Having decided on the material component of the work, the fisherman must prepare some simple tools. To complete the work you will need:
- electric drill or screwdriver;
- a set of small diameter drills ranging from 1 to 3 mm;
- sharpened stationery and pocket knives;
- pliers;
- needle file set;
- fine sandpaper;
- hacksaw for metal;
- vice;
- awl;
- measuring tool, preferably a caliper;
- small chisels;
- scriber, which can replace a pencil.
It would also be useful, before planning to make a homemade float, to have a model, sample or sketch in the form of a sketch of the final product. After all, knowing a clearly defined end goal, it is easier to achieve the required parameters and performance characteristics of the simulated alarm and obtain exactly the product that can cover the required fishing conditions. Further on in our article, we will talk in more detail about the most popular types of floats that you can make yourself at home.
Homemade floats for catching crucian carp from cork
The basis of the float can be a cork from a bottle of wine or champagne, made of a special cortical material
Let's look at making a float in stages. Starting from preparation and ending with installation on equipment.
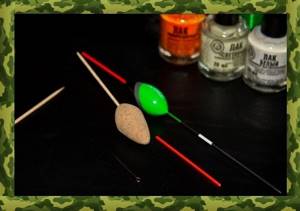
- The first step is to make a through hole in the plug. Or make one hole at the bottom and one at the top. This can be done using a thin drill or a heated nail.
- Then you need to stretch the base into the hole. Any item of oblong shape and light weight, from an ear stick to a match, can act as the basis for a float.
- Then you need to attach the float to the drill. This can be done by inserting a stick into the drill hole. Then you need to wrap the float with sandpaper (hold it with your hand) and sand it by rotating it with a drill. You can sand it by hand, but it takes a long time and requires a lot of effort.
- The final step is to make a ring at the end of the float. For this, a fitting needle (such as the one in the photo) is best suited; you just need to pierce the base of the float in the middle, and you need to insert a fishing line into the ring that is already on it.
- Painting the float depends on the preferences of the angler, as well as varnishing the float. The main thing to remember is that the part of the float that will be immersed in water should not be painted brightly; for this it is best to choose black.
How to make a feather float
The feather version of a fishing alarm is one of the oldest ways to provide a fishing rod with a float. For the product you need to get feathers from the wings of a large waterfowl. Most often, domestic geese and ducks become reliable suppliers of these products, but wild ones will not be an exception.
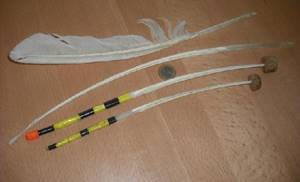
You can make a float from a goose feather, taking into account the painting operation, in about one hour. A large fly feather of a goose is cleaned of the fan and side fluff, leaving only the shaft and quill for use, which will be the body of the future signaling device.
Important! The fan is in no way torn off by hand, but is cut with a razor or a sharp knife against its direction of growth. Otherwise, the hole in the hollow eye will fill with water, and the product will completely lose its buoyancy.
After trimming the fluff, its smallest fibers are removed with fire by running a lit match or lighter along the length of the feather. Next, the workpiece is painted from the thick end with bright paint, which will clearly stand out in the water; scarlet and light green colors best satisfy this requirement. As a rule, the product itself, the length of which usually remains in sizes from 12 to 15 cm, is painted exactly in half, leaving the lower part in a natural white color scheme.
Now, the almost finished product remains to be equipped with two nipple rubber rings for fastening to the fishing line, weighed to determine the exact weight, to carry out marking, setting a number on the body of the accessory, which will help you navigate easier when making further loading during installation.
From the pen
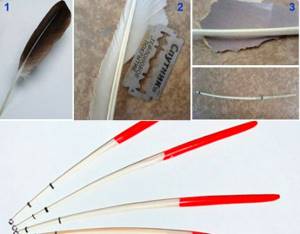
You can make a goose feather float with your own hands very light and close in shape to the ideal, which is why it is considered one of the most sensitive and best. Its sensitivity allows you to see the most precise touch of a fish.
For many novice fishermen, the use of such a float marks the beginning of a fishing career; with subsequent experience, it is replaced with more modern models. Just a couple of years ago, besides making a float with your own hands from a goose feather, it was not possible to use other equipment.
Making such a float yourself is very simple, you just need to clean the feather from the fluff and it is almost ready. If necessary, you can shorten the feather itself a little with a blade, this is also quite simple. The only thing you need to remember is to carefully clean off excess fluff so as not to break the seal of the pen.
, it is best to use a lighter or blade for this. Then clean the burnt feathers using very fine sandpaper to bring the feather into perfect shape.
All that remains is to attach the sensitive goose feather float to the main fishing line with your own hands. It is best to secure it with two pieces of nipple, about 4 millimeters wide. The nipple is very easy to put on the feather, the main thing is not to forget to thread it onto the main line. But this mount is not ideal - it has several negative features. The nipple quickly burns out in the sun and will not last more than one year. But the simplicity and accessibility of such fasteners significantly covers its disadvantage.
When fishing in cloudy weather, it will be quite difficult to see an unpainted float made of such material, since the white color (namely, this is the color of a goose feather) is very difficult to see. It is best to paint such a float with your own hands so that it is easier to see it from a long distance and without particularly straining your eyes. The most common means of coloring is nail polish; every fisherman's wife, girlfriend, daughter or mother has it. Do not paint the entire length of the float; it is better to paint only the part that will look out of the water.
As practice shows, this is the best option for saving time. You will spend only a few minutes making it, and you will be satisfied with the quality throughout the entire fishing season, and maybe for many years.
I often notice such floats on the shelves of fishing stores, which means that they are really in demand.
Video
I think it’s better to watch a video about making such a float once and just repeat all the actions of the presenter. This way you will get excellent tackle that is suitable for catching cautious fish, such as crucian carp.
Plastic tube float
A homemade float from a plastic tube can be constructed in literally twenty minutes. The easiest way to use the blank is to take a cocktail drinking straw with a diameter of about 5 mm. To make a simple but effective stick-type float, you will need a piece of tube 15 cm long. The main construction operation is soldering the ends of the tube, which is done in several stages by heating, melting and then compressing the fused plastic with pliers.
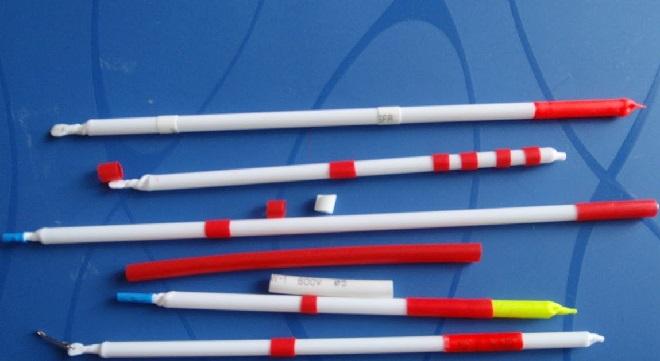
The tube is sealed at both ends, one of which is cut off, making the end even, like a cylinder; this part will be the top of the accessory. The other end of the tube is made flat and a hole is pierced in the center to thread it onto the fishing line from the equipment; this will be the lower part of the alarm. If necessary, the tube is painted in a color that is attractive to the eye and is equipped, as in the case of a goose feather, with a rubber fastening ring.
How to make a float from foam plastic
This type of manufacturing is more labor-intensive and requires skill in handling and compliance with safety precautions when working with an electric drill. Before you start making a foam float, a rectangular blank is cut out of a piece of material using a knife, which is threaded along the central axis onto a wooden toothpick and attached to the chuck of an electric drill. Next, the drill is used as a lathe, clamping its body in a vice and turning on the chuck in automatic mode. Using a belt of sanding paper attached to a rotating piece of polystyrene foam, the desired shape of the alarm body in terms of diameter and configuration is formed. Grinding of the foam blank material occurs due to an increase in the pressing force of the abrasive material or a change in the number of the stone fraction on the sandpaper.
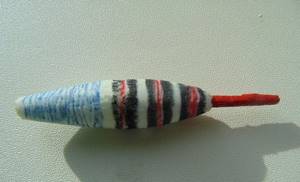
Important! For final polishing, use paper with as little abrasive as possible, bringing the foam planes to a smooth, pore-free surface.
Having turned the required shape, the workpiece is removed from the mounting wooden axis and, using waterproof glue, an antenna and keel are glued from pre-selected material options, which can be either wood or plastic tubes of various diameters. In particular, using a plastic tube as an antenna, you can make a luminous float by inserting a chemical firefly into the hole of the tube from above, which helps to control the equipment in the dark.
All that remains is to reduce the diameters of the tube and the firefly into a suitable backlash-free interface. The very foam body of the alarm is painted in different colors, exactly along the border of the maximum diameter, the upper part is covered with catchy paint, and the lower part is painted in tones that do not arouse the suspicion of fish. To fasten the float to the fishing line, you can use either nipple rings along the diameters of the antenna and keel of the alarm, or by placing a special wire fastening loop in the body of the accessory.
To do this, a thin wire, 0.5 mm in diameter, is twisted, leaving a ring at one end, and at the other end of the wire, the ends twisted into a braid at a length of at least 5 mm. The twist is glued into foam plastic into the upper part of the alarm, soaking everything with the same moisture-resistant glue.
Materials from which a float can be made
To ensure a high-quality float, the following requirements apply to the choice of material:
- it should be light;
- must be amenable to manual processing;
- must keep its shape.
The following materials have these properties:
- Wood of different species with low density. Balsa (balsa) wood meets this requirement best of all. It doesn’t grow here, but you can buy it in aircraft modeling stores. It is from balsa that ship models are made.
- Foam plastic and other polymer materials.
- The most accessible feathers goose and rook feathers. You can use more decorative ones - swan and peacock.
- Porcupine quills, cork materials , burdock core and dried stems of reeds, reeds , and cattails are used for homemade floats.
In addition to the material itself, to make a float you need: waterproof glue, bright paints and varnish.
Feather
The most affordable material for making a float is a feather . The main thing is not to damage the rod when the fan is removed. Carelessness will waste all your work if the keel begins to leak water.
- First you need to trim the edges of the plumage with a sharp knife or blade. Burn out the rest using a lighter or candle. After this, sand the workpiece with fine-grade sandpaper. The thin tail can be cut or bent into a ring or loop.
- You can start painting. Bright colors should be alternated so that they are visible in any weather. The paint should be waterproof and serve not only as a bright color for the lighthouse, but also as a protective layer for the float.
- After the paint has dried, varnish is applied. This is a necessary attribute of all floats. It not only serves as protection from external influences, but also provides greater glide, thereby increasing sensitivity to the slightest movement.
- All that remains is to equip the float with line holders. Here you will need two rubber rings (nipple): one is put on the middle; the second - on the thin part of the keel. The float is now ready to dive.
Plastic straw
A plastic tube can be called an artificial feather. The material can be any product similar in shape: a cotton candy holder, cocktail straws, ballpoint pen accessories, etc.
- Having found a suitable item, you need to trim off the excess length. Seal the ends of the tube using a candle or lighter. To do this, heat the tip of the product until the material softens and twist the tail with a flagellum.
- Then you melt one edge again and flatten it with pliers. At this point you make a hole for the swivel. You give the product an aesthetic appearance by cutting off unnecessary unsightly edges. Sand with sandpaper to avoid scratching surfaces.
- Apply water-repellent paint, let the product dry, and varnish. You can make several of these “feathers” at once and please your friends. And the loss of a float will not upset you - making a new one is a matter of a few minutes.
Styrofoam
Not only folk craftsmen, but also professional fishermen are engaged in making floats from foam plastic. This material can be used to produce a product of any shape and load capacity. You need to start by selecting the type of foam.
- Not just any type will do, but only with a high density, then it is easier to process - it does not crumble in your hands. A piece of foam plastic is cut into pieces of the required size.
- You can process it manually, cutting off excess with a sharp knife or using a drill. To prevent the drill from “beating” while working at high speeds, it is clamped in a vice and fixed in the desired position. The “lathe” is ready to go.
- Stick a wooden barbecue skewer into the workpiece three-quarters of the way. Clamp the free end with a drill. At high rotation speeds, carefully apply a file or sandpaper, cleaning off all excess.
- You can do the opposite - fix the abrasive material in a drill, and hold the product in your hands, grinding it to the required shape. The first option will give a more symmetrical processing of the workpiece.
- Having given the product the required shape (ball, drop, olive), use sandpaper to bring the surface to a perfectly smooth appearance. Now you need to seal all the cracks in the foam with waterproof putty to prevent the float from getting wet. After drying, a final sanding is performed with fine-grained sandpaper.
- The finished product is pierced through with a new skewer coated with glue. The product is ready for painting. After applying the desired color and letting it dry, apply the varnish. Attach a carabiner to the bottom. Make sure that the water tightness of the float is not compromised.
Cork
The sensitivity of the cork float is less than that of the models described above. It is suitable for catching larger fish. The process of making the body of a product is no different from working with foam plastic.
- Having received the workpiece of the desired shape, you need to carefully drill a longitudinal hole for inserting a plastic tube (lollipop stick, ballpoint pen refill, etc.). You secure it with glue. There is no need to solder the ends - such a hole is not a problem for the plug.
- Next, make the necessary fastening for the fishing line from twisted wire threaded through the hole - a nipple and a hinge system. Paint and varnish the product, let it dry - the float is ready.
Tree
A wooden float will require more time and equipment for processing. A successful model can compete with factory production of equipment.
The best material is balsa wood or bamboo, but our native oak, birch, aspen, etc. are also suitable. Having decided on the breed, we begin to “conjure” the manufacturing process:
- Cut out blanks of the required size with a thickness of up to 2 cm and a length of up to 5 cm. The less excess volume, the better.
- Drill a hole no more than 1.5 mm in diameter along the center of the body. Place the body tightly onto the wire, leaving tails about 2–3 cm long.
- The “machine” consists of two drills, clamped in a vice and “looking” at each other. Fix one end of the wire in one drill, and the other in the other.
- Only one will work - at high speeds. The second rotates freely. Having set the wooden blank in motion, you begin to remove all excess. To do this, you can use a sharp chisel, a file, abrasive devices or sandpaper stretched over a hard base.
- Remove excess wood from the workpiece carefully, without sharp pressure. If you manage to get the desired shape, then sand the surface to perfection with sandpaper by hand.
- Remove the wire from the float and drill a hole for the antenna about 2 mm in size. Place the lighthouse on glue. In the keel part, screw the wire into the body of the wood, filling all the holes with glue. At the remaining end of the wire, make a loop for the dog.
- Before painting, you need to saturate the float with a water-repellent solution. Then you can apply paint and varnish. That's it - the work is finished - you can start testing.
Cane
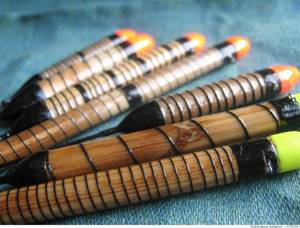
- lies quietly on the water;
- resistant to water flow;
- has high sensitivity;
- easy to make.
It can be done right on the pond, using improvised means.
In order for the product to have an aesthetic appearance and serve for a long time, it is better to make it at home, spending a minimum of effort and time:
- First, choose the appropriate material. The reed must be dry and undamaged.
- Cut the tubes to the required length, about 10–13 cm.
- Cut the top part into a cone and insert (using glue) a beacon (a toothpick or a kebab skewer will do) up to 12 cm long.
- The lower keel end is weighted to give stability to the float, for which several weights, lubricated with glue, are inserted into the tube and rewound with thread for strength.
- All that remains is to paint and varnish the surface of the product. Sometimes a foam ball is placed on the top of the lighthouse, making the float visible at a great distance.
- Two nipples will serve as fastenings for the fishing line: one in the middle of the float, the other at the end of the keel part. In this form, the product will last a long time.
Homemade fishing float from a wine cork
A cork float is made using a technique similar to processing foam blanks, using an electric drill or screwdriver as the main device for grinding the configuration required for the float. The only difference is in the composition of the material itself, where cork is a more capricious substance in its structure.
Important! It is more difficult to form holes in cork due to its increased fragility, and also to bring the surface to a perfectly smooth state, since the material has high porosity compared to foam plastic.
The final finishing is carried out manually, scrupulously monitoring the grinding of each deep pore and subsequently, before final painting, covering the body of the accessory with special varnishes that hide microcracks and pores, preventing further penetration of water into the body of the alarm.
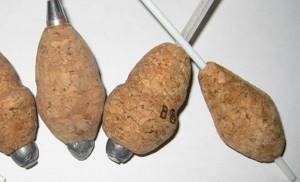
When preparing holes for the keel and antenna, it is recommended to pierce them step by step with a thin awl, drilling them together to the required diameter. This is especially true for the option of working when forming a float from a champagne cork, which is characterized by the high fragility of the material structure. A cork float, as well as a polystyrene foam version of the alarm, can be easily made to fit all possible luminous floats for night fishing by inserting a fluorescent element into the antenna.
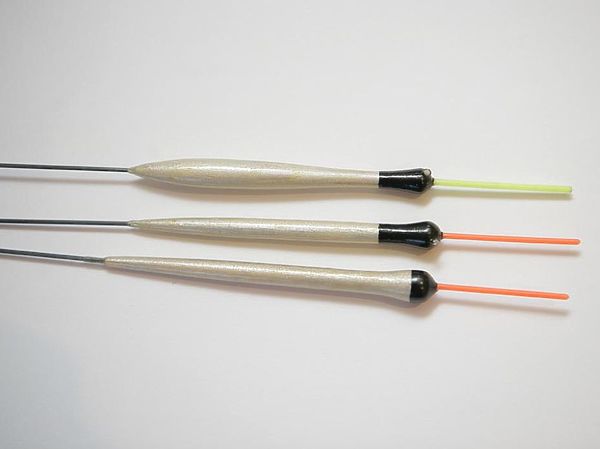
DIY balsa floats
At least, the income was enough to compensate for our expenses on gear, bait, training and experiments with the first production of foam fishing boxes and some other fishing gear.
The relevance of handicraft production from a commercial point of view naturally disappeared over time, but the need to make floats for one’s own needs remained.
This is natural, since it is extremely rare to acquire a float that personally suits me in all respects. I make gear on a pond for specific fishing conditions, and store-bought products always contain elements in their design that are adjusted to “versatility.”
Mass-produced floats are distinguished by not the highest quality of raw materials, thick and bulky antennas, completely non-functional balls on the antennas, and a motley palette of multi-colored stripes.
The absence of a second attachment point on the fishing line, thick but short keels on floats with excessive carrying capacity make them unsuitable for accurate catching of both large and small fish.
There is no point in going into further detail and explaining why a “handmade” product is better than “consumer goods”.
Read the material “Repairing a fishing rod: throw it away or buy a new one”
It’s much easier and faster for me to make several of these floats that I really need on my upcoming fishing trip. And there is nothing complicated about it.
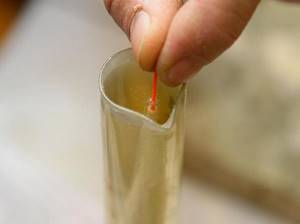
You will need balsa wood.
It can be purchased at an aircraft modeling supply store. Balsa can be in the form of boards of different thicknesses, in the form of bars and in the form of cylinders. The difference in the price of the float will be noticeable if you plan to make a batch. In any case, the cost of wood per float does not exceed five rubles.
In the same store you can purchase steel wire with a diameter of 0.6 mm or rods made of glass or carbon fiber for float keels. For antennas, you can take plastic rods of any color, but of different diameters. They will still have to be repainted. As a last resort, electrical wire casings with thin steel wire inserted inside are suitable.
For large floats, bamboo toothpicks are suitable as antennas.
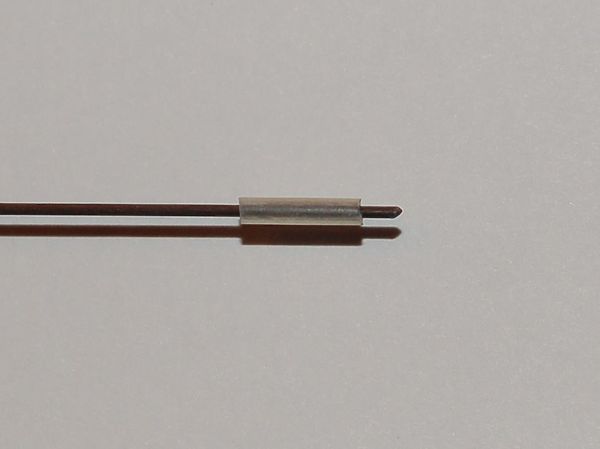
You will also need soft wire, preferably nichrome, with a diameter of about 0.3 mm, for rings under the fishing line.
The step-by-step manufacturing process is as follows:
1. For a workpiece with a square cross-section, you need to remove the obvious excess material from the ribs using a paper knife.
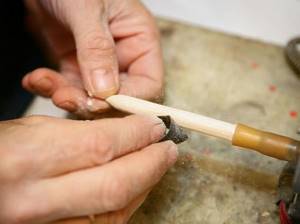
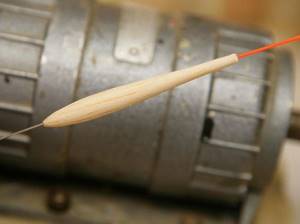
2. From one of the ends of the workpiece, you need to remove the material with the same knife, so that the workpiece fits into the silicone or rubber tube with a strong tension. The tube itself is fixed, for example, on a pencil, which, in turn, is clamped in the chuck of an improvised centerless machine.
3. We process the workpiece with sandpaper at a rotation speed in this case of 2800 rpm (electric motor power 90 W).
|
| Photo: Andrey Yanshevsky. |
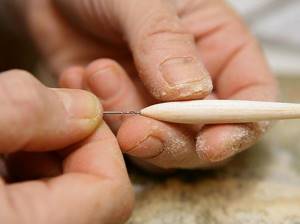
4. Without cutting the workpiece, we drill a hole for the keel or antenna, which depends on the shape of the float body.
|
| Photo: Andrey Yanshevsky. |
5. After finishing sanding, cut off the workpiece.
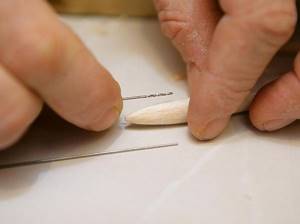
6. Drill a hole for the antenna (or keel) and glue them in using any glue. If the fit of the keel and antenna into the workpiece is tight enough, then glue is not needed. The coating varnish will do the trick.
|
| Photo: Andrey Yanshevsky. |
7. It is important to securely glue the ring for the fishing line. It does not matter in which plane the ring will be located.
8. Next comes the most important part - sealing the float and protective coating.
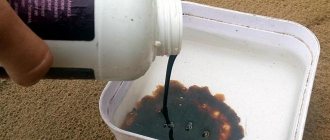
In order for the float to serve for decades and its coating not to crack after several fishing trips, you need to saturate the top layer of balsa with a low-viscosity varnish. Tsapon varnish is best suited for this purpose. This is a varnish that previously could be quickly prepared by dissolving a piece of celluloid toy in acetone. Now I buy varnish in the same store for modellers.
It is important that the varnish, even when quickly pulling the workpiece out of it, does not drip after drying.
Read the material “Spring hunting dates 2018”
After the workpiece enters the varnish, air bubbles begin to be released. You don't need to pay attention to them. It is enough to quickly drown the workpiece in the varnish once, slowly remove it and stick the keel into a piece of foam rubber.
|
| Photo: Andrey Yanshevsky. |
9. After about an hour, you can sand off the raised “pile” with very fine sandpaper and begin applying the protective coating.
|
| Photo: Andrey Yanshevsky. |
10. Before varnishing, if desired, the float is painted by dipping into diluted acrylic paint. I only color the functional upper body. Paint does nothing except increase the float's own weight.
|
| Photo: Andrey Yanshevsky. |
To paint part of the float, I clamp the keel into the chuck of the machine and paint with a brush. In this case, it is better to rotate the machine chuck manually.
11. As a coating for the finished float, I use alkyd-polyurethane yacht varnish. Two layers of slightly diluted varnish with intermediate drying for at least 24 hours.
12. After the varnish has dried, you need to trim the keel to the desired size and be sure to smooth its free end. Otherwise, when constructing the equipment, you can damage the thin fishing line.
|
| Photo: Andrey Yanshevsky. |
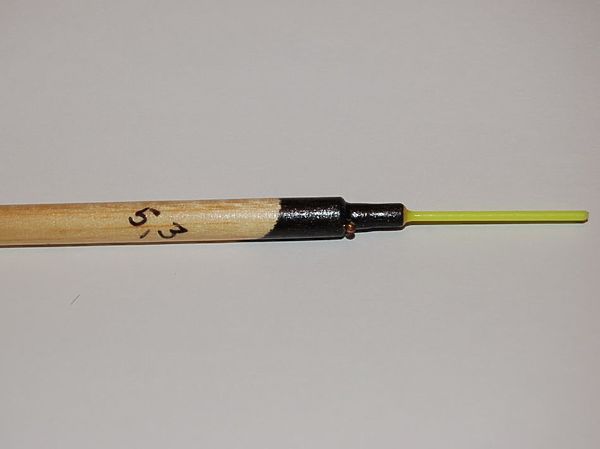
13. I load the finished floats and mark the body with the true load capacity.
14. Carefully, using a dental drill, I make a hole in the varnish, which is located inside the ring for the fishing line.
15. I put a silicone cambric on the keel and leave the finished products stuck in foam rubber for several days so that the remaining solvent evaporates.
|
| Photo: Andrey Yanshevsky. |
This coating technology provides not only durability, but also a significant gain in load capacity due to the fact that there is no thick layer of ballast paint.
The smaller the float, the more important this gain becomes. I emphasize – not big, but important!
|
| Photo: Andrey Yanshevsky. |
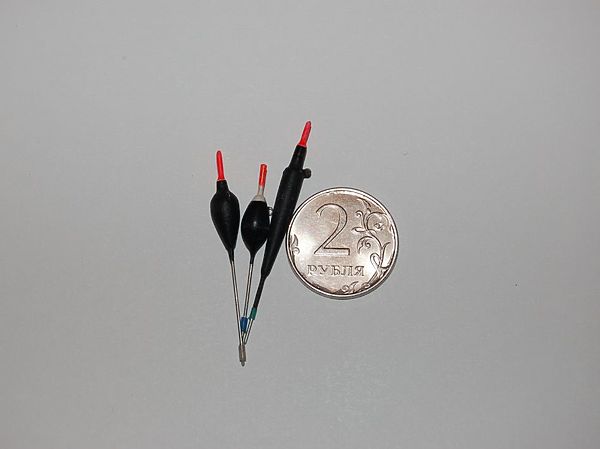
This gain is most clearly manifested when fishing for bleak, perch or roach with floats with a carrying capacity of about 0.2 g.
Andrey Yanshevsky April 3, 2021 at 11:10
DIY wooden float
A float made of feathers and wood is considered one of the most environmentally friendly and natural options for alarms. But working with wood to form the body of any float will require a significant investment of time and certain carpentry skills from the fisherman.
Important! Hardwoods and, in particular, oak and larch are selected for wooden floats.
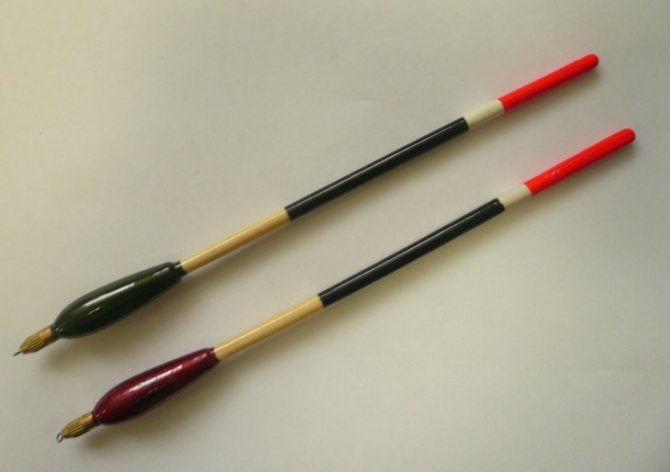
The first stage of production involves cutting a wooden blank into a parallelepiped of a certain size using a hacksaw. Next, the parallelepiped is drilled through along the central axis and placed on a metal rod, the ends of which are secured in two oppositely located and rigidly fixed drill bodies. One drill is placed in the neutral position of rotating the chuck without turning on the electricity, and the second should become a drive for rotating the workpiece.
After starting this improvised lathe, float bodies of any configuration are formed from a piece of wood using a file or sandpaper. The last operation will be the final polishing of the surface with the finest sandpaper. After polishing the sample, to avoid water absorption, it is coated with a waterproof varnish and allowed to dry completely at room temperature. The formed body is equipped with an antenna made of plastic or thin wire, gluing into the hole from which the metal pin originally inserted for operation in the machine is removed.
A wire keel is glued into the lower part of the float body, or a wire ring is mounted to make a sliding float. Now you can proceed to painting the alarm and marking the accessory after control weighing.
Homemade reed float
This technique is suitable for making an extraordinary float right in the field fishing conditions. After all, it is rare that a body of water is not the place where reed grows.
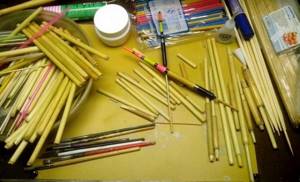
Important! For work, select a smooth and dense reed stem without burrs or cracks and cut it so that the length of the future float is approximately 15 cm.
The lower part of the workpiece is ground into a cone, which reduces bite resistance, and a seven-centimeter metal antenna can be inserted into the upper part. The homemade product is painted from the top in a color that is noticeable to the fisherman and is equipped with two nipple rubber bands for attaching to the fishing line.
Match float
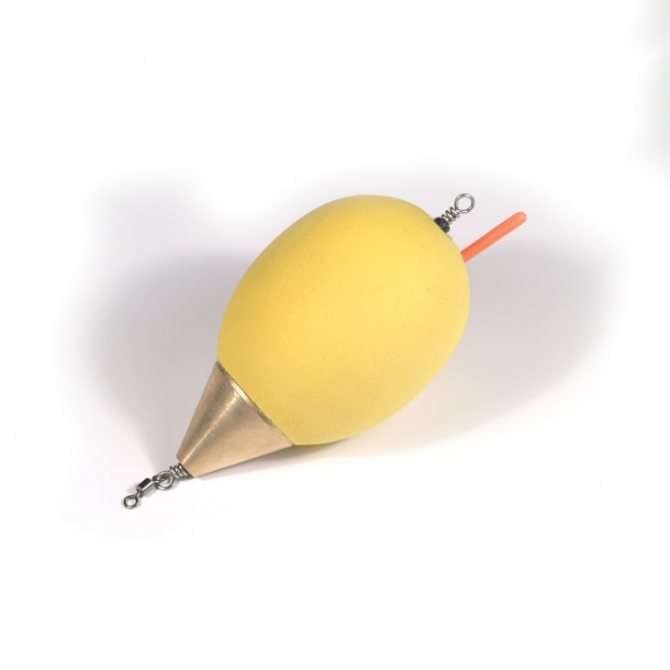
The match float must have a certain mass and have high aerodynamic properties. For its production, a main body made from foam plastic or a wooden blank is selected and equipped with a massive antenna and a weight with a ring. The easiest way to assemble the antenna is from four cotton sticks, freed from cotton wool and tied with a polyurethane cambric, which, when heated with a hairdryer, tightly compresses the plastic sticks into a rigid structure.
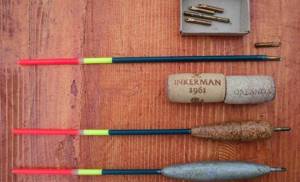
The top of the antenna is equipped with a foam or cork boss, connecting them to each other using waterproof glue. The antenna itself is glued into the hole in the housing. A weight with a fastening ring is mounted on the lower part of the body. The easiest way is to make a load from a tin cone with a pin for fastening in its blunt part and a soldered fastening ring at the sharp end of the figure. After assembling the structure together, the accessory is covered with bright paint or nail polish.
Homemade water-filling float from a container for shoe covers
A fairly sensitive float with the ability to change its mass can be made from a container for shoe covers, having previously selected a twist-up box of the desired color in order to subsequently eliminate the operation of painting the product. A winding ring is mounted at the bottom of the container to secure the structure to the fishing line. This can be done either with an awl or with a small-diameter drill. A hole is drilled in the upper part of the container to match the diameter of the antenna.
Important! After installing the fastening ring and antenna, the holes are hermetically sealed with glue or silicone, preventing spontaneous accumulation of water inside the container.
All that remains is to paint the antenna in a bright color and directly on the reservoir by collecting water or installing a lead weight, achieve the signaling load required for the fishing conditions.
Sliding float casting technique
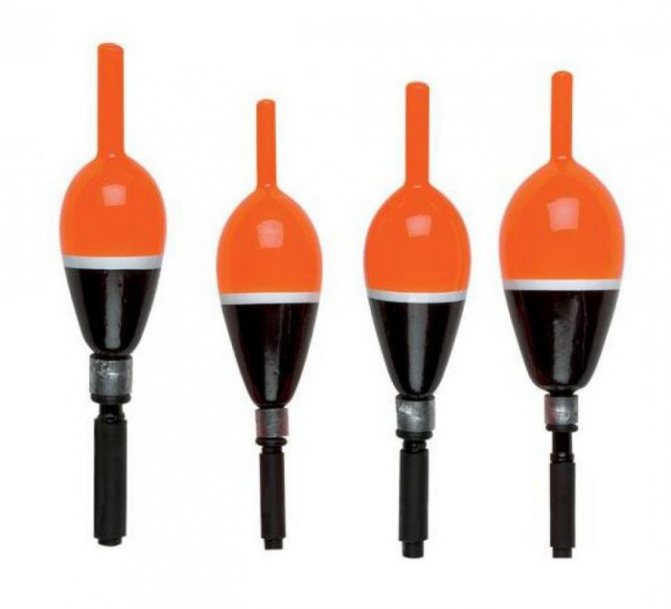
From the moment the cast is completed, the float begins to pull the entire equipment toward itself. This process stops at the end of planning for the water surface, where shipping takes over the baton. Ideally, the rig should be pulled along its entire length so that it lies neatly on the water. It is at this stage that many amateurs make mistakes. The fact is that floats for long casting must create an arc with the correct flight path, which is achieved not by itself, but through correctly coordinated actions of the fisherman. For example, exceeding the trajectory can lead to the equipment turning to the side or lying on the water at an angle. There is also a risk of getting caught, since the load in this case can lie directly on the float. On the contrary, a low trajectory will cause the equipment to simply squish and create a big splash.
Homemade float for long casting
A heavy and long-range float for fishing in the current is constructed on the basis of an elongated cone-shaped body, which is made of dense extruded polystyrene foam. A long, up to 20 cm, antenna made of bamboo cane is glued into the upper part of the workpiece, equipping the top with a bright foam ball-shaped boss, strung with glue, on the tip of the element’s axis. The lower part of the cone is cut off to make it possible to drill a hole into the depth of the material for subsequent installation of the load. The load is prepared from a lead stick. Solder a winding ring to its lower part to attach the accessory to the cord of the tackle. Depending on the thickness and length of the load, the required mass is selected, which will form the main performance characteristics of the finished accessory. The weight is mounted into the foam body using moisture-resistant glue. After the glued elements of the product have dried, it is painted and tested, testing for range and strength in real conditions of a reservoir.
How to make an underwater float
This type of signaling device, which is radically different in operating principle, is most easily made from extruded foam plastic, turning the workpiece into a ball or oval shape. An important production criterion is polishing the surface of the product, which is done manually using the finest type of sandpaper.
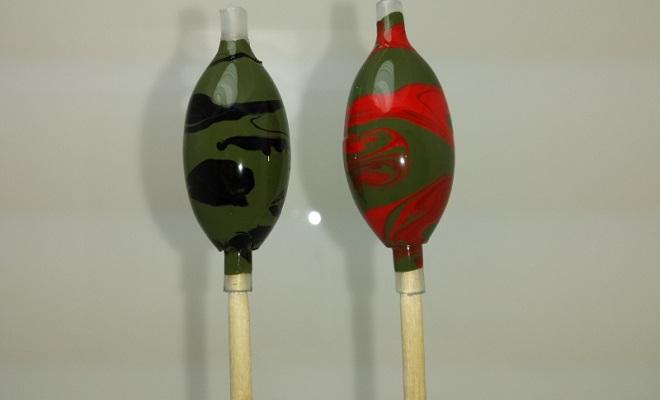
The polished form is drilled through with a millimeter drill along the entire body, shifting from the central axis to one of the edges of the workpiece.
Important! A rubber or polyurethane nipple is glued into the hole exits onto the surface of the foam mold, which will prevent the hard nylon line from cutting through the soft foam.
Underwater floats made using this method are painted scarlet with acrylic paint.
How to make a sports float
A float for current and standing water in a sports design will require a more careful approach to production. To do this, the fisherman will have to acquire expensive materials for blanks and the highest quality paints for coloring the finished product. Every little detail in sport fishing affects the final result, so the elements to be glued are additionally checked for strength and visible glue deposits are sanded with a file and sandpaper. Surfaces are polished to an ideal state and when painting, smudges and uneven application of paint layers are avoided. In terms of their design and production principle, sports versions of float alarms do not differ from amateur homemade ones.
Making a tube for floats
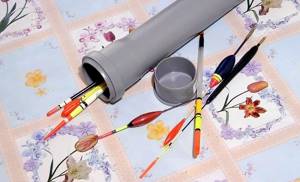
You can make a tube for floats with your own hands from polyethylene pipes and, in particular, a sewer pipe with a diameter of 50 or 100 mm. Before manufacturing the container, the dimensions of the floats for storing which it will be intended are determined. According to the number of accessory units and the longest length of one of them, with a margin of one and a half, two centimeters, a piece of tube is cut. One of its parts must have a factory socket, which is plugged with a shaped part in the form of a plug, placed on glue for immobility. The tube cover is made of a coupling with a plug glued into it. To make opening the tube easier, remove the sealing rubber from the coupling. For massive float collections, a 100 mm pipe is used; for smaller floats, a diameter of 50 mm is suitable.
Important! The sewer pipe is lightweight and does not undergo compression, which guarantees complete safety of the float collection and ease of movement.
For single options for storing floats or protecting delicate models from breakage, you can use cases for drills, in which they are sold in hardware stores. The cases are made of lightweight and often transparent plastic, which allows you to decide on the type of accessory you need at the moment without opening the container. Tight fitting of the two parts of the case guarantees both water resistance and spontaneous opening of the tube.
Polystyrene foam is a great option for creating a float
A foam float is most often made by hand. This species is considered the most famous among fishing enthusiasts. Unlike other homemade products, it is quite easy to make. A minimum of material is required for its production.
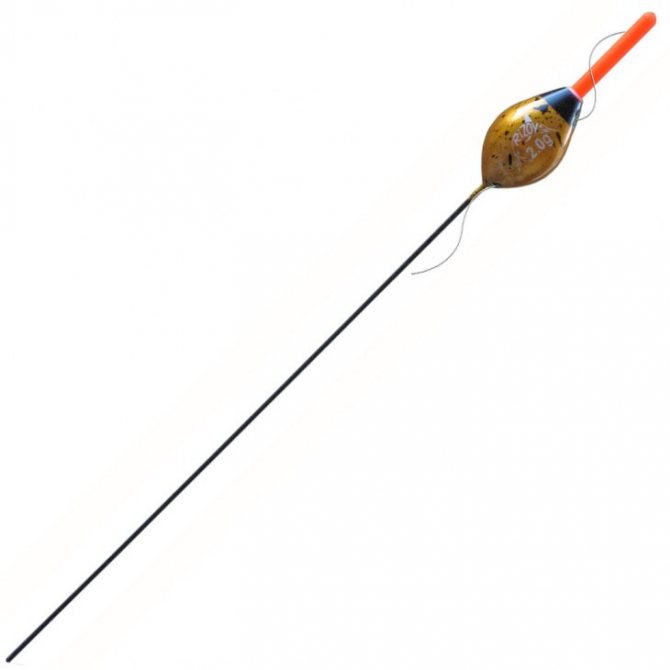
Thanks to its special sensitivity, it is easy to determine from the float whether a fish has bitten. As a rule, such a fishing device is used for catching perch or pike.
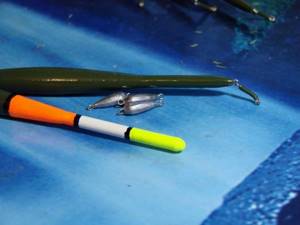
It will be useful for you to know how to make a float with your own hands. Let's note the necessary tools for work:
- high-quality foam;
- kernel;
- nipple;
- sanding paper;
- colorful base of not bright tones with increased water resistance.
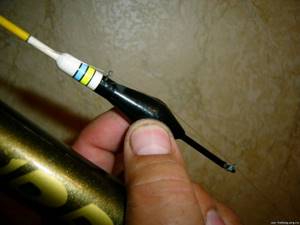
Read here Winter float - fishing tactics, choice of gear and methods of using a float (100 photos)
«>
First of all, you should prepare the product. We cut an oval shape from a piece of foam plastic, then sand it with sanding paper to obtain an attractive shape.
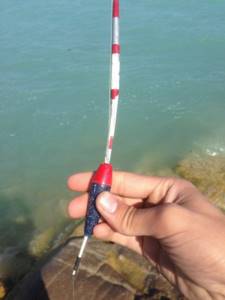
Next, you need to make a small hole in the center of the workpiece. We thread a thin stick through it and place a nipple on top. Below you can watch a video of making a foam float with your own hands.
At your discretion, you can cover the homemade product with your chosen colorful shade, or use regular nail polish.
When painting, you should refrain from using bright colors, as they can scare the fish. Mostly blue or red colors are used. The upper part of the float is painted with it.
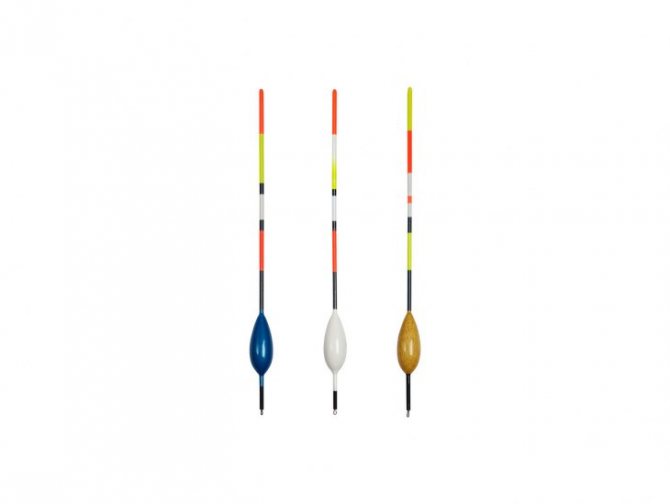
The bottom of the product, which is under water, is painted dark. After complete drying, the float is secured to the gear.
