Quite often, there comes a time in the life of every fisherman when he begins to experiment with gear, trying to find the most optimal option for fishing. This can lead to independent production of gear, the variety of which will amaze everyone.
What functions does a match float perform?
The float for match fishing is characterized by the following functions:
- They are clearly visible on the surface and during flight.
- Even the smallest bite manifests itself in a matter of seconds.
- Delivered to the required point as accurately as possible.
- During the casting process, the bait does not fly off the hook of the rig.
- When wind and waves appear, the fishing accessory floats perfectly on the water.
The following types of structures are typical for such floats:
- Constant load. Match floats do not have the ability to change the load; therefore, any match fisherman should have several spare models in his arsenal. Fishing conditions change - the type of float on the tackle changes.
- A float that allows you to adjust the load. It is considered the most universal option - the ability to change the load and adjust it to certain fishing conditions, and select the depth.
- A match float that has no weight. Strong currents and great depths are the right time to install a float that has no additional weight.
- Attention! If we are fishing at a short distance, it is better to use a float with a thin tail. Long distances require a thick tail to be more visible on the surface of the water.
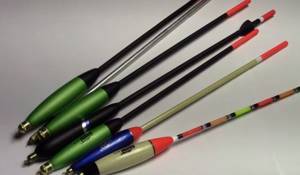
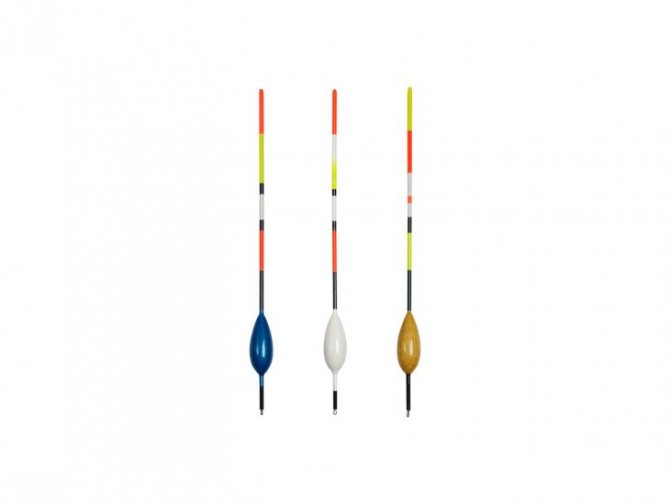
Wagler floats for match fishing
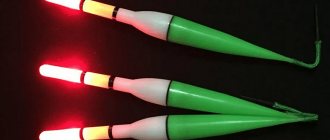
If the float is needed for long-distance fishing, then it must have the appropriate color. The market is represented by bright models specifically to increase visibility from a long distance - so as not to look at it through binoculars. Some are supplemented with a tail unit in order to fly better and reach the target as accurately as possible.
The antenna must be painted in such a color that the fisherman can see it not only during the bite, but also in flight for tracking. Bright sunny weather means using a dark antenna, otherwise the bright float will produce glare. Dark, cloudy weather calls for a brightly colored float. Some floats allow you to change the tail - put a brighter or darker color.
- Attention! Depending on the fishing conditions with a match fishing rod, each float will have different equipment. The weight that needs to be added to the float is indicated on its body.
DIY float
Experienced float fishermen often encounter a situation where they cannot find the desired float on sale. In the sea of consumer goods there is simply not what you need, or there is no balance, or everything fits but the buoyancy is not the same, etc.
In this situation, only making a float with your own hands will help. How to make a float? Let's look at the recommendations given on this matter by the famous sports fisherman Andrei Yanshevsky. According to these recommendations, the process of designing and manufacturing a float is approximately as follows.
The float is based on balsa
Balsa wood is best for making a float. The material is durable, lightweight, and well processed. Balsa can be purchased in stores for aircraft or ship modellers. It is sold in the form of boards of various thicknesses.
It is important to choose a board with a uniform density over its entire area. Visually this can be understood by the structure of the wood. The more uniform it is, the easier it will be to process the material. Balsa with a density of about 0.11 - 0.12 g/cm3 is best suited.
Other materials for making a float
In the same store you can immediately purchase other materials for making a float.
- Straightened steel wire 0.5 - 1.0 mm.
- Rods made of carbon fiber or fiberglass with a length of 1.0 m and a diameter of up to 1.0 mm.
- Varnish called “Emalit” or nitrovarnish NTs222 or NTs228.
- 1 liter of urethane varnish (called “Yachting varnish” or “Yacht varnish”.
- Acetone, white alcohol.
- Glue "Moment" or similar.
- A little wire with a diameter of 0.2 mm for making rings.
- Acrylic paints of different colors in small packaging. They can be purchased in stores for artists, schoolchildren, and home crafts.
The average cost of materials for the manufacture of one float will be only 3 - 4 rubles. But if you stock up, with the expectation of making many floats, you can spend 1000 rubles.
Tools used
To process balsa, similar to how it is done on a lathe, you need an electric motor with a power of 90 - 200 W with a chuck. An electric drill can also be used as a motor, although it is quite noisy. If an electric motor is found, it must be mounted on a frame, for example on a wooden block.
The engine is converted into a lathe as follows. A piece of an ordinary pencil is fixed in the cartridge, onto which a silicone tube of suitable diameter is placed. The float blank will be inserted into this tube during processing.

You will also need:
- sandpaper of various sizes,
- sharp knife,
- wire cutters,
- drills with a diameter of 0.3 - 1 mm.
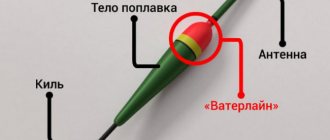
Next, we will consider the design of the float and the selection of its components - the keel and the float antenna.
Keel selection
The keel of the float must have a certain length and mass. By selecting the keel, the float is balanced. By lengthening the keel or using thicker wire to make it, we increase its mass and shift the center of gravity down.
The general rules are as follows. The lower the center of gravity of the float, the better. But the downward shift of the center of gravity is limited by the length of the keel and other parameters of its buoyancy.
For floats with a buoyancy of 1.0 - 1.5 g, the keel mass, as a rule, should not exceed 20 percent of their carrying capacity.
As buoyancy decreases, this percentage increases. On very small floats, the keel mass can already reach 70 - 80% of the buoyancy. This is done so that with very, very light rigs, there remains the possibility of casting and manipulating the tackle. In this case, weight is added to the float itself in the form of a massive (relatively) keel.
To make the keel of light floats, fiberglass is often used rather than metal, so that with such low weights the diameter and length are not too small.
For metal keels, wire with a diameter of 0.5 - 0.8 mm is usually used. The thinner one is not used for the reason that it is not very strong and bends. On large elongated floats it is possible to use wires with a diameter of up to 1.5 mm.
It is necessary to plan a keel that is obviously longer than necessary, so that later it can simply be shortened when balancing.
Question about gluing a keel into a floating body
To what depth should the keel enter the floating body of the float? The general recommendation is that the keel should fit into the body of the float by about a third of its length. But naturally, for different forms of a floating body, this parameter can vary greatly.
For elongated floats, the gluing depth is reduced, but still should not be less than 20 mm. For spherical floats of low buoyancy (less than 0.5 g), the keel can also be docked with the antenna.
Selecting an antenna for a float
What is the best material to make an antenna for a float from? For very small floats, when fishing under the surface of the water, or with very careful bites, the antenna can be made of metal, i.e. it may be a continuation of the keel.
- To make a float antenna, you can also use fishing line of the required diameter. But first it needs to be straightened. Straightening the fishing line, i.e. Removal of internal stress occurs when it is heated.
How to straighten a thick fishing line? Bring some water to a boil in a frying pan. Then pieces of fishing line are placed in it. When heated, the line will bend from side to side as it floats in the water. But the water will soon evaporate. Therefore, it is necessary to determine the moment when there is no more water and the line has straightened. At this time, cold water is poured into the frying pan and the fishing line “freezes” in a straightened position.
- You can also use boar bristles to make an antenna, which is even better than fishing line. But both of these materials have one very significant drawback - they do not paint well.
- Bamboo is an excellent material for making a float antenna. It has more buoyancy than plastic, which is a good thing. On sale you can find bamboo toothpicks, as well as impressively thick grill skewers. Bringing bamboo sticks to the required condition is very labor-intensive. But this process is simple and it is possible to do it yourself.
As in the case of the keel, initially it is better to glue in the antenna with a margin of length.
How to make a balsa float body
First you need to cut the blanks from the balsa board. To do this, the board is drawn to the required dimensions and cut with a sharp knife. The result will be rectangular bars. Then the edges are removed from the bars with a knife, and they are given a rounded shape in cross-section.
After this, they begin to grind the workpieces with sandpaper. The float blank is tightly inserted into the silicone tube on the electric motor. The engine starts up and the workpiece rotates.
When starting, you need to hold the free end of the workpiece with your left hand so that it does not fly out of the mount. Processing begins with sandpaper from the free end in order to grind it down to a cone and get a second centering point there for further processing. In this case, the workpiece is held against beating with the left hand, and the processing is performed with the right hand.
When the cone at the free end of the floating body of the float is formed, they begin to grind the balsa along the entire length, giving it the desired shape. In this case, the left hand centers the rotating workpiece, and the right hand does the processing using sandpaper.
The workpiece is cut with either sandpaper or a knife. After such treatment, it will have a fleecy, rough surface, which makes no sense to clean; when priming, the pile will still rise.
Next, the process of drilling a hole for the keel in the end of the float body is performed.
The drilling itself is performed with a drill with a diameter 0.1 - 0.2 mm smaller than the diameter of the keel used, to the depth the selection of which was discussed above. The drill is carefully brought to the rotating workpiece and slowly centered. When drilling, the process of self-centering of the drill will already occur.
After this, the selected keel is lubricated with “Moment” type glue and inserted into the drilled hole. After the glue has dried, the keel is clamped in the chuck and the balsa is drilled under the antenna on the other side. In this case, the drill is selected in exactly the same way and the selected antenna is glued in.
As previously mentioned, it is better to select the keel and antenna with some excess length, so that they can then be shortened if necessary. The result should be an almost finished unpainted float.
Primary primer
For the primary primer, nitro varnish is used, diluted with acetone to the viscosity of water. The float is lowered by the antenna into a long and narrow container with diluted nitro varnish, and immediately slowly removed. In this case, air bubbles will be released from the pores of the balsa.
After priming, the float is dried until the varnish is completely dry. To do this, the keel is simply stuck into something suitable.
Now it’s time to remove the lint and polish the body. This is done with the finest sandpaper, very carefully and without pressure.
Then a ring for the fishing line is glued into the body of the float. It is bent from wire on a drill with a diameter of 0.5 - 0.8 mm. The drilling diameter for it is selected slightly smaller than the wire itself.
It is also useful to re-prime. If air escapes from the pores again, which is possible when using very porous and light balsa, as well as when the varnish is too diluted, then a third primer will be needed after the float dries again.
Priming and painting
For final priming, it is recommended to use a thinned urethane varnish. It can then be painted with nitro paint.
But you can also prime with acrylic paints. And then apply urethane varnish. True, in this case the paint layer will be thicker. Therefore, the method is not entirely suitable for very small floats.
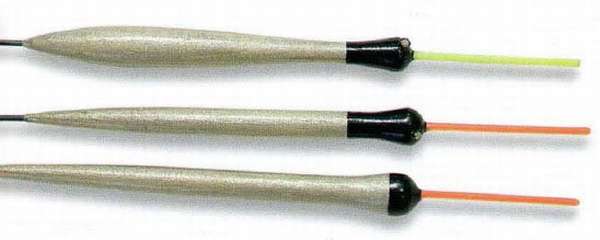
The following selection of paints by color is recommended. The body itself can be painted in soft colors - brownish or silver. But the coloring of the antenna largely depends on its depth during fishing. If the antenna is completely above the water, it is painted with bright colors along its entire length. If it goes deep, then the underwater part is painted black, and the surface part is painted yellow, orange, and red.
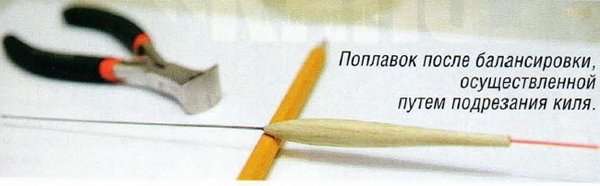
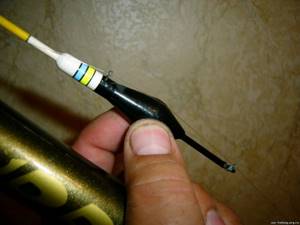
Balancing the float
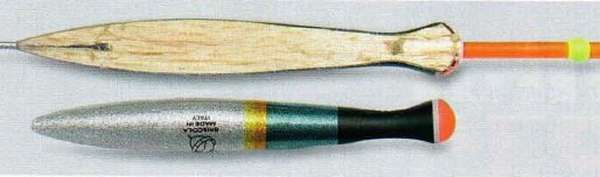
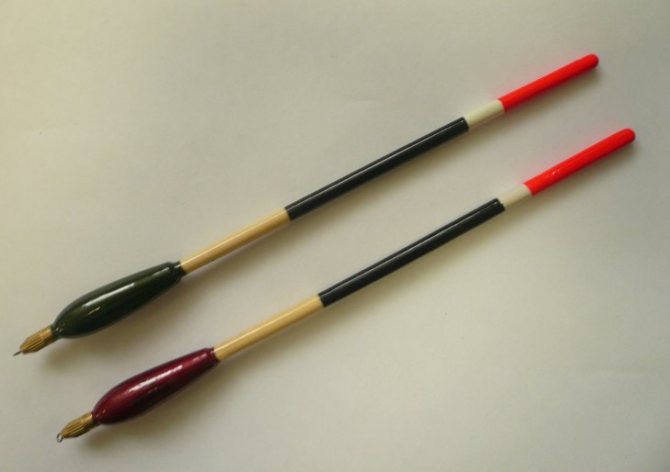
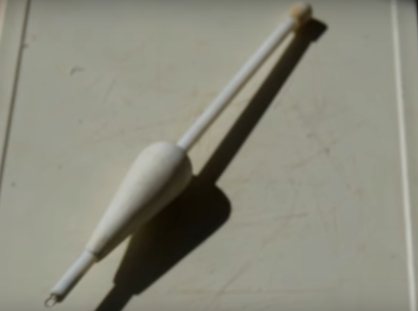
Balancing is done after the paint has completely dried - when the mass of the float has already been established. The balancing process is performed by trimming the keel to the desired length. The figure shows a balanced float.
Another option for making a homemade float, this time a floating heat made from extruded polystyrene foam. Today, this material is already inexpensive and widespread (in any hardware store). Therefore, such floats are cheaper, but processing the material is more difficult.
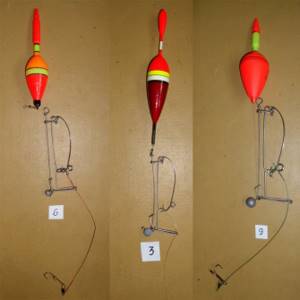
Match float with solid fixation and sliding type
Floats can be fixed in different ways. The blind rig consists of immovably fixing the match float, and when moving it along the main line - match fishing with a sliding float.
In order to qualitatively fish shallow depths, fishermen in Astrakhan on the Volga mainly use the float with a blind fixation. If we use a 4-meter fishing rod, we use a blind mount and set the corresponding depth to no more than 3.5 m. To ensure that the float is movable, a few centimeters of fishing line from each edge of the float are equipped with stoppers.
If we are faced with a deep area of water that needs to be fished with a match fishing rod, it is better to use a sliding version of the equipment. In this case, the depth of the fishing spot should be greater than the length of the form. Let's tell you more about the Wagler float for a match fishing rod
Polystyrene foam is a great option for creating a float
A foam float is most often made by hand. This species is considered the most famous among fishing enthusiasts. Unlike other homemade products, it is quite easy to make. A minimum of material is required for its production.
Thanks to its special sensitivity, it is easy to determine from the float whether a fish has bitten. As a rule, such a fishing device is used for catching perch or pike.
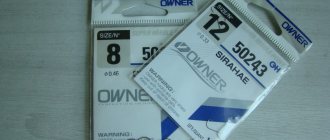
It will be useful for you to know how to make a float with your own hands. Let's note the necessary tools for work:
- high-quality foam;
- kernel;
- nipple;
- sanding paper;
- colorful base of not bright tones with increased water resistance.
Read here Rigging a float rod - a step-by-step description from A to Z. Step-by-step description of the rig from start to finish (100 photos)
«>
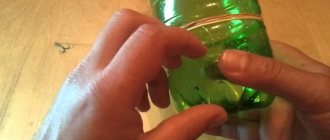
First of all, you should prepare the product. We cut an oval shape from a piece of foam plastic, then sand it with sanding paper to obtain an attractive shape.
Next, you need to make a small hole in the center of the workpiece. We thread a thin stick through it and place a nipple on top. Below you can watch a video of making a foam float with your own hands.
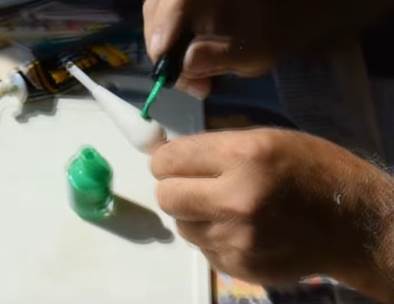
At your discretion, you can cover the homemade product with your chosen colorful shade, or use regular nail polish.
When painting, you should refrain from using bright colors, as they can scare the fish. Mostly blue or red colors are used. The upper part of the float is painted with it.
The bottom of the product, which is under water, is painted dark. After complete drying, the float is secured to the gear.
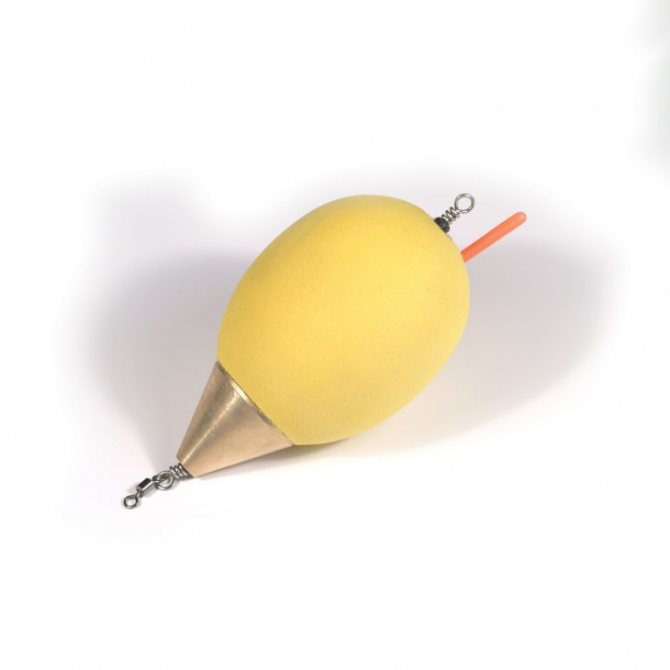
Float Wagler
The accessory is characterized by a small cross-section for greater stability and increased sensitivity. The body of the accessory must include granular cork, which prolongs the service life and, in case of hard physical contacts, allows the original appearance and properties to be preserved.
The match float is mainly equipped with an antenna in black, white or bright orange. These colors can be mixed. The tail feather of a peacock is used to make the antenna. The modern Wagler already has two types of weight built in - a constant one, which cannot be changed, and an adjustable one, which allows you to change the weight of the float in accordance with fishing conditions. The second option allows you to load the float with washers through the screws. Such floats are equipped with a hollow inner container into which you can pour water or put lead by adjusting the load.
- Interesting! The marking of floats for match fishing includes several numbers, the first of which indicates the weight of the load, the second - the permissible value of added weight with washers.
In Europe, such accessories are called by a different name - slider floats for match fishing with exactly the same short keel.
How to attach a float to a fishing line?
Fishing with a float rod is the most common. The thickness of the fishing line for such fishing is selected each time specifically, and depends on what kind of aquatic species will be caught this time. But in this case, you need to pay attention not only to the thickness of the “fishing thread”, but also to how they are connected to the float. A properly tied float should not emit splashes and promptly and accurately signal bites.
There are two ways to attach a float:
- Blind mount . This type of fastening is most common among fishermen, this is largely due to the fact that in this case it is the person himself who can completely control the position of the float; such a structure cannot move independently. This type of mount is only suitable for waters with a quiet, practically no current. There are several variations of blind fastening; they will be discussed a little later.
- Sliding . With a sliding fastening, it is given the opportunity to move along a certain section of the fishing line; this trajectory is limited by stops (knots) from the upper and lower edges. When casting a fishing rod, the float drops to the lowest point, and already during the dive it can rise to the highest permitted point. The sliding fastening, as well as the blind fastening, has several options, each of which we will discuss separately below.
Solid mounting methods
The float can be tightly attached to the fishing line either from one point or from two. But each of these methods has its own characteristics, which will be discussed further.
One point
When fishing in still water, you can attach it to the line using a single point method. For such a case, you need a float shaped like a needle, that is, it is long and the keel is weighted.
For single-point fastening, you need a small piece of wire, which must be threaded through the float ring at the bottom, and the remaining, excess ends of the wire should be twisted. After that, the rolled ends of the wire need to be threaded into the cambric through which the fishing line was originally threaded.
Such a single-point fastening has both advantages and disadvantages, the first include convenience and speed, and the second is the weak fastening of the float: it can fly off when casting, especially if it is very heavy.
Two points
Two-point fastening can be used when using the following types of float rods:
- Flywheel.
- Bologna.
- Match-trolling.
With such fastening, one point is usually called the upper point, and the other lower.
The lower center of the attachment is always located at the very keel of the float. This fastening is carried out using cambrics strung on a fishing line. Cambrics today are made from both PVC and silicone. Silicone cambrics are more practical and their service life is much longer.
It is best to put 3 cambrics on the keel: one at the bottom, the second in the middle and the last one a little higher. This fastening allows you to more securely connect the float to the fishing line. In this case, the lower cambric should be five centimeters higher from the end of the keel, that is, a kind of tail should remain.
The float can be attached to the top in one of the following ways:
- Pass the main line through a special passage ring made of stainless steel.
- Pull the fishing line into a spring made of metal, which should be installed on the float antenna.
If a conical float is used for fishing, then one cambric with an oblong shape will be enough. Using a large number of cambrics in this case will be unnecessary, since they will not replace each other.
The main difference between these two fastening methods is the stability of the entire gear.
When using a spring, the tackle becomes more sensitive, but when using a ring, if the line is pulled too tightly, it may break out and you will have to insert it again.
Types of sliding fastening
In cases where the upcoming fishing is planned in a reservoir whose depth reaches the length of the rod, the use of a blind mount is unacceptable. In such conditions, it is more acceptable to use a sliding mount, which allows the bait to move to the desired depth.
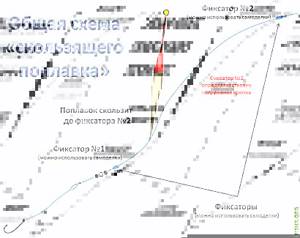
There are also several methods of sliding fastenings, each of which we will discuss separately below:
- Two nodes. The fishing line needs to be threaded into a ring. Then you need to put plastic stoppers or beads on both ends of the main line. At the end of the line along which the float will move, it must be closed with two strong locking knots. Previously installed stoppers will prevent the nodes from getting stuck in the ring. The knots should be as strong as possible, since when casting a fishing rod, the float will press on them with its entire mass.
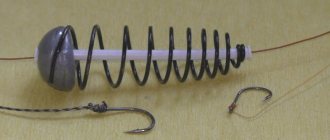
- Using a staple. A bracket made of wire sets the boundaries for the sliding float. It makes it possible to set a certain depth and allows you to fix the tackle in a certain position while fishing. In this case, the fishing line will get tangled much less, compared to the two-knot method, which was discussed earlier.
- Line inside. If deep-sea fishing is expected, then for this case you should purchase a float with a tube in the middle. A fishing line is inserted inside this tube, after which the keel is put on, and this design is completed by fixing the fishing line at the end of the keel, also with a cambric.
- With lock. With this type of fastening, the latch slides along the fishing line, so installing a stopper is mandatory. This type of attachment of the float to the line is mainly used for the so-called Waggler designs.
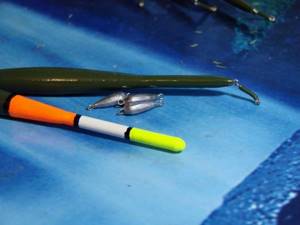
We make a match float ourselves
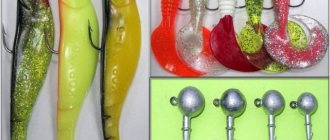
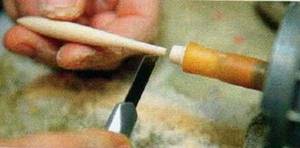
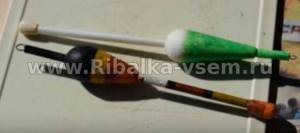
Professionals make their own match float, which is suitable for fishing conditions and is more familiar to perception. Our homemade float will consist of a plastic stick used to clean ears - 4 pcs. You also need a rubber tube with a diameter of 3-4 mm, a heat-setting tube with a diameter of 5 mm, a wire of 1 mm to make a loop, a plastic or wooden antenna 15-20 cm long.
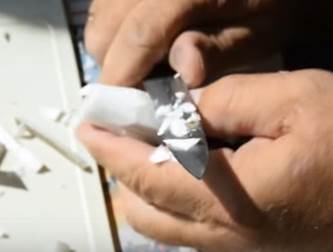
- Remove cotton wool from ear sticks.
- We cut 2 20 mm pieces from the plastic tube and put them on the ends of the ear sticks. We blow the structure with a construction hairdryer so that it becomes monolithic. We made the antenna rod.
- The long antenna is made of foam or wood.
- We drill a hole through and through and pour glue into them - quickly insert the rod.
- We attach a swivel to the bottom to allow the float to slide smoothly from one stop to another.
- We paint the float in a bright color - add phosphorus.
Such floats have a large weight, which allows you to cast over a long distance. Accessories made by yourself will last longer, and I will delight you with bites every fishing trip.
TAGS:
Work order
First, we take a piece of polystyrene foam, as in the photo, and make markings. Using a marker or pencil, draw a square measuring 2x2 cm. The height of the workpiece is 5.5-6 cm.
We draw diagonals. The place where they intersect will be the middle of the square:
After this, take a drill with a drill of the same diameter as the tube. We drill a hole in the middle of the square to just mark the location for attaching the antenna.
After this, take a hacksaw blade and cut out a piece of foam plastic according to the marks:

As a result, we get the following block:
Next, draw a circle so that it fits in the center of the square. We cut off the part that is outside the circle with a sharp knife. It should look like a barrel.
If the knife is very sharp, it will cut the foam like an apple or potato:
We cut off the sides of the workpiece evenly to obtain a barrel of the desired thickness. You decide for yourself what thickness you need. After this, you need to sand the entire surface of the workpiece so that it turns out perfectly smooth. To do this, first take medium sandpaper, and then finer sandpaper and manually sand the barrel. It's good if you have attachments for this type of dremmel:
They fit onto the drill, and grinding will be more productive and quick. We grind out the barrel so that we get this neat drop:
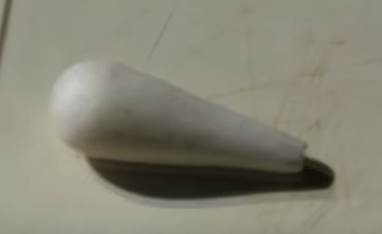
Making such a body for a float is not so easy. The main thing is to sand evenly on all sides. One part is processed more, and the second less. This workpiece has a length of 5.5 cm and a diameter of 2 cm at the bottom and 0.4 cm at the top. To get a smooth product, we process it with zero-grit sandpaper.
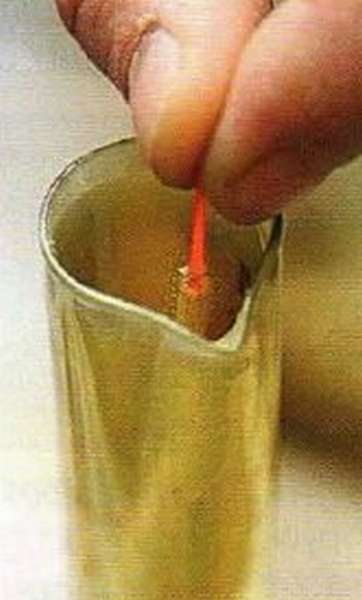
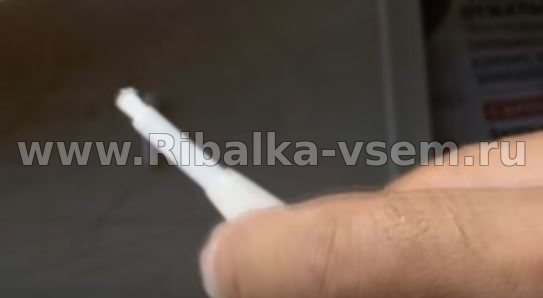
Having obtained the desired result, we put the workpiece aside. The next stage is threading the tube into the body of the float. We cut a piece of plastic tube 15 cm long and insert it into the hole of the workpiece:

We will put a cap on top of the tube. It can be in the form of a ball or droplet. We will also cut it out of foam plastic. The cap will cover the hole in the tube and will be clearly visible from afar if it is painted in a bright color:
Before putting the tip on the antenna, we will lubricate it from the inside with glue. Thus, we will ensure a good seal and a tight fit of the cap to the antenna.
The inside of the barrel is also coated with glue. After this, we proceed to installing the mount to the bottom of the float.
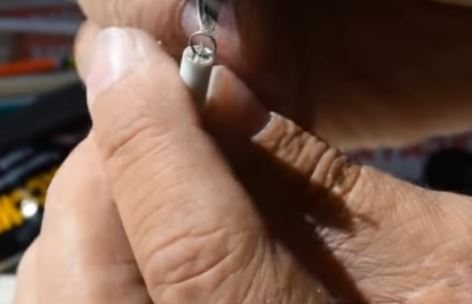
We need to attach the ear to the tube. The main line will pass through it. We will make the eyelet from steel wire with a diameter of 0.2 mm. Cut a piece of wire 6 cm long, fold it in half and form a pigtail with a ring at the end. It should look like this:
We will attach it to a foam plastic blank, which we will insert inside the tube. Cut out a cylindrical blank and insert it inside the tube:
Next, soak the workpiece in glue and screw it into a foam cylinder:
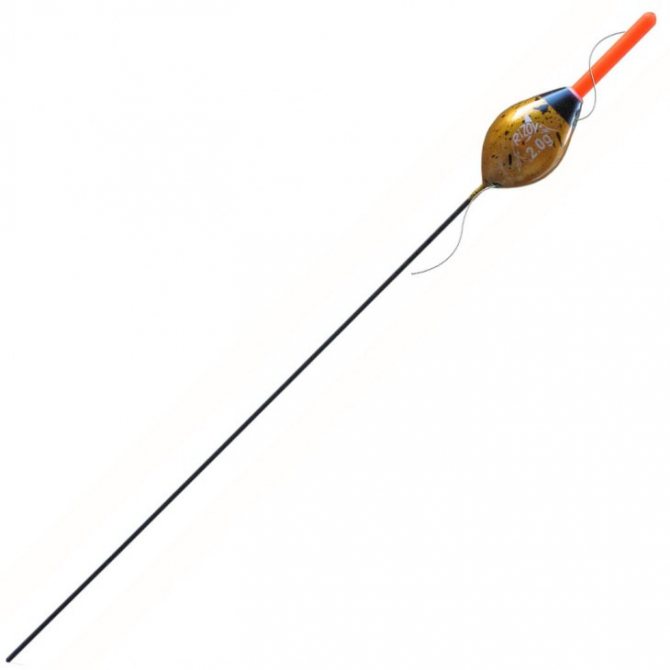
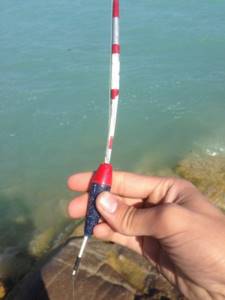
Our match float is ready. Now we need to paint it.
We take acrylic paints or fluorescent varnish and begin to paint the body of the float and the antenna.
When coloring, you can use your imagination if you have it. For example, for fishing in sunny weather, you can leave the tip white, and when fishing in cloudy weather, paint the body of the float black and brown, and the tip bright red. As a result, we will get the following products:
Due to their large body volume, such floats are stable when fishing in the current. They don't carry much. It happens that you need to cast to a remote area where the current gets stronger. These floats are best suited for such conditions. It turns out that they fly well, and during the retrieve they pass through the fished area at the required speed.
Tags
Carp Buffalo Spring Vobla Asp Winter Crucian Rudd Summer Fishing baits Lower Volga Perch Autumn Fisherman's reminder Lures Bite forecast Fishing in Astrakhan Fishing baits Fishing tackle Fishing secrets Catfish Fishing methods Pike perch Catch Pike