The benefits of making it yourself
The advantages of making an underwater gun with your own hands include:
- high level of accuracy;
- significant money savings;
- production does not require special knowledge and skills;
- comparatively quiet in operation.
But do not forget that there are also disadvantages:
- Hunting can only be done for medium and small fish; for large fish, the harpoon is not strong enough;
- It is impossible to change the harpoon tip.
Beginning underwater fishing enthusiasts need to know how to make a homemade gun. This can be done even without special skills, professional tools and precision equipment. There are several key types of underwater guns, differing primarily in the method of throwing the striking projectile - the harpoon. The element that imparts acceleration to the striking projectile and imparts the energy necessary to overcome the resistance of water can be a spring, a special rubber band, vacuum and pneumatics. In addition, hydropneumatic, powder, gas guns and even double-barreled shotguns are produced industrially and made by numerous home-made craftsmen. But since to manufacture most varieties it is necessary to have experience in such work, a variety of materials and drawings to maintain exact dimensions, you should know how to make the simplest homemade underwater gun - an improved version of the so-called Hawaiian.
Beginning underwater fishing enthusiasts will be interested in a way to make a homemade gun without special skills, professional tools or precision equipment.
The Hawaiians, which appeared, as the name suggests, on the islands of Oceania, had an extremely simple structure. Initially, they consisted of a pole with a harpoon tip and a rubber band with a diameter of 10-15 mm, rolled into a circle. Having hooked the rubber band onto the thumb, the hunter used the back end of the pole to pull the rope back to the elbow, after which he grabbed the pole closer to the middle with his hand. After that, all that remained was to aim and unclench your hand so that the compressed rubber band would forcefully push the harpoon towards the target. However, the described method of catching fish is not very convenient for hunting, since holding the harpoon in the “cocked” state requires constant tension of the hand. This drawback can be easily corrected without complicating the design fundamentally, but simply by equipping the Hawaiian with a home-made trigger mechanism. Now let’s talk about exactly how to make a gun for hunting underwater - it’s extremely easy to make, effective and at the same time easy to use.
- aluminum tube with an outer diameter of 10-15 mm and a length of 150 cm;
- PVC pipe 25-30 cm long, the inner diameter of which is slightly larger than the outer diameter of the aluminum tube;
- a rectangular steel skewer;
- M4 bolt 20-25 mm long with a nut, metal and rubber washers;
- M4 bolt 40-50 mm long;
- steel rectangle measuring 40×15×2 mm;
- three self-tapping screws 70-100 mm long;
- fishing rubber;
- ring-shaped elastic band;
- nylon thread;
- cutting boards with a thickness of at least 20 mm;
- epoxy glue.
Also, to make a gun for hunting aquatic life with your own hands, you will need the following tools: a screwdriver, pliers, a hammer, a chisel, a vice, wrenches, a rasp, a drill, hacksaws for wood and metal.
Separate a 20 cm long fragment from the skewer, clamp it in a vice so that 10-12 mm protrudes from the jaws, and bend the protruding section at a right angle. Having taken the resulting L-shaped part out of the vice, bend it in the direction opposite to the short part of the letter “L” so that you get an arc - a sector of an imaginary circle with a diameter of 50 cm. Drill a 4 mm hole in the middle of the part. In the center of the short tube, drill 2 opposite holes - with diameters of 5 and 4 mm and 2 - with a diameter of 5 mm, 1 cm from the edge. Also, in a short tube at a distance equal to the length between the hole and the bend of the L-shaped part, make a transverse slot measuring 8x2.5 mm. A centimeter from the edge of the aluminum tube, drill 2 opposite holes of 8 mm each, and then make a transverse slot measuring 8x2.5 mm in the center of the tube. From fishing rubber, make a tourniquet 1 cm thick, 40-45 cm long, and every 5 cm, tightly rewind it with nylon thread. From the board, cut a round plug corresponding to the inner diameter of the long pipe and drill a 4 mm longitudinal hole in it.
Shotgun crossbow for underwater hunting: pneumatic crossbow or rubber shotgun?
Underwater hunting with a crossbow is a very exciting activity.
But, like any other, it requires appropriate equipment, the most important of which is a gun. There are two types of these weapons: pneumatic and rubber shotguns, or, as they are also called, crossbows for underwater hunting. It’s enough to just buy a gun in a specialized store, but it’s much more interesting to make it yourself. A pneumatic crossbow is quite complicated both to manufacture and to use. It requires special knowledge and skills. But it’s much easier to make a rubber crossbow; learning to shoot accurately from it is much faster. The device of an underwater crossbow. photo. Hunting with an underwater crossbow
First the device, then drawings for a homemade crossbow for underwater hunting
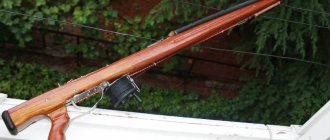
Before reading the drawings and collecting tools, let's look at the design of an underwater crossbow. As can be seen in the photo, the rubber fighting gun pushes the harpoon by returning the rubber bands to their original position. The design of the crossbow is quite simple and reliable. The barrel, handle, trigger (trigger), headband, cords, hook and harpoon are the components of a crossbow. You can do all this with your own hands and assemble quite powerful weapons. Types of barrels Crossbow barrels can be of different types: round cylindrical or arbitrary irregular shape. The photograph shows a gun with an irregularly shaped wooden barrel.
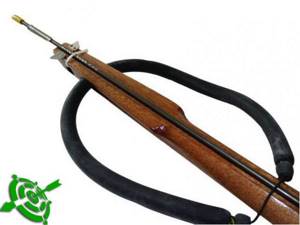
photo. wooden crossbow “spearfishing”
The task of the barrel is not only to hold the guide, but also to resist fairly strong bending loads arising from the tension of the strands. The barrels of factory crossbows are made from a particularly strong alloy of aluminum, carbon, fiberglass or wood. A homemade crossbow for spearfishing can be made from wood or aluminum tube. The most bending strength is wood. It is also the lightest in water, so special weights are often added to it. However, it is inferior to aluminum in maneuverability. Guide, cords and headband.
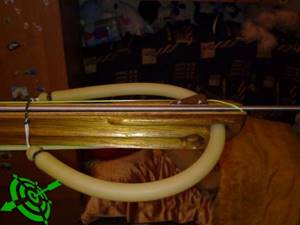
photo. Crossbow for hunting made of wood
The gun guide serves to stabilize the harpoon as it is guided along the barrel. They are relevant for guns longer than 90 cm. Headbands come in open and closed types. Paired cords are attached to a closed type headband (see photo), and for open ones, ring cords are used. In the second case, the acceleration of the harpoon will be slightly greater. The power of the cords must be balanced. A weak tension will not provide enough force for the arrow to fly out, and a too strong tension will increase the initial speed and put an extra idle load on the barrel. The harpoon can have different lengths and thicknesses, commensurate with the design and power of the crossbow. Hooks on harpoons also have two design options: cut or sharpfin.
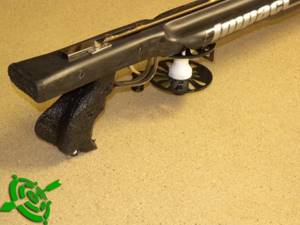
photo. Underwater crossbow reel
The dihedral sharpening of the harpoon withstands impacts from stones and dulls much longer than others. And the triangular one has more significant penetrating ability. Reel, handle and trigger The reel is needed for hunting in rocky terrain or for large fish to ensure a reserve of tench. The handle of the gun should fit comfortably in your hand, although a homemade crossbow can be made without it. The design of the gun without a handle is shown in the photo. The trigger mechanism must work flawlessly. This is especially important in spearfishing, since you will have to return to shore to fix the problem. Therefore, the recommendation, the simpler the more reliable, is especially relevant in this case. But simplicity should not be confused with sloppiness in design and execution.
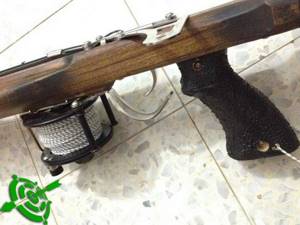
photo. DIY underwater crossbow trigger mechanism
photo. Drawing of the trigger mechanism of an underwater crossbow
Drawing of an underwater crossbow for fishing
How to make an underwater crossbow at home? In general, there are no particular difficulties in this. You just need to arm yourself with patience and conscientiously follow all the recommendations in this article. The proposed crossbow with a wooden barrel, equipped with a reel, is quite simple. No special drawings are needed to make it. A massive wooden block of irregular shape with four edges perfectly withstands fracture loads. Therefore, the risks of breaking it due to the disproportionate power of the strands are minimal. The trigger mechanism and handle are absent on the proposed model, since the design allows shots to be fired without it. This greatly simplifies the manufacturing process. But you will have to shoot with both hands, so it is still worth equipping the crossbow with a trigger mechanism made according to the drawings. This can be done right away or you can upgrade an already finished gun. So, the underwater crossbow is the first step.
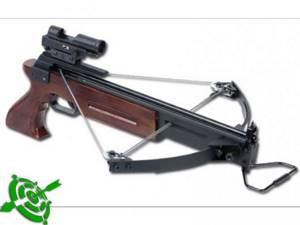
photo. Homemade underwater crossbow gun
We assemble a homemade crossbow-gun from a reel, trigger mechanism and other spare parts
To make it, you will need a wooden block of a comfortable size. It is not recommended to make a gun longer than 76 cm if this is your first experience making such things with your own hands and using them in practice.
Photo. Drawing of an underwater crossbow
It is also better to make the handle and trigger after the first tests have passed. For greater resistance to loads, the block on one side can be made a little thinner, so that a slight bend of no more than 2 degrees is formed. This is easy to do with your own hands, after carefully reading the drawings below. Step two - the 6 mm wire rod coil is bent in a U-shape. Its length should be sufficient to go around the barrel in such a way that along its two long edges it should fit 1/4 on each side, going around the end side. On both sides of the block, we attach the workpiece to it using a perforated metal tape, bent along the diameter of the wire, so that the workpiece is between the tape and the block (see drawings). You must use stainless steel wood screws.
In factory shotguns with a coil, it is installed where the trigger is located. This requires completing the structure with additional parts. In our case, when the process is done by hand, it will be installed in the front end part. This will eliminate the need to install additional mechanisms.
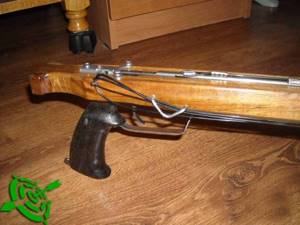
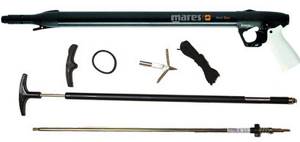
photo. Spare parts for underwater crossbows
Any small drum, preferably plastic, is suitable for the reel. We drill a hole in it for a 2.5 mm fishing line. We pass the fishing line into this hole, secure it by melting the knot, and then wind it onto the reel. We, in turn, put it on the blank so that it is on the short side of the holder, in the avant-garde part of the gun. We attach the holder together with the coil to the block at such a distance that the coil rotates freely along the end side of the holder, between it and the block. Metal fasteners should not be exactly opposite each other. One should be closer to the coil, the other further, as shown in the photo. Step three. Guide. We will also make it ourselves from an aluminum tube with a diameter of 9.5 mm (outer) and 6.5 mm (inner).
In order to reduce friction to a minimum, we will make the guide from two pieces of pipe (1 mm each). We will attach one of them to the head of the gun, the other at a distance of 10 cm from it. We fasten them to the trunk with screws using perforated metal tape.
The mechanism is quite simple, the only condition is that the harpoon must pass through them freely. Rod and harpoon For rods, it is best to purchase a rod (16-18 mm) in a specialized store, and strengthen it with your own hands. Its length should be such that the middle tension falls on the end of the barrel. You need to attach it to the spool holder on each side using a plastic clamp, the end of which should be cut as close as possible to the lock. Having secured one end of the rod, we pass the other end through a special ring (see photo). With its help, it will be much more convenient to pull the strings and shoot.
If you equip a rubber traction gun with a trigger mechanism, then the point of maximum tension should be at the hook. We also make a harpoon of the required length with our own hands from wire rod with a diameter of 6 mm. To do this, you just need to cut it to size. But the best way to sharpen the sharp part is to turn to a turner. Those who prefer to work with extreme precision can use drawings with the exact dimensions indicated in the photo.
Types of spearfishing
Before you go shopping for a gun, you need to know in advance what type of hunting you need it for. There are only two of them:
- Sea hunting.
For hunting in the marine environment with diving to great depths and in clear water, where visibility is good, it is necessary to purchase a long-barreled gun; it is quite convenient and shoots with great accuracy. - Freshwater hunting.
Hunting in freshwater means a person remains in muddy water with a small radius of visibility. In such conditions, you need to swim to the chosen victim as close as possible (so as not to miss), so the accuracy of fire should be small.
The main thing is to understand that a gun that was originally purchased for freshwater hunting is in no way suitable for sea hunting, and therefore vice versa. In this regard, it is better to have two guns for each type of fishing.

Underwater gun diagram
The weapon's handle consists of two identical plates. To produce it, the plates are fixed in a special carpentry device and holes are drilled into them to suit the size of the muzzle, after which the handle is cut out along the contour. Afterwards, on each plate it is necessary to make a recess with a depth of 3.5 mm under the trigger mechanism with a milling tool or a file. Another step in making a weapon is to drill holes for the axis of the trigger mechanism, the spring and the safety. The grip plates are connected at the muzzle and compressed with screws. To prevent the possibility of the handle sliding along the muzzle, a stop ring is attached in front of it with a special pressing screw. The final assembly of the handle ends after the production of individual parts of the trigger mechanism structure.
Types of guns for underwater hunting
To choose the best equipment for spearfishing, you first need to understand its classification. This is not difficult to do, since today there are only three types of underwater guns, which differ from each other in their operating principle:
- crossbows (rubber bands);
- pneumatics;
- springs.
Crossbows for spearfishing
The first type is considered the most popular among both experienced and novice hunters. Rubber bands are perfect for shooting in conditions of good visibility, so they are more often used in the sea than in rivers and lakes. Shooting from a crossbow is carried out using rubber rods. The range of the harpoon and the power of the shot depend on the thickness and number of rods.
An important parameter of crossbows is the barrel length, which is in the range of 50-200 cm or more. The longer the barrel, the more accurate and powerful the shot will be. Therefore, if you plan to hunt large fish from a long distance, it is better to choose a speargun with a length of 100 cm or more.
Aluminum products are the cheapest, but they are heavy, so aiming them at the target and keeping it on target for a long time is quite difficult. Wooden and fiberglass rubber bands are considered more effective and convenient, which is why it is recommended to buy them for spearfishing.
The advantages of crossbows include:
- lack of recoil, resulting in increased shooting accuracy;
- quiet operation;
- high reliability and simple design;
- low cost.
Among the disadvantages of rubber bands, it should be noted that the barrel is relatively long, which makes hunting in hard-to-reach places impossible and somewhat reduces their maneuverability.
Pneumatic spear guns
Unlike crossbows, pneumatic guns have a more complex structure, which consists of a barrel, receiver, trigger mechanism and pump. The principle of their operation is based on the movement along the piston barrel, which is driven by compressed air pumped into the receiver by a special pump.
Pneumatic guns are available in two versions - with and without a shot force regulator. In the first case, it is possible to choose the optimal power of the gun for a particular case, so pneumatic products with an installed regulator are more preferable.
The diameter of the barrel in pneumatics is 11 and 13 mm. The former are equipped with harpoons 7 mm thick, and the latter – 8 mm. For long-range hunting, it is better to choose a thirteen-millimeter shotgun. A smaller cross section is suitable for shooting small fish.
The positive qualities of pneumatic weapons include:
- high power with small dimensions;
- compactness and maneuverability;
- high rate of fire;
- possibility of using many models of harpoons.
An air gun for spearfishing has the following disadvantages:
- noisy operation;
- complex design, which increases the risk of breakdown during operation;
- lower shooting accuracy compared to a crossbow, which is due to the short barrel length;
- complex charging that requires care and attention.
Spring weapon
The operating principle of this type of weapon for underwater hunting is based on a cocked spring, which, when triggered, pushes the harpoon. The spring mechanism can operate in compression, tension, or simultaneously compression and tension.
There are also guns in which one spring is inserted into another, which allows them to increase their power and the range of the harpoon.
Making a gun
The process of creating homemade guns with your own hands begins with making a spring - the most difficult stage. The spring is made on a lathe, after which it is thermally treated and coated with a protective layer against corrosion. The spring should be 25-30 cm longer than the barrel, because after the first use it will tighten.
The next step will be making the barrel . You can use a regular ski pole as it. The length of the trunk should be from 60 to 80 cm, this also depends on the body of water in which the hunt will take place.
Then a slot of about 15-18 cm is cut in the barrel for the sear. It is this length that is responsible for the lethal force of the gun. Also at this stage, holes are made to drain water.
A muzzle with a plug is machined from a duralumin tube. A hole is made in it, where the harpoon is then inserted. At this point, the creation of the barrel comes to an end and the stage of constructing the trigger mechanism and handle begins.
The handle is made based on the size of the barrel. First, a contour is cut out from two plates. Then slots for the trigger are cut out in the plates with a file.
Next, a hole is made for the spring, fuse and sear axis. The two plates that were used for the handle are fastened together with screws. You can put a ring on the handle to prevent your hand from slipping along the barrel. It is better to entrust the manufacture of the trigger mechanism to a mechanic.
The final step is to make an easy release device and a harpoon of approximately 6 mm. The main material is stainless steel. Now the gun is ready and can be tested.
The gun has sufficient destructive power to hit a target at a distance of up to three meters. Its main drawback is noise. To get rid of this problem, the harpoon and spring are lubricated with glycerin .
Spearfishing snorkel
Underwater fishing equipment is not complete without a breathing tube. An ordinary diver can still afford to lose sight of something, but there is one thing that he definitely cannot do without - breathing. For most hunters, the usual position is to drift on the surface, waiting for prey. From this position it is very convenient to quickly dive, harpoon a fish, reload the weapon and continue observing. In such situations, it is very convenient to use breathing tubes.
For hunting in grottoes and under rubble, the best choice is a flexible tube. It does not cause any inconvenience if you need to climb somewhere - you just bend it back and do what you intended. But for those who specialize in fishing in shallow water, such tubes are not very convenient. Due to the fact that you often have to wade through vegetation, the design of the tube bends, clinging to the grass, and complicates breathing. For such cases, it is more reasonable to use rigid breathing tubes.
It is worth understanding that different spearfishing conditions require different tubes. Fishing at depth is unpretentious to tubes and allows you to use any. But it is still preferable to model with a valve at the bottom and a cap at the top. Such accessories for underwater fishing have a convenient design, but, unfortunately, it is not suitable for overgrown and shallow reservoirs, since the bottom valve becomes very clogged with all sorts of small things in the form of grass and debris. Therefore, it is better to do without a valve at all, since if it becomes clogged, its plate will not fit tightly to the tube, which can result in large quantities of water entering and preventing breathing.
By the way, about the use of tubes: it is possible to breathe comfortably through them only at a very shallow depth. But, diving deeper, the diver begins to experience increasing water pressure and even after half a meter it becomes more difficult to breathe. The longer the tube, the more of it sticks out above the water and eliminates the possibility of it being flooded with water. And the thicker it is, the more it will resist air. Also, both of these parameters affect the amount of water that needs to be blown out of it when emerging to the surface. Based on these data, the optimal dimensions of the tubes were determined - 40 cm from the bend with a diameter of 2.5 cm.
To prevent water from getting inside the tube when immersed, a valve with a ball is installed. This system has acquired the name “dry”, and its use is quite acceptable when the tube is constantly in the hunter’s mouth. But you should always be prepared for the fact that the valve may become clogged and stop working as it should.
The first tools of people
The design of the harpoon, as well as its appearance, has remained almost unchanged over the past 5 thousand years. Primitive people used a strong and long wooden rod with a characteristically shaped silicon tip. This part had a hook that did not allow the prey to get rid of the weapon that struck it and break free.
We invite you to familiarize yourself with: Do-it-yourself mandula for pike perch, pike: how to make a hook-free hook and catch fish
Modern harpoons for underwater hunting have similar design features, only they are made of different materials. In addition, they have a hole at the end opposite to the point for fixing the line, since today they are no longer thrown by hand, as was the case just a couple of centuries ago. Now harpoons are driven by special mechanisms.
Nowadays, you can still find a type of hand-made homemade harpoon with a wooden handle and a trident tip, like Neptune’s. It's called a prison. Typically, poachers use such “tools” to kill fish in coastal thickets during the spawning period.
But a harpoon for underwater hunting by a professional hunter is a completely different thing, radically different from an ancient weapon. The material for its manufacture is stainless steel, titanium alloy, a combination of steel and Kevlar or steel and carbon fiber; the tip can be removable; many models have various grooves and clamps corresponding to a particular trigger mechanism.
Cheap air guns use simple products that provide a front hook. In their front part there is a groove for the sear; the hole for attaching the line is located here, which negatively affects the quality of shooting. A line tied in front after a shot takes the harpoon to the side, turns it around, and places it in a T-shaped position, which causes serious inconvenience when hunting in snags or among pitfalls. In other words, it clings tightly at the pivot point, and it is quite difficult to pull it out.
Harpoons equipped with a sliding sleeve are much more convenient and, most importantly, more reliable than the previous version, which is why they are widespread. The line is tied to a runner sleeve, which, after the shot, moves to the tail section, is fixed there and thereby evens out the flight of the harpoon.
There are milled titanium harpoons for underwater hunting with several grooves, as well as polyhedrons, which also have a “running” sleeve. They did not become popular due to their high cost. Such sophisticated models have one pattern: the more complex their design, the more expensive they are, which is quite logical. It is the high price that pushes them into the background.
There are also tubular harpoons, but even in specialized stores these are very rare. They do not have any special advantages, which is why they have not found their fans. Only a beginner who does not really understand the intricacies of shooting underwater can purchase such a harpoon. You can make a harpoon for spearfishing with your own hands from a stainless steel rod, following the information about the types of tips and their sharpening below.
Tip Types
The main part of the harpoon is the tip, which is responsible for piercing the body of the fish and further holding it. The harpoon tip of an underwater gun can be removable (screwed onto a thread) or permanent if the harpoon is made of a solid metal rod. The tip of a harpoon for spearfishing is the tip of a harpoon of a certain shape and design. For example, a bullet, a trident or a so-called broom.
As a rule, the line of such models is attached to the tail section.
Many novice divers find removable tips much more convenient, especially when they need to remove their catch. I unscrewed the sharp part, pulled the harpoon out of the fish and returned it to its place - what could be simpler? It's really easy on the shore, but not underwater. This procedure is not only lengthy, but also very risky, because one careless movement is enough to drop and lose the tip.
Now let's return to the Tahitian harpoons. It is easy to remove it from the fish’s body; to do this, you just need to press the flag and unscrew the harpoon with rotational movements. For a professional hunter, this is a matter of 5 seconds, but a beginner can do it in a maximum of 15. In addition, the Tahitian version is smoother and more durable, since it has no joints, and it is also reliable. Removable tips can unwind spontaneously, and this often happens under water, at the most crucial moment.
Today, developers of underwater equipment, with the participation of experienced hunters, have created many different types of tips designed for hunting in different conditions. They differ from each other in the number and size of flags, thread, method of sharpening, etc. Let's look at the most popular ones:
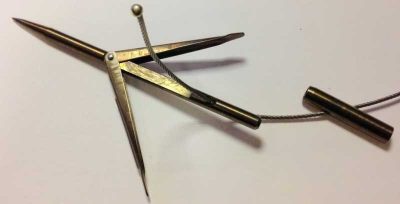
The Zelinsky tip (X-shaped) is the most popular model among our catchers, who mostly hunt in freshwater bodies. Its main advantages are low resistance in flight and excellent penetrating ability. Such a harpoon does not blow away when shooting from a long distance, it perfectly holds the shot trophy, and if you are lucky enough to get close to the flock, then there will be more than one. There are cases when, with its help, it was possible to shoot and hold two or even three fish at once. But this model has two serious enemies: river sand and hard objects. After contact with them, the tip immediately fails (jams, bends, breaks).- The Lagutin tip (T-shaped) also does not withstand direct hits into solid objects, in addition, it is too intricate in terms of design. Pros: flies smoothly, hits accurately, automatically opens after a hit and holds prey perfectly.
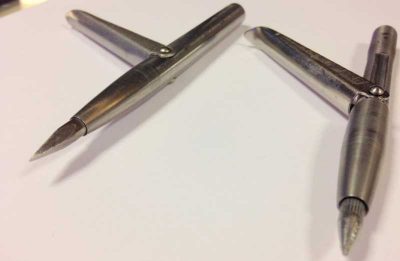
Knurled tip - produced in the shape of a cylinder with a diameter of at least 10 mm. Length - from 10 to 15 cm. On the striking side it is equipped with a pointed striker, and on the reverse side it has a thread for fixing on a harpoon. Flags are usually not placed on these models. The fish is held by a large knurl, and besides, a blow from such a thick tip plunges it into a state of shock, in which it is not able to provide adequate resistance.- The detachable tip is the best option for those who are planning to get a large trophy. It is additionally connected to the harpoon by a special cable. After an accurate shot and the first jerk, the fish remains in its body, while the harpoon comes out and hangs on a flexible cable. According to the assurances of seasoned hunters, with such a thing you can easily catch a large carp, carp or catfish.
There are several different sharpening methods. They are selected taking into account the type and size of fish to be hunted.
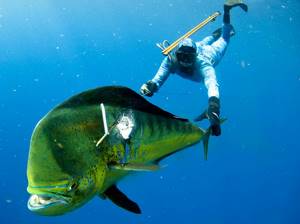
The double cone tolerates contact with stones less painfully, but often ricochets off the hard scales of trophy specimens. Triangular and tetrahedral sharpening also have their disadvantages. They not only pierce any scales, which is undoubtedly good, but also tear soft tissues, and this is unnecessary.
We suggest you read: Catching pike perch in the fall with a spinning rod: where, when, what and how to catch
At first glance, rather strange sharpenings such as “crown” or “cross” deserve special attention. They do not ricochet, they pierce bones, including the spine, that is, they completely immobilize the fish. A sharpening called a “chisel” also looks no less exotic, although in practice it has proven itself to be the best.
Often, tricksters have to hunt in difficult places where there is no way to aim well. In such conditions, multi-pronged tips come to the rescue. There is a misconception that when using them, shooting accuracy suffers greatly, but statistics refutes this: in 9 out of 10 shots, the fish is hit by the central (main) tooth.
In addition, the multi-prongs really shock the prey and hold it perfectly. True, they experience significantly greater water resistance during flight, and therefore require the use of the most powerful weapons. They are of little use for hunting medium and small fish, since such tips not only pierce them at several points, but also literally chop them into pieces.
A harpoon with a multi-prong has to be checked directly on the pond and adjusted during the process - bending each tooth and firing test shots to achieve the smoothest possible flight. However, this option is quite common. There are even tips with 7 or more teeth, designed to catch large freshwater eels.
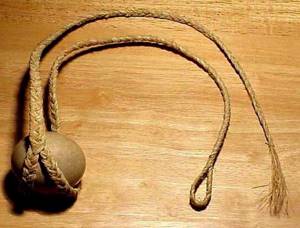
Most of our contemporaries believe that a harpoon is something like a spear for catching fish. Most often it is confused with spear. This is understandable: for hunting and fishing “for fun,” the classic harpoon is almost never used, but among the indigenous peoples of the North, who live by traditional crafts, this weapon is still held in high esteem.
“Civilized” Europeans and Americans now use a harpoon gun, but it has little in common with the ancient weapon: this rather complex instrument has undergone significant changes over the many centuries of its existence.
Particularly famous, of course, was the whaling harpoon, described in detail by Herman Melville, but there were others, different in design and purpose. Let's try to highlight their common features.
Compilers of explanatory dictionaries agree that this term (harpoen) owes its appearance to the Dutch whalers, who in the 17th century had no equal. The word comes from the Late Latin harpo ("hook").
Structural features of the harpoon and spear
The simplest device is a harpoon for fishing. This harpoon has the appearance of a jagged spear. Some harpoons have rings for attaching to boats. Harpoons can sometimes be called spears or vice versa. However, in reality, forts are somewhat different tools. They have several long teeth and are not throwing weapons. Hunters use them to hit fish without letting go of the shafts.
The tips are usually flat and jagged and are inserted into the shafts, but are not connected to them tightly. Following the throw, the shafts are separated from the tips that enter the bodies of the victims. However, it was not so often possible to kill animals with one throw. Wounded animals, trying to hide, pulled on the rope, and poles floating on the water surface showed the hunters the direction of their movement. The victims could not free themselves from the points stuck in their bodies due to the obstacle from the side teeth.
Features of testing weapons under water
When testing a homemade product under water, a harpoon is inserted into the barrel, the spring begins to compress until it is fixed with a sear. When a click is heard, the harpoon snaps into place, which means that charging is complete.
When the hunter pulls the trigger, the sear moves into part of the piston and makes room for a spring sleeve that pushes the harpoon.
It is strictly forbidden to reload guns in the open air; this can only be done under water.
DIY fishing boat: video and drawings
Experienced fishermen know how difficult it is to catch fish that prefer to stay far from the shore using float or even bottom tackle. Using a boat also does not guarantee success, since cautious residents of water bodies are wary of unknown objects. A boat will help the fisherman catch ide, chub, asp and other predators in such a situation. This old tried-and-true tackle will deliver topwater bait far from shore where wary fish will attack it without fear. Such gear is practically not found on sale, so fishing enthusiasts make fishing boats.
Weapon on compensator
It is quite difficult to assemble a spearfishing gun on a compensator with your own hands these days. However, if you have parts from a traumatic pistol at hand, then everything becomes much easier. First of all, you need to choose a large block. Its width should be at least 6.5 mm. The channel should be made on it about 2.3 mm. In this case, the sear must be mounted on an aluminum winding. A hook should be fixed at the edge of the trunk. To install the fuse, you need to secure the clip. Its width should be at least 4.5 cm. In this case, a hollow cleaning rod is suitable.
The line for the weapon must be quite long. Due to this, the compensator can be installed at its base. The feeder must be at the clip. It should also be taken into account that the compensator should not come into contact with the trigger mechanism. In this case, the latch should be at a distance of about 2 cm from it. Thus, when the fuse is turned on, the compensator will not overlap.
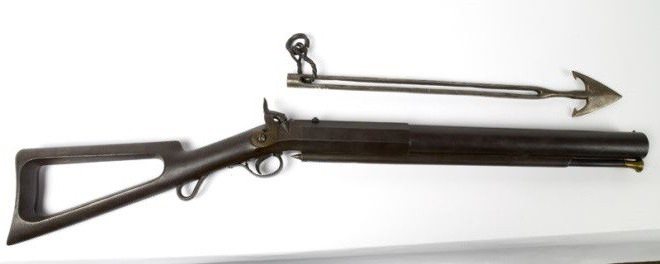
Spring shotgun
It is more widespread than all previous ones. It was especially popular until the middle of the last century, although some people still use it now. The gun has a powerful spring, under the influence of which the harpoon is thrown out of the barrel.
There are several modifications of this gun, with differences in the spring mechanisms, which:
Springs stretch; The springs are compressed; Two springs - the first is compressed, and the second is stretched.
In addition, one gun can be equipped with two springs of similar action, but different in diameter. A thin spring is placed inside a thick one, which increases the power of the gun.
Expanding springs are used in small models, while compression springs, on the contrary, are also more powerful. Double-spring - very strong, but difficult to charge.
The advantages of such products include simplicity of design, ease of operation, low cost and reliability.
Despite this, such guns are not advisable for beginners because they have:
Weak lethal force; Low buoyancy; Noisy during reloading and shooting; Low shooting accuracy. The barrel is thrown upward.
Operating principles of popular types of shotguns
The sale of equipment for hunting in the deep waters began with the invention of slings. The design of slings bears little resemblance to a gun, but it was this type of equipment that laid the foundation for the development of combat tools for underwater hunting. The sling is a metal spear with a special tip at one end and a rubber band (spring) at the other. By pulling the elastic band towards the middle of the prison, the mechanism is started. Using the mobility of the structure, the hunter aims and fixes the instrument in order to release the deadly tube at the right moment. The tension force guides the device towards the target. The span can reach more than one meter.
A vacuum underwater gun is assembled from a barrel, a piston and a large-diameter metal tube. To charge the device, you need to press the harpoon by moving the piston. The pressure creates a vacuum between the pipe and the handle. The design of the barrel provides an open hole at one end into which water is drawn when immersed. This creates natural pressure, which makes the power of the device even higher. The result is an effective shot. However, the force of the shot is not sufficient to kill large prey.
Spring devices were considered the most popular among underwater hunters in the mid-twentieth century. Even many modern experts prefer this configuration. The key element of the gun is a strong spring, which pushes the harpoon out of the barrel under strong pressure. The spring mechanism can function in compression or tension. There are also universal modifications that combine both types of springs.
The air gun system for underwater hunting is the choice of progressive hunters. This option works using the energy of compressed air. This no-consumption system is very convenient for quick recharging at depth. By loading the harpoon, the hunter creates pressure on the piston, which moves in the desired direction near the handle.
The piston creates compressed air in the chamber. The most extreme position of the piston is characterized by a stable position, which is maintained until the mechanism is started. Thus, the compressed air acts like a spring, creating a certain firing force when pumping. After the shot, the air remains in the chamber space, and the harpoon flies out of the barrel.
It can be difficult for an inexperienced beginner to understand all the intricacies of underwater guns in order to choose the most suitable option. Therefore, it is better to buy several devices for different bodies of water and types of prey, after consulting with experienced hunters.
Advantages and disadvantages of homemade products
Unlike expensive industrial designs, a homemade gun will not hurt your pocket and will not force you to sit on bread and water. You can assemble it gradually, taking turns buying materials and ordering complex parts from craftsmen.
If you do a little revision in your garage, you can save a lot. Cheapness is a clear advantage of a hand-made spearfishing gun. This should also include its low weight. It also does not require any permits or special training. Made it, checked it and go hunting!
Among the shortcomings, we can mention the noise level when shooting, although this problem can be easily eliminated, you just need to rub the spring and barrel with glycerin. Another disadvantage is limitations in choosing a target. It is unlikely that you will be able to harpoon a huge fish, but with such a gun you can effectively hunt medium-sized underwater inhabitants and get your dose of pleasure.
This design of a homemade speargun is not very complicated, lightweight and has good fighting power. Numerous experiments and refinements yielded the desired result.
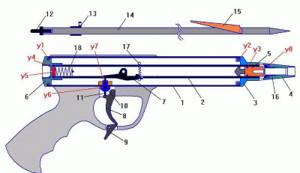
The picture shows a cross-section of a spring speargun for spearfishing.
| Spring underwater gun: 1 - harpoon, 2 - bushing, 3 - M3 screw, 4 - barrel, 5 - piston, 6 - mainspring, 7 - clip, 8 - bushing, 9 - M3 screw, 10 - hook, 11 - liner , 12 — fuse spring, 13 — sear spring, 14 — sear, 15 — fuse, 16 — trigger, 17 — line winding rod axis, 18 — handle, 19 — line winding rod. |
The harpoon is made of steel rod Ø 5 mm (“silver”). An M5 thread is cut at one of its ends and a hole for the line is drilled. After mechanical processing, the harpoon is hardened. The sleeve - the guide for the harpoon - is machined from stainless steel or duralumin.
The barrel of an underwater gun is a 12x1 mm tube. Material: brass or stainless steel. To allow free passage of water when firing or loading, holes Ø 4-5 mm are drilled over the entire surface of the barrel in increments of about 10 mm. The piston is machined from stainless steel or duralumin.
By the way, both the bushings and the piston can be made from sections of 10x2.5 mm tube, which will completely eliminate turning work in the manufacture of the gun.
The mainspring is wound from OBC wire Ø 1.6 mm. Initially, a wire is wound onto a Ø 6 mm rod, turn to turn, which is then stretched to obtain the required pitch of 4.5 mm. To ensure that there is no residual deformation when processing the spring, the wire must be released, that is, heated to approximately 300°C and cooled to room temperature. The end coils, having become red-hot, must be bent so that their plane is perpendicular to the axis of the spring.
The clip of a speargun is cut from sheet brass or stainless steel 1 mm thick. It is advisable to cut holes on its side surfaces by inserting a board of a suitable size after the workpiece is bent. This will avoid errors in the location of the holes on the right and left cheeks of the clip. During assembly, the clip is soldered to the barrel, focusing on the position of the slot.
The hook is designed for winding a harpoon line onto it. It is cut out of brass or stainless steel and soldered to the end of the barrel.
The insert is made of textolite, it is intended for fastening flat return springs. The liner is riveted to the holder, the springs are also riveted to the liner. It is advisable to use steel rivets; in extreme cases, you can use ordinary nails.
The safety springs of a speargun are designed to fix the safety in two stable positions. The material is steel strip 0.5 mm thick, grade 65G or U10A. It is best to attach the springs to the cage with screws or rivets.
The rod for winding the line is a piece of steel wire 2 mm thick. One of its ends is bent into a ring, with the help of which the rod is attached to the trigger.
| Drawings of parts of a homemade underwater gun. увеличить, 1000С...1323, 200 РљР' |
Homemade spring gun for spearfishing
If all the instructions and recommendations are correctly followed, it is possible to ensure that the spearfishing gun will be characterized by a sufficiently strong force to hit a fish of medium size and light weight.
Most likely, the damage radius will be no more than 3 meters.
It is also worth knowing some of the negative aspects of homemade spearfishing weapons:
- Significant level of noise when fired;
- Spring creaks during charging.
In order to reduce the level, you need to systematically wipe the barrel of the weapon and the spring with a rag, which must be moistened with glycerin.
It is worth paying special attention to the safety rules and requirements:
- It is necessary to charge the weapon only directly in a body of water;
- When going ashore, be sure to unload it.
- Shoot only if the water is clear and the target is clearly visible.
This is interesting: Illegal survivalist weapons
Any fisherman who tries himself as an underwater hunter needs to know that just shooting accurately is not everything; you need to not lose the fish from the harpoon.
Important little things
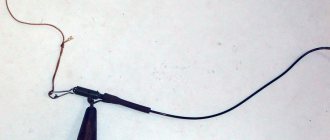
Kukan is a cable with a metal needle and carabiners that is attached to the belt. I hang the fish on the kukan: the bunch with the catch hangs on its side, and I swim further.
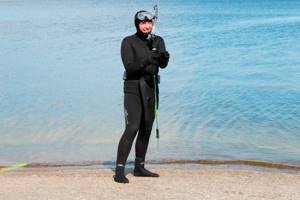
Kukan - a rope that hangs on the right
Knife - needed in case you get tangled in fishing nets while hunting. It must be carried with you for safety reasons. I got confused one night in 2021 when I was swimming in the middle of the fry: I just didn't notice the net. He quickly cut everything with a knife and swam away. I bought my knife at the Kondratievsky market in 2014, I wear it on the boot with rubber straps - these are included in the kit.
Flashlight. I like to swim at night when the fish are sleepy and calm. You can even swim up to the perch and touch it with your hand. During the day, everything is different: in the light of the sun, the fish is active, senses a person from afar and swims away. To swim at night you need a flashlight. Ordinary household ones are not suitable, you need a special one - for spearfishing. It charges from a battery, works up to five hours on a single charge, and works quietly underwater even in the cold.
When I swim, I hold the gun with my right hand, and the flashlight with my left, and use the candle in all directions and look for fish. I also leave a flashlight on the shore and turn it on in blinking mode. When I get out of the water, I see where the camp is.
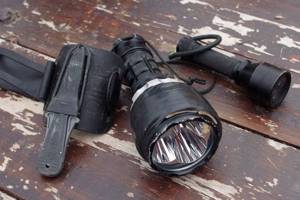
The photo shows my knife with mounts and flashlights. I have two flashlights: one I take with me, the second is a spare, kept in the car. I attached pieces of foam plastic to a large lantern with electrical tape - it became lighter, and my hand did not get tired
Rubber slippers are needed to walk from the camp or car to the water. You can walk straight in neoprene socks, but I feel sorry for them because they wear out. I have the most ordinary flip flops for 500 RUR.
Spare equipment. One day I went to the bay, swam for an hour, and the gun broke. I had to finish the hunt ahead of time and just sit by the fire. Another time, a friend and I came to the shore, and he forgot his socks. It's cold in the water without socks and it's impossible to swim. We ended up taking turns swimming. Now I take with me a spare gun and additional equipment: a flashlight, a harpoon, a couple of spearheads, socks, gloves.
