Feeder equipment is a connection of a fishing weight-feeder, a thin leash and a hook on a fishing line using several knots. The main purpose of feeder rigs is to achieve high sensitivity of the rod tip to the touch of the fish, create the effect of self-hooking fish, camouflage the feeder and fishing line.
In this article, we have collected 11 of the most popular feeder rigs and made a classification according to the conditions of fishing on the feeder - for flow on a river and in conditions of standing water on a pond or lake. They gave recommendations on the choice of equipment for all types of carp fish: crucian carp, carp, bream, silver bream, sabrefish and 10 other popular fish, including predatory ones.
See photos and video instructions to tie any of the feeder rigs with your own hands correctly, and get significantly more bites when fishing due to the sensitivity of the gear.
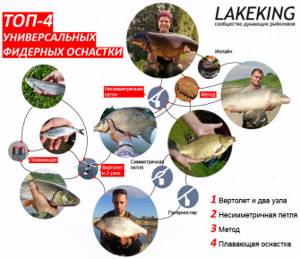
Table for selecting feeder equipment according to fishing conditions
| Fish | Reservoir, bottom character | Catching equipment |
| Carp | pond, silt | Method ↓ |
| river, silt | Method ↓ | |
| river, hard bottom | Inline ↓, Asymmetrical loop ↓ | |
| Carp | river, silt | Method ↓ |
| river, hard bottom | Inline ↓, Asymmetrical loop ↓ | |
| crucian carp | pond, silt | Method ↓, Symmetrical loop ↓ |
| river, silt | Paternoster | |
| river, hard bottom | Asymmetrical loop ↓ | |
| Bream and silver bream | pond, silt | Method ↓ |
| river, silt | Helicopter and two knots ↓ | |
| river, hard bottom | Asymmetrical loop ↓ | |
| Roach | pond, silt | Paternoster |
| river, silt | Symmetrical loop ↓ | |
| river, hard bottom | Helicopter and two knots ↓ | |
| White amur | pond, silt | Method ↓ |
| river, silt | Method ↓ | |
| river, hard bottom | Asymmetrical loop ↓ | |
| Tench | pond, silt | Method ↓, Symmetrical loop ↓ |
| river, silt | Paternoster | |
| river, hard bottom | Asymmetrical loop ↓ | |
| Bleak and Chekhon | fishing near the surface | Helicopter and two knots ↓ |
| shallow fishing | Helicopter and two knots ↓ | |
| Chub | pond, silt | Helicopter and two knots ↓, Floating equipment ↓ |
| river, silt | Helicopter and two knots ↓, Floating equipment ↓ | |
| river, hard bottom | Helicopter and two knots ↓, Floating equipment ↓ | |
| Vobla | pond, silt | Paternoster ↓ |
| river, silt | Symmetrical loop ↓ | |
| river, hard bottom | Helicopter and two knots ↓ | |
| Trout | river, hard bottom | Helicopter and two knots ↓ |
| Pike | river and pond, hard bottom | Helicopter and two knots ↓ |
| Zander | river, hard bottom | Helicopter and two knots ↓ |
| Som | river, hard bottom | Inline ↓ |
| Burbot | river, hard bottom | Inline ↓ |
Important components of feeder equipment and their properties
Main line. When installing a feeder fishing rod, monofilament fishing line is used. We recommend paying attention to the following brands: Mikado Sensei Feeder, Trabucco T-Force feeder, Shimano Technium.
The diameter of the monofilament is 0.2-0.24.
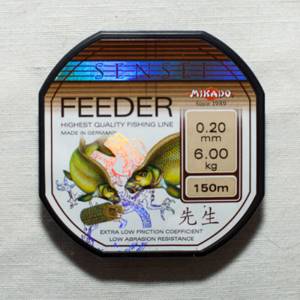
Mikado Sensei Feeder. Price: 180 rub.
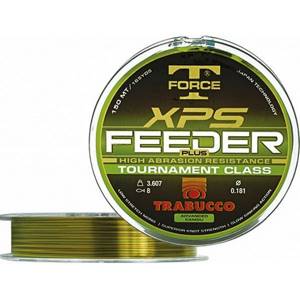
Trabucco T-Force Feeder. Price: 350 rub.
![]()
Shimano Technium. Price: 1150 rub.
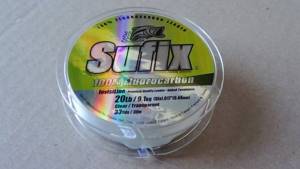
We do not recommend the brands Salmo, Colmic, Gamakatsu, Owner, Suffix due to their insufficient hardness. In feeder fishing, it is very important that the line does not stretch. This allows the tackle to remain sensitive to bites and accept even the smallest touches of the fish on the tip of the rod.
Attention! Why don't we use braided line?
The fact is that feeder fishing involves constant rubbing of the fishing line on the bottom of the reservoir. Braid is susceptible to rapid abrasion, while monofilament, on the contrary, practically does not deform when in contact with gravel, stones and snags.
However, quality braided line is used in competitive fishing. If you want, we recommend Pontoon 21 Extreama 0.14-0.16 mm. Price: 1050 rub. for 100 m.
Fluorocarbon leashes. The hook is tied to a fluorocarbon line (fluorocarbon) for two reasons:
- This line is almost invisible in the water and does not scare the fish.
- It has increased rigidity, and this reduces the tangling of equipment. The length of the leads, depending on the equipment, is 10-100 cm. For example, in the Method equipment it is 10 cm, and in the Helicopter and two knots it is 100 cm.
Best models: Pontoon 21 Grand Fluorocarbon and Owner Broad Game Pro 0.1-0.31 mm.
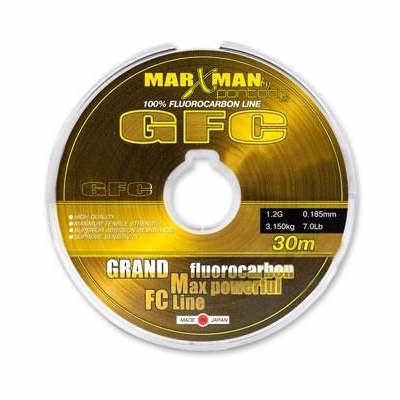
Pontoon 21 Grand Fluorocarbon. Price: 655 rub. Owner Broad. Price: 330 rub.
There are ready-made leashes on sale: Owner RL 340 (thin hooks for bream), RL 330 (yellow hooks for corn), RL 044 (dark hooks for a worm). A choice for those who do not want to knit a leash with a hook and make a loop to the rig themselves.
Thickness of leashes. For a leader with a hook, use 0.1-0.2 mm depending on the weight of the intended fish. Up to 1 kg of production, 0.1 mm of fluorocarbon will be enough for you. The Running Feeder Rig and some others use a 0.3mm rigid fluorocarbon line take-off.
Swivel with carbine. It is important to choose a swivel commensurate with the feeder feeder, especially when using non-branded models. We recommend using an Owner swivel No. 14 when using a feeder larger than 60 g, and when fishing in still water using a small feeder - No. 12.
Important! Use a swivel only in black or dark colors, but never gold. Bright elements of equipment can scare away fish.
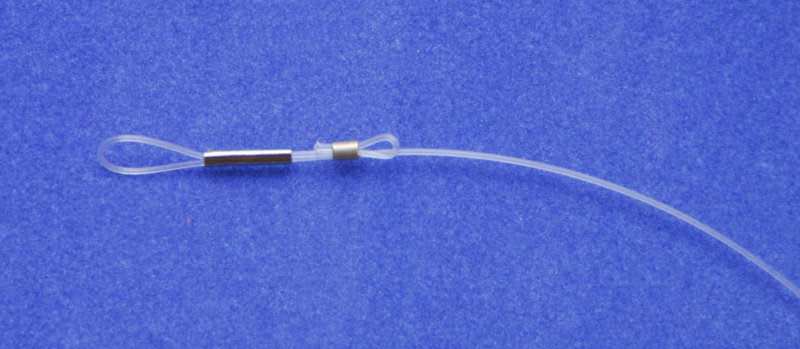
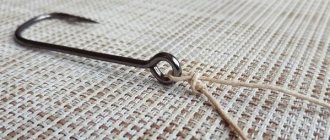
Crimping tube for loops
Crimping tube. An optional element, but can be used to make some equipment that uses thick monofilament fishing line. The crimp tube helps secure the hook to the fishing line without using knots at all. Nevertheless, we advise beginners to study the basic nodes and use them first.
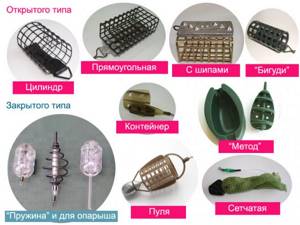
Feeder. In total, 7 types of feeder weights are used in feeder gear, differing in their design. Key parameters to pay attention to:
- Feeder shape. Round and spiral are suitable for fishing in still water and in the absence or very weak current. Square and flat feeders are ideal for fishing in the current, as their shape does not allow the current to move the feeder from its place.
- Weight. Feeders up to 30 g are ideal for fishing in still water, and at the same time, you can throw such a load with a feeder rod at 50-80 m quite easily. For fishing in the current, use heavier feeders. Weight depends on the strength of the current and the depth of fishing. For example, in the Volga region on the Volga they use 120 g square feeders.
- Presence of thorns. Again, when fishing in the current, use feeder feeders with spikes.
- Shape and placement of the sinker. Important for the quality of self-tapping of feeder equipment. The more massive the side of the sinker is close to the hook, the harder it will be for the fish to move it, therefore the quality of hooking increases.
- Closed or open types. The closed feeder is designed for small feed that is easily sprayed into the water. The most popular are the spring and feeder for animal baits. Open - with a sharp pull, it is easily freed from the bait, pouring out in the right place. Varieties: cylindrical, rectangular, “curler”, container, “Method” (Method), with spikes and a bullet feeder that flies well.
Limit stop. The element is important for protecting the units from the heavy elements of our installations. Use hard rubber stoppers, soft plastic is a little worse, and it’s much worse to use beads as a stopper because of their hardness. Sooner or later they will damage the node.
Anti-twist tube. It is useful in equipment with the same name (the second name is “rocker arm” or “anti-twist tube”). Serves to move the fishing line with the leash to the side, which reduces the number of tangles in the equipment. They are used in currents and extremely rarely in still water due to the massiveness of the element.
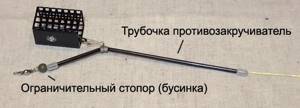
Anti-twist tube and bead stopper
Hooks. Choose sharp, strong hooks that won't bend or break. Editor's Choice – Owner. The standard size for the feeder is No. 6-8. But for catching medium and small fish, they use up to No. 16 (roach, bream, silver bream), and when catching bleak on a floating rig - No. 20.
Hook sizes according to Owner classification
There are other elements, but they are used less often and we will talk about them further.
Relevance of application
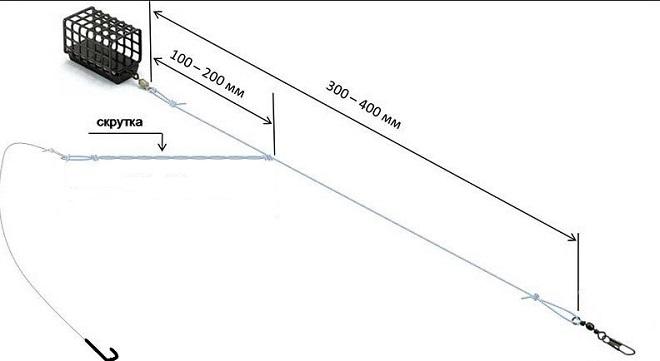
The beneficial properties of twisting are used in many types of fishing.
- When fishing on a feeder for a diverting leash.
In this case, hard Skr. moves the leash with the hook away from the feeder , which prevents the monofilaments from tangling and overlapping each other.
You can also use Skr for the feeder. For float fishing, to equip the fishing line with several hooks.
If there is a need to install additional hooks on a fishing rod with a float rig, a small hard SCR helps to remove the hook or leash with a hook from the main monofilament line . This equipment option is possible if the float rod is equipped using modern methods: a sliding float and a sliding sinker, limited in movement by cambrics.
By moving the sinker and float to the free space of the monofilament, you can install additional hooks under or above the sinker.
A half-bottom is a fishing rod with a reel on which a fishing line with hooks is wound, at the end of which a sinker of the desired weight (usually 30-40 grams) is tied. This design allows for long casting. The bite is detected due to the activation of a signaling device from the vibration of the fishing line or due to the jerky chaotic movements of a large float freely moving along the fishing line (most often a foam ball painted in a bright color is used). In this case, the float-ball does not record the diving depth of the bait, but only signals a bite. For equipping donks with bends with hooks or leashes.
For donkeys, you can also use Skr., SkrO and SkrOP as outlets for attaching hooks (or leashes).
Making carp rigs with your own hands
We have already touched on the topic of carp rigs superficially. Now let's look at them in more detail.
Carp installation “Safe clip”
Safety clips are an element that attaches the sinker to the fishing line, facilitating the easy release of the fish from the sinker if the main line breaks.
This equipment has advantages over other equipment when fishing in snags, since the load is secured in a safe clip, which guarantees detachment under strong tension.
We will need:
- Leadcore (thickness 45 lb). This element has a braid and a lead core. It plays the role of weighting the equipment at the bottom so that the fishing line does not hang in the water column and does not scare the fish. The second role of leadcore is that it is a safer material for fish when playing. The carp will not be scratched during sharp maneuvers because the material is soft and thick.
- Mounting needle for leadcore.
- Quick release with swivel.
- Safety clip (Safety Clips, with a lock for blind equipment or sliding) - plastic or metal. The disadvantage of plastic is that it breaks during forceful casting. There are also metal options on sale, try it.
Instructions:
- We fix the leadcore in the needle. To do this, take out a core about 3 cm long from it and bite it off with tongs. Return the braid to its original place and bend the leadcore where the core ended. At the bend, pierce the leadcore with a needle and bring it out after 2 cm towards the tip.
- We put the swivel on the tip of the leadcore, and then hook the hook of the needle on this very tip and begin to move the tip of the leadcore inward with slow rotational movements left and right - forming a loop.
- Cut off the extra piece of the tail, leaving a little more than 1 mm. We tighten it very tightly. The harder you pull, the more firmly the braids will be attached to each other and will not unwind.
- We drip a drop of Moment Pro glue in the place where the leadcore shell went inside for an additional guarantee of strength.
- The length of the leadcore will be 60 cm. We perform the same operation from stages 1 to 4 on the other side. And yes, the presence of leadcore greatly distinguishes carp rigs from classic feeder rigs.
- We insert the needle into the clip from the side where we will have the cone, fasten the leadcore into the needle and pull it through the clip to the very end.
- The clip is put on the swivel on the other side of the leadcore. It is important to secure the swivel in the clip using a small plastic quick release, this is part of the clip itself.
- Step No. 7 is also done with the cone for the clip.
- We put the sinker on the clip and fix it with a cone.
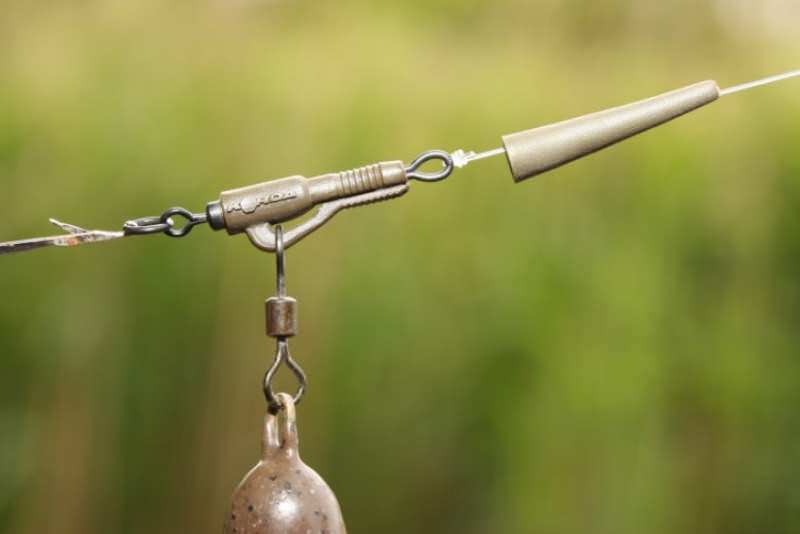
Carp equipment Inline (Inline)
There are many types of Inline installations described on the Internet, and most of them structurally replicate the Running Feeder Rig. But historically, Inline is a carp rig for carp fishing (waiting) fishing, not feeder fishing. In carp fishing, a feeder tip is not used as a bite alarm, but a bite is detected by an electronic alarm. When the line is released from the reel, the alarm makes a sound. Naturally, this is a sliding equipment, which means it is sporty.
Inline is suitable for fishing on rocky hard bottoms and shell rocks. Unsuitable for fishing in snags, since the sinker does not shoot off under strong tension. It's also bad on muddy bottoms.
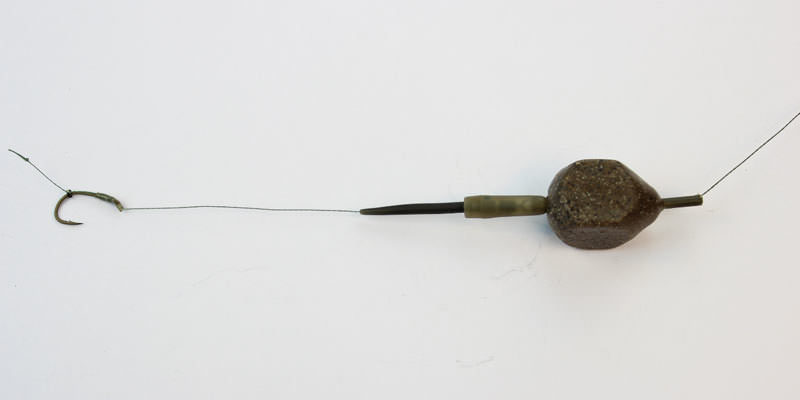
Feeder installation Inline is very good at self-hooking carp and carp due to the drop-shaped shape of the sinker. The part of the sinker close to the leader has a thickening, which gives much more resistance to lifting from the bottom. Consequently, the hook with the sinker is sharper.
You will need:
- Inline cargo
- Leadcore (with or without core) length 60 cm
- The needle is thin for leadcore
- Large broaching needle
- Scissors and glue
- Swivel
Instructions:
- We form a loop at one of the ends of the leadcore (we use leadcore without a core). Apply glue to fix the loop.
- We fasten the swivel using the “loop-to-loop” method.
- We insert the mounting needle into the Inline sinker from the side of the connector tube (narrow part), and attach the free tip of the leadcore to the needle. We tighten the swivel inside the sinker by pulling on the free tip of the leadcore.
- The leash is attached to the swivel using the loop-to-loop method or another reliable knot.
Manufacturing process
To make a twist, you need to fold the fishing line in half and twist it, fixing the ends of the braid with a figure-of-eight or double-triple simple (surgical) knot. Manufacturing is generally identical for different cases, however, depending on the type of equipment, there are nuances. Applicable in the following cases:
- Retraction to a leash in a paternoster;
- In an asymmetrical or symmetrical loop;
- Retraction on a leash in inline (running);
- Transfer to the feeder online;
- Twisted from feedergam.
Material
Material requirements:
- You need to twist a rigid line. A soft twist will tangle and wrap around the main line, just like a regular lead.
- This is the direct working part of the equipment, which is in contact with the bottom, stones, and shells. An important characteristic is abrasion resistance, resistance to abrasion and microdamage.
- The best material is real 100% fluorocarbon. However, such material is expensive. As an alternative, a regular rigid feeder line is suitable, rigid, inextensible, and resistant to damage. Typically, fishing lines and fly with a diameter of 0.28-0.31 mm are used to form montages.
- When using shock absorbers made of feedergam or plug rubber to strengthen the equipment (in the absence of this material with the required tensile load), they can be twisted, thus increasing the thickness and strength. Rubber braid also improves the leader's retraction from the rig due to its elasticity, but to a lesser extent than fluorocarbon or rigid line.
- In some carp setups, it still makes sense to use braids made of braid, leadcore and leader material. But this applies more to carp fishing than to feeder fishing.
Paternoster
As already mentioned, you need to twist the feeder using a fishing line, and a rigid one, or use fluorocarbon. Therefore, it makes sense to knit a twist on a feeder paternoster if the main one is a monofilament, or a shock leader made of the same material. In this case, the braid is knitted directly on this fishing line or shock leader as a single whole, in the process of creating a paternoster. When used as the main braided cord, the paternoster is made as a separate installation from fluor or fishing line, and is entirely attached to the feeder equipment using the loop-to-loop method.
The advantage of the paternoster, which is why novice fishermen love it, is the simplicity and speed of creation. Twisting in the design complicates the process somewhat. But it solves the main problem of novice feeders who try to fish with this equipment - twisting and tangling of the leash.
Making a paternoster with twisting:
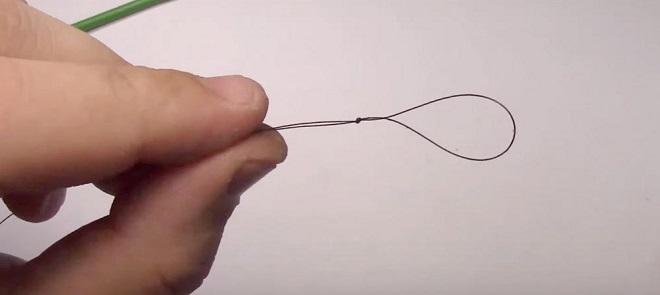
- We fold the fishing line in half and form a small loop for the leash at the fold. This must be done with a figure eight or surgical knot. Don't forget to wet the knot when tightening.
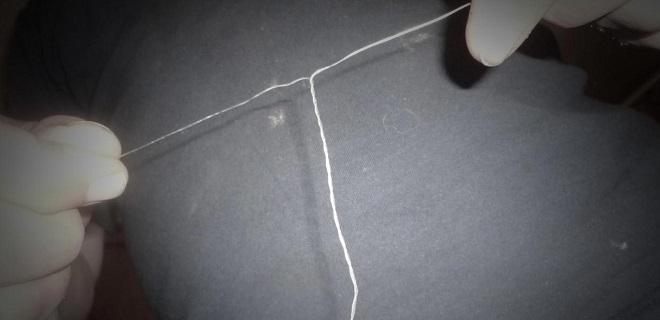
- We form a twist. There are two ways to do this. The first is to take each end with your hands and twist it inward with your fingers. Second, we lightly clamp the loop with our teeth and braid the ends together.
- We make the length such that it, together with the loop for the leash, is longer than the branch with the feeder.

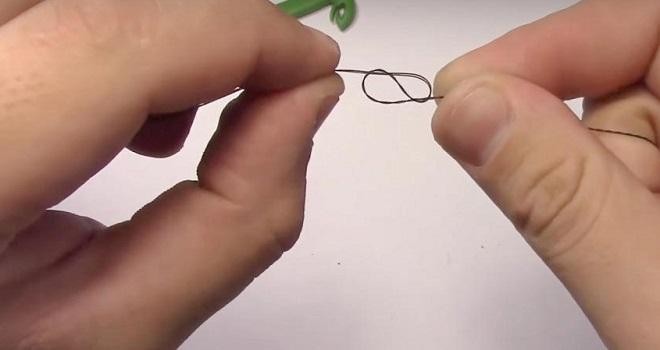
- We secure the other end of the braid with a figure eight again.
- Thus, we get a twist from which two ends come out. One is for the main fishing line (for a loop attached to the main cord in the case of knitting a separate equipment), the second is a branch for the feeder.
- We cut the second end to the required length and attach the feeder (via a swivel with a clasp or a loop).
Improvement of equipment
Feeder Gum, Power Gum
Feedergam dampens sudden jerks of fish. This is a piece of rubber between the feeder equipment and very thin fluorocarbon leaders (for example, 0.1 mm).
Feeder rubber is important for creating a shock-absorbing effect in the equipment. This is especially important when using the main cord - braid. Length – 10-12 cm, thickness 0.6-0.8. Feeder Gum provides delicate fishing with very thin fishing line (0.1 mm).
Installation:
- Pull the feederham. When the knot is pulled together, it will return to its original state and give the knot greater strength.
- Make loops on the feedergam using a figure eight knot on both sides of the elastic.
- The feeder will be an intermediate link between any of the rigs and a fluorocarbon leader. Everything is attached using the “Loop to Loop” method.
Important:
- Don't make the feeder ham long. Up to 15 cm is ideal. 30 cm is too much. The longer the rubber, the more the equipment gets tangled and the less sensitive the equipment is.
- Don't use colored rubber bands. Take transparent ones. This doesn't scare the fish.
- Do not glue the elastic knots. This eats away at the feeder.
- Lighten your feeder rigs. Do not use swivels when attaching swivels. Only using the “Loop to Loop” method. This will reduce weight and reduce the amount of debris that can be caught from the bottom by unnecessary elements in the installation.
Asymmetrical loop + feedergam = the best combination.
Protection of equipment from snagging
In order to protect the equipment from getting snagged on snags or falling through stones, reduce the thickness of the fishing line on which the feeder weight is attached. If you get hooked, you will lose the feeder, but if there was a fish on the hook, you will fish it out.
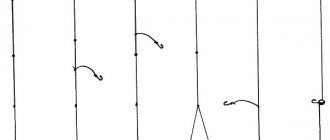
Applicable in snap-ins:
- Paternoster and Gardner's loop.
- A helicopter and two knots, if you knit a large loop on a thinner line.
On Inline, Method rigs - use a safe clip. Once caught, it will come unfastened.
Making a leash from braided fishing line with your own hands
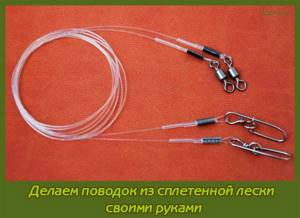
Making a leash from braided fishing line with your own hands
At the moment I will tell you how to make a leash from braided fishing line. It is done quite easily.
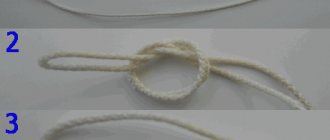
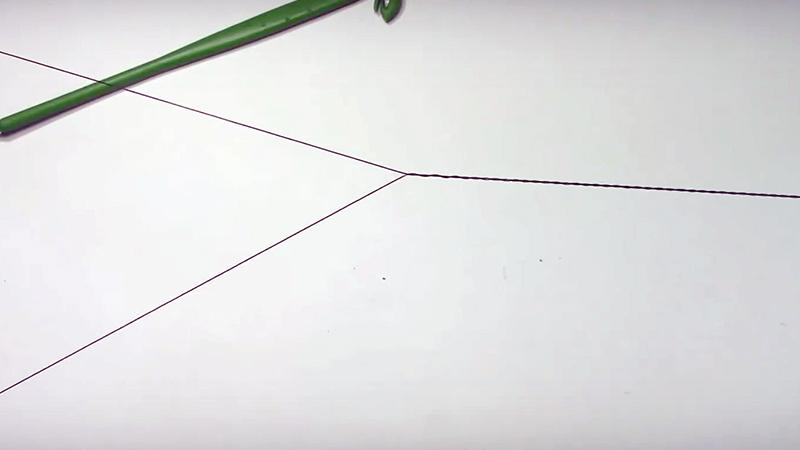
We take the fishing line, fold it in half and tie a small knot. We tie a knot so that the twist holds.
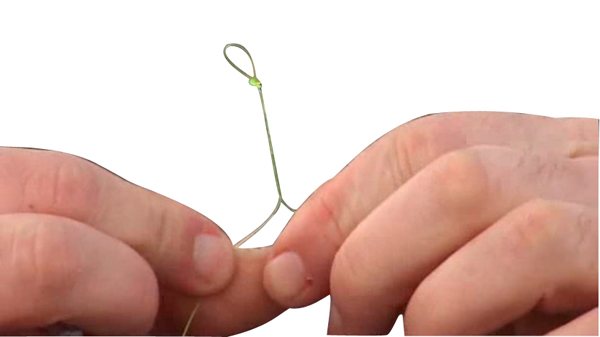
Now we take the two ends of the fishing line and begin to twist them in one direction, in one direction (Fig. 47-29). We intercept and move on. Now, we have made a twist, now we need to tie the next knot so that the twist does not run away. We tie it, move the knot to the edge and tighten it.
Rice. 47-30 We had a twist. We bite off the extra end (Fig. 47-30). We tie any wire fastener to one side of the twist, and we get a leash from a fishing line twisted twice.
Rice. 47-31 It is quite elastic, so to some extent it helps to avoid overlaps.
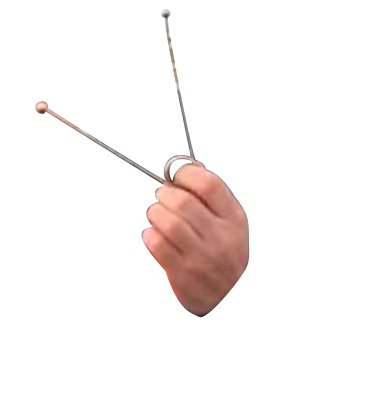
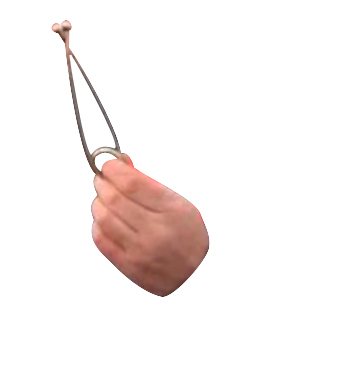
Rice. 47-32 On every pike fishing trip, it is imperative to have a device like this (Fig. 47-31, 47-32), thanks to which we can open the mouth of the pike when it grabs the bait in order to reach it.
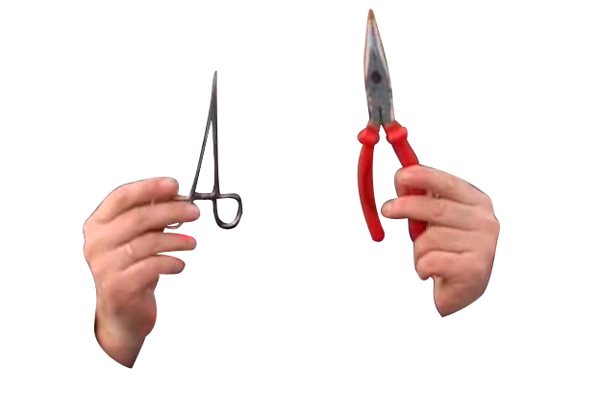
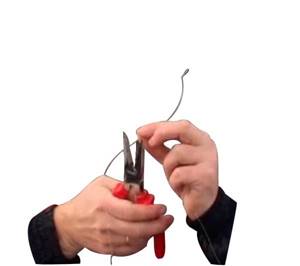
Rice. 47-33 And either long-nose pliers, or a surgical clamp, in order to detach the bait without cutting your fingers (Fig. 47-33).
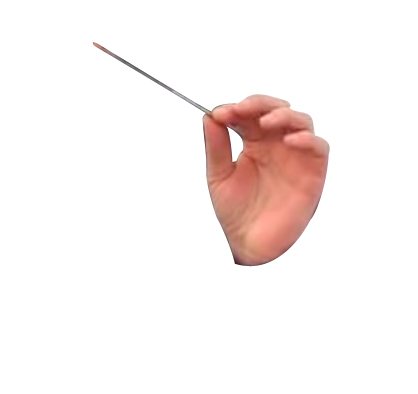
Rice. 47-34 In addition, you need to have a diamond file with you on every fishing trip in order to sharpen the hooks (Fig. 47-34). In addition, the hook on the balancer can be easily bent using pliers.
Leash for pike fishing. With my own hands.
Take action!
- Equip your feeder rod with a rigid, inextensible monofilament line, for example, Mikado Sensei Feeder 0.24 mm 150 m . This will increase the number of bites.
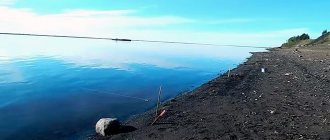
- Decide on fishing conditions. Let's say we want to catch bream on the Volga . This river usually has a current and a hard bottom, so we will use a Helicopter feeder rig and two knots . Assemble it directly on the main line according to our instructions from this article. It will take no more than 10 minutes.
- Since fishing takes place in the current, at great depths and at a distance of at least 50 m from the shore, you should choose a feeder weighing from 80 to 120 g . Choose a square shape with spikes so that the feeder does not slide along the bottom.
- a fluorocarbon leader 0.3 mm thick and 1 m long to the feeder rig . At the end there is hook No. 8 according to international numbering. Bream does not have a very large mouth, so small hooks should be used.
- a bunch of maggots as bait . Bream really loves bunches of 5 or more pieces.
- The bait must contain sweet ingredients (vanillin, chewing gum flavor, cake).
- After catching a fish, not necessarily bream, please share your experience here in the comments below the article. Thanks for reading!
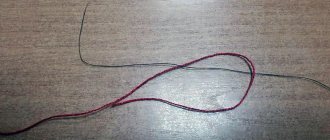
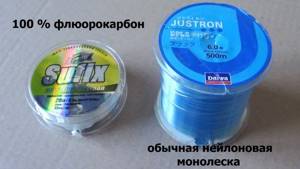
Fluorocarbon twist leader for rigs
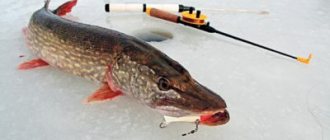
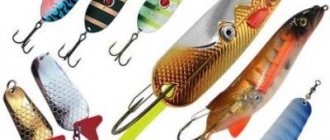
A fluorocarbon twisting leader for girders is less noticeable in the water than a metal leader. It is practically invisible to fish, which increases the number of bites from pike and other predatory fish.
When I started fishing in Canada, I of course used a variety of traditional metal leaders. Later I learned that many fishermen began to use fluorocarbon not only for summer fishing, but also for winter fishing. Little by little I switched to flurika leashes for harnesses.
fluorocarbon itself came into the fishing language from the chemical industry, after in 1969. The Japanese corporation Kureha Chemical Industries has invented a new polymer for the needs of the oil industry. It turned out to be durable, wear-resistant, able to withstand high temperatures and aggressive chemicals.
Some time later, this concern released the first fluorocarbon fishing line for anglers. In addition to the characteristics described above, what anglers liked about this line was that it was much less noticeable in the water than traditional nylon mono lines. Refractive index of light in water = 1.3; fluorocarbon = 1.42; traditional lines = 1.52. And if such differences are not very noticeable to the human eye, then this difference had a significant effect on the activity of the fish.
During winter fishing, metal leashes are very visible in the water, which ultimately scares away the fish, especially in the middle of winter. To increase the number of bites, we used leashes made of ordinary monofilament, but as practice has shown, pikes easily snacked on them. Therefore, they were replaced by fluorocarbon leashes. This is more expensive than nylon line, but ultimately cheaper than metal leaders. Over several years of fishing, I haven’t had a single pike lead cut, but it’s worth saying that I haven’t caught more than 4 kg of pike.
It is also worth saying that pike still easily bite through thin fluorocarbon. Therefore, for pike leashes, it is worth taking leash material with a diameter of 0.35-0.4 mm. Twisting reduces the chances of the pike cutting off the lead when fishing.
In local Canadian stores you can most often buy “100% Fluorocarbon” not as a main line, but as a leader material - a 30-meter reel. You can also find “Fluorocarbon coated” fishing line, it differs in that there is a nylon fishing line inside it, and fluorocarbon only covers it on top. Hence the name - “fluorocarbon-coated” fishing line. It is cheaper than 100% fluorocarbon, so it is not as expensive to use it as a main line.
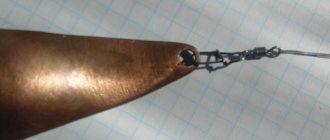
Fluorocarbon line for leaders may seem expensive, but it's worth it. For example, to make one 30 cm twist leash it takes me 80-100 cm, i.e. from one bobbin I can make at least 30 leaders, which is enough for several seasons of winter fishing. In addition, in the summer I use the same fishing line for leashes for bottom fishing, especially on stones and behind shells, where it has proven itself very well in terms of wear and tear.
In this video I will show you how to twist fluorocarbon to get a leash for a harness:
Fluorocarbon practically does not get wet in water, so its strength characteristics are not affected. Regular monofilament can pick up water molecules, expand and lose properties. In cold weather, this property of fluorocarbon is very beneficial - the leash material does not freeze and does not lose its properties.
Also, fluorocarbon does not have “line memory”, i.e. In case of any tangles or overlaps, the fishing line retains its original condition. The pike actively fights when fishing, spins under the hole, after several catches of pikes, metal leashes turn out to be absolutely unsuitable for further fishing, it is impossible to straighten them. The fluorocarbon leader remains straight even after repeated fishing with active fish.
As you know, pikes have very sharp teeth, so after every fish I catch, I check the roughness of the fishing line with my hands. If my hand glides without problems, then I continue to use this leash; if there are a lot of rough spots, then I knit the leash again.
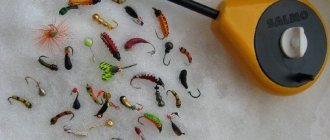
I also tie the leashes if I change the size of the tees. In past years I fished with small live bait, so the hooks were of minimal size. Starting this year, you can only fish in Quebec with dead fish, and the frozen store-bought fish that I started using as bait are larger and thicker than the live bait that I had before.
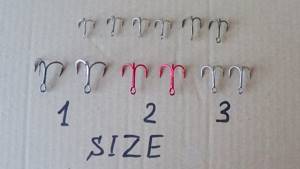
So this year I tied up all the leaders and made them with large treble hooks (size 1 and 2; I used to fish with the ones on top in the picture). In general, I think that it is better to use different sizes of tees, hence you need to have spare leads. I knit them at home so that my hands don’t get cold on the ice.
It’s worth mentioning one more property of fluorocarbon, but this is more suitable for summer fishing. Fluorocarbon is heavier than water and nylon, so it sinks 2.5 times faster than nylon. This property is useful for fly fishers and floaters. I have enjoyed using fluorocarbon leaders when fishing for trout and trout.
In general, if you decide to make twisted leashes from fluorocarbon, do not be afraid of its price, because the number of bites when using it increases, which means the chances of coming home with a catch become several times greater.