Bells on the feeder - types and methods of fastening
In some situations, a bell on the feeder is still used, although in the classic version it is customary to track the bite by vibrations of the quiver tip. During active tempo fishing there is no time to bother with bells. However, when fishing is slower, for example, when waiting for large fish or when fishing with flat rigs, many amateurs consider the use of such alarms to be advisable. Let's look at how to install the bell on the feeder correctly and what technical solutions to use for this.
Feeder alarms
In feeder fishing, many different bite alarms have been invented. These are a variety of pendulums, rattles, swingers, side nods, electronic signaling devices and, of course, bells or bells. Most often, all these solutions are used for targeted fishing for carp or carp, when the gear is installed for a long time. At the same time, the fisherman is engaged in some other business on the shore, and reacts to the activation of a sound or light detector. Read more in the article about feeder alarms.
This kind of fishing is highly specialized and more similar to carp fishing. For ordinary amateurs, all these bells and whistles are not needed, but sometimes an alarm is required, especially when bites are not frequent. In this case, the principle “the simpler the better” works. The main inconvenience of all these gadgets is installation problems. Additional structures appear on the gear, making it more difficult to work with. If this is justified in the waiting tactics, then in active fishing problems may arise - overlaps, entanglements, loss of time for installation. The vast majority of anglers use simple bells. If you need it, you put it in, if not, you take it away and you catch it using the quivertip. Let's look at how to place the bell on the feeder correctly so that it does not interfere with active work with the tackle.
How to make your own electronic signaling device
Principle of operation
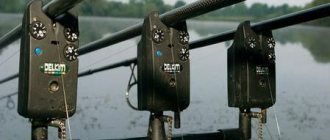
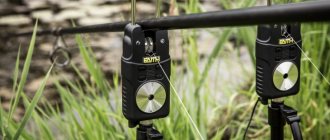
An electronic bite alarm installed on a feeder is a device that reproduces the action of opening and closing an electrical circuit through a feeder line during a bite. The alarm has both sound and light warning signals.
How it is made
To manufacture the alarm, you will need a housing, which may consist of a plastic box. The indicator of the alarm can be operated by an LED, which will be mounted on the housing. The sound capsule is attached to the wall inside the housing in a tight-fitting manner. The battery is also installed in the inside of the case. You also need to place a corner in which the spring will be attached at one end. Next, a small ring should be attached to the top of the spring.
It is necessary to take into account the attachment of a piece of additional fishing line, which will be attached at one end to the ring on a spring, the free part of which is brought out through a hole on the body located opposite the ring. A clothespin is attached to the free part of the fishing line, which will be located on the outside of the body. The electronic parts of the alarm will be located inside the housing. The reed switch is attached to the free edge of the spring, which must be fixed with threads. A magnet attached to a metal plate is attached to the side wall of the housing and is located on the side of the reed switch, which facilitates its movement towards the magnet.
The signaling device, during its operation, must be attached to the rod. The clothespin must be hooked onto the main fishing line. When the fishing line is pulled, an action mechanism is activated, as a result of which the reed switch will begin to approach the magnet, as a result of which the alarm goes off. At the same time, the electrical circuit will work, which contributes to the lighting of the light bulb and the operation of the sound capsule.
Bells
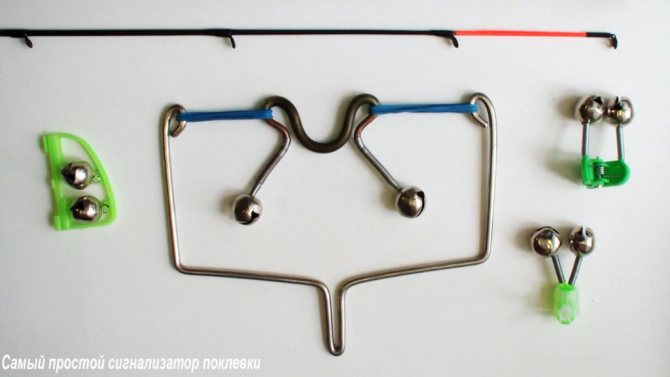
Finding the bells themselves is not a problem - there are plenty of them in all fishing stores for a penny price (unlike expensive special alarms). These are both ordinary sleeves with tongues, which used to be hung on hooks, and spherical bells with balls inside on a clothespin, attached directly to the fishing rod. You can hang a bell on the feeder on the rod itself, as well as on a stand for it.
Bells on a clothespin
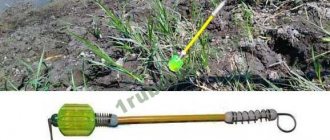
The most common option is ordinary bells on a clothespin for donks. You can hang the bell on the feeder directly behind the quivertip. You can find a variety of fastening designs in stores. In addition to clothespins, these can be various connectors, magnets or latches. The standard method of attaching rods with clothespins leads to the following problems:
- The bell flying off while working with tackle, especially when hooking.
- The bell may fly away during casting. Each time you have to remove it and install it after throwing it. This is inconvenient, especially on long rods.
- Constant snagging of any clothespins, and especially metal crocodile clips, on the quivertip leads to microdamage to this part of the rod, which will ultimately render the tip unusable.
- Some anglers simply don’t like too loud sounds and ringing when reeling in or retrieving gear. This violates the general silence and idyll on the pond.
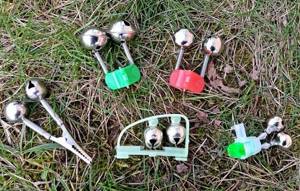
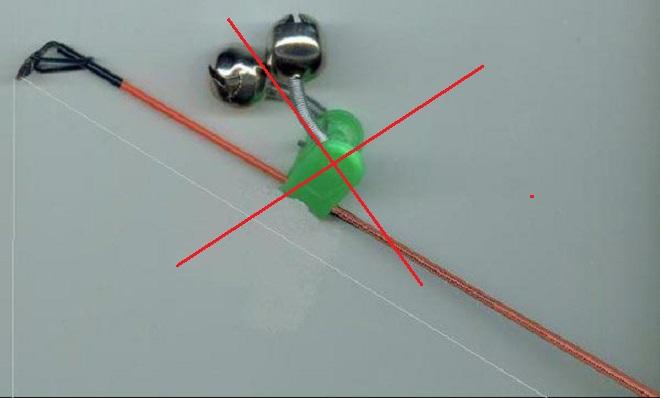
With axial fastening for quivertip
Problems with bells constantly flying off, taking off and putting on when casting are solved by another design - on a bar with axial grooves for snapping right on the tip of the rod. The bell for the feeder can be secured more firmly with this design. It can still fly out when casting. And fishermen easily solve this problem by wrapping the attachment point with a couple of turns of electrical tape. You can tear off a regular bell with a spring from a clothespin and tape it to the quivertype with electrical tape. However, such fastening of the bell to the feeder gives rise to another problem - an increase in the likelihood of the braid getting caught on this alarm when casting, which, when using heavy feeders, leads to the shooting of the braid or breakage of the quiver tip.
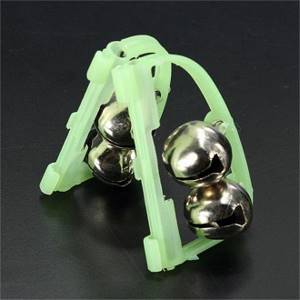
There remains an ethical drawback - a constant and loud ringing while working with the feeder. To get rid of the constant ringing that plagues everyone, some fishermen make structures using neodymium magnets. In them, the bell jingles when there is a bite, but with strong vibrations (reeling, casting) it sticks to the magnet and is silent. However, this design is also located on the rod itself and can lead to overlap.
DONKS WITH FEEDER
Pre-feeding is an integral stage of any fishing. All kinds of mixtures of cereals, legumes, cereal grains, mixed feed, cakes, and so on can be used as bait. In spring and autumn, adding components of animal origin - chopped worms, for example, works well. First, massive bait is applied in the fishing zone, then targeted.
When using bottom gear of all types, the problem of delivering complementary food to the fishing site is urgent - we are talking about long distances. For this purpose, a boat is used (only before fishing, otherwise the frightened fish simply will not approach), special remote-controlled boats, self-expanding rocket feeders, slingshots, catapults, and so on. At short distances, it is permissible to throw food by hand, having previously rolled it into balls with the addition of binding and weighting elements (oats, starch, soil, etc.).
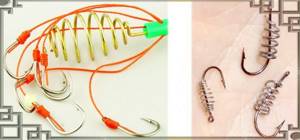
Special feeders that are attached directly to the equipment should be placed in a separate category. Go to any fishing store and you will see a lot of options. The clearest example of such a feeder is a spring, which is used both on good old feeders and on feeders. It allows the bait to “float” slightly without immediately disintegrating in the water, which increases the duration of its “action”. In addition, the presence of a spring helps improve casting accuracy.
The so-called “makushatnik” demonstrates high efficiency when fishing for carp and carp: a sinker with a “makukha” (bait made from cake). Its only disadvantage is its narrow specialization: only cake, and nothing more.
When casting far, which is practiced when fishing with a bottom, the angler may encounter the problem of baiting fish. How to accurately deliver bait to the site of an abandoned donkey? As a result, the idea was born to modernize the gear, which received a small feeder attached with a carabiner.
SPRING
Many fishermen made primitive homemade feeders from small springs. Today, such spring feeders are effectively used for bottom fishing.
The main object of fishing with spring feeders is white fish. Such fish include bream, bream and carp. In rare cases, crucian carp and silver carp are caught using springs. The choice of bait and bait for fishing largely depends on the specific characteristics of the reservoir and the preferences of the local fish.
FEEDER
In specialized stores you can find dozens of different models of feeders, which differ in their weight and shape. They are designed for various fishing conditions and various purposes. However, they are united by the fact that the main purpose of the feeder is to attract fish.
Such feeders are very popular when fishing with a feeder. You can make your own feeder from metal wire and lead. You can also purchase ready-made varieties of feeders in specialized stores. Their cost is not high, but at the same time they are effective and allow you to lure fish efficiently, thereby increasing the chances of success.
Remember to use the same bait on the bait and on the hook. This will allow you to successfully catch even the most cautious and large fish.
Installation on a stand
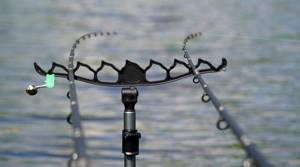
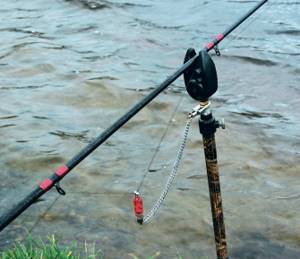
Experienced feederists argue that even if you use a bell, you need to hook it to the stand on which the feeder is installed. This immediately solves all the problems - there is no constant ringing when casting and retrieving, there is no need to farm anything on the rod itself, there is no need for constant installation and removal when casting. Installing the bell on the feeder by attaching it to a stand is the most correct option. However, there are pitfalls here too. A bell that is incorrectly attached to the stand may simply not respond to bites. The rod should be placed on the stand so that it lies on it in the upper third, almost at the quiver tip. In this case, the farthest (first) stand, closest to the tip, on which the bell is hung, should not be inserted tightly, but hingedly and have a slight movement to the right and left. Then, when biting, vibrations will be transmitted to the bell, and it will jingle.
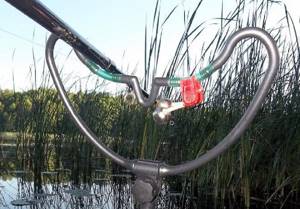
A convenient option for an amateur is a swinger on a chain, without any electronic fillings (then it costs 100-200 rubles). It operates on the principle of a simple counterweight, like on the good old kiosks. This gadget is needed in cases of hatching rarely biting fish when fishing not with a quivertip, but with free reeling. For example, when fishing for carp or carp, especially with inline montages. Moreover, if the tackle is left for a long time, a large fish can simply pull the feeder into the water if the clutch is not loosened. The swinger is attached with a chain to the stand, and the heavy part is attached to the fishing line in the area of the first ring from the reel with special hinges. When jerked during hooking, it simply breaks off the braid and remains hanging on the stand. A bell is placed on the chain, and when the swinger twitches during a bite, the ringing will be heard from afar. This is useful when fishing with several gears installed at a distance from each other.
The simplest devices
A donkey alarm is a must. The easiest way to place it is to find a small piece of sedge, split it on one side and attach it to the fishing line between the rings. Under its own weight it will make a slight sag. When there is a bite, the weight will either rise or fall - at this moment you need to hook.
What kind of supports are there for the feeder?
Improved devices are used on the same principle:
- A wine bottle stopper, drilled along the axis and cut with a thin blade on the side to a hole. It glides freely along the rig when casting and reeling, does not damage the rod blank during sharp hooks, and provides a good signal that the fish is taking the bait.
- Aluminum chocolate foil rolled into a ribbon and wrapped around fishing line.
- Clothespins. The linen is hung so as not to pinch the fishing line. But before hooking, you need to have time to remove it, otherwise there is a risk of damaging the rod body. There are special clips that only need to be slightly secured to the fishing line. From below they are tied to the fishing rod stand and when the form is lifted, they freely disengage.
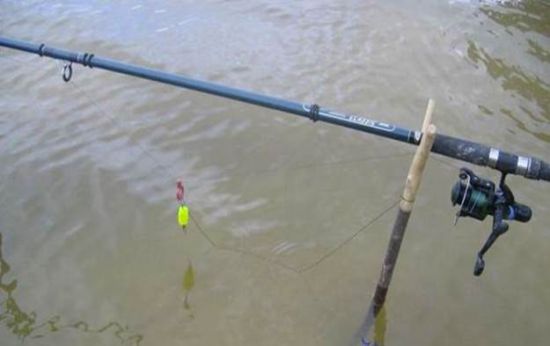
Despite the simplicity of this type of device, due to the sagging of the fishing line, they give some head start to the fish and a sharp hook does not work, especially if the distance to the fishing point is large and an extensible monofilament is used.
Improvement of the bite alarm “bell”
I heard the bell - hook up!
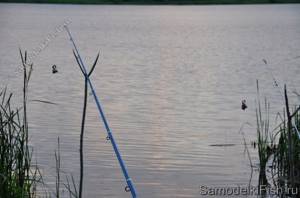
Using a metal bell as a bite alarm is not new.
This method is common, simple and accessible, especially among novice fishermen.
But factory models often suffer from flaws. The main inconvenience is that the factory holder can be difficult to remove from the line at the time of hooking.
The alarm remains in place, during the fishing process it rests against the upper ring of the rod, complicating the reeling of the tackle. You have to reset it by hand.
Using a short spinning rod for donkey, you can be distracted for a couple of seconds. When working with a long carp rod, it is difficult to reach the top and keep the rig with the fighting fish under control. Possible gathering.
Donka for crucian carp: how to make it yourself
The design of the gear is simple: the equipment consists of a rod (you can do without it), main fishing line, weight, leashes and hooks. It is easier to wind the vein onto the reel by attaching a lead weight to the end using a blind or sliding method. The number of leashes depends on the preferences of the fisherman, but there is no point in knitting more than five pieces. Hooks must match the size of the bait.
Using a rod and reel allows you to cast bait over a long distance, and large crucian carp prefer to live away from the coastal zone. In reservoirs with a clean bottom, you can send the tackle to the required place and aim it with your hand, choosing the correct weight of the sinker. When fishing with this equipment, worms, maggots, corn, potatoes, and dough are used as bait. Having installed a small live bait, you can hope to catch pike, pike perch, and perch, but it is worth remembering that the tackle is “tailored” for peaceful fish.
To learn more:
Bite alarm on a winter fishing rod
Modification of the bite alarm holder
The problem is solved by replacing the retaining device. First you need to remove the entire factory cover from the bell.
Next, you need a piece of rubber hose with thin walls, about three centimeters in diameter. Cut an even ring approximately 1.5 cm wide.
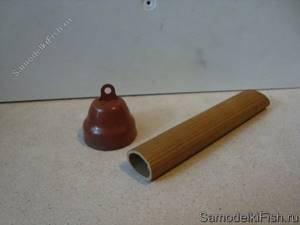
Having examined the end of the workpiece, determine its geometry. The location of the incision depends on this.
If the cutting has the shape of a regular circle, then it can be cut at any point. If you have an oval in front of you, it is better to cut off one of the elongated sides. Then the top of the oval will become a natural hook for hanging on the rig.
At the very beginning, you should prepare a bolt that will fit freely into the ear of the alarm and a nut for fixation.
Having given the hose ring the shape of a hook, you need to make a hole in its long part for the bolt.
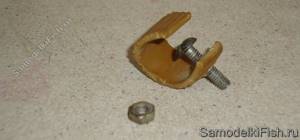
Assembling the “bell”
Having put the rubber on the bolt, you can string a piece of fishing line there, making a loop on it. Let the fishing line be at least a meter thick so that it does not get tangled. With its help, you will tie the bell to a guard, a rod or other support (stand) for the fishing rod.
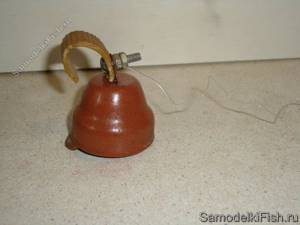
This is done so that at the moment of hooking the alarm does not fly far. And it will fly off instantly. In addition, this leash will not allow the bell to slide down the working line into the water.
Following the loop of fishing line, the bolt enters the eye of the signaling device, and the entire structure is tightened with a nut.
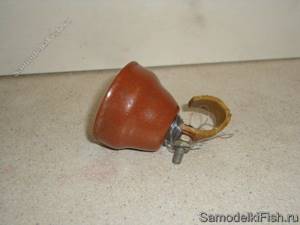
For transportation, it is better to wrap the holding line around the holder.
Parting words
This modification method is very simple and effective. The main thing is that the alarm works clearly and does not cause any trouble.
And one moment. Once a fishing trip is over, bells are often forgotten. So they hang sadly on the guardhouses, having completed their mission, forgotten by everyone.
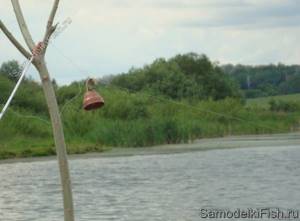
Take care of your gear, it will not let you down. Happy fishing!
Nurzhan Suindik (nurzhan) – Specially for Homemade FISH, Russia, Kuznetsk
DIY bite alarm
Bite alarm, that's what it's called now. Previously there was a regular bell, but now it is a bite alarm. Of course, today on the shelves of fishing stores there are not only primitive bells, but also bite alarms. Equipped with electronics and all possible quirks and bells and whistles.
But let’s start from the very bottom first, namely what they are needed for and whether they are needed at all, what signaling devices were and what they have become today.
From my experience, I can say that previously bells with a special eye were used as a signaling device and these bells were attached directly to the fishing line. Yes, specifically on the fishing line and not on the rod itself as it is now. Previously, they used to catch more fish with hooks, and mostly carp were caught with hooks. And since fishing on the top is a long song, to increase the chances they used not one, but several tackles. And they hung bells so that they could immediately recognize on which gear there was a bite.
When I didn’t have bells, I just hung a piece of clay on a fishing line or twig. Yes, I have to say that I had much less gear than my father. So this was enough for me. Clay is of course much more convenient. When the bite is good, sometimes in a fit of passion many people often forget to remove the bell before casting the tackle, and as a rule, the bell flew into the water. And there is no need to remove the dirt or clay, it simply fell off on its own when hooking. Nowadays you can also see tackles with clay at the end. I often see such lumps on my grandfathers when fishing. By the way, the float is also a bite alarm, if you look at it like this, it also signals a bite.
Differences in equipment and fishing techniques
Bottom devices, with which you can catch large individuals even with gusts of wind and current, have three varieties:
- classic donka for crucian carp;
- tackle with a rubber shock absorber;
- equipment with a feeder.
Fishing (except for crucian carp, roach, rudd, carp) on an ordinary donka is appropriate when casting equipment at a considerable distance from the coastline or to depth. When fishing in small and shallow ponds, use an ordinary bottom fish on a reel or on a spinning rod. When choosing a place to cast your tackle, you should pay attention to ensuring that there are no snags or lush vegetation in the water.
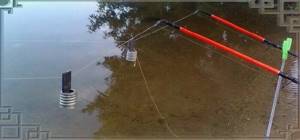
Tackle with a rubber shock absorber is used when fishing in deep water, delivering the load using a boat or by targeted casting. The floating device allows you to install the tackle more accurately, but getting to the right place from the shore is problematic. The main difference between this gear and the classic donka is the presence of an elastic band, which allows you to make a single cast during fishing. One end of the shock absorber is attached to the main fishing line, and the other to the sinker cord. Leashes up to 35 cm long, equipped with sharp hooks, are tied to the main vein no closer than half a meter from the elastic band.
To learn more:
Choosing a leash for crucian carp
Feeder and boilies
Fish like to explore places with ample food, so fishing for crucian carp with a small feeder contributes to effective catches. You can mix the finished bait yourself using pearl barley, semolina and wheat porridge, cake, and peas.
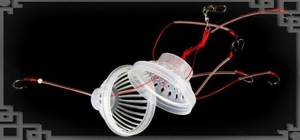
To cast such equipment you will need a rod and a spinning reel of simple models. A feeder weighing 40-80 g is attached to the fishing line either tightly or in a sliding manner. Leashes with hooks are attached directly to the spring or to the main vein, hiding the sting in the bait. To install bottom equipment, tops, springs, and nipples are used. The main task of the device is to attract prey. Crucian carp are more willing to feast on bait located in the springs and nipples.
Some fishermen prefer to use boilies rather than feeders, which also go well with bottom devices. But, in addition to the bait attached to the hook, it is also necessary to use bait boilies. In ponds with a muddy bottom, this is not always appropriate or advisable.
The best bite alarm is a bell.
Today, bells with a special clothespin are more often used in everyday life, which is fixed on the top of the spinning rod of the bottom tackle. This is a very convenient thing. It has so many advantages that there are practically no disadvantages visible. It's worth a penny, meaning you don't mind losing it.
It weighs quite a bit, which increases its sensitivity. Now they use two rattles - this is excellent audibility, plus they have rattles on springs, which means that when they take any bite they start ringing and can be heard along the entire shore. The plastic body is not capable of damaging the tip. And the last advantage of this alarm is that almost all of them have a hole for inserting a firefly into it for catching at night. So this is an almost indispensable thing for a fisherman.
Electronic bite alarms
But let’s not hold on too much to the past and move on to the bite signals of the future. The signaling devices of the future include electronic signaling devices that also work on the principle of fishing line tension. Such signals scream and glow at the same time. So you will know exactly where to run and which stick to pull.
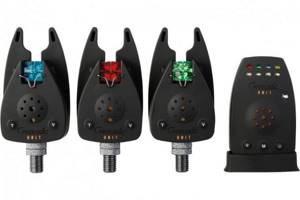
The principle of operation is as follows. After casting the tackle, we thread the fishing line into a special recess under a special roller and release the reel clutch. At the slightest twitch of the fishing line, motion sensors are immediately triggered, which close the complex electronics, which begin to beep and glow. Many electronic signals serve as a rod stand, which is always very convenient.
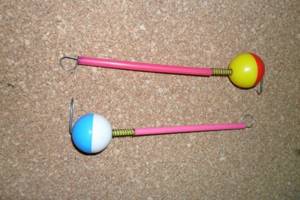
But still, many fishermen remain faithful to the usual bell. Who always serves his master well and faithfully. Even if they are inconvenient because they need to be removed when casting. Let them be loud so that they can be heard along the entire shore. But they have always been and will ring on the banks of reservoirs. Bells are by far the most popular bite alarm.
How does a bite alarm work?
The principle of operation of the donkey guard is based on the fact that at the moment of a bite, the fishing line transmits vibrations of the equipment, recorded by a signaling device. The fish, having grabbed the bait, moves in any direction. The donkey alarm responds to fishing line pulls, regardless of their strength.
A powerful jerk is much more noticeable - it can be recorded by both a factory and a homemade device. Large fish often bite cautiously, and it is important for the alarm to be sensitive in order to detect such a bite.
Requirements for signaling devices for donkey:
- high sensitivity;
- simplicity of design;
- protection from water;
- reasonable price.
Each angler chooses bite indicator devices depending on:
- fishing conditions;
- own needs;
- weather conditions;
- expected fish in the catch;
- time of day.
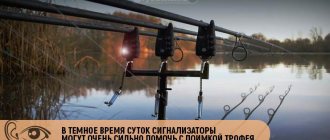
At night, visual indicators are ineffective, even with lighting. It is impossible to sit for several hours without taking your eyes off the rod, and if you are distracted, you will miss the bite. Therefore, at night, sound sensors are needed for donkeys. And if they also provide a visual effect, the return on such equipment increases significantly.
The weight of the transducer is important, and this concerns not only the convenience of the angler. In strong winds, a lightweight design will show false bites, and the meaning of the device itself is tripled.
Buying a signaling device is not difficult; stores sell models for both summer and winter fishing. But quality equipment doesn't come cheap. Therefore, many fishermen prefer to make sensors themselves from scrap materials; it is cheaper and takes a little time.
DIY bite alarm
The most common homemade donkey gatehouses are:
- pendulum type;
- nod type.
A homemade universal signaling device for donkey is mounted on a fishing line and attached to the rod rings. When a fish bites, the tackle, which is in a tense state, changes its position in the water, and the fishing line moves, transmitting vibrations to the guard.
The advantage of such a signaling device is that it is attached to the rod and remains hanging on its ring when hooking. However, the fisherman needs to monitor the bottom tackle with a hand-made pendulum sensor for the bottom in order to make a hook in time.
Combination devices
Bells are probably the oldest sound bite alarm, sounding a bell when the fishing line twitches. It is used both for its intended purpose and as a visual indicator. It can be tightly attached to the fishing line and removed immediately after hooking (as happened before).
But it is better to do this with a weak clamp, just enough to prevent the bell from coming off while at rest. When hooking, the line is easily removed from it, and a cord tied to the other end prevents the guard from falling to the ground.
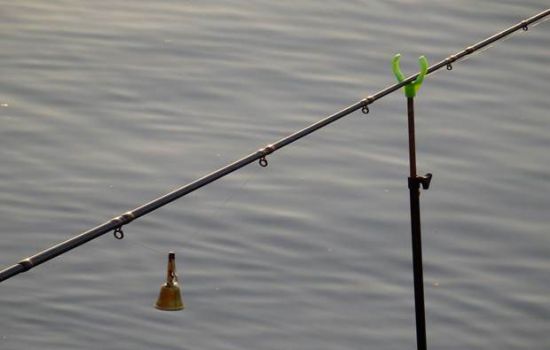
Solid mounting of the bell is not a very good option. It is better to loosen the clamp and tie the alarm to the stand.
You can make such devices yourself.
