How to choose a float and fishing line
Before you begin to study the question of how to properly load a float, you need to make the right choice of fishing line and float. Modern fishing shops offer a huge range of floats. Some of them are dismantled by professional floaters right away, and some of them are not even looked at. What is the reason? After all, their appearance is approximately the same, and the prices are not much different.
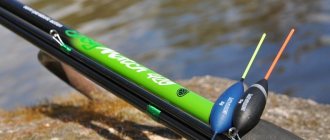
Floats differ in material, shape and responsiveness to bite. Immediately pay attention to whether there are bubbles on the float antenna; if there are any, then feel free to pass by and don’t even look in that direction.
If everything has become more or less clear with the floats, then the question arises about choosing a fishing line. Many beginners tend to choose a strong fishing line. For some reason, many people believe that the quality of a fishing line is determined by its thickness. It's not like that at all. If you are going to an ordinary pond for crucian carp or small pike, then a fishing line of 0.14-0.16 mm will be quite enough for you. There is such a concept - “memory” of the fishing line. This means that when unwinding from a reel, good fishing line will remain straight, while bad fishing line will unwind and retain its ring shape.
Float for beginners.
I think I won’t be mistaken if I say that the most common and well-known fishing tackle is a float rod. You can use a float to catch almost any fish in different conditions, be it a lake or a river. Today, float fishing includes many areas - this includes long-distance match fishing, plug fishing, and Bolognese equipment. But the most famous and popular tackle among many anglers is the classic fly rod with a blind rig. We will talk about it below.
Let's start with choosing our working tool - the rod itself. As you know, progress never stands still and affects all areas of human life. He doesn’t shy away from fishing gear either. If earlier, in Soviet times, the ultimate dream was a bamboo or very heavy fiberglass fishing rod, and most often willow was cut and dried for these purposes, now, with the advent of new materials, excellent light and durable carbon or composite fishing rods have appeared. They are worth paying attention to. As mentioned above, a fishing rod is a working tool with which you will work for many hours. And if you take a cheap fiberglass fishing rod, then with an active bite, within a couple of hours, or even earlier, your hand will get tired and you may lose further interest in fishing. A good coal or composite rod is very light, you can work with it all day with one hand, even with a very active bite (as is often the case when fishing for roach and active spring crucian carp). A composite, and even more so a carbon rod, will of course be more expensive than a cheap Chinese “glass” rod, but it will also bring much more pleasure from fishing - there’s no point in saving here, a fishing rod is not just for one day. I will give one example of a relatively budget composite fishing rod - this is the HELIOS COMPOSITE Pole
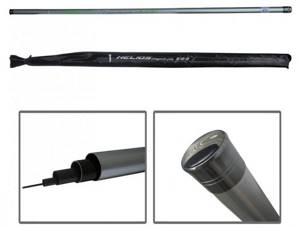
(the lower legs are glass, and the upper ones are carbon. Due to this, the entire weight of the rod is concentrated in the lower part (in the butt) and is practically not felt, and the upper legs are light, do not hang forward and do not “peck” when casting the equipment).
Many people have a question: what rod length should you choose? There is no definite answer here and cannot be. You must have at least 2-3 fishing rods of different lengths in your arsenal. For example, 4.5 and 6 meters. If we are fishing on a small river with bushes hanging over the water, then we need a fairly short fishing rod, about 3 - 4 meters.

When fishing on a lake where the shores are fairly flat and the depth begins quite far from the shore or the shoreline is overgrown with coastal aquatic vegetation, we will need rods from 5 to 6 meters. I personally don’t like to use longer rods, because they are quite bulky and heavy (even carbon ones) and fishing becomes uncomfortable. In such conditions, it is better to choose another fishing method (feeder, match, etc.), because fishing should be fun and not turn into hard work.
After we have chosen a fishing rod, we need to equip it with a connector, with which we will attach the equipment to the fishing rod.
The advantage of the connector is that when fishing conditions change, it allows you to quickly exchange one equipment for another without tying anything up. Connectors come in different diameters and it is advisable to select it immediately in the store, after purchasing the rod. And now, our rod is ready for battle, all that remains is to properly equip it. Let's start by choosing one of the most important elements - the float. Often, when they come to the store, novice fishermen are simply blindsided by the overwhelming variety of floats and get lost. What is the difference between some floats and others, which one to choose? The difference is that each float is designed for specific fishing conditions. According to the simplest classification, they are divided into 2 groups: for fishing in currents and for fishing in still water.
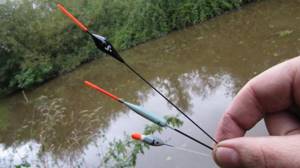
For swing fishing in the current, floats with a voluminous spherical, or rather teardrop-shaped body, a short antenna and a long or medium keel are well suited.
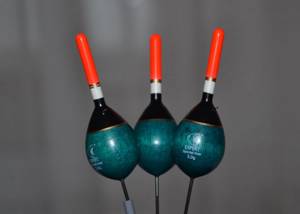
When fishing in a current, you often have to hold the equipment so that the bait does not rush past the fish at the bottom at high speed, but floats smoothly and remains in the fish’s field of vision longer. This tactic is due to the fact that in the bottom layers the flow speed is much weaker than in the upper layers. Therefore, if we do not hold the float, the bait below will move, carried away by the float too quickly, and behave unnaturally, alarming even active fish. Due to its drop-shaped shape, when held, the float does not lie on its side, but remains in a vertical position (if we have correctly selected the gram for the strength of the current) and continues to signal us about the slightest cautious bite.
In stagnant reservoirs, it is better to use elongated needle-shaped floats with a small carrying capacity (up to 1.5 grams).
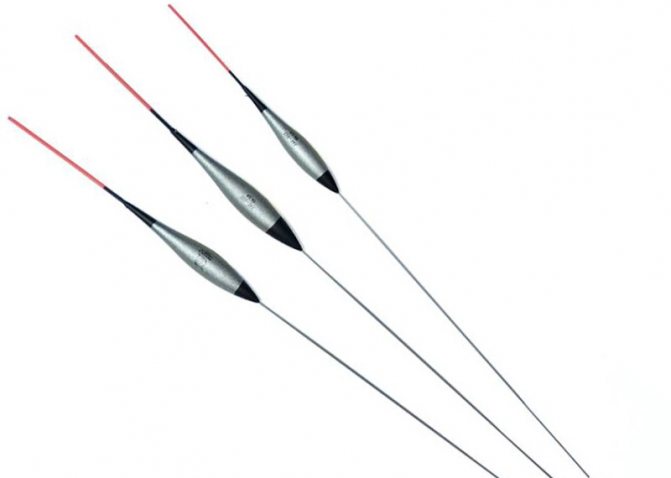
Such a float has the least resistance in the water and shows well any bite, both rising and drowning. In a current, such floats are not used, because even a small stream of water will put it on its side and you won’t see a bite, even if there is one.
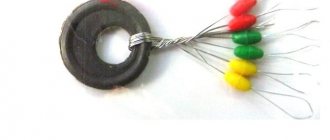
A separate topic is the correct loading of the float. Many anglers often make mistakes at this stage of gear assembly, and the most common one is placing the entire load at one point on the line. The most correct load in classic fishing with a fly rod is spaced, when the load is concentrated not at one point, but at least at five. To do this, we need a set of float weights, which includes lead pellets of different weights.
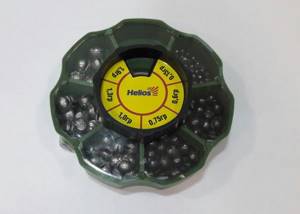
The heaviest pellets should be located closer to the float, and as you approach the leash with a hook, the pellets are attached less and less. The very last pellet is the lightest, the so-called sub-grass, usually weighs no more than 0.1 - 0.15 grams.
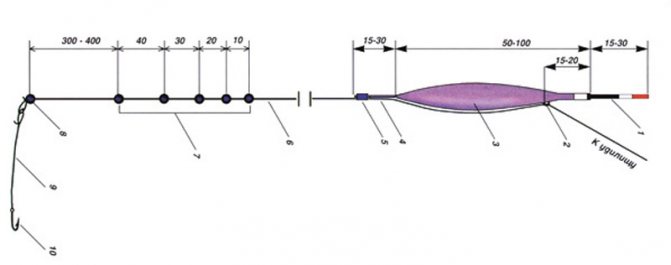
With such a load, when biting, the fish feels minimal resistance only from the last weight and takes the bait more boldly. In addition, you can change the distance between the pellets for different conditions and adjust the speed at which the bait falls to the bottom, adjust the tackle to suit any conditions and catch any type of fish. Example: if we need to break through a school of tightly packed bleak or small roach and deliver the bait to a large bottom fish, then we reduce this distance, and if we need the bait to fall more naturally and smoothly, we increase it, moving the upper weights almost to the float, near the leash 1 - 2 pellets remain. If the load is concentrated at one point, then when biting the fish feels great resistance from the entire load, at the same time it becomes wary and throws the bait, especially for large, cautious fish.
Another important point worth mentioning is the position of the float when properly loaded in the water. If we loaded the float correctly, then only the upper part of the antenna should be visible from the water. If we see the body of the float, it means it is not fully loaded and it will not show us a careful bite.
The next important point is the choice of fishing line and hooks. Everything here is simple and logical - if you go to catch roach or crucian carp, you don’t need to use a 0.35 monofilament and a huge carp hook. In our conditions, I usually use a fishing line with a diameter of 0.14 - 0.18 as the main one, and for leashes I use a fishing line from 0.08 to 0.14. It all depends on what kind of fish I will catch on a given day.
If it’s a good crucian carp or there’s a chance of catching a bonus in the form of bream, then I use a little coarser equipment, with a small margin of safety, and if I’m fishing for roach/bleak, I use the most delicate and sensitive rigs with the thinnest line (in summer I don’t use anything thinner than 0.08 ), small thin hooks and a light float (0.5 - 0.8 grams).
As for the hooks, here they need to be chosen for the most part according to the bait on which you will fish. For example, for maggot and vegetable baits (pearl barley, mash) you need a thin small hook with a short shank, but for a worm it is more convenient to use hooks with a long shank, etc. Well, as for good fish, if when fishing for roach you come across a good crucian carp or bream, a small hook will just as reliably hook it and you will successfully fish it out. The most popular hook numbers in amateur float fishing are from 10 to 16 numbers.
It’s not for nothing that there is such an expression: “If you don’t feed, you won’t catch.” In float fishing, well-chosen complementary foods have a direct relationship with how many fish you catch. Bait, like everything else, is selected for fishing conditions and sometimes for a specific type of fish. I will not focus on this issue in detail - this is the topic of a separate large article. I'll tell you only about the very basics. If you fish in the current, the bait mixture must contain a binder so that the food lingers longer in the fishing zone and does not erode very quickly. On the lake, on the contrary, the composition should be more loose and free-flowing. If we catch roach, the food should be well dusted and create a column of turbidity. If it is crucian carp or bream, then you need to choose a consistency so that the bait balls do not break when hitting the water, but begin to disintegrate at the bottom. And so on. Experiment with ingredients, flavors and you will always have a good catch.
In conclusion of this article, I would also like to mention some things that will make life easier for the fisherman. It is best to store the rigs on separate reels, and the floats in a float tube. It is very useful to have with you a special depth gauge that fits on a hook.
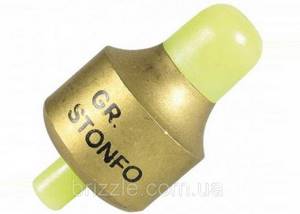
It allows you to measure the depth in the fishing zone with an accuracy of up to a centimeter and you won’t have to guess where your bait is - at the bottom, buried in the silt or high above the bottom in a suspended state. It’s also a good idea to have a chair and a folding bucket for bait and containers for storing live bait.
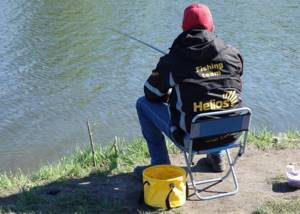
Here is perhaps the most minimal set for starting to master float fishing:

I hope this article will help you successfully start fishing with a float and avoid many mistakes when choosing and installing gear. I will attach a short practical video to the article. Don't judge strictly, I'm just learning and I'm a little nervous in front of the camera))
That's all, see you on the reservoirs! If you have questions, feel free to ask them in the comments!
How to choose a good float
Before you learn how to properly load a float on a fishing rod, you need to learn how to choose this very float. So, in order for your fishing to bring you pleasure and a good catch, when choosing a float, consider the following requirements that a good float must meet:
- You should be able to easily spot it in any thicket or against the background of water.
- You need to select a float for the type of reservoir in which you plan to fish.
- Make sure this gear is secure enough.
- A good float always has excellent sensitivity even to the slightest bite.
- Installation should not cause any difficulties even for a beginner.
- A floater shouldn't put a serious dent in your wallet.
It is also worth noting that the float depends on what kind of water you are going to fish in, how far you plan to swim or cast, on your manner of attaching the float and on many other factors.
There is a certain set of rules that one professional fisherman compiled that will teach you how to choose a good float:
- If you are fishing on a river or in a body of water where there is a current, then choose a float with a large teardrop-shaped body.
- If the water in your pond is stagnant, then a narrow float that looks like a goose will suit you.
- The tenderness of the tackle depends on the carrying capacity of the float. The lower the load capacity, the more delicate the tackle will be.
- Pay attention to the material from which the float antenna is made. This will further affect the loading method.
- The length of the keel also matters. The longer the keel, the more stable the float on the water (the keel is the lower antenna that is under water).
- If you like night fishing, then choose a float with an antenna on which you can attach a luminous device.
- Long-distance casting is best done with floats that have a long antenna.
- It's not worth saving. It is better to purchase several floats of different shapes. This way, you can experience for yourself and choose the type that is right for you.
Don't be afraid to try new things, learn from other people, make your own mistakes and gain experience. All this will be useful to you in the future.
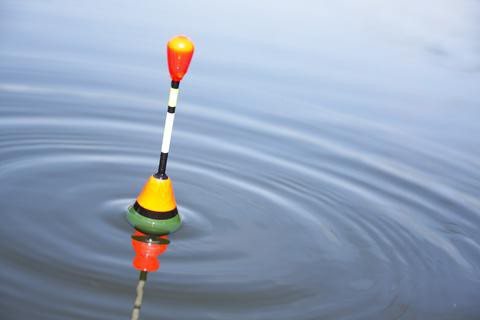
Bream. The behavior of the float during a bite
Usually bream bites are noticeable to the fisherman and knowing in what phase you need to hook, you can hook a good trophy. Well, it depends on which specimen bites. With a properly carried out hook, you can reliably hook the fish, and this is a fifty percent chance that you will be able to pull the bream ashore. After all, there is still fishing and hauling the trophy to the shore or into the boat with a landing net.
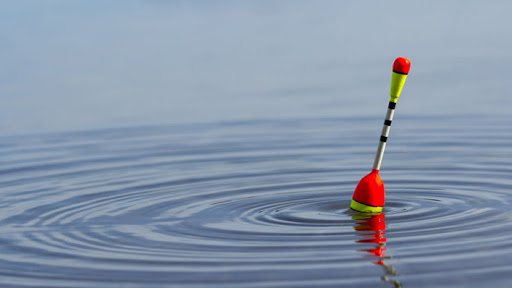
Let's consider the case when a fish is caught on a float rod with conventional equipment and a float standing on the water, and a bunch of worms is used as bait. The behavior of bream during a bite can be as follows. The fish takes a position almost vertical in relation to the food lying at the bottom of the reservoir, and begins to suck in the food with its mouth. After which the bream rises and takes a horizontal position in the water. As a result of such actions, the weight of the tackle also rises with the fish, and the float on the surface, due to deprivation of the load, sinks into the water. Next, the bream begins to swim to the side, thereby dragging the float with it and plunging it into the depths. This is the signal to make a sweep.
Read: Catching bream without bait
Let's consider another case when bream fishing is carried out with a float lying on the water and a sliding sinker is used in the equipment. At the moment when the bream draws in the food, the bite alarm starts to move and gradually rises and bends. After which the float stands upright and gradually moves to the side, gradually sinking until it disappears under the water. At this moment it is worth making a hook.
During a cautious and weak bite, the bream, having placed the float in a vertical position, can keep it in this state for some time. And when fishing for small food, such as peas or porridge, the hook is made when the bite alarm falls on the water or, conversely, rises.
The bream resists quite strongly after hooking, but after the fish is brought to the surface and it takes a breath of air, the resistance of the trophy stops for a while. This is a signal to the fisherman to quickly pull out his catch. If you hesitate in this situation and do not have time to immediately pull out the fish paralyzed by the air, then the bream, having come to its senses, continues to resist, and this may be unexpected for the fisherman. Such a resumption of fish activity can result in the disappearance of the trophy. Good luck catching bream this summer!
Subscribe to
our channel in Yandex Zen
The concept of correct loading
How to load a float? Correct loading means that the fisherman must correctly select and mount the lead weight, which determines how informative the float will work. In more understandable terms, with the help of this weight the float is immersed in the water to the level necessary for its proper operation.
Please note that the float should not be completely immersed in the water, but it also cannot stick out much from the water. More precisely, the rules for correct loading of a float say that the body of the float must be submerged under water, but its antenna must always be above the surface of the water. Do not forget that in this case it is important to take into account the weight of the bait and hook.
Professional fishermen have discovered the secret of how to check that a float is properly loaded. It is enough to lightly click your fingers on the protruding antenna. If the float immediately flies back, then the loading was done correctly, and if it starts to rotate slowly, this means it is overloaded.
How to achieve proper immersion
How to ship a fishing float without making mistakes? This question is asked by every novice angler. To do everything without errors, you need to choose the right weight and distribute it on the fishing line so that the information content of the float is maximum. Those for whom fishing is not only a favorite pastime, but also a sport, have long acquired many different floats, which they can change as needed. But picking up cargo directly in nature is very difficult, so it’s better to do this at home. Now there are even special devices that help in selecting weight at home.
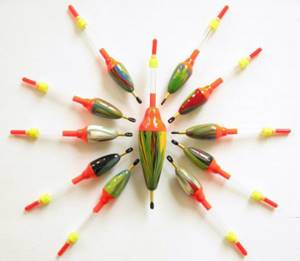
What kind of device
How to properly ship a float at home? For this purpose, a special device has been invented that allows you to select weights and pellets without the troublesome clinging of weights to a fishing line. If you use a large number of pellets, then such a device will become an indispensable assistant for you. In general, pay more attention to various things that can make your life easier and help you save some time.
Loading a float for long casts
A fisherman who practices long casts uses a large amount of fishing line. Its length always exceeds the length of the rod. This can only be done if you have reels installed and special floats designed for long casts.
These floats can be easily identified by their appearance. Their center of gravity is shifted downward, and the antenna is slightly elongated. Sometimes the length of the antenna reaches forty centimeters. All this is done so that when casting, the float pulls the line along with it and prevents it from getting tangled. And this length of the antenna is needed so that the float can be seen from afar.
Now you can return to the correct loading of the float, the concept, types of loading. Now there are two main methods that can be used to distribute weight under the float:
- Distributed load - more often used for fishing at great depths. It allows you to keep the casting noise to a minimum so as not to scare away the fish. In addition, here the weight distribution is carried out in such a way that the bait sinks to the depth as smoothly as possible.
- Concentrated load - also used for fishing at great depths. But here heavy equipment is used, the immersion of which cannot be made invisible. Concentrated loading is recommended only in cases where the bite is good and there are enough fish at great depths.
Concentrated loading
This option is more suitable for catching cautious fish. This is due to the fact that here the grazing area is significantly removed from the main load. This is an installation option where the equipment does not respond well to a bite, so when using this method of loading you need to be as careful as possible so as not to miss a bite.
Both the first and second options have their pros and cons. The choice is up to the fisherman. In many ways, this choice depends on the number of fish, its character, depth and water (stagnant or current).
The float started
In the distant times when I was still young and handsome and also began to get acquainted with fishing, I had a goose feather float on my fishing rod because we had never heard of other floats. Although we haven’t heard of it, there were also floats made from wine corks. But we will not talk about them. Undoubtedly, there are still fishermen who to this day use feather floats. They have their advantages, the most important is excellent sensitivity, but the disadvantage is that the feather is very light and very inconvenient for long casting, and even in the wind it is difficult to cast it even a short distance.
But progress does not stand still and plastics have replaced feathers. Today, almost all floats are made from it, sometimes from foam plastic, sometimes from carbon or wood.
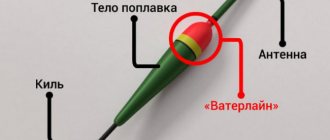
So why did they start making so many models of floats? And before we begin to analyze in detail all the qualities of floats, a little terminology to make it easier for you to understand what we are talking about. And so the part that we see above the water is called an antenna or signaling device. Then comes the body of the float, and the lower part is the keel.
How to properly load a float onto crucian carp
First of all, you need to choose a good float. It should be designed for long casts, have a long antenna and have high sensitivity. In specialized stores, any knowledgeable seller will be able to offer you options for floats that are designed specifically for catching crucian carp.
If the choice of float has been made and you are sure that this is the best option for catching crucian carp, you should start loading it. This is also a very important question when catching fish such as crucian carp. The correct shipment is one in which the entire top of the float is above the water. With such a dive, the volumetric part of the float is completely under water.
There is one proven home method of loading crucian carp. For this you will need a 1.5 liter water bottle. The slightly loaded float is lowered into the bottle, then you just need to watch it sink. Shots are added until the entire body of the float is submerged under water.
Of course, there is no need to carry out such manipulations on the reservoir itself. The correct load can be determined directly on the pond. But to save time on fishing, it is recommended to use the home method of loading a float onto crucian carp.
As you can see, if the float is loaded correctly, you can count on a good catch. Shipping for crucian carp is a little different, but there is nothing complicated in this method. The article described all existing answers to the question of how to properly ship a float. If you follow all the recommendations of experienced fishermen, then fishing will not only give you aesthetic pleasure, but will also bring you a good catch.
Loading a float on the current
Usually in calm water the pellet closest to the hook is easier to set than the others. This type of equipment does not scare away fish. Also, a series of pellets makes the equipment more balanced, which has a positive effect on the quality of the bite. With such a load, during the bite, the fish lifts from the bottom not only the hook with bait, but also a small hook and practically does not feel its weight, and the fisherman observes the float rising and instantly reacts to this by hooking.
If the current is fast, then the angler should choose a bait of such weight that the float is immersed almost to the top edge of the antenna. In this case, the float will react to the slightest touch on the hook with the nozzle. If you equip the rod as simply as possible - with one or two pellets, then the float simply will not work to rise, and the angler will never see a bite. And the fish, feeling the weight of the shot, will, of course, get scared and drop the bait.
A float weighing one and a half grams is shipped as follows:
- attach five pellets of 0.2 g each in increments of ten centimeters, which gives a total of one gram.
- hang one pellet on the leash itself weighing 0.5 g - this will be the under-shepherd.
Fishing with such a load is suitable for fishing on rifts and in the middle reaches.
Here's another way:
- Place two 0.5 g pellets in ten centimeter increments at the base of the leash.
- two - 0.2 g and 0.3 g - in the immediate vicinity of the hook with a distance between them of fifteen centimeters.
This type of loading is good in still water.

