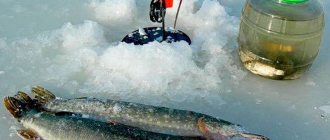
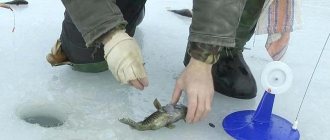
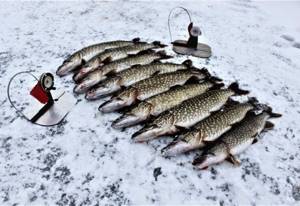
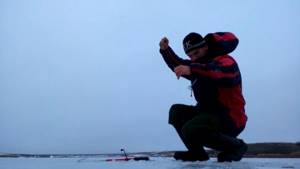
Ice fishing rods with flags are usually used for catching predatory fish, but are also suitable for crucian carp. When fishing with flags, live bait is usually used.
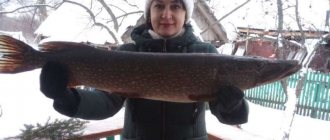
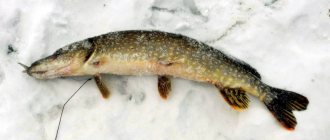
In winter, pike often stand aground, where the fry are looking, so it is advisable to fish at a depth of 1.5-2 m. At such a depth you can catch a fairly large pike.
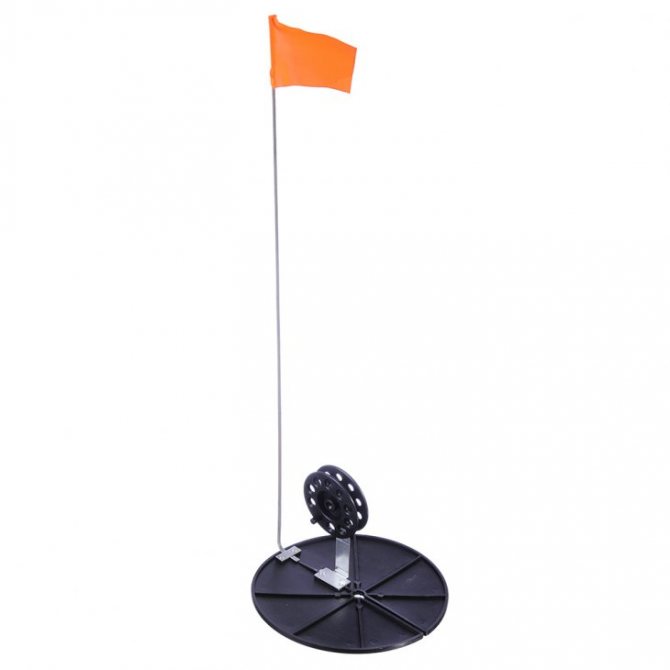
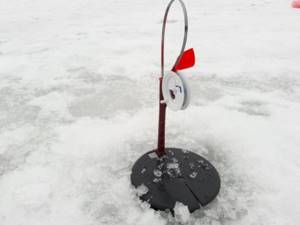
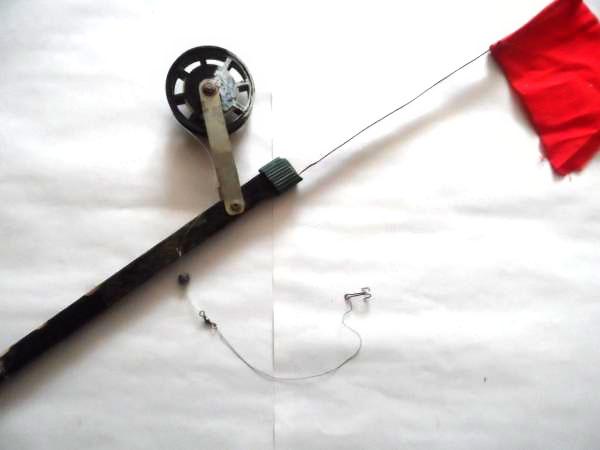
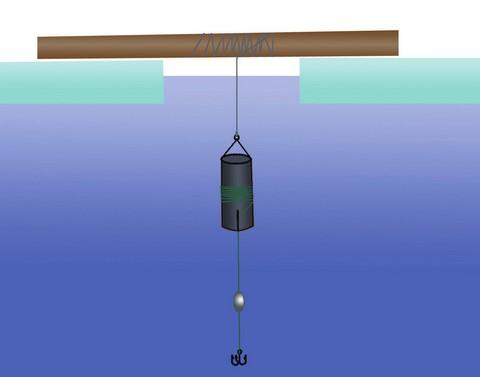
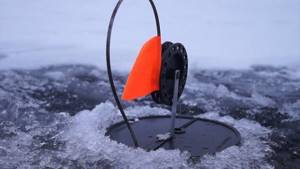
Design of the vent
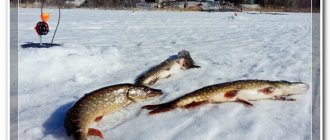
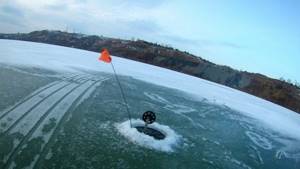
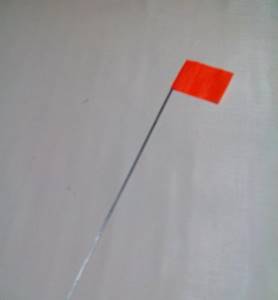
Winter fishing with live bait using a flag is characterized by good results due to fast and effective bite signaling. Usually they use red flags, clearly visible on a white background.
Let's look at the easiest and fastest way to make flags for winter fishing:

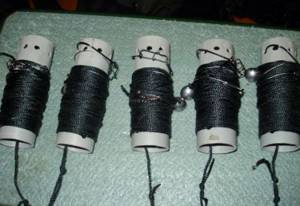
Make a wooden or plastic base (metal is not suitable). Place a reel and a flag on it. The length of the base of the flag should be 30-40 cm.
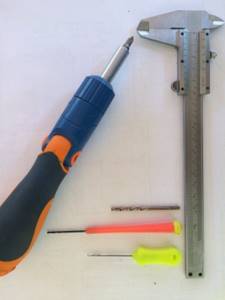
You can use a metal rod of small thickness (up to 3 mm).
Wind about 20-30 m of fishing line onto the reel. Typically, braided fishing line with a thickness of 0.1 mm is used.

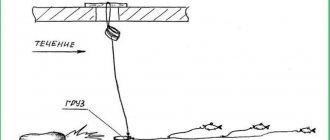
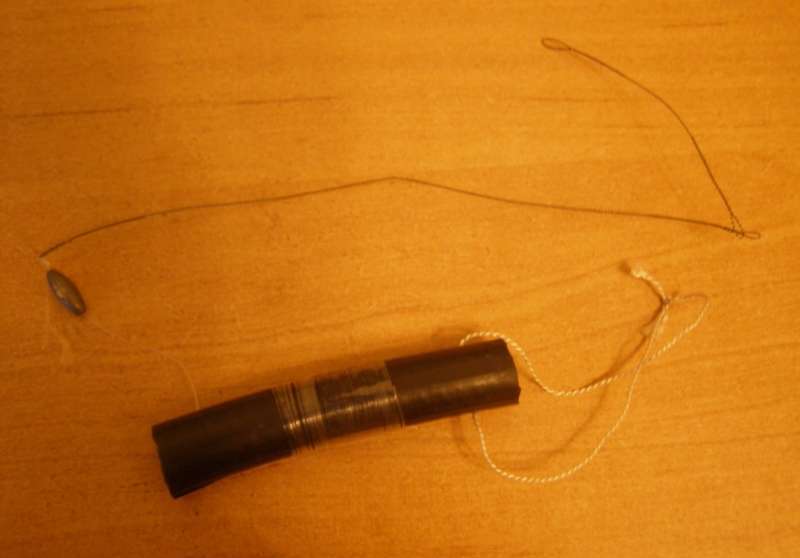
Attach a leash to the main fishing line (you can use a string or special types of fishing line). The length of the leash should be about 20 cm. It is advisable to use a triple hook.
Step back from the leash about 6 cm and install a weight that ensures that the live bait is lowered to the bottom.
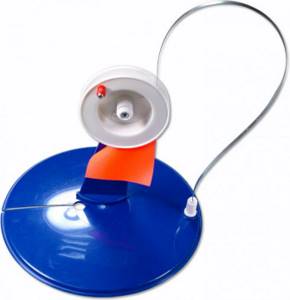
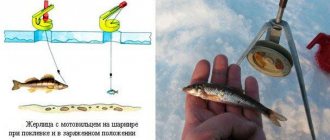
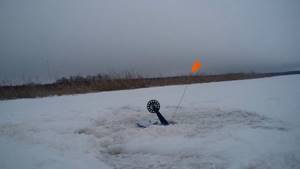
The most effective way to set a flag for ice fishing is to hook it behind the reel handle. The effectiveness of the alarm depends on the correct installation of the flag. Mount it so that during the process of resetting the fishing line, the flag takes a free sensitive position.
Do-it-yourself winter girders
There are the following types of homemade girders:
- Changeling. Consists of a plastic tube, thick wire and electrical tape. A hook with bait is attached to the wire and placed above the hole. The end of the tube with bright electrical tape shows whether there is a bite or not.
- On a leg. To use such a girder, you will need more materials. Here you need to have:
- plastic tube;
- bright flag;
- fishing line reel;
- nuts and washers;
- base;
- hose bushing.
It works this way: the leg is placed on the snow and frozen. A fishing line with a hook and bait passed through a reel will signal a bite.
- On the platform. The design is considered the most complex, as it requires drawing and fitting of all elements. They are mounted on one platform, which is often cut out of wood or plastic. To prepare it take:
- coil;
- checkbox;
- plywood;
- staples;
- fishing line;
- hook.
When there is a bite, the line comes out from under the clamp brackets, the flag rises up and signals the appearance of fish.
- From a bottle. The easiest way to make winter lanterns, as a regular plastic bottle will do. For large fish, you should take not a half-liter bottle, but at least a three-liter one. The only thing that will depend on the fisherman is whether the fish will fall on this girder. The main thing is to be careful.

- Under the ice. They leave the fisherman more free time. It is better to leave such supplies overnight. If you place the structure on ice, you need to place a signaling device there. This option does not contribute to freezing of the hole.
There is a great deal of information about various girders in the specialized literature, but they have one thing in common - you can actually catch fish on them.
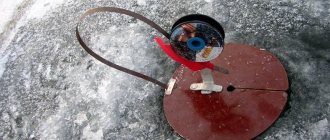
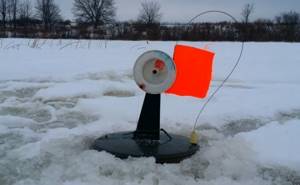
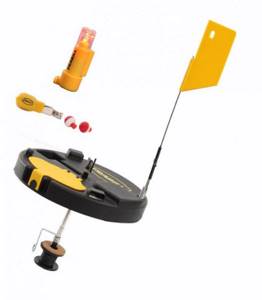
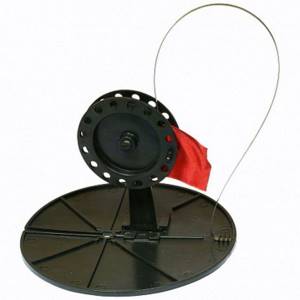
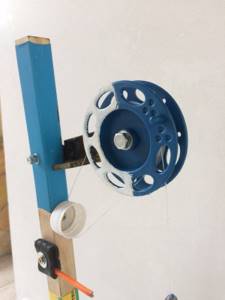
The ice fishing rig consists of the following components:
- signaling device;
- bracket together with the coil;
- rack;
- equipment
The stand is made of a plastic tube, and the bracket is made of a metal knitting needle, and their corners should remain even. The coil is made of polystyrene foam, and the alarm is made of steel wire.
When assembling the winter girder, you need to perform the following steps:
- Fix the wire on the stand at one end and attach the other with a flag.
- attach the equipment to the reel.
Recommendations for improving the girder
- Using the example of an American jig with a rubber shock absorber, we recommend that you also use this feature so that the pike does not break the tackle and when fishing, the rubber smoothes out sharp jerks of the fish.
- A great way to mount racks is to use a tripod. Unlike the platform version, this one will be securely fixed in the ice and dusted with snow, which guarantees its immobility.
- Closer to the bait, use fluorocarbon up to 0.4 mm so that the pike does not notice the fishing line. However, you will still have to use a metal leash.
- The wooden structure of the vent can be replaced with propylene (PVC) tubes.
- A flagless vent is another option for improving your design. Use an electronic bite alarm, or even better, a pager to transmit a bite signal at a distance.
Classic version (for pike and others)
This design consists of several elements:
- signaling device;
- bracket with coil;
- rack;
- equipment
It's not difficult to make.
- Take a metal tube that will serve as a stand.
- The bracket can be made of metal knitting needles.
- The coil is made of polystyrene foam.
- The signaling device is made from a piece of wire.
- Attach equipment to the reel.
- At the moment when the fish swallows the bait, a bright flag rises up.
Modernized classic version
This design includes the following components:
- base;
- signaling device;
- bracket with coil;
- equipment
Cooking process:
- The base is prepared from hard foam or plywood with such a diameter that it matches the hole;
- The coil is made of polystyrene foam and is mounted on a bracket;
- The alarm is screwed to the base;
- A fishing line is threaded into the base and secured to the reel;
- During fishing, the signaling device goes behind the reel, and at the moment of a bite, it begins to rotate, causing the flag to rise up.
Reel "Spatel"
Comprises:
- polystyrene;
- racks;
- hinge;
- signaling device.
Since the alarm is similar to a spatula, it is equipped with a wooden handle and then secured with an elastic band. The handle itself should be painted or covered with electrical tape so that it remains bright and noticeable. When a pike bites, the alarm stands straight and the line begins to unwind.
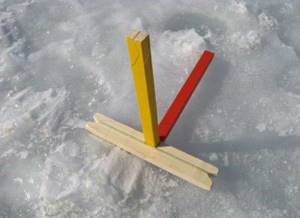
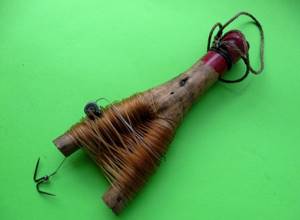
Wood frame construction
The simplest model:
- Find a wooden flyer from a branched knot (preferably an elastic one).
- Cut a fork with a handle 15 centimeters long and 10 millimeters thick.
- At the end of the flyer, make a rim to secure the loop.
- It is better to have a fishing line with a reserve of up to 7 meters and a diameter of 0.6 mm.
- Attach a metal leash to the free end of the fishing line.
- Attach a treble hook size No. 4-5 through the ring from the leash.
- Place a sinker on the fishing line (several of them can be installed).
- Secure the sinker at the bottom with a swivel.
Subglacial vent
Such girders are simple to manufacture and are suitable for various objects that will correspond to the hole made. To prepare an ice trap you will need:
- object corresponding to the hole;
- a plastic tube approximately 40-50 cm, which is attached to any selected item;
- the fishing line is inserted into the sawn hole of the plastic tube.
Another way to make a structure for fishing from under the ice can be made from a duralumin strip using metal wire. The method of self-cooking consists of the following points:
- A strip of duralumin 1x50x200 millimeters or more with curved ends in one direction (this is also the base);
- Drill a small hole in the center of the plate where the coil will be placed;
- Make another hole near the reel for the fishing line.
- Attach a signaling device wrapped or painted with bright colors to the spring;
- Attach the spring to the end of the base and secure with a pin.
Another option for fishing from under the ice. To make it you will need:
- a couple of pieces of hose about 10 centimeters;
- make a hole on one piece of hose to attach a loop;
- on another section, cut a hole where the rope will be attached;
- instead of a reel, they use a plastic tube into which 10 meters of cord are wound;
- secure the first end of the cord with a loop, and insert the second into the slot at the end of the hose;
- Attach a sinker and a leash made of fishing line about 40 cm to the free end of the rope;
- connect the leash with another metal leash and hook.
Hose rigs
Homemade flags from skewers
Another simple option for making flags for winter fishing is the use of kebab skewers. To construct the flags you will need the following materials:
- wooden kebab skewers. Choose the simplest, inexpensive option with a length of about 30 cm;
- cocktail straws;
- plastic file folders;
- stapler
Secure the cut out flags onto the cocktail tubes with a stapler. Place 2 kebab sticks in each tube. No additional fixation is required here.

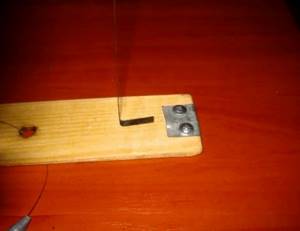
Making a transverse bracket, adjusting the coil
The bracket was specially made from 4 different materials: a 20x20 mm block made of ash, a durable plastic rod 15x15 mm (red used Morzan from a mini-guillotine), a wooden corner 30x30 mm made of ash, a carbolite corner 25x25 mm from a device that burned out at work.
Therefore, we had to come up with different options for fixing the bracket in the working (almost horizontal) position. For corner brackets, you need to make the correct cuts on the shelves and fit them in place, nothing complicated. For the brackets, I took a regular furniture corner from a block.
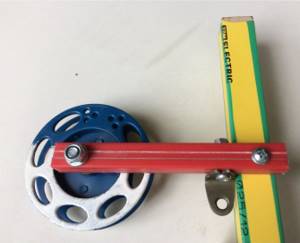
I’m not very happy that it’s metal, but the construction is very durable.
The bracket is secured to the stand with a 4mm screw (don’t forget the washers) and is firmly secured with a second nut - this is a very important point.
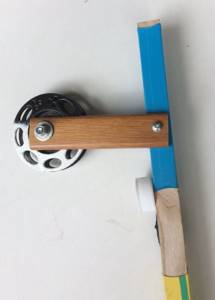
The nut closest to the rack is tightened to the required force (so that the bracket moves smoothly and does not slack), then this nut is held with side cutters and secured with a decent amount of force with the second nut. The tip of the screw is sawed off in advance so that it does not stick out, or a screw of the required length is selected.
The coil is attached to the bracket with a 6 mm screw, which is also the axis of the coil.
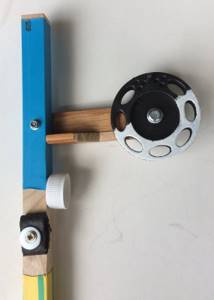
A hole is drilled in the bracket 6.5-7.0 mm. Be sure to lay the contact points of all planes with washers, preferably bronze ones (I couldn’t find any and took regular galvanized ones). I don’t recommend using wing nuts (they come loose, burn your fingers in the cold, don’t fix the force for smooth movement of the reel, stick out and get caught on everything). Ideally, the nut is self-locking. Choose the smoothness you want and fix the entire assembly just like that. Again, ideally it is necessary that the tip of the screw-axis does not stick out beyond the nut (saw off the excess in advance).
Don’t forget that the reel handle should be on the side of the screw-axis head, this is clearly visible in the photo.
Catching perch with flags
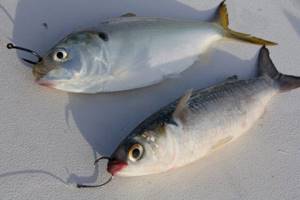
Perch can also be caught using gear with flags. In this case, the bait will be a small bloodworm, worm or maggot. Perch also goes well on scraps of fresh fish. Perch loves attractively playing baits.
Fishing for crucian carp
It is more difficult to catch crucian carp in winter, even with the use of flags. For the winter, this fish goes into the mud, where it hibernates almost until spring.
However, often in winter, if certain conditions are met, crucian carp go out in search of food. But this happens only in those reservoirs where there is enough oxygen in the water for the normal functioning of crucian carp.
Note!
How to attach live bait to a girder - the best methods and step-by-step description of how to properly attach live bait (115 photos and videos)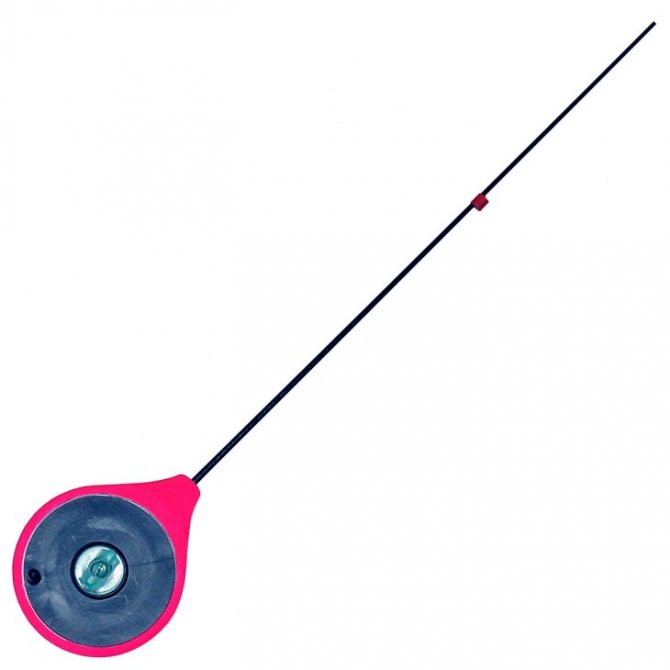
Winter fishing rods - nuances of choice and secrets of winter fishing rod rigging options (115 photos and videos)
Winter baits: useful tips on choosing gear, secrets of experienced fishermen and features of their use (video + 110 photos)
Crucian carp take bait very carefully in winter, so use the most sensitive equipment.
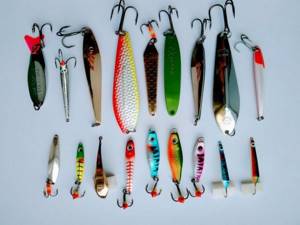
Photos of flags for winter fishing
Read here Folding chair for winter fishing - tips on choosing equipment and the main nuances of using a folding chair for winter fishing (125 photos + video)
Help the project, share on social networks 
0
Content
- Disadvantages of purchased girders
- Making a stand
- Making a transverse bracket, adjusting the coil
- Checkboxes
- Equipment and “anti-beard”
- Tests
I read on the website how Colleague Anton Yuryevich modified this winter trap for crocodiles, and watched his video on YouTube. I decided that I could do a lot of things my own way for winter.