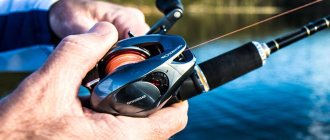
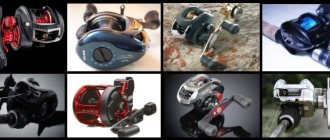
In this article we will talk about setting up spinning coils. To correctly set up such a reel, or rather its drag, you first need to install it on the fishing rod, then correctly wind the fishing line on it, and only after that set up the friction brake.
For experienced fishermen this all seems quite simple, but for beginners this information will be very valuable. So, let's start by installing the spinning reel.
If you want to understand the topic of spinning reels in more detail, we recommend our article - spinning reels.
How to install a reel on a fishing rod
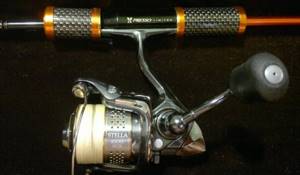
Installing the coil is extremely simple, and even absolute beginners should not have problems with this procedure. First you need to unscrew the mount, then the reel is inserted into a special holder located on the handle of the rod.
The ring is then tightened tightly and the base of the coil is subsequently clamped. The coil should not dangle, but it is important not to overdo it when tightening, so as not to strip the thread.
It happens that during fishing the reel holder gets unscrewed a little, so tighten it from time to time.
How to wind fishing line on a spinning reel
We stretch the end of the fishing line through all the rings of the rod, starting with the smallest one at the tip of the spinning rod;
We fold back the line ring and tie the line to the spool using a reliable self-tightening knot;
Next, the actual process of winding the fishing line begins. For this procedure, it is necessary to provide a slight tension on the line, which a partner can help with, or you can put the skein in your pocket and pass the line through the fingers of the hand that holds the rod (with the other hand you rotate the reel handle).
Too much tension is also undesirable, as it can lead to the formation of knots or simply uneven winding.
Stop the process of winding the fishing line when there is approximately 2-3 mm of free space left to the edges of the spool. You should not reel in more fishing line, otherwise the same knots, tangles, or slipping of the fishing line during casting may form in the future.
At the end of fishing, it is recommended to always make a “idle” cast, and then, with the rod positioned perpendicular to the ground, slowly wind the fishing line so that it dries a little and lays flat on the spool.
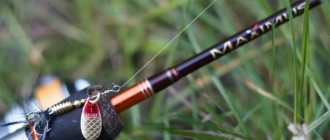
Installation of equipment on a spinning rod for pike fishing
If the fishing line is already wound, pass it through the rings, starting from the bottom one, the leader and the bait in the same sequence as shown in the video.
Assembling a spinning rod and installing equipment for pike fishing is not a tricky task, but it requires some knowledge and dexterity from the angler. Properly selected and mounted gear is 80% of the success of the upcoming fishing.
Views: 118
Similar articles:
- How to choose a spinning rod for catching pike from the shore? Optimal rod length What should be the ideal spinning rod for coastal pike fishing?…
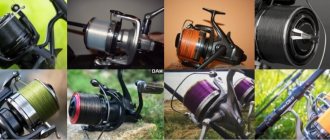
- The best spinning reels for pike fishing. Top 10 best models Top 10 best spinning reels recommended for catching large…
- Fishing line for pike. Choosing monofilament and braided line for spinning When fishing for pike on a spinning rod, there cannot be one “ideal”...
- Spinning rod structure - what is it? Rod construction is one of the most common topics of discussion...
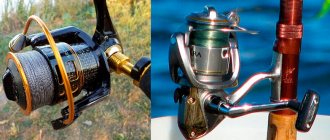
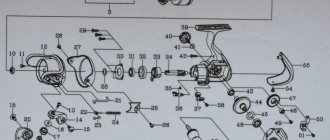
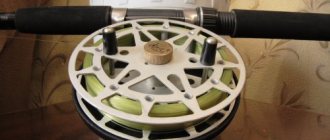
What is reel backing?
To answer this question, you first need to understand the reel spools themselves. There are reels with deep and shallow spools. Deep spools are used for winding thick lines, and shallow spools for thin lines. The question arises - how to properly wind a thin fishing line onto a deep spool.
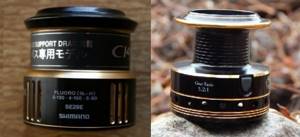
The winding should be such that the fishing line fills the spool almost completely, so that only 2-3 mm remains from the end of the spool side to the fishing line. In the case of using thin lines on deep spools, it is necessary to first wind an auxiliary line onto the spool; this line is called backing. This way we will fill the inside of the spool, and on top there will be a thin line with which we will fish.
If you are going to fish with thin braided lines, we highly recommend choosing reels from Shimano and Daiwa . They have a wide range of suitable reels at different prices.
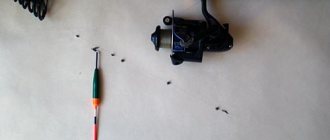
Adjusting the winding of line on the reel spool using washers
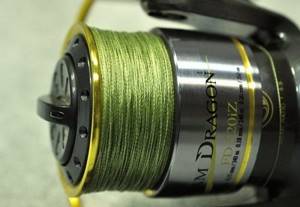
There are times when even a new and even very expensive spinning reel sheds loops and forms “beards”. But this is not a reason to write it off; you can and even need to adjust the winding profile and it will properly perform its functions. This happens especially often if the spool is wound with braided fishing line. Braided line tangles more than simple monofilament line.
Imagine the situation - you bought a new reel, wound a brand new cool Japanese line and went fishing for the first time with a new reel, and this is where the surprises begin. Especially, they lie in wait for those who like to fish with twitching, i.e. jerk wiring. The main problem is the dropping of loops, or “beards” as they are called. Unraveling them takes a lot of nerves and time, and when fishing there is never enough of it.
And often we don’t untangle them, but simply cut off the tangled piece of braided cord. If she often sheds these same “beards,” then you can lose half of the line on just one fishing trip. To avoid this, you just need to try to adjust the winding profile on the spool and in 90% of cases, this will help avoid loops.
A profile is a conventional section of the spool along with the cord wound around it. There can be three options: straight cone, reverse cone and “camel mountains”. When the turns lie unevenly and lumps of fishing line form.
The last “bumpy” profile is the most problematic, and if you wind the cord on the spool and see these bumps, then there will definitely be “beards”. From experience, the most correct option is a reverse cone; it gives the least number of problems with dropping loops, or rather, there are practically none. With a straight cone, the situation is 50 to 50. If there are no loops, then nothing needs to be adjusted, if the coil is a no-no and drops a couple, then you need to adjust. How to do it?
But, not the ones we use with bolts and nuts, but very similar. Based on the above, our task is to obtain a reverse cone. With which there will be the least number of loops and “beards”, in most cases there will be none at all.
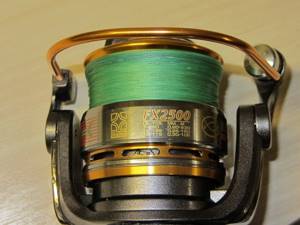
The essence of adjustment using washers is essentially very simple:
We take the reel and perform the standard procedure for winding the braid onto the spool. We look at the resulting winding profile. If after winding we get a light reverse cone, then we leave everything as is. When the profile is far from the reverse cone, you need to try to change it using washers that are located under the spool. Usually, it is enough to remove the washer or replace it with a thinner one and you will get a reverse cone. But it often happens that this cone is too steep and this is bad. Then the adjusting washer should be thinner. This can be cut out of plastic, which is used in boxes for wobblers and spinners. It is just a little thinner than the standard washer that comes with the spinning reel. Some reel models already come with spare washers in the box specifically for adjustment. Moreover, they are different in thickness. If you bought just such a spinning machine, then adjusting the winding profile will be a little easier and faster.
After all these adjustment manipulations, only real fishing will show whether we have adjusted the winding profile correctly. If during the entire fishing there was not a single beard or loop, then everything is normal, but if there were problems, you still need to work with the washers.
In some cases, the reasons for the beard and loops are not the winding profile, but something else:
A cheap and unadjustable coil that you simply can't do anything with. Incorrect line winding on the reel. The coils did not fit tightly together, and this caused problems with the hinges. During winding, it is imperative to adjust the brake so that at the slightest resistance it works. This is the only way to achieve an even and tight laying of the cord on the spool.
Read other articles, reviews and testimonials:
- Shimano Exage - Review and reviews of the spinning reel
- Daiwa Legalis - Review and reviews of the spinning reel
- Shimano Stradic - Review and reviews of the spinning reel
- Daiwa Freams - Review and reviews of the spinning reel
- Daiwa Legalis LT 17 - Review and reviews of the spinning reel
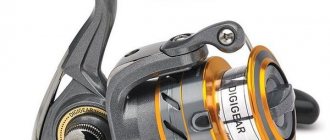
How to adjust the reel clutch
By properly setting up the reel, you will minimize the possibility of line breakage and will be able to catch large fish. All models of spinning reels are equipped with a friction brake that allows you to adjust the force.
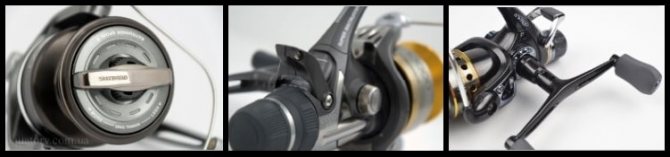
When loaded, the reel spool rotates and the line is gradually released, which allows you to “extinguish” sharp and strong jerks of the fish. The clutch can be front (located on top of the spool) and rear (at the bottom of the reel).
When setting the friction brake, you need to focus on the breaking load parameter of the fishing line. So, if the latter is about 7-8 kg, then the clutch is adjusted to 4-5 kg. If the fish jerks, the friction brake mechanism will work and the reel will “release” a certain amount of fishing line, protecting you from the gear breaking.
In order to adjust the clutch, ordinary weights with a certain weight are most often used, which are attached to the end of the fishing line. Although many fishermen practice adjusting the clutch in a different way, right before fishing. To do this, the spinning rod is fully equipped and put into working condition, and then the bait with a hook is hooked onto a tree or other static object.
Next, you need to step back a little and tighten the spinning rod as if fishing for a potential catch, and, having reached the maximum tension at which the rod bends into an arc, release the friction brake until the ratchet operates. Do not overdo it, otherwise, instead of a adjusted drag, you will only get a broken rod.
There are two types of friction brake: front and rear. The front clutch is more accurate and reliable, the rear clutch is more convenient to set up. Read more about friction clutches in the article - friction brakes.
In conclusion, we note once again that no special skills or knowledge are required to secure and configure the coil. These procedures are quite simple to perform, but they are very important, because the success of fishing and the preservation of gear largely depends on the reliable fastening and correct adjustment of the reel.
Author of the article: Vitaly Leonidovich Ivanov, 2021.
Adjusting the spool friction brake
Finally, adjust the friction brake tension. It should be slightly less than the strength of the fishing line (indicated on the packaging). If the brake is too tight, the line may break when landing a large fish. If the braking is very weak, then even a small fish will reel in the fishing line and go into hiding. The tension of the friction brake can most accurately be adjusted using spring scales. Attach the free end of the line to the weight hook of the scale and pull it: when the tension in the line exceeds the braking force, the spool will rotate and release the line (which the ratchet brake will notify you). The indication of the scale arrow at this moment indicates the braking force.
About