What is feeder tackle?
A feeder is one of the well-known tools designed for bottom fishing (peaceful fish), using a specially designed feeder rod and a feeder, which also serves as a sinker.
The bite indicator in such rods is interchangeable tips of a certain flexibility, designed for various fishing conditions. This nuance can be attributed to the features of feeder fishing. What is still needed for fishing to be considered feeder? Rod. For feeder fishing, special rods are produced, both telescopic and plug-in. The presence of different flexible tips in the kit allows you to use feeders of different weights. At the same time, instead of feeders, you can install ordinary sinkers, depending on the fishing conditions. Therefore they say:
- picker-quivertypes – for fishing with sinkers;
- feeder quivertips - for fishing with feeders.
In retail outlets you can find rods with lengths from 1.8 to 4.5 m. Depending on the length of the rod, the casting distance also depends. The tips have their own sensitivity and their own test. To avoid confusion during the installation process, they are painted in separate colors.
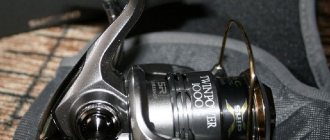
Coil. Bottom fishing does not require special reel performance, so any spinning reel equipped with a front or rear drag will do. When fishing for carp or carp, especially larger ones, you will need a reel with a baitrunner.
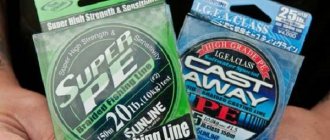
Main line. Since you plan to fish at a considerable distance from the shore, it is better to take a braided fishing line. It does not stretch and is able to quickly transfer bites to the tip of the feeder. In addition, it is stronger and more stable than monofilament fishing line.
Feeder. The feeder, its dimensions and its weight are selected depending on the casting distance, as well as the presence of a current. As for the shape of the feeder, this is not of fundamental importance.
Leash. Monofilament fishing line or fluorocarbon are used as leashes. Recently, fluorocarbon has been used more often because it is invisible to fish in the water. In this case, you should always install leashes whose breaking load is less than the breaking load of the main fishing line.
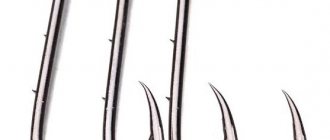
Hooks. Hooks are selected depending on the type of fish being caught. For example, when fishing for carp, carp hooks are used. Hooks come in both thin and thick wire.
Rod stand. Feeder fishing does not involve constantly holding the rod in your hands, like fishing with a regular float rod. Having thrown the tackle into the water, the rod rests on the stand. You can use a regular wooden flyer, cutting it directly onto the pond.
The catchability of feeder gear depends on factors such as the correct choice of equipment, which would take into account all the characteristics of both the reservoir itself and the gear as a whole.
First you need to find a catchable place where bream can be found. If fishing is carried out on the river, then you can use heavy feeders weighing up to 100 grams. If it is a pond with standing water, then the weight of the feeder may be less. But at the same time, you should not forget that you cannot throw a light feeder far.
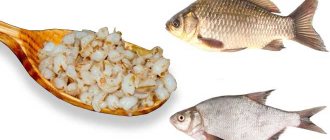
For catching bream, a rod with a length of 3 to 4 meters and a weight of 100-120 grams is suitable. The leash can have a diameter of about 0.18 mm. Hooks are selected in such a way as to use baits such as worms, pearl barley, peas and corn.
Tools such as “paternoster”, “asymmetrical loop”, “symmetrical loop”, anti-twist tube and others are suitable.
When configuring feeder equipment for carp fishing, you should take into account the fact that this is a fairly strong fish that can damage both the rod and the reel, not to mention the equipment breaking.
Basically, they choose a rod about 4 meters long and install a reel on it, size 5000-6000, no less. A special carp leash can be used, as can hooks. The thickness of the leash made of monofilament fishing line must be at least 0.25 mm. The thickness of the main line is 0.35-0.4 mm.
Fishing for crucian carp does not require the presence of powerful gear. A rod 2.5-3 meters long, equipped with a reel, size 2000, is enough. It is possible to use a leash with a thickness of 0.08-0.12 mm and a main line of 0.2 mm. Moreover, ordinary monofilament fishing line is sufficient. Hook, size no larger than No. 6, according to the international classification.
Donka fishing from a spinning rod with a feeder - how to improve and set up catchy gear
For successful catching of bottom fish at a great distance from the shore, bottom gear with a feeder is ideal.
One of the simplest options is a spinning rod with a feeder, which is easy to assemble and the cost of the gear can be no more than 500 rubles, since the most inexpensive components are used. But such gear also has its drawbacks. First we'll look at the pros and cons of the gear, and then we'll look at how to assemble it and what alternatives you have.
Advantages of spinning donkey:
- Cheap;
- Quite durable;
- That's where the pros end, the cons will come next.
Minuses:
- Very weak casting range (no matter what spinning rod you have, you won’t be able to cast a large 70+ gram sinker far, it will break).
- Weak sensitivity (prevents you from actively catching fish with a good bite).
Let's draw conclusions. If you already have a spinning rod and want to try what bottom fishing with a feeder is, try it, but know that you will not get 100% return from the gear. To get the most out of it, you need feeder tackle, which we already have an article about. It includes a powerful, sensitive rod and a good feeder reel. These components allow you to throw rigs 80 meters or more, which is more than enough on any body of water.
And the cost of feeder rods is not that high. Initial options can be found from 800 rubles per fishing rod.
But let’s return to the primitive option - a spinning rod donka, which we will equip with a feeder.
How to make catchable feeder gear?
Long gone are the days when anglers made most of their gear themselves. Feeder is an exception. There is enough gear available for fishing this way. You can just come to the store and buy everything you need - from a rod and reel to a seat and a box of feeders. And all this will work without additional modifications.
- Feeder rod - from scratch or converted from another
- Feeders
- Seats, platforms
- Sieves for bait
- Rod stands
- Advanced Fishing Reels
- cages
- Additional alarms
- Extractors
And many thousands of little things that a fisherman can make on his own and does not need to be bought in a store. In addition to completely homemade things, there are a lot of useful purchases that can be made more profitably in other stores than in special fishing stores. And they are perfect for feeder fishing, performing just as well as specialized ones.
Feeder and spinning rod
On many reservoirs, feeder fishing is the most common type of recreational fishing, but what is the difference between a feeder and a spinning rod? Often this is the only way to catch big fish at certain times of the year. And that’s when adherents of other types of fishing, for example, spinning anglers who decide to try their hand at feeder fishing, have some questions. They are puzzled by the following nuances: is it possible to make a feeder from a spinning rod? It will be useful for these spinners and just beginning anglers to know the answers.
Which feeder to choose?
- Bait - for primary feeding of fish, attracting them to the fishing spot. Holds a large volume of feed, has large holes for its quickest rinsing;
- Feeder for long-distance casting - similar to a badminton shuttlecock, good for casting to the right place;
- Supplementary feeding - good in still water and in currents, has different cells for slowly washing out the feed. Its task is to keep the fish in one place for a long time.
Choice of bait
The success of feeder fishing depends on well-chosen bait. The bait is based on various cereals and cakes. They also add aromas and worms. Each fisherman has his own secrets for preparing bait.
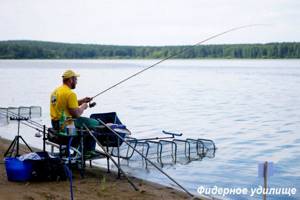
The feeder is filled at the fishing site and always with fresh food. An exception may be fishing for carp, which is called “water pig” because of its omnivorous nature. Throw a feeder with hooks attached to it to a possible location of fish. Fixed on a stand at an angle to the plane of the water. This makes it more convenient to watch the moment of the bite.
One of the disadvantages of feeder fishing is frequent baiting. This reduces the actual fishing time. To solve this problem, feed is delivered in another way (by hand, slingshot). It became possible to use a form without a feeder, with a lighter structure. This is how light-weight picker rods with large dough appeared. There was also a spinning rod here. Picker from a spinning rod has become available to many homemade fishermen.
Depending on where the fish will be caught and what kind of fish will be caught, the feeder rod is selected.
This indicator is of serious importance, since it determines how far a feeder with bait of a certain weight will be thrown. In this regard, the feeder rod is divided:
- for ultralight with dough up to 30 g;
- for light ones with dough up to 60 g inclusive;
- medium class with dough from 60 to 80 g;
- for medium heavy with dough from 80 to 100 g;
- for heavy dough with dough from 100 to 120 g;
- for extra-heavy with dough from 120 g and more.
It is not recommended to go beyond the test limits, since extra grams will overload the tip and can lead to its failure. If you use feeders whose weight is less than the test indicator, this will lead to a decrease in the sensitivity of the feeder gear.
The longer the rod, the further you will be able to cast the rig. Therefore, when choosing a fishing rod, you should consider how far you will have to cast the tackle. If the reservoir is small, then a long rod is not needed at all. Therefore, you need to pay attention to a rod with a length of 2 to 4 m.
We suggest you read: Spinning rod for jigging from a boat: rating and which one is better to choose
Feeder rods differ not only in test, but also in structure. The structure can be:
- Slow. The blank of this rod bends completely, both when casting and when playing fish.
- Fast. As a rule, in such rods only the upper part is bent. Such rods react very quickly to fish bites and allow you to completely control them when fishing.
- Average A similar rod reacts differently to different loads. At low loads, only the upper part works, and when the load increases, the middle part can also be turned on.
What is the difference between a feeder and a spinning rod:
- The feeder rod is quite long, up to 4.5 meters and heavier than the spinning rod. It is used for bottom fishing; after casting, it is fixed in the stand. The spinning rod is held in the hands and the reel is constantly rotated. The length of the feeder is an important indicator; it determines the casting of the feeder over a long distance.
- Feeder forms have the same indicators as spinning forms: test, action, length. They show the weight of the bait, which can be cast without fear of breaking the tip. The structure of the whip is characterized by its convexity under load;
- Spinning rods are much shorter than feeder rods. This was done for ease of throwing. Spinning fishing is active; you have to cast baits of different weights hundreds of times. With a short whip, the angler will not get so tired.
- An important difference between a spinning rod and a feeder is the presence of a tip on the latter. The fisherman feels the bite, this is not the case with a spinning rod. There, holding the fishing rod constantly in his hands, the angler hears the fish hitting the bait.
Vershinki
Special mention must be made about the top. Its sensitivity is measured in ounces. The ounces indicate how hard you need to press the tip of the tip to bend it 90 degrees. The toughest are the 6-ounce ones.
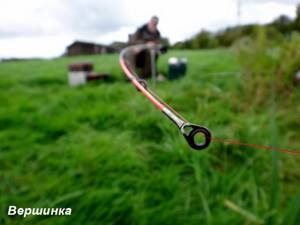
The tips are divided into three degrees of hardness.
- Soft - used in standing water;
- Medium - for fishing in small currents, or in windy weather;
- Hard - used on rivers with strong currents.
The tips do not take part in the throwing process; they transfer the weight of the load to the form. When choosing a tip, you should know the speed of the current and the weight of the feeder being thrown.
In addition to these differences, there are also great similarities between spinning and feeder rods. This concerns the material of manufacture: they are all made of fiberglass and carbon fiber. Composite materials (graphite and fiberglass) are also used. And the most modern materials for the manufacture of spinning and feeder rods are carbon.
For successful feeder fishing, an angler must know all the accessories for such fishing. Feeders can be factory-made or home-made. Its role is to deliver food to the place where the fish are located. It is both a bait for bottom inhabitants and a place for them to feed.
Do-it-yourself feeder rod: manufacturing and alteration
It's no secret that not all anglers can afford a new rod at all. There are different situations in which you have to fish on a feeder with a homemade rod or a rod adapted for the feeder: the only working feeder broke on a previous fishing trip, you want to try a new type of fishing, but at the same time do not spend money on buying a new rod, you want to get an additional feeder rod in addition to the main one or or other options. Of course, a purchased rod specifically designed for feeder fishing will be better than a homemade one made by a non-professional.
Expert opinion
Chashchin Pavel
Federation of Fishing Sports of the Moscow Region
The easiest way to make it is to make a homemade telescopic feeder. To do this, you need to purchase a cheap telescopic spinning rod in the store, or use an old one. Even a rod with a broken upper leg will do.
manufacturing is as follows:
- The cap is removed from the lower knee and the tulip from the upper
- The upper knee is removed
- An insert is made into the penultimate elbow, which allows you to install a feeder tip of suitable diameter. Can be made from a hollow top elbow or any hollow tube.
- If necessary, the tip at the base is sharpened so that it fits there tightly enough.
That's it, the homemade telescopic feeder is ready. It unfolds, a coil is installed in it and the tip is placed. After this, they thread the fishing line through the rings, place the feeder and fish as with a regular feeder.
Another option is to use an adapted fishing rod. Quite soft spinning rods with a length of 2.4 to 2.7 meters are suitable. As a rule, these are cheap rods costing up to 1,500 rubles. The tip should be solid and quite thin. The material of such a spinning rod is only fiberglass, since you will have to throw it with overload, and cheap coal will immediately break.
It is unlikely that such a spinning rod will produce a full-fledged feeder, but you can use this rod as a picker. The solid tip will indicate a bite quite well.
It is recommended to throw a weight of no more than 40 grams, but when fishing on a pond this is quite enough. For comfortable fishing, you should change the rings on the upper knee to smaller ones and place them more often, every 20-30 cm. You should follow the line along which the rings were before. The monolithic tip will show a bite, and if necessary, it can be used for limited spinning fishing by placing another reel and fishing line and tying a spinner bait.
Is it worth converting a feeder rod from a spinning rod with insertable knees? No, it's not worth it. Usually such rods are quite expensive, and a ready-made feeder will cost less. And in terms of functionality, even an inexpensive purchased feeder will outperform a homemade one made by a beginner in rodbuilding. There is, however, an option to use broken spinning rods. The one with only the top near the tulip broken will do. It can be altered by making an insert for a replaceable tip.
Usually it takes a very long time to make a special feeder rod; it will still require additional costs for some materials, epoxy glue, and tools. Therefore, it is still recommended to purchase a ready-made rod for feeder fishing, but you can save on accessories.
How to make a feeder from a spinning rod
I am an avid spinning rod player, and if in the spring the predator’s bite is difficult, then I have a backup, long-proven option - I’ll instantly convert my spinning rod into a feeder and catch leucorrhoea, getting great pleasure from it, since the pike and perch are on strike.
I’m not keen on bottom fishing in summer and autumn, so I don’t have much desire to purchase specialized feeder gear for just a few spring fishing trips. Moreover, a normal 2.7m jig rod with a soft tip and 40g test completely suits me when working with feeders weighing 20-80g, and I haven’t broken anything yet. I don’t encourage you to follow my example, but I will say this – you can foolishly break anything, including even a powerful feeder with a small 20g feeder. When I work with the spinning rod carefully, I don’t cause any problems to it. I’m just not too lazy to check before each cast to see if there is any overlap in the tulip area.
The cast itself is not a short, sharp jig, but a wide, smoothly accelerated one. I always hook it short, because even when the fish is not hooked, I still have to move the feeder along the bottom. And the tip of the rod is not at all hard when fishing in the current, but somewhere there is a lack of sensitivity, so I’ll hang a bell or a simple plumb line, following the example of the zakidushechniks. Plus 0.12 braid on a reel, some 0.12-0.2 fishing line for leashes, a set of feeders, hooks, a stand with a small fish tank, a folding chair, some groundbait - so I’m practically a full-fledged fisherman. Maybe I’m wrong, but, in my opinion, too much attention is paid to feeder equipment; nevertheless, the most important thing is the choice of the right tactics and fishing techniques, and this is what I focus on when searching for fish.
It’s difficult to get rid of spinning “habits” when using feeder fishing, but this is not bad – sometimes it has a positive effect on the results. I often hear that the fisherman must sit out the fish, not twitch, and persistently feed the point. I don’t argue, but in my experience, it is in the spring that the legs feed not only the spinning fisher, but also the milker. On a spring day I can easily walk along the river for about a kilometer, checking each promising place for a maximum of half an hour, and if I don’t find anything interesting, then I move further 50-60 meters. If I don’t see any obvious good places, then, following my jigging habit, I will quickly tap the bottom, finding an interesting “trunk”, an edge where there is no grass, snags and where there is potential for feeding.
I will tap it with a suitable weight so as not to break into spinning fishing. But sometimes I can’t stand it and leave it with a ripper on a jig head - I’ll scout out the place, catch something predatory, if I’m lucky, then I’ll feed.
Spinning habits also affect the active selection of catchable feeder baits. Just as in spinning fishing it is difficult to count on regular success with one or two spoons or rubber bands, in bottom fishing there is no desire to fish only for a worm on a hook or to rely only on a universal, easy-to-use maggot.
Fussing with preparing plant baits is alien to me, but I try to compensate for this laziness with animal baits that I look for in a pond or on the way to fishing - shells, leeches, shitfish, caterpillars, bark beetles, water worms, etc. And I often change different baits, combining them in “sandwiches”, looking for and finding my cherished bite. Plus, I have long been convinced of the effectiveness of artificial baits, making cuttings (in the form of maggots or small shortened worms) from old rippers or twisters. Even ordinary tires worked, and when the “edible” appeared, everything went great, especially for perch and silver bream.
The biggest influence of spinning on feeder fishing was the habit of selecting a catchy line. Of course, in donk its importance is not so great, but it can be significant, giving significantly more fish compared to fishing with a stationary bait. Even the simplest braces can work great - pull it up very slowly a few centimeters, give a pause for a couple of seconds, pull it up again and then another pause.
The main experiments I conduct are not with the pull-up distance, but with pauses, from very short to long, several minutes. On a river current, such pull-ups are especially good when the weight of the feeder is beyond reserve, it can hardly be held at the bottom, and when pulled up, it is slightly carried away in an arc, while the nod straightens. Having convinced himself that this was an interesting technique, he began to complicate such wiring, making the demolition arc longer.
The main thing is that there are no algae at the bottom, and especially no snags. It is also important that the equipment is as simple as possible, not prone to tangling, I assemble it on the basis of a regular spiral, oval sliding feeder, loaded according to the force of the current: I put it on the braid, then a plastic bead - a bumper, I tie a swivel, and a leash with a hook to it.
I cast across the river a little higher upstream, hoping that the feeder will lie on the bottom opposite me, fix the whip in the reel clamp, determining the range, and immediately reel it to the shore. I fill the feeder with food, put on the bait, cast it - the feeder lies on the bottom, and it slowly begins to be pulled in an arc towards the shore, the whip is taut. At some point the drift stops, I pause for a few seconds and reel in the equipment for the next cast. I add food to the feeder and throw it to the starting point, trying not to smear it, noticing a suitable landmark on the other side. After just a few casts, a fed arc is created at the bottom - a path along which I continue to fish.
Coil selection
Along with classic spinning fishing, feeder spinning fishing is gaining popularity.
There are differences between spinning and feeder forms. Although these differences do not prevent you from fishing with a spinning rod as a feeder, or with a feeder as a spinning rod.
In a spinning rod, the strength and elasticity of the rod should exceed that of float rods. A simple spinning cast is sometimes on the verge of the strength of the tackle material.
Modern rods for spinning tackle are made of carbon fiber and carbon fiber with the addition of boron fibers, which create additional flexibility. The most common products now are made from multilayer composite with the addition of graphite. They have the inscription "CARBON" on them.
There are no special requirements for the reel for feeder gear. At the same time, you need to take into account that you will have to throw heavy feeders over a considerable distance. Therefore, the reel must be reliable and must have a rear or front clutch. In addition, if you plan to catch large fish, then you need a baitrunner to smooth out the jerks of powerful fish.
The size of the reel depends on the thickness of the fishing line and its quantity, or rather its length. As a rule, at least 150 m of fishing line is wound on the reel. When fishing for carp or other large fish in large bodies of water, it may be 150 meters.
Basically, reels with average gear ratios and traction are selected.
The number of bearings in the reel is also important. The best option is 5-6 bearings. The quality of the reel depends on the number of bearings, which is associated with uniform and smooth winding of the fishing line. Although this indicator is more important for completing a spinning rod.
A very important point! The more bearings, the more expensive the reel. Although the number of bearings in a reel for feeder fishing is not of fundamental importance. You can fish with one bearing, which is what many anglers do.
Feeder fishing technology
The first stage of feeder fishing consists of feeding:
- in order to bait one place, fishermen use an object on the opposite bank, for example, a tree, as a guide;
- fill the feeder with food and throw it at the point where you will fish;
- after the feeder splashes down, you must immediately close the line guide and clamp the line with a clip (thus, the next throw will be the same length as the previous one);
- after the bait feeder reaches the bottom (the tension of the fishing line disappears), you need to make a sharp jerk so that the feeder pours its contents onto the bottom. We take out the feeder.
In order to properly feed the future fishing spot, you will need to make about ten such casts.
After feeding, we begin the fishing itself:
- attach a leash with a hook;
- we put a worm or maggot on the hook (there may be options);
- we cast to the baited area;
- If the tip signals a bite, then we hook and pull out the caught fish.
Homemade feeder tips
Any angler who is familiar with a feeder knows that rod tips are a consumable item. At least two or three break during the season, and you have to constantly buy them in the store. But you can make the ends for the feeder yourself, using cheaper components, and save up to 50% of money! Fiberglass tips are made.
It is better to do this in a large batch, about 20-30 pieces. To do this, you need to buy a semi-finished product in the store - fiberglass whips. The price of such a whip is from 1 to 2 dollars. The whip is clamped from the butt part into a drill, which is installed motionless in a vice. Then sandpaper is applied to it and it is ground down to the desired thickness.
After processing, the butt is ground down to the desired thickness that is suitable for your feeder. Rings from old broken quivertypes, store-bought or homemade, are installed on the tip. It is desirable that the rings be as light as possible and they need to be placed quite often. If you use a braided cord, it is better to buy rings with ceramic inserts.
At the end it is painted with bright colored nitro paint. The tips can be marked by placing it in the rod and seeing under what load it bends 90 degrees - this is the quivertip test. As a result, you can save up to $2 on each homemade feeder alarm if you buy all semi-finished products in bulk or use spare parts from broken gear. In the same way, you can make feeder nods, which are more used in bottom fishing.
Feeder feeders
Many people know that for feeder fishing you can make feeders yourself from lead and a plastic bottle. These are the so-called “chebaryukovkas”, named after the name of the inventor, which are an oblong lead weight with an eyelet for fastening and a plastic cylinder with holes attached to the top of the weight into which food is poured. The cylinder is hollow on both edges, delivers feed even to great depths and currents without scattering and delivers it satisfactorily. This homemade feeder feeder is best suited for catching bream in the current.
However, not everyone knows that the process of making a chebaryuk feeder can be simplified. For this, thickened plastic from a bottle is used. The bottle is heated over a fire, causing it to shrink slightly in size. The plastic of the bottle becomes much thicker. Feeders are made from this kind of plastic.
Plastic with holes made in it is immediately installed into the mold for casting sinkers, into which lead is poured during casting. Lead is not capable of melting thick plastic, and even if it does, it does not affect the functionality of the feeder. As a result, we get rid of the operation of attaching the sinker, and the attachment itself is more reliable.
The most important question is where to get lead. All the old lead-braided cables have long been dug up and handed over to homeless people, and it’s expensive to buy weights for tire fitting, which are recommended by most authors of videos on YouTube. A simple option is to purchase the largest “hare” shot by weight at a hunting store. It is the cheapest source of lead available to any angler and is sold without a gun permit.
Using this method, you can make many feeder feeders with your own hands and not be afraid to unhook them. It is very technologically advanced and does not involve any precise operations or special tools such as a riveter. The only expensive component that can be recommended is an aluminum casting mold, which can be made to order at the factory. But if you make a lot of feeders, then this expense is justified, and if the angler himself is a miller, it’s not so difficult to do it during a lunch break. Feeder mounts and anti-twist mounts can also be made by the fishermen themselves and are the same consumables as feeders.
Leash
Monofilament line or braided line (cord). The most preferable option is braided fishing line, especially if fishing is carried out at a distance of 70-100 meters. In addition to the fact that it has a greater tensile strength and is more wear-resistant, it also does not stretch. This makes the tackle much more sensitive compared to using monofilament fishing line, unless, of course, it is a cheap Chinese fake.
We suggest you familiarize yourself with: Catching perch with a retractable leash in a river, lake or pond
At fishing distances up to 20 or 30 meters, monofilament fishing line is suitable. Therefore, under such fishing conditions, as well as when fishing in still water, you can safely use monofilament fishing line and not pay extra money.
Line for leashes. As a rule, monofilament fishing line is used to make leashes. Its thickness is determined depending on the weight of the fish. When fishing for crucian carp, for example, or roach, a leash with a diameter of 0.1-0.12 mm is sufficient. When fishing for bream, where a medium-sized specimen can bite, you can install a leash 0.2 mm thick, with a main line thickness of 0.25-0.35 mm.
Recently, fluorocarbon has been used as a leader material. It is ideal for this because it is invisible in water, although its characteristics are somewhat inferior to monofilament fishing line. But if you take into account that it is not noticeable to the fish, then you can install a leash of a larger diameter.
Feeder hooks. As a rule, feeder tackle is equipped with the most common hooks. At the same time, they are selected in size, depending on the bait used and the size of the fish. The main thing is that it fits freely in the fish’s mouth. At the same time, you need to take into account that each type of fish has its own mouth size.
The length of the leash can be 15-20 cm or more. If fishing is carried out on the current, then the length of the leashes is increased to 50 cm or more. For example, when fishing for sabrefish, the length of the leash can be from 1.5 to 2 meters. In this case, especially on a river, the length of the leash is determined experimentally.
Stands
Many anglers look at feeders and are amazed at how many different supports are used when fishing. This is a pair of stands opposite the angler, so that you can fish several different points with different casting sectors, a second pair under the butt of the rod, another stand on the side to put the rod on it while fishing, when you take off the fish, fill the feeder and change the nozzle, and another pair stands on which ready-made spare fishing rods lie.
Of course, you can get by with three - two for installing an abandoned feeder and one on the side, on which the rod is placed to remove the fish. Many people consider this unnecessary, since they can cut flyers from bushes growing along the banks of a reservoir as weeds. But anyone who has used stands knows that they are much more convenient, and no time is wasted preparing the fishing area.
All these stands have different configurations, and their price in the store is quite high. But you can use cheap flyer stands, which cost a little over a dollar, and then make wide feeder stands out of them, allowing you to move the rod in a large sector.
To make it, take a cheap flyer stand, usually used in float fishing. You can take both short and telescopic ones. It is most convenient to use supports that are screwed into the ground, as they do not warp if you place the rod close to the edge. The flyer from the top is twisted and sawed off. We only need the threaded part that fits into the rack. It comes out carefully.
After this, take a 16-gauge polypropylene pipe and insulation for it of a suitable diameter. The pipe is bent so that the side stops of the stand of the desired shape are obtained - an angle, a ring or a hook. You can bend it by heating the pipe over gas and holding it in welding gloves so as not to burn your hands.
Expert opinion
Chashchin Pavel
Federation of Fishing Sports of the Moscow Region
Then pipe insulation is put on the pipe, and a hole is cut for the insert. A rod placed on such a stand is not injured and clearly maintains its position due to the roughness of the polypropylene coat. The stand is resistant to water, ultraviolet radiation and mechanical damage.
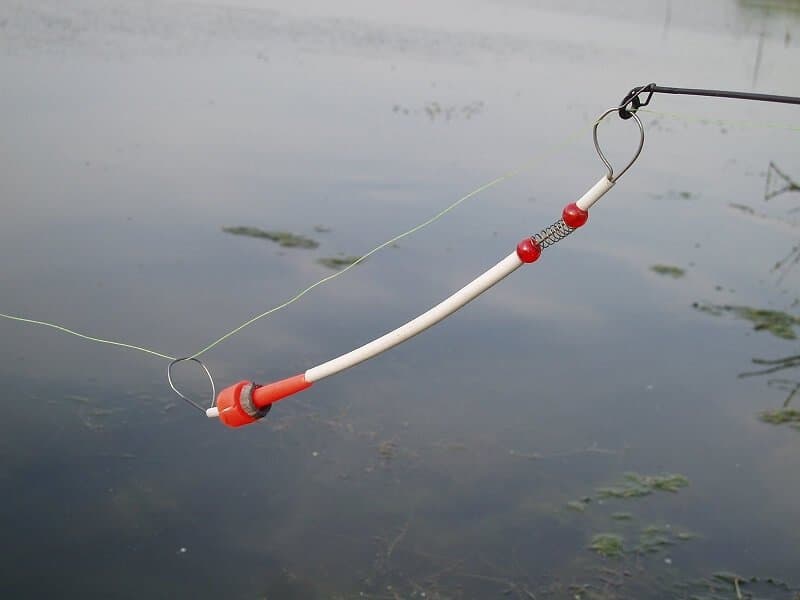
If desired, you can make other stands according to the same principle, using purchased ones or made from other materials - old canes, ski poles, tubes, etc. The main thing is that they are collapsible, light enough, and that the rod does not have direct contact with metal, but lay on a soft lining.
Contact with metal and stones when fishing will certainly kill the rod, especially the ringing coal. Cracks will certainly form in it, and the likelihood of failure will increase. For example, if a bent stand is made from wire, it must be hidden in a hose from a dropper before use, so as not to injure the rod while fishing.
Feeder fishing requires the presence of a stand to set the rod at a certain angle, for constant control over its tip. The following can be used as stands:
- Wooden flyers. They are very affordable and simple.
- Butt holders. Not very comfortable, especially in the presence of wind.
- Factory racks made of metal (like wooden flyers). They are light in weight and can be adjusted in height. They are widely used by fishermen, since not all bodies of water can cut a wooden flyer.
- Rod-pods. This is expensive, and therefore not every angler can afford such a stand. It can accommodate 3-4 fishing rods at the same time, which is very convenient.
Seats and platforms
Feeder fishing is associated with a fishing platform. This is a special seat for a fisherman, on which the necessary rod stands and accessories are attached. The platform is comfortable, has a backrest, a footrest and adjustable legs, with which you can install it even on a steep, uneven bank. For those who drive a car, the platform is very convenient.
Unfortunately, sitboxes and platforms are very expensive. A fairly high-quality and lightweight platform costs at least a thousand dollars. And good options with accessories are even more expensive. You can make a good platform yourself, using drawings and ready-made components, purchased in medical equipment stores, parts for shelving and other parts. As a result, the platform will cost you two to three times cheaper, plus a little time spent and a couple of tools for work.
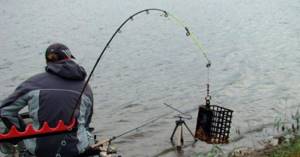
A great option is to use a winter box instead of a sitbox. It's convenient, easy to carry to your fishing spot, and most anglers already have one. To install it on a slope, two methods are used - attach a pair of legs to it on one side or install it by digging the bank under it. Both options take the same time, unless, of course, you have to place it on a concrete slope where digging will not work.
Another seat option is a regular bucket. By the way, it’s better to buy it not in a fishing store, but in a construction store - it will cost three times less. It's comfortable to sit on the bucket. You can take a couple of buckets nested one inside the other. In one the bait is prepared, on the other they sit and put the fish in it. In order to sit comfortably, the lid is made of plywood and upholstered with soft material.
Fishing technique
Fishing with a feeder weight is called feeder fishing. This is a sporting option for fishing and is much more catchy than simply throwing out gear and waiting for an ill-fated bite. We advise you to use the concept of feeder fishing from now on, and your gear is a feeder, not a feeder weight.
Here are all the stages of fishing:
- Starting cast (15-20 casts to the same point using a landmark on the opposite bank and a stopper on your reel to cast to the same place).
- Methodical fishing with recasts in 3-5-10 minutes. When recasting, we constantly replenish the contents of the feeder with new bait and be sure to update the bait.
Bite alarm
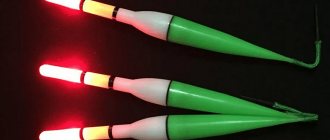
When fishing on a feeder, bite indicators are replaceable tips. In practice, this is their main purpose. If the angler is absent during the bite, then most likely he will not catch the fish, since he needs to hook in time.
Many fishermen use electronic signaling devices, which is much more convenient and does not necessarily “stick around” near the rod. This is especially true when fishing in the dark, when the tip of the rod is simply not noticeable.
We suggest you read: How to tie a fishing line
Other accessories
You can make a lot of other things for fishing - bait sieves, homemade leashes, anti-twisters, flat feeders for the feeder, etc. Also, many fishermen make homemade baits for the feeder, and they work no worse than mass-produced ones. On sale you can find self-cutters for feeders, the drawings of which are offered by a number of craftsmen, for money and for free.
Expert opinion
Chashchin Pavel
Federation of Fishing Sports of the Moscow Region
After all, the feeder originally began as fishing for the poor, when a feeder was made from curlers, a homemade stand was sharpened from a chair leg, and a fishing rod was used repurposed from a broken spinning rod. And he has great potential for improving his own gear, even those purchased in the store.
How to choose a feeder rod?

Feeder rods are presented on the Russian market in a wide range. There are both domestic and foreign brands present. There are budget feeder rods and top-end gear for every budget. All this can confuse a novice fisherman, because he is the one who asks the question of choice. Therefore, the purpose of this article is to focus on the most important details of a spinning rod for a feeder and explain to anglers what is really important and what is worth paying attention to. So, how to choose a feeder rod?
Save on purchases
There are a number of items that are used for fishing, and which are purchased in stores not for fishing, but in hardware stores.
- Buckets. It has already been said about their ability to be used as a seat. At the fishing store, the bucket says “sensas” on the bucket and costs five dollars. You can buy it at the hardware store for one or two dollars. If you wish, for two and a half, a milk bucket for food products. There is almost no difference in manufacturing quality. And if so, why pay more?
- Fishing suitcases. They are sold in fishing stores in the form of a box with a handle, which has a couple of compartments inside and small compartments on top where you can put hooks, clasps and feeders. This again can be bought at a hardware store at a price three times lower. By the way, it is very comfortable to sit on it if the shore is flat and the suitcase is large enough.
- Sectional boxes. These are boxes with a lid with a latch, with several compartments. Usually they store hooks, feeders, and other small accessories. In a fishing store, this will cost from three dollars and more. In a sewing store, these same boxes are sold for sewing supplies and cost two to three times less. You can give a lot more examples when you can simply buy the same thing cheaper and use it for fishing. However, the list is far from accurate, because sellers can change prices for their goods. The main thing that can be advised to fishermen is to look and you will find. You need to have a creative view of things and imagination, and you can always find a replacement for something that turns out to be unaffordable.
More information about the components of feeder equipment
There are several types of feeder equipment, differing from each other:
- According to the fastening of the tip: blind or sliding.
- By type of feeder: open or closed.
- According to the placement of the leash: below or above the feeder.
Paternoster
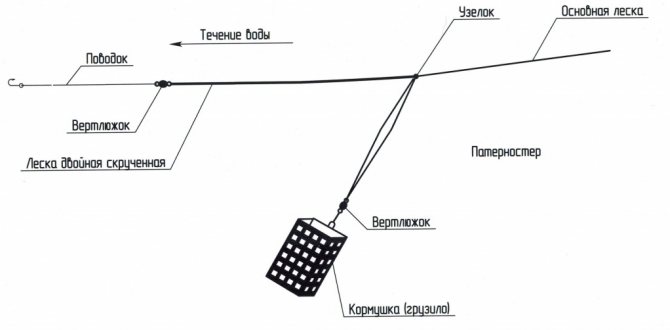
This is the most common and simplest version of feeder equipment. In this rig, the leash is placed below the feeder. To get a “paternoster”, it is enough to form two loops on the main fishing line. A smaller loop is knitted at the end of the main line. A leash with a hook is later attached to it. The second loop, larger in size, is formed at a distance of 25-30 cm from the first.
This type of equipment allows you to attach the feeder using a sliding method. In this rig, the feeder is also located above the leash. Sliding installation is done like this: take a piece of fishing line about 1 meter long and fold it in half so that one end is 15-20 cm longer than the other.
At the end of the fishing line, folded in half, a small loop is knitted, to which the leash will later be attached. After this, the fishing line is tightly twisted and, after 5-10 turns, a surgical knot is tied. A swivel with a clasp is attached to a long piece of fishing line to secure the feeder. After this, the ends of the fishing line are tied in such a way that the shoulders of the large loop along which the feeder will slide are the same.
An asymmetrical loop is knitted in a similar way, but with the difference that the loop along which the feeder slides must have arms of different lengths. In this case, the feeder should be attached to a longer arm.
The equipment is based on a sliding installation with a feeder, which is connected to an anti-twist tube. The tube is put on the main line, and at the bottom and top of the tube, on the main line there are restrictive rings. They limit the free movement of the tube to which the leash is attached.
"Harvester"
This equipment option also involves the use of an anti-twist tube, but for attaching the feeder.
"Inline"
This is a very simple rig, but similar to a sliding feeder rig. The only difference is that the feeder is attached to the main line. The sliding of the feeder along the main line is limited by 2 stoppers located at the top and bottom of the feeder. A leash with a hook is attached to the end of the main line.
Donkey device with feeder
All gear consists of the following elements:
- Spinning rod (the bigger the test, the better). Ideally, from 40 g dough. Jig rods are best suited, because they are specifically aimed at fishing with heavy jig heads.
- Inertialess reel. Any will do, since our gear is budget-friendly. If only she laid the line well. When purchasing, you can focus on standard parameters - the number of bearings (4 or more, preferably 6-8) and the quality of the housing (the more metal parts, the better, minimum metal spool).
- Fishing line – don’t go cheap here and buy high-quality monofilament fishing line that has minimal stretch when stretched. Diameter 0.3 mm. The fact is that we will have to monitor the tip of the rod, and it, in turn, gives a signal about touching the bait, but if the fishing line is too susceptible to stretching, then you will not notice the touch of the fish. There is an option with braided fishing line - it does not stretch at all, but it is less preferable due to its high cost.
- Feeder equipment is a combination of a feeder weight and a leash with a hook, which would allow all bite signals to be very sensitively transmitted to the tip of our rod. There are many different rigs. We will focus on the simplest one - paternoster. The manufacture of equipment is described in detail in our article.
At this point the tackle is ready.
