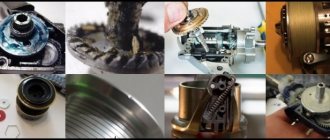
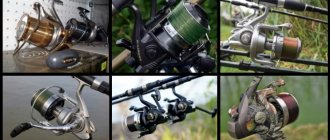
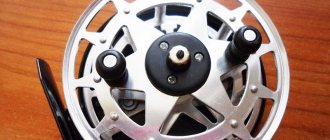
Like any mechanism, fishing reels require scheduled maintenance, naturally if they are subject to active use and proper storage. But even the most unclaimed tackle in a fisherman’s arsenal must be serviced on time; if stored improperly, the internal parts of the mechanism can rust and oxidize, therefore, the service life of such a reel will be significantly reduced.
If we talk about constantly used gear, in fishing conditions, hardly anyone noticed how the reel touched the water and sand on the shore. Debris that gets into the moving elements of the reel is cleaned on the spot, only partially by wiping with a cloth, the sand still remains in hard-to-reach places and subsequently causes damage to the bearings, bushings and gears. This greatly reduces the service life of the coils and leads to their failure.
When to lubricate coils
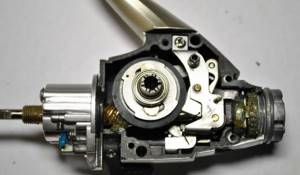
Typically, the need for maintenance of a spinning reel can be determined by several criteria:
- The beginning of the fishing season.
- Mid-fishing season, routine inspection and diagnostics of moving parts to ensure there are no extraneous noises or difficult movement.
- Routine inspection throughout the season, visual assessment of the condition and color of the oil, its leakage and contamination.
- Unscheduled diagnostics when improper operation of the mechanism is detected - noise, squeaks, difficulty rotating moving parts, backlash and visible sand contamination.
In practice, it is always better to inspect gear 2-3 times per season, even if there are no visible signs of wear, because if a reel breaks, it is not always possible to fix it, and preventive inspections and maintenance help prevent breakdowns.
Care and storage of spinning and multiplier reels
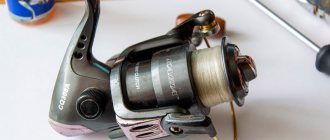
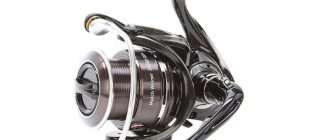
Spinning reel
When purchasing a spinning reel in a store, evaluate its “dynamics,” noiselessness and smoothness of operation, and how quickly the friction brake is loaded. The line handler's bow must be clearly fixed when opened (to increase its service life, it is recommended to close the bow by hand). Pay attention to the edge of the spool - it should be impeccably smooth.
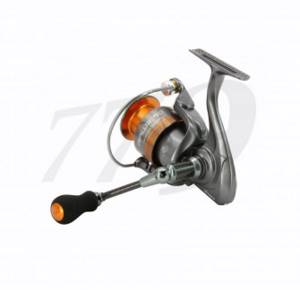
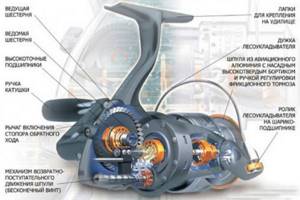
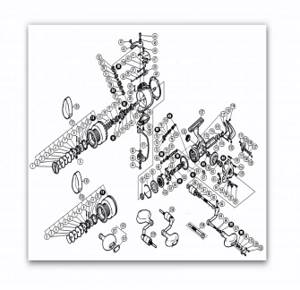
When equipping a new reel for fishing, wind such an amount of fishing line or cord onto the spool so that there is a gap of 2-3 mm in front of the edge. Having installed the reel on the spinning rod, pass the line through the rings and “load” the tackle, holding the free end of the line with your hand. Adjust the friction brake in such a way as to protect the tackle and line from excessive overload. During operation, ensure that there is no extraneous noise in the coil and any play in the components. Do not hit hard objects or drop the reel on the ground or sand. If possible, protect the spinning reel from “swimming”. If any malfunction occurs (noise, difficulty moving, etc.), it is recommended to take the reel to a specialist or disassemble it yourself. In the latter case, the assembly diagram that comes with the coil will be very useful to you. First, remove the spool from the reel. By turning the handle, lift the rotor rod to its highest position, unscrew the rotor fixing nut, loosen the internal screws and remove the housing cover. Then remove the main gear. Inspect the internal mechanism,
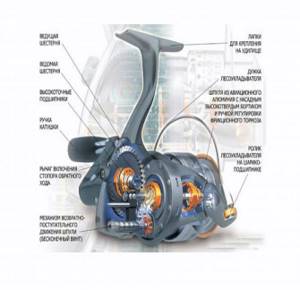
paying special attention to bearings. If you notice darkened grease, remove it with a napkin or lint-free cloth. Sometimes it is necessary to remove the bearing and wash it in a small jar of alcohol or gasoline. After removing all dirt from the internal components of the reel, fresh lubricant should be applied. To increase service life, use only special types of lubricants. For example, such a reel manufacturing giant as Shimano (Japan) produces sets of two lubricants - liquid and thick. Liquid lubricant is intended for processing bearings, thick - for gears and worm gears. The lubricant is available in cans with a long “spout” sprayer for spot application. When applying lubricant, do not overdo it - too much will definitely leak out and stain everything around. When going fishing, transport your spinning reel in a special case that protects its “owner” from shock and contamination. If the reel is briefly submerged in water or dropped onto sand, quickly and carefully pick it up, clean it and inspect it. Remove the spool and check that there is no sand on the rotor rod. In case of significant contamination or abnormal noise, immediately stop using the coil - it must be disassembled, cleaned and re-lubricated.
After fishing, it is recommended to carefully inspect the reel and, if necessary, simply wipe it. Often there is no need to completely disassemble the reel; it is enough to just slightly lubricate a certain assembly. In any case, a signal for maintenance will be a loss of smoothness or extraneous noise. Before the winter “downtime”, the reel should be checked, possible contamination should be removed, the bearings should be inspected and the old darkened grease should be replaced with a new one. And loosen the friction brake and give the reel a good rest before the next fishing season.
Multiplier reel
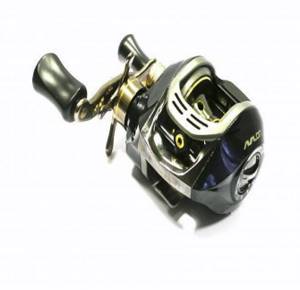
After purchase, it is recommended to wipe the multiplier reel from preservative grease. Unscrew the screws located under the handle and remove the bobbin. Wipe the bearings to remove excess grease. Don't forget to also inspect the spool ends and reel brakes. That’s it, the “cartoon” is ready to go. The multiplier reel has several nodes at once,

open to contamination and, therefore, requiring regular inspection - endless screw (line drive), spool release button, overrunning clutch. Water or dirt, getting into the gaps between the reel body and the spool (or “sprockets”), quickly penetrates the reel and begins to “work” as an abrasive. If you notice dirt or extraneous noise, stop using the reel, blow out the gaps or remove the spool and remove any accumulated dirt. In case of severe contamination or extraneous noise, full maintenance cannot be avoided. Using the assembly diagram, disassemble the coil. Pay attention to the direction of rotation of the parts - this will be useful during assembly. Remove old darkened grease from all parts. Wash the overrunning clutch without the inner race especially thoroughly in gasoline. Then carefully clean the power and speed bearings. After cleaning, dry all parts. Assemble the coil while simultaneously lubricating the already installed parts. Speed bearings are lubricated with liquid lubricant, power bearings are lubricated with thick lubricant. The more tightly the parts are fitted to each other, the thinner the lubricant should be. The overrunning clutch is lubricated with a small amount of liquid oil. After cleaning, the line layer is treated with thick lubricant. As with a spinning reel, do not overdo the amount of lube you apply. Any excess oil will definitely leak and make working with the reel more difficult. Never lubricate the driven gear of the multiplier reel. Excessive lubricant will get on the centrifugal brakes, “jumping” will begin and the reel will “beard”. Also, do not treat the spool support bearings with oil - the rotation speed will decrease.

Use only specialized reel oil. Any major manufacturer of spinning and multiplier reels produces all the necessary lubricants, guaranteeing high quality processing. Reel oil can be synthetic or mineral. Decide for yourself what to prefer. Synthetic lubricant will help achieve maximum range and better withstand fishing in the cold season. At the same time, fluid “synthetics” will “leave” from the coil faster, requiring relubrication. Mineral lubricant is more viscous and versatile. In addition, “mineral water” better resists moisture. In most cases, large power coils are treated with thicker mineral lubricants. High-speed reels, “soap dishes” or medium-sized “classics” are lubricated mainly with synthetic oil. To increase the life of the reel, it is recommended to loosen the friction brake after each fishing trip. During fishing, regularly inspect the reel, immediately removing dirt. Transport the multiplier only in a special soft case. Preserving a multiplier reel for the winter involves complete disassembly and re-lubrication of all necessary parts. After assembly, apply a thin layer of liquid oil to the reel and place the multiplier in a sealed bag. At the beginning of the fishing season, you just need to wipe the reel dry and it is ready for use again.
How to lubricate coils
To save money and time, many fishermen use what they have at hand - solid oil, motor oil for a car of any brand. Such lubrication will help temporarily, and in some cases it can even cause harm.
It is advisable to use lubricants that are designed to serve this particular area, namely bushings, bearings and gears.
Thick specialized lubricants for servicing bearings and gears - dense, viscous lubricant that does not drain from moving elements, providing better wear protection.
Liquid lubricants – for servicing shafts and rotors.
How to disassemble a spinning reel?
Most experienced fishermen have developed their own methods and schemes for lubricating spinning reels, however, we will advise you on how to do it most effectively.
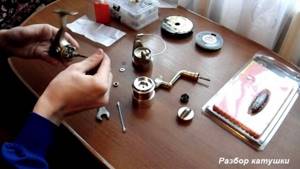
To do this, we will tell you about the correct sequence of all actions. By doing everything “according to GOST” you will be able to lubricate the coils without spending extra time on it.
Lubrication sequence
- Place everything you need on the table - a container with lubricant, a disassembly tool, cloths (preferably microfiber), brushes. Remember - there is no rush, everything must be done calmly.
- Let's disassemble the mechanism of a spinning reel. We release the spool and unscrew the handle. Next, release the bushing. Remember: the bushing must be removed as carefully and accurately as possible. The bushing will contain a bearing (or several bearings, depending on the model) and a set of shims. For these jobs you will need a thin screwdriver and a toothpick. After the procedure, unscrew the overrunning clutch bolts.
- The coupling must be removed from the bearing. Afterwards, wipe both the needle bearing and the clutch with a cloth. Try to completely free the parts from any remaining old oil. Dirt and grains of sand must be completely removed.
- Remove the anthers by first unscrewing them. Afterwards, remove the cover. Don’t throw all the details into one pile, even if this has already become a habitual procedure for you. Accuracy is not the province of beginners, but a principle of professionals. Try to place all the removed fragments of the mechanism in one row sequentially in the order of disassembly.
- Mark the main gears for perfect assembly.
- Remove the box. For this you will need tweezers. Next, remove (again using tweezers) the carriage stopper, and then remove the carriage itself.
- Remove the axle and another gear of the main pair. At this stage, complete disassembly can be considered successfully completed.
- For beginners, we recommend taking photographs of everything you see in front of you. This, as experience shows, can make the assembly process easier. After disassembly, you need to clean all parts of the reel mechanism. Place the parts in gasoline. This method is old, but effective; it is used in car repair shops and ideally removes dust, sand and corrosion from parts. While soaking parts in gasoline, using brushes and toothpicks, it is necessary to completely clean the body elements.
- After cleaning the parts, dry them with a regular household hair dryer. It is drying that prevents corrosion in the future.
- The lubrication of the coil and the assembly itself occur simultaneously. In exclusively reverse order (no other way, no exceptions!) you assemble the mechanism, lubricating the rotor, bushing, bearings and axle. Immediately upon completion of assembly, check the operation of the mechanism; it should work clearly, smoothly, without noise, squeaking or jamming. Remember that the assembly that closes the bow must also be lubricated. If the spinning reel operates without failures or failures, this means that you have successfully carried out the procedure for lubricating the inertia-free reel.
Is it possible to lubricate the coil without completely disassembling it?
Answer: no. Lubrication will not occur until you clean the parts and re-lubricate them. Using an aerosol silicone spray, a more or less acceptable result can be achieved without disassembling the coil. But this is only temporary; it will have to be disassembled, lubricated and reassembled one way or another.
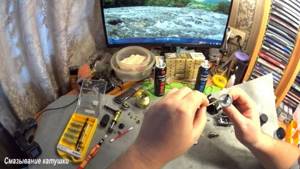
How to lubricate a fishing reel
There is nothing complicated in the process; with the necessary tools, even a beginner in this matter can lubricate.
To disassemble and reassemble the coil we need:
- Paper napkins or a small piece of cloth.
- Medium Phillips and flat head screwdrivers.
- Wrenches for 10, 12, 13, 14 depending on the type of coil.
- Tweezers with sharp edges, for removing stoppers and installing springs.
- Cotton buds.
- Toothpicks.
- Old toothbrush.
- Lubricants.
- WD-40 or brake cleaner, gasoline in a small container may also work, but then it will be necessary to clean it outside due to the strong smell of gasoline.
Lubrication process
- First you need to dismantle the spool and reel handle; they are easily removed because they have fastening mechanisms provided by the manufacturer.
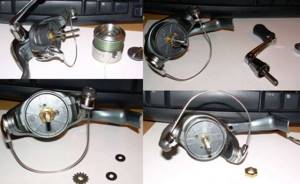
- Next, remove the shaft sleeve on which the adjusting washers and bearing are located. Here you can use thin toothpicks and tweezers.
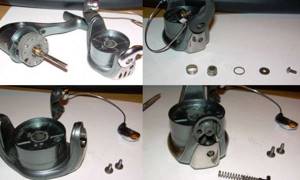
- The overrunning clutch cover is fixed with bolts that will need to be unscrewed with a suitable screwdriver; sometimes the bolts are shaped like hexagons or asterisks; this must be taken into account when preparing the necessary tools.
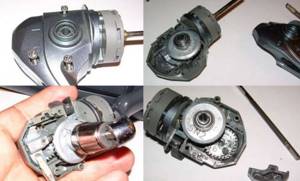
- You need to remove the clutch from the needle bearing and wipe it well to remove any residue, dirty oil and debris. For more effective removal, you can use DV-40.
- Next, you need to unscrew the anthers, removing which will make it possible to remove the cover.
- Having gained access to the gears, you need to make marks on the teeth so that when reassembling the marks coincide clearly, and the mechanism works exactly as it did before.
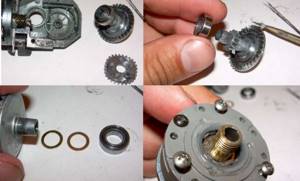
Then you need to remove the main gear.- Next we dismantle the stop box.
- Next, you can dismantle the carriage; it is secured with a stopper; after removing it, the carriage can be easily dismantled.
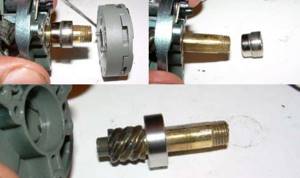
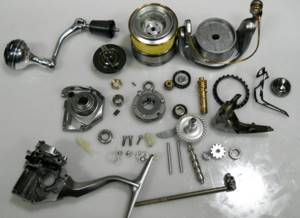
As a result, the coil was disassembled into all the main moving elements. It would be correct to lay out all the parts on a clean table or cardboard in the order of dismantling, and even better to photograph everything at each stage of disassembly for a clear understanding that everything will be assembled correctly.
How to prepare a reel for your first fishing trip
After purchasing a reel, you need to wind the fishing line or cord onto the spool. Many modern models have spools with a low side. We immediately wind the fishing line on them. The old fishing line is first wound onto a standard spool. This will be a backing, on top of which the main fishing line is already wound. On the spool it is written how much fishing line of a certain section can be placed.
It is written, for example, that fishing line with a cross-section of 0.25 mm will fit 250 meters, and with a diameter of 0.2 - 300 m. This means we wind 150 meters of old fishing line with a thickness of 0.25 mm and 100 meters of new 0.2 mm. You need to ensure that the line fills the spool without reaching 2 mm from the edge of the side. In this case, the line will move well when casting. In general, if possible, carry out this operation right in the store. As a rule, sellers do not refuse this service. Some even provide backing themselves. The fishing line or cord is wound using a special device.
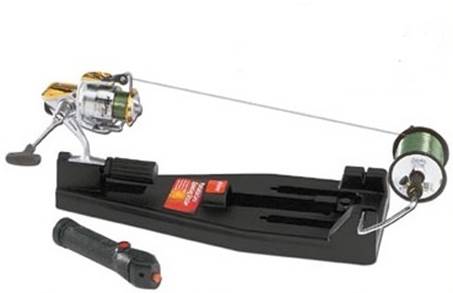
It is very important to ensure that the winding is uniform and that there are no humps or distortions on the spool. If you reel in at home, attach the reel to the rod blank and use your finger to press the line against the blank near the reel seat and slowly reel it in. The line will run under tension, and the winding will be tight.
Usually the reel comes with a spare spool. You can wind a fishing line of a different section on it. You can do the following: wind braided fishing line on one spool, and monofilament on the second. When fishing, different conditions arise and it happens that in one case you need braid, and in the second - fishing line. The spools are easily changed within a few seconds.
Another very important point related to spools. The surface of the side must be perfectly flat. There should be no chips or scratches on it. If they are, then it is better to replace the spool, or clean the damaged areas with fine sandpaper and then polish with Goi paste. If you leave everything as it is, then during casting the line or cord will touch the rough surfaces and be easily damaged. Naturally, this is unacceptable.
When purchasing, you should check the reel for any play between the handle and the body. Be sure to pay attention to the line roller.
It should rotate smoothly and freely. There should be no gaps between it and the bow into which the fishing line could get caught. This roller should be made of hard metal so that the line does not cut through it during reeling. It is clear that it is difficult to find out such details in a store. But you can ask fishermen, or even better, craftsmen who repair and service reels, which models are worth taking and which are not.
Also check the coil stroke. When you rotate the handle, the spool should spin easily and there should be no jerking or noise. The smooth running of the reel is ensured by bearings. The better their quality, the better the move will be. A large number of bearings does not necessarily indicate a high quality reel. It happens that a reel with 4 bearings is better than models that have ten.
And another very important point when choosing a reel. It must match the rod. This means that the reel and rod must match each other in weight and task. It is wrong to put a light reel with a volume of 1500 and 2000 on a picker. It is also wrong to put a carp reel with a volume of 6000 on a picker. The tackle should be harmonious so that you can easily fish with it.
Before fishing for the first time, it is important to wind the reel a little so that it develops. It is best to store the reel in special cases of this type:
These bags hold one or two reels plus spare spools with fishing line. In them, the coils will not be damaged and will retain their original appearance longer.
Cleaning gears and other parts of the reel
Cleaning of old oil and hardened dirt particles is carried out using a cloth, cotton swabs and paper napkins; an old toothbrush will also help in cleaning the gear teeth.
VD-40 or a special cleaner is suitable as a cleaner, but you can also resort to more aggressive methods, such as a gasoline bath, but you need to take into account the acrid smell of gasoline, this must be done in the open air.
You also need to take into account that gasoline is a very aggressive substance that can dissolve some types of plastic and rubber parts, so be careful. It is not recommended to expose rubber and plastic parts to gasoline when cleaning, as they may lose their shape and integrity.
Cotton swabs or a rag wrapped around tweezers or a screwdriver will help to clean the coil body well.
All contaminated parts can be easily cleaned and laid out in the reverse order of their assembly.
Disassembling the spinning reel driven gear assembly
We unscrew the screws that hold the casing of the sub-rotor assembly (photo 25) using a PH 0 screwdriver and remove the casing (photo 26), after which we take out the overrunning clutch with a pressure ring and a knob (photo 27). Using a PH 1 screwdriver, unscrew the 3 screws that hold the driven gear rotation unit (photo 28), and then pull this unit out by the driven gear shaft (photo 29). Then we take out the main axle with the rocker (photo 30). It should be noted that the screw that secures the main axle to the rocker is stamped. Don't try to unscrew it. Otherwise you will only ruin this part.
Assembly and lubrication process
It makes no sense to lubricate the parts separately, because during assembly, slippery parts are very difficult to put in place, and there is a high probability of the parts slipping and falling on the floor, which leads to repeated cleaning.
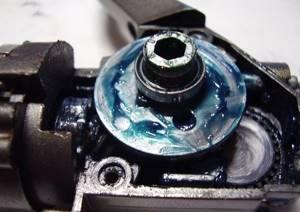
- First, you need to partially assemble the coil in the reverse order, having photographs and the order of disassembly, there will be no difficulties in assembly.
- Assembly occurs until the coil cover is closed, all parts must be installed in their places, the marks on the gear teeth must match.
- Lubricant is applied to the gear teeth and the mechanism is rotated manually for more even distribution and penetration of lubricant into hard-to-reach places.
- There should not be a lot of grease; it is recommended to remove excess with a piece of clean cloth, then you can close the reel body with a lid.
- It is also necessary to pay attention to the roller bearing; play is not allowed. If the inspection reveals play or difficulty in movement, the bearing must be replaced.
- Depending on the manufacturer of the reel, the bearings are installed serviced or not serviced; if the roller body is closed on both sides with plates, such a bearing does not need lubrication. The bearing is an open type and needs to be lubricated before installation.
- The final assembly of the coil, inspection and smooth rotation are carried out, as a result, planned maintenance can be considered complete.
Take care of your gear and it will never fail, even in the harshest conditions.
The most popular problems and their repairs
Depending on the type of coil and its design features, problems may arise during operation, some of which are easy to fix yourself. Let's look at the setup principles in more detail:
- Lost pen. This is the most popular problem. To avoid losing the handle, choose those models that have a washer and bushing for attaching the handle.
- Self-resetting of the line laying machine. The line handle is folded down during casting. Usually this problem leads to the bait being shot, and in more severe cases it can damage the rod. Sometimes this problem can be fixed by simply tightening the bolts securing the arc. If this does not help, then you need to remove the cover that hides the spring and either replace it with a more elastic one, or add hardness to it by installing a gasket on the rod that secures the spring.
- Constant line breaks. Braided fishing line has less springiness than monofilament, and on some models of spinning reels it breaks when casting. The problem may be due to the fact that the clutch locking nut is 1.5-2 mm higher than the edge of the spool. The line catches on the nut and gets under the edge, gets tangled there and breaks. This problem is eliminated by installing a plastic gasket. To do this, you need to remove the locking washer, then remove all the friction washers, and then replace the felt pad with a thin plastic one. Having installed the parts in place, you will see that the locking nut is level with the edge of the spool, and the line can no longer catch.
- The line is fed in a spiral. This malfunction is due to dirt getting into the line roller. The bearing rubs, the line does not pass through it, so it twists and does not feed smoothly. Repair consists of disassembling, thoroughly cleaning and lubricating parts.
- Internal noise. If while fishing you hear any sounds uncharacteristic of a spinning reel, then you must stop any work with it. They can be associated with serious damage. It is possible that dirt simply got inside the mechanism, but there is also a possibility of damage to the bearings. The coil needs to be disassembled and, depending on the problem, either cleaned or replaced damaged parts.
- Uneven winding of line. It often happens that the line is wound onto the spool along an oblique line, forming either a front or rear cone. There are washers of different thicknesses on the main shaft. If the line is wound with the cone down, then to fix the problem you need to remove one washer. Accordingly, if the cone is directed upward, then the washer needs to be added.
Carp fishing for beginners - a guide that will pave the way to the world of carp fishing and big trophies.
Edible Rubber Guide - Expert analysis and detailed analysis of the best brands and models of flavored baits.
Have you tried fishing with a bombard? Try this exciting spinning tackle.
