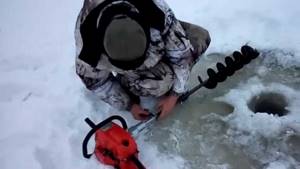
An ice drill is a necessary device for fishing lovers in winter. You can gouge the ice with an ice pick, but this is only in cases where the ice layer is not very thick, otherwise without a drill it will not be possible to make a hole or this process will be very difficult.
In addition, in the cold it is more pleasant to drill a hole quickly. You can make an ice drill with your own hands, even from a screwdriver, which will add comfort when hunting for fish.
Manufacturing process
Many fishermen cannot afford to purchase ready-made accessories, especially with a mechanical drive.
That’s why they make an ice screw with their own hands at home, using:
- metal pipe of the required size;
- plates for making a screw;
- high-quality steel for knives;
- paint and varnish composition for the final stage of work.
For manufacturing, you will need turning equipment or contact a specialized turner. You will also need a welding machine to connect the parts to create a complete structure.
Finally, you need to process the product with a sanding machine.
- knife hardening;
- geometric manufacturing accuracy;
- both blades must be properly sharpened, even if the ice drill is made by hand, this will make drilling ice easier.
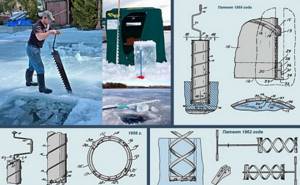
Making a ring ice auger with your own hands is a little different from an auger, the only thing is that in this model the cutting part is a plane wrapped in a ring.
Types and characteristics of motor drills
For ice fishing, drills with manual and motor drives are used. Often they are made independently according to their height and choosing the direction of rotation. Making an ice screw with your own hands is difficult, but possible. This requires welding skills and will also require the help of a turner.
A self-made drill must meet the following characteristics:
- have little weight;
- be collapsible;
- be made of quality material;
- have a drive corresponding to the diameter of the screw.
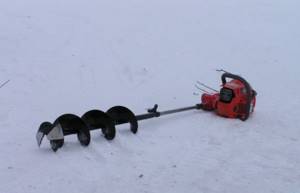
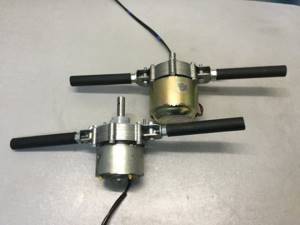
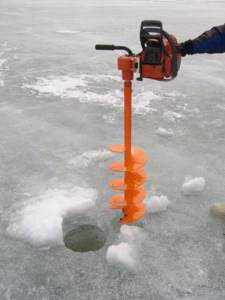
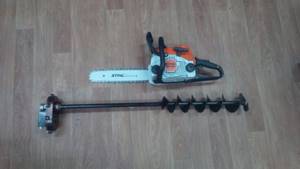
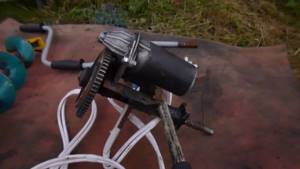
When making an ice ax from a chainsaw with your own hands, the connection diagram between the engine and the auger is performed using a reduction gearbox. Most often, the mechanical part of a low-speed electric drill is used.
Spatula
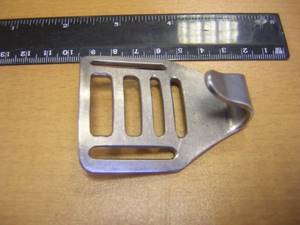
Making a homemade drill bit is not difficult. It consists of a brace with a pin, at the bottom of which a cutting tip, made in the form of a spatula or spoon, is welded. Only one side is sharpened depending on the direction of rotation of the tool. This drill for fishing in winter can drill into ice up to 30 cm thick.
Annular
Now this type of drill is unfairly forgotten and is almost never used. It is a ring with an outer diameter of 130 mm and an inner diameter of 80 mm. The cutting serrated edge selects ice only according to the shape of the ring, leaving an ice cylinder inside. The drill is centered by a triangular collar, which is located on the bottom of the working part. Thanks to the eccentrically located handle, the force is evenly distributed on both hands. During operation, there is no characteristic noise heard, like with other ice augers.
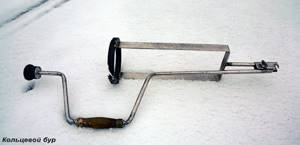
The disadvantage of the ring drill is the lack of a device for removing ice chips.
Frame
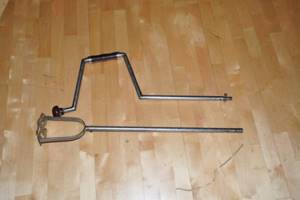
This simple design is a pipe, in the lower part of which 2 holding rods located on opposite sides of the rod are welded at an angle of 30°. The lower parts are connected to the pipe by plates in which holes are made for attaching cutting elements. Proper sharpening of the edges and their location should provide an optimal angle of attack for uniform distribution of forces when drilling a hole.
When ice fishing, fishing gear, including jigs, can be extremely effective. If you prepare enough holes, you can hope for a good catch. However, it will not be easy to do this with a frame drill that does not have a device for removing slush.
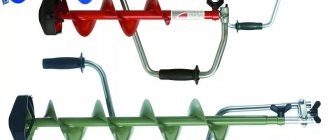
Screw
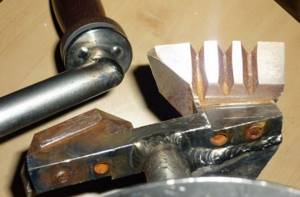
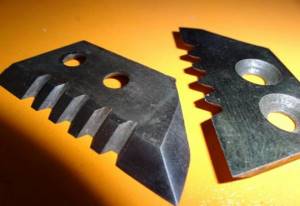
The most common type of ice screw. Not everyone can make it themselves. This requires appropriate skills. The drill consists of a rod made of a pipe to which an auger tape is welded. To make a homemade project, you will need to cut out several metal rings and bend them into blades. The parts are welded to the rod and sequentially connected to each other by welding.
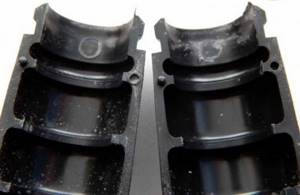
Making knives is particularly difficult. This requires alloy steel. It is practically resistant to corrosion and has high strength. Parts from disc cultivators have proven themselves well.
The cutting head can be made removable or its parts can be welded to the pipe. The number of knives affects the drilling speed, but at the same time the applied effort increases. Proper sharpening of the cutting edge facilitates the drilling process.
The auger part of the ice auger is connected to the rotator or mechanical drive using an adapter, which simplifies disassembling the tool for transportation.
Material selection
In many cases, R18 steel is used, but this material can be replaced with analogues. The main thing is to choose a hard material, a suitable shape and high-quality sharpening.
Blades are often coated with titanium nitride. They last for a very long time.
The tool drive can be:
- manual;
- from a chainsaw;
- from a screwdriver;
- from a wrench.
How to make an ice screw with your own hands is the choice of the fisherman himself.
Making your own ice screw
Material for making knives
In conditions of mass production, it is not possible to use ultra-strong grades of steel. Both domestic and foreign analogues use a material with a hardness of about 60 units. according to Rockwell. These knives are good if the ice is free of sandy inclusions. The best option would be tool steel with 70-72 units. True, the manufacture and proper sharpening of knives will be expensive.
Manufacturing from scratch
The easiest way to make a homemade ice auger for winter fishing is in the form of a garden auger. A circular saw blade of the required diameter is used as knives that simultaneously act as an auger. It is sawed in half and welded to the drill rod at an angle that provides the best cut.
The saw teeth have pobedite surfacing, which protects the edges from breakage when drilling through ice with sand inclusions and at the boundary of the underwater part. Using an ice drill screwdriver will help increase productivity. The increased speed of rotation of the rod will allow you to make holes even with not very sharp knives.
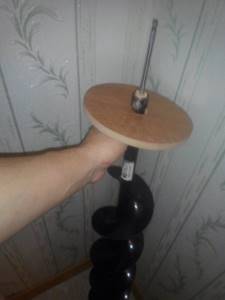
Using a screwdriver
Fishing enthusiasts have adapted to equip an ice drill with a screwdriver. This way they save their energy and time.
To make such a device you need to stock up on:
- hand drill;
- adapter;
- reliable and suitable cordless screwdriver.
Battery selection
Two types of batteries are most often used:
Nickel-cadmium perfectly withstands low temperatures, but is quite heavy for such an instrument.
Lithium-ion is suitable for temperatures down to -10℃, with thin ice. It is suitable for drilling holes with ice thickness up to sixteen centimeters and can be used up to sixty times.
In case of severe frost, it is better to put it in a warm place: in a clothing pocket or other heat source.
Note!
- A nod for do-it-yourself winter fishing - how and what to make good gear from. 115 photos and video tips from the pros!
Do-it-yourself spinners - types, features of homemade spinners and their assembly (100 photos and videos)
How to minimize fishing costs? Useful tips from experienced fishermen and an overview of current solutions (65 photos)

It is better to take a spare one with you and also put it in a warm place.
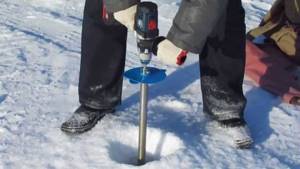
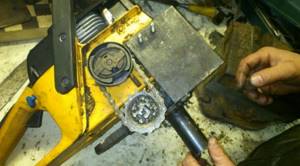
Next, you need to decide how to modernize the drill. This can be done using an adapter.
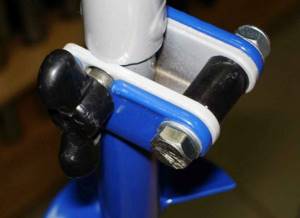
Making an adapter
This adapter serves as a connection between the drill and the driven tool. You can buy it at a specialized retail outlet or make it yourself.
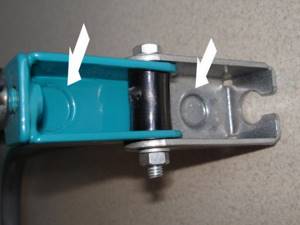
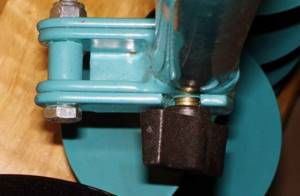
The adapter has a hexagonal shape. One end is securely fixed in the drive holder using a key designed for this purpose. The second end is attached to the drill. A hole is drilled in the adapter, then it is secured to the auger using a bolt.
It is better not to make a large-diameter auger; this will increase the load on the driven tool and quickly damage its battery.

Note!
Do-it-yourself boat motor - tips for beginners, projects, drawings and step-by-step description of the construction of the main components and elements (video + 120 photos)
Feeder for winter fishing - secrets of use and techniques for feeding fish in winter (115 photos)
Bottom gear - the most effective types of equipment and features of casting techniques (95 photos and videos)
The most acceptable size for a hole is about 20 centimeters. This makes it possible to catch medium-sized fish.
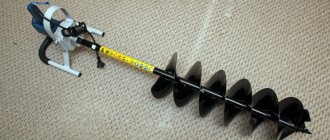
Homemade ice auger with screwdriver
Fishermen improved the ice auger by attaching a screwdriver to it. They just figured out how to save precious time. To make a drill for winter fishing with your own hands, you need to have:
- Mora's hand ice auger,
- Adapter,
- Cordless screwdriver.
First you need to choose the right and reliable screwdriver.
Tool selection criteria
An ice drill is a tool that makes winter fishing easier and more comfortable. To ensure that drilling holes does not cause problems, you need to choose a suitable cordless screwdriver.
The tool must be:
- With high power,
- Power supply - 18 to 36 V,
- 40−80 N/m - torque,
- Battery capacity 2.5−3 Ah.
To simply upgrade the drill, you can use the following models: Mora Nova System or Ise Arctic (Micro, Viking), Rapala. It is possible to use Russian-made screwdrivers, such as Tornado, Barnaul, Tonar.
Often, anglers drill several holes, even up to several dozen, because fishing in winter is an eternal search for places where the fish have stopped. As a result, fishing takes a lot of effort and does not bring any pleasure from the process. Therefore, fishermen use a homemade ice drill with a screwdriver.
How to choose a battery
These two types of power supply are often used:
- Nickel-cadmium feels great at sub-zero temperatures, but makes the instrument heavier.
- Lithium-ion is operated at a temperature of -10ºС, and unless the ice is too thick. Although it allows you to drill about 60 holes of 10-16 cm each. If the temperature drops below, you can remove it from the device and put it in the inner pocket of your jacket.
It is advisable to have an extra battery with you and keep it in a warm place.
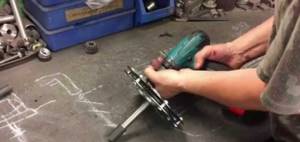
The screwdriver has been selected, now you need to determine how it can be attached to the drill. This is done using an adapter.
Making an adapter
It serves to connect the structure with a screwdriver. You can buy it in a specialized store or make it yourself.
The adapter has a hexagon shape. One side of it is clamped in the screwdriver chuck. In this case, you should make sure that the connection is reliable. The hexagonal part is clamped using a special key. Its other side is attached to the drill. A hole is drilled in the cylindrical part, then a bolt of the required size is taken and the auger with an adapter is secured.
It would be a good idea to use a handle that will help hold the drill and prevent it from falling into the water. There is no need to make the auger large, as this increases the load on the screwdriver and will cause the battery to drain quickly. The adapter has a cylindrical part diameter of 18 mm, a hexagon-shaped shank, and must have a stop. The most optimal diameter for the hole is 10-13 cm. This allows you to catch medium-sized fish .
Advantages
The main advantages of this device:
- easy to modernize;
- for manufacturing you do not need to have special skills;
- does not require large financial costs;
- Fascinating production method.
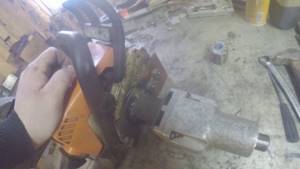
Sometimes fishermen use a wrench instead of a screwdriver. This tool has a powerful body and high torque.
Advantages of an ice drill with a screwdriver
The main advantages include:
- Ease of modernization, which does not require special professional skills,
- Small financial costs,
- Genuine interest in this simple design.
Some fishermen also use a wrench to mechanize the process of drilling holes. It may well serve as an alternative to a screwdriver, since its body is more powerful and it has high torque .
Operation and care
The drill can last a long time if you follow some rules:
- You should wipe it dry after use, even if it is coated with a protective agent.
- Keep the device in a special ventilated case.
- During the off-season, you need to preserve its knives and joints; you can use used oil for this.
- Carefully remove snow to avoid damaging the blades.
- Watch the fastening points and tighten them in time.
- Touch up scratched areas to prevent rust from appearing.
- Consider the load based on the thickness of the ice.

Facilitating the process of drilling holes leads to a comfortable rest when fishing.

DIY photo of ice screws
Read here Bottom tackle - the most effective types of equipment and features of casting techniques (95 photos and videos)
Help the project, share on social networks 
0