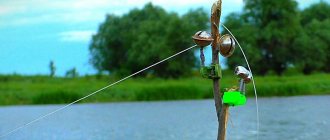
Probably the most common question among anglers is “what to fish with?” If during an active “zhoring” a fish can swallow a completely bare hook, but when such a bite subsides, then serious disputes begin.
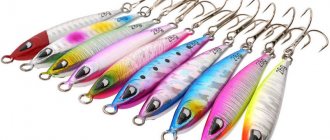
Every fisherman tries to choose something special so that the fish bite well, regardless of the time of year and weather. And, not surprisingly, many people recognize the spinner as the best bait. And the reason is that it most closely resembles something edible. Of course, there are a huge number of such baits in stores, but in this article we will tell you how to make spinners with your own hands. Even more ideas can be found on the DIY portal.
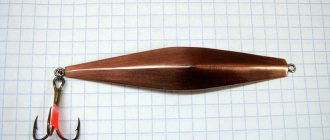
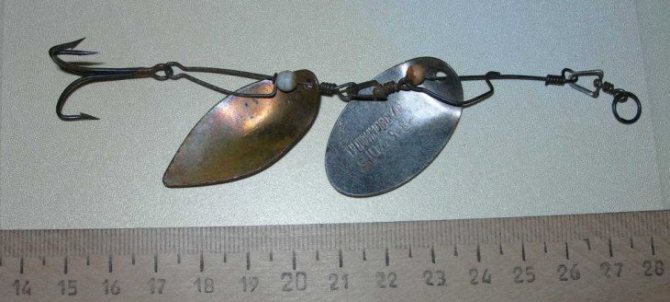
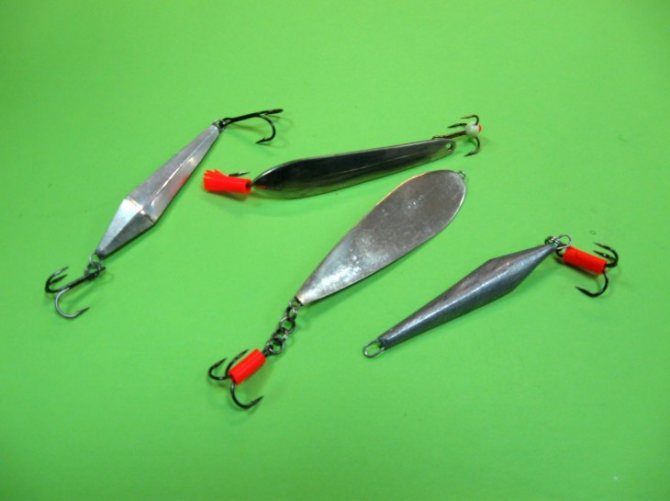
Spinner-spoon
Very often this spoon is used when fishing for perch and you can easily make it yourself. Below we will similarly explain how to make a lure for perch with your own hands:
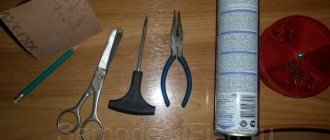
- Take thin sheet metal, steel will do just fine, if not, then you can take an ordinary tin can from any drink. Cut a square sheet with metal scissors and straighten it, this will make it easier to draw the contours of the bait.
- Our bait will be in the shape of a diamond, use a permanent marker to mark the dimensions on the sheet.
- Using metal scissors, cut out the prepared layout.
- Calculate where the minor axis is located, along it you need to bend the metal gradually giving the shape of the bait.
- After giving the workpiece a shape, you need to solder a small triangle of copper, this can be done using a soldering iron.
- Then the hook is soldered to the copper plate.
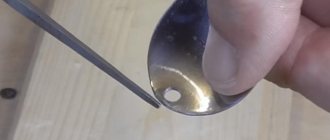
- You will need to secure a ring at the top of the triangle; it is necessary for attaching the fishing line. To do this, drill a hole, it is advisable to wet the drilling site, otherwise you may damage the drill or part.
- Finally, we need to sand our vibrator and then it will be ready for use. Below you can see photos of do-it-yourself spinners.
Read here Foam fish - the secrets of catching pike and other predators with foam fish (125 photos and videos)
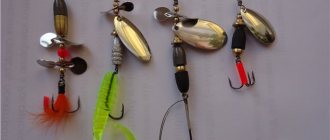
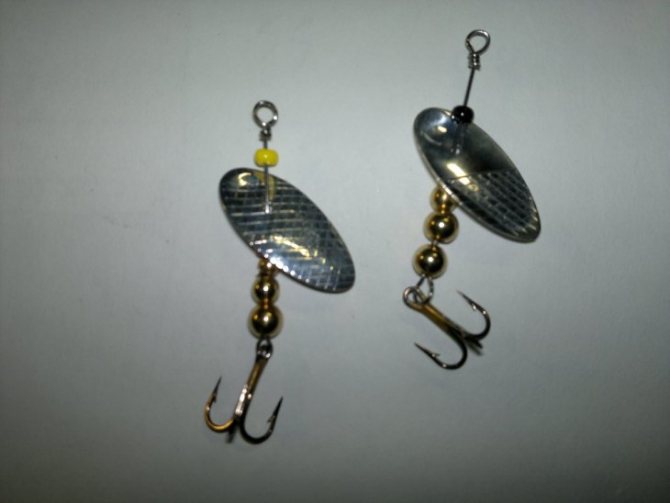
The most catchy do-it-yourself oscillating spoon
When buying an oscillating spoon, you must first evaluate the body of the bait itself. Everything else is easy to replace. You can only take blanks from craftsmen and equip them yourself. By the way, it is much easier to work with such blanks, because they are usually stamped from sheet brass and are subsequently easily processed.
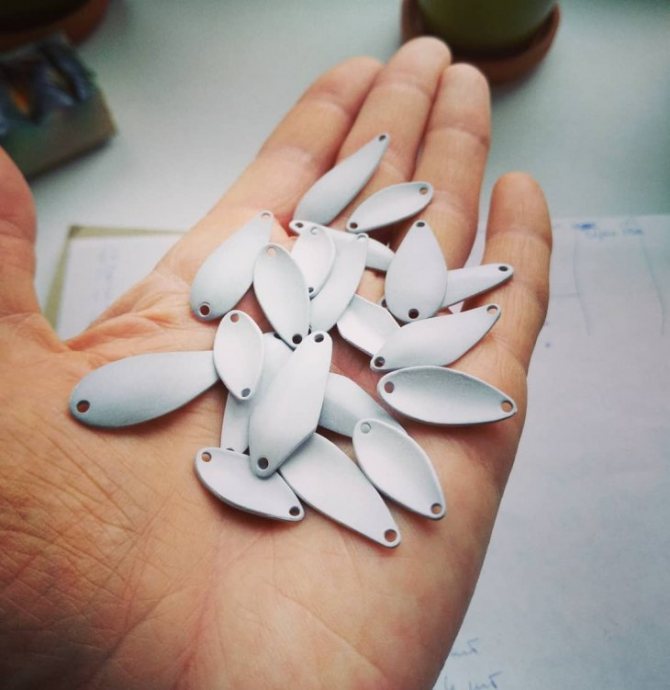
Layout
Let's start with the fact that you can often find spinners of a good shape, but put together somehow.
Sometimes when stamping, burrs remain - we grind them off, and at the same time round off the sharp edges. Then we will work on the holes for the winding rings. For free play, it is desirable that the diameter of these holes is at least twice the height of the winding rings. If necessary, drill holes and countersink their edges.
The sizes of all elements must be harmonious. Let's pay special attention to the hooks. Not only are they of high quality and the right size, but it is advisable to have dark hooks. After all, a light anti-corrosion coating is made for salt water, and in fresh water, excess shine can only alert the fish.

Changing shape
The easiest way to change the action of a spinner is to reduce its convexity. Once upon a time, I “ruled” an overly active “wave” with a cobblestone while fishing. If, on the contrary, the “wave” played sluggishly, it was necessary to additionally bend its front and back parts.
But the spoon bait behaves differently. Here, the flatter model, on the contrary, activates the game - the vibrator moves even further to the sides and even begins to rotate.
If necessary, you can change not only the convexity, but even the very shape of the spoon. True, it is difficult to predict in advance what will happen later. But if the bait doesn’t suit us in some way, why not try it? After all, for filing you only need a file or an emery wheel.
For example, let's take a wide S-shaped vibrator and see what can come out of it (Fig. 1).
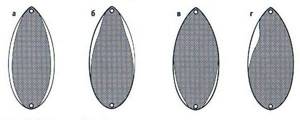
Fig.1. Filing of the spoon: a) symmetrical, b) front, c) rear, d) asymmetrical.
If you evenly remove the metal from the top and bottom edges of the spoon, you will get a similar, but narrower model (Fig. 1a). The new bait will not oscillate as actively, but more steadily, which means this modification is useful for faster retrieval or for fishing in the current.
If you “cut” the top and bottom only on the front part of the spoon, then the frequency of its oscillations will increase and the amplitude will decrease (Fig. 1b). And vice versa, if we “cut” the back part, we get a vibrator with wide slow play (Fig. 1c).
To give the spinner game an unstable, “hunting” character, you can remove part of the metal only from the top (Fig. 1d).
If you want to leave the shape of the bait unchanged, then you can adjust the activity of the game within small limits by changing the bevels (Fig. 2).
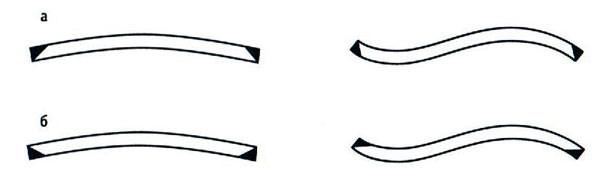
Fig.2. Changing the bevels: a) to strengthen the game, b) to weaken the game.
Another way to change the game is to make your lure lighter or heavier. In the first case, part of the metal is ground off from the surface, in the second, it is soldered. If at the same time different “pairs” appear, then a bimetallic spinner with its own electric field is obtained.
Soldering is often useful for giving the vibrator better planning properties.
Additional items
To give the spoon new properties, you can experiment with various additional elements.
First of all, these can be acoustic holes and channels, both transverse and inclined. They are made on some “cut” spoons, but they can also be justified on ordinary spoons.
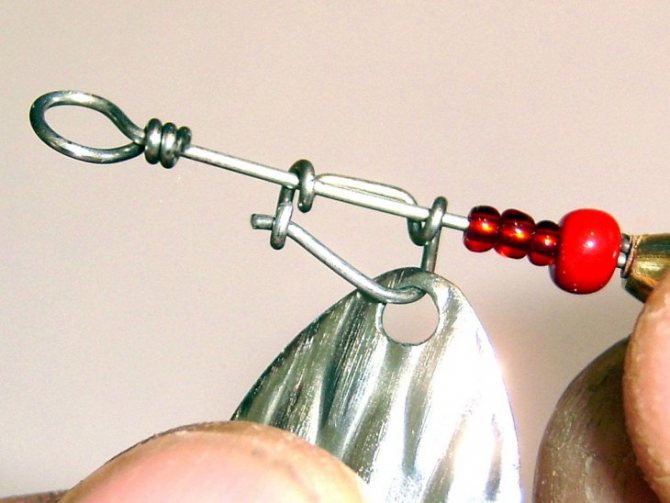
A faceted glass eye is considered a very useful element, and drilling three holes and inserting the desired bead on a wire is not difficult.
Why, for example, not try adding one or two additional petals to the vibrator?
If there are no hooks and the fish takes sluggishly, an additional hook installed in front or in the middle of the spoon will help.
And finally, you can make a non-snagging lure out of your favorite spoon by replacing the “standard” tee with a hook with a safety mustache.
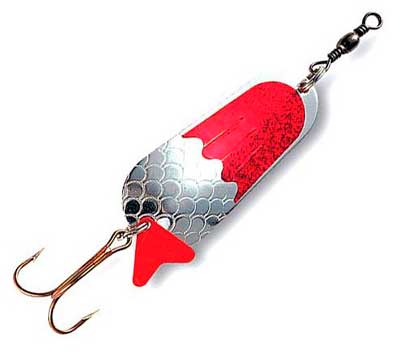
Hook attachment
A bright additional element on the tee not only camouflages the hook itself, but also attracts the attention of the predator and serves as a “sight” for it. Usually a bright cambric or a thin plastic tail is used for this (Fig. 3).
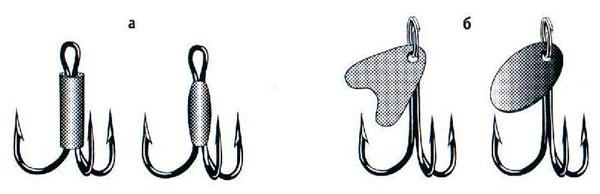
Fig.3. Additional element on the hook: a) cambric, b) plate.
For brightness, the tail can be pasted over with orange or acid-green “flex” - sometimes this significantly revives the bite.
An even greater effect can be obtained if you put a twister on the tee of the spinner (Fig. 4a).
Fig.4. Additional bait on the hook: a) twister, b) rubber tail.
However, it makes the tee heavier and can negatively affect the performance of the entire bait, so the rubber nozzle must be used selectively.
You can cut a twister yourself from thin rubber gloves (Fig. 4b) and put it on the forend. The lighter version has less influence on the spinner’s own play, and has the same attractive effect on the fish.
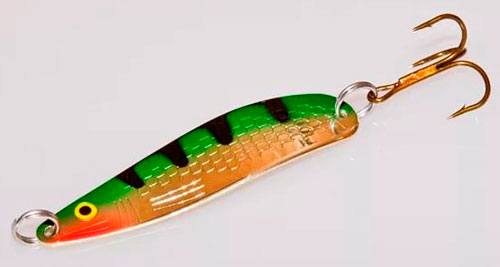
Color change
Even the most proven model can misfire if its color does not match specific conditions. For example, the spoon is white and shiny, and there is a bright sun in the sky. Even if a predator comes to such bait, it does not want to peck.
I used to take coarse sandpaper and scratch overly shiny surfaces. Now I prefer to reduce the “shine” of the spinner by applying a design with paints or waterproof felt-tip pens (Fig. 5).
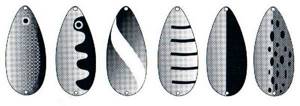
Fig.5. Typical color options for spinners.
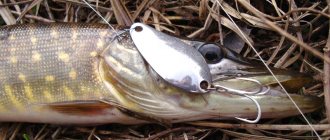
By the way, this is not a waste of time at all, but a completely justified action. I have had repeated cases when only painting the spoon “like a perch” made the pike still take the bait. And try to guess which fish ended up in her stomach during cleaning?
But the lure can not only be painted.
Reflective stickers sometimes double or triple our catch. The most typical options for using “flex” are shown in Fig. 6.
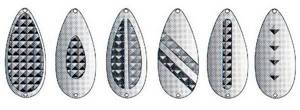
Fig.6. Options for using reflective stickers.
Flex is especially effective on an active and aggressive predator. In this case, a bright sticker will attract the fish’s attention to the spoon much faster.
Once on the Kola Peninsula I saw an incredibly decorated fiddler. However, it was with this that a local angler caught a one-kilogram brown trout on a sunny day in clear water. Rather, for fun, I covered my entire lure with the four brightest segments of yellow, green, orange and red “flex” - and three spotted beautiful fish became a “valuable gift” for the invention. It seems that at that time the northern fish was let down by its aggressiveness.
To the south, the picture is the opposite - in good light, muted colors work better: pink, gray, bronze. They are also preferable for a cautious predator.
Small contrasting details are always useful on a spinner. For example, I like to stick on diamonds, circles or thin strips of “flex”. It seems to me that when the bite is good, silver and red elements are more effective, and when the bite is bad, golden and pink elements are more effective.
Small parts are glued to the convex side without problems, but large parts sometimes become puffy. In this case, we will cut out several narrow side “wedges” on the sticker in advance. And so that the “flex” does not lag behind, we first degrease the surface of the spoon and lightly heat it with a hairdryer. Now all the fish are ours!
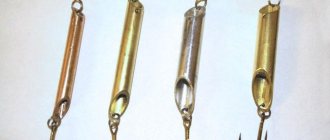
Spinner
- To create this spinner you will need a cylinder-shaped steel blank. After you find it, you should check how well it submerses under water. To test, you can fill a bucket with water and throw the workpiece into it.
- Step back half a centimeter and drill a hole; its diameter should be enough to pass the fishing line through this hole.
- A hook is soldered on the opposite end, but it must be soldered with an offset of 20 degrees. If you don’t have a protractor with you, then this operation can be done “by eye”: point the tip towards the sinker and solder the hook.
Additionally, you can wrap the resulting lure with colored threads or fishing line.
Just remember to use waterproof glue, otherwise all the threads will blur in the water. You can also use beads for decoration, then such a bait will attract more attention.
A unique way to paint spinners
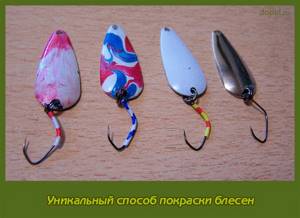
A unique way of painting spinners Now let's look at how it is possible to paint a spinner.
It goes without saying that you can take a felt-tip pen and paint it, or apply a couple of stripes with nitro paint, which will add contrast to the lure. What is all this for? Let me explain. The entire process of painting spinners, both chemically and in combination with conventional paints, is designed to copy the natural color of a particular type of fish, the fish that is most often hunted by river predators. And, although now in stores there is quite a large selection of fishing baits, which include the same spoons, and the same wobblers of all types, varieties and sizes, from time to time there is a desire to fish with “your own”. The chemical dyeing process is quite simple. The availability of chemicals and the ability to paint any metal in an original color provide enormous scope for imagination and creativity as such. Moreover, painting spinners is only a particular matter, because any other metal object can be painted. So, the process of coloring metals chemically.
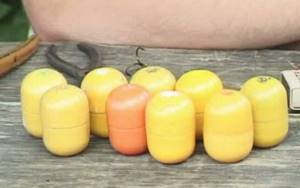
Fig.49 There are also special American powder paints, which are very interesting. We ordered these from. To paint with powder paints, we need a candle, the paints themselves and matches.
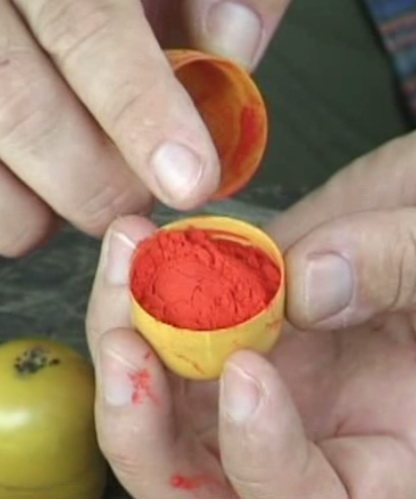
Fig. 50 We get paints, they are poured into jars from “Kinder Surprise” (Fig. 49). Small holes are burned on top with a needle, and it looks like a salt shaker.

Fig. 51 These paints are made on the basis of epoxy resin and are very finely dispersed, actually like powdered sugar, perhaps even finer (Fig. 50).
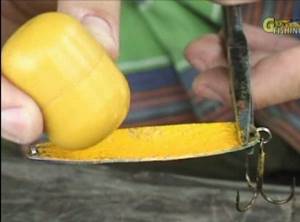
Fig.52 What is the essence of painting with this method? We light a candle and thoroughly warm the spoon over it (it is better to do this over gas) (Fig. 51).
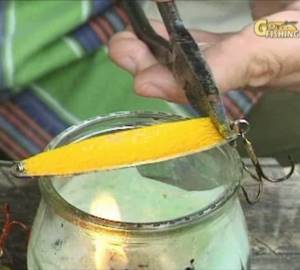
Fig. 53 And while it is heating up, we will sprinkle this paint on the spoon, like from a salt shaker, and the temperature will immediately spread the paint over the surface of the spoon (Fig. 52).
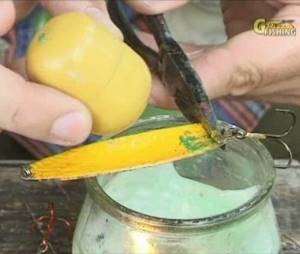
Fig. 54 A very high-quality coating is obtained (Fig. 53).
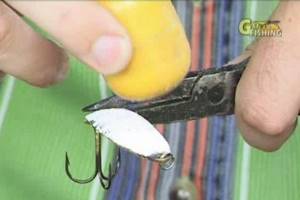
Fig. 55 Let's add, for example, green spots: take the green paint and sprinkle it where the spots should be (Fig. 54). Now the spinner has become more contrasting. And paint the other side of the spoon with white paint. Warm it up, sprinkle it with white paint (Fig. 55), and later add a little red for contrast (Fig. 56).
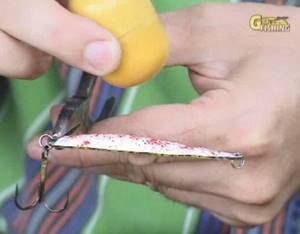
Fig.56 We also painted wobblers with the same paint, and the results were quite interesting designs, as if covered on top with a thick layer of enamel, very strong, and practically cannot be chewed by pike teeth.
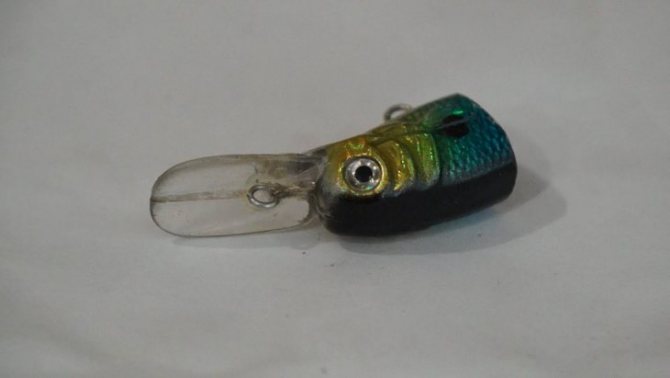
Fig. 57 Well, we have a fairly contrasting spinner - on one side it is yellow-green (Fig. 57), and on the other - white-red (Fig. 58), and thanks to this color, it will work perfectly in contaminated water.
Fig.58 So, we have demonstrated how it is possible to give baits additional attractiveness right in field conditions. It must be stated that the color of the oscillating spoon plays a fairly significant role, due to the fact that the oscillating spoon can be carried out very slowly, and with a slow retrieve, the predator has the opportunity to carefully examine the object that it plans to attack. Based on this, it is imperative to pay attention to the color of the oscillating spoon.
Painting of ultralight spinners. CRACKING EFFECT!!!
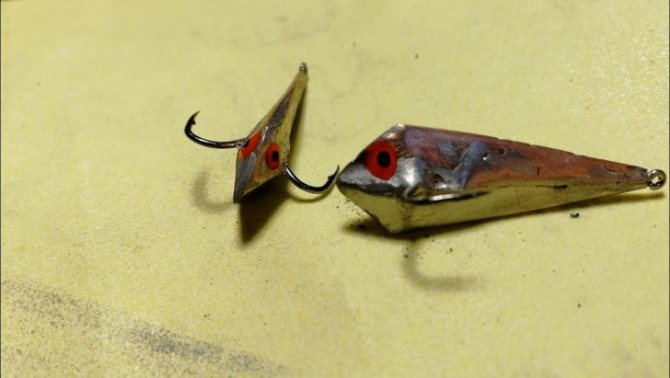
Spinner-balancer
Now we will tell you how to make a lure for pike with your own hands; people usually call it a balancer. Of course, there are a huge variety of ways to create this bait, but we will tell you about the most common manufacturing method.
- From a sheet of copper (preferably 0.4 mm thick) you need to make a stamp with a file.
- You can use an aspen log as a place for stamping. Take a hammer and use it to form a workpiece, then use scissors to adjust and cut off all unnecessary parts. Then use a file to bring the shape to perfection, so that there are no nicks or sharp bulges.
- A pendant will be mounted on top; for it you need to make a notch 0.4 cm deep.
- Next, you need to solder a hanging loop and hooks on the sides into the workpiece.
- Then melt lead or tin and pour it into the cavity of the spinner. This must be done until the balancer reaches a horizontal position.
- Finally, you should adjust the tail of the spoon and test it in the bathroom, this way you can achieve the desired game.
Now you know how to make spinners with your own hands, we hope that the article was useful and interesting for you. Happy fishing!