Blade parameters and wobbler depth
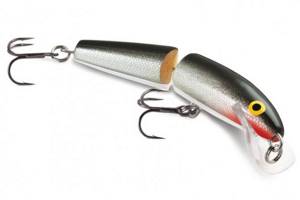
The blade of a wobbler has four main parameters: slope, length, area and configuration. Of course, their influence on the bait must be assessed comprehensively, but this topic is worthy of a separate book. Therefore, to begin with, let’s conduct a simplified comparative analysis and consider three blades of floating wobblers with different depths (Fig. 1).
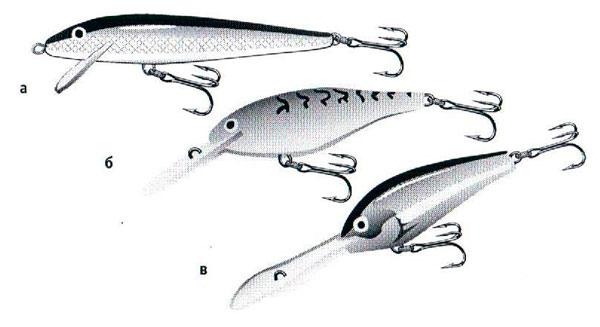
Fig.1. Blades of floating wobblers "RAPALA" with different depths: a) Original Floating, b) Shad Rap, c) Down Deep Rattlin' Fat Rap.
The inclination of the blade determines the rate of descent. The smaller the angle between the blade and the horizontal axis of the wobbler, the steeper and faster the bait goes down.
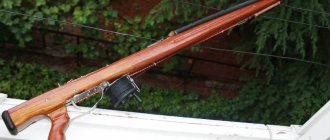
The inclination of the blade partially affects the immersion depth of the wobbler. The most obvious example here is the floating model ABU GARCIA Hi-Lo (Fig. 2).
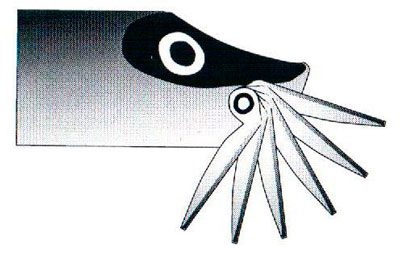
Fig.2. Blade with variable inclination.
The blade of this bait is fixed in one of 6 positions, thanks to which the wobbler goes to a new depth every time. The maximum depth is achieved when the blade is in the upper position, and the lower we lower it, the shallower the depth becomes. With the blade perpendicular to the wobbler's axis, the bait can no longer go deep, and with further deflection of the blade back, the wobbler begins to be carried to the surface.
The length of the blade determines the maximum depth to which the wobbler can dive. The longer the blade, the greater the working depth. However, in this case, the disturbing forces from the oncoming flow increase significantly. And if the bait is not stable enough, it is “swept” to the side until it reaches the surface. To balance such a wobbler, the line loop is moved approximately to the middle of the blade, then the bait retains its deepening ability and stability of play.
The area of the blade determines the game activity of the bait. In this case, the maximum rocking effect is achieved when the blade is perpendicular to the oncoming flow. If the water hits the blade at an angle, the disturbance and intensity of the game are reduced. Here, not the entire area of the blade works “for the game”, but only its projection, perpendicular to the flow. Therefore, despite the fact that different blades differ significantly in area, the play of their baits is approximately the same.
The configuration of the blade determines various subtleties of the behavior of the wobbler. This is a rather complex and voluminous issue, which we will touch upon only as necessary. To begin with, let's remember just a few basic points:
For better interaction with the oncoming water flow, the front surface of the blade is made either slightly concave or with a slight depression.
Types, type of structure of wobblers
Wobblers can be floating or sinking, the depth range is mainly from 10 cm to 10 meters.
Wobbler body structure
According to the structure of the body, they can consist of one, two, three or more elements.
This gives them the following options:
Two-component wobbler Rapala Scatter Rap, photo Rapala.ca
A multi-component wobbler moves in the water in a “snake” manner, which improves and makes the game more natural and attractive to the predator, but it creates less vibrations in the water, so the predator does not feel it well with its lateral line.
Suitable mainly in places where there are a lot of fish, and especially for a lake, or when you are absolutely sure that a predator is present in the place where you will fish, for example, after checking the place with an echo sounder. In this case it will be quite effective.
We recommend: What is pellets for fishing, what does it consist of and how to use it
Not suitable for fishing a reservoir when searching for a predator.
A common problem with them is that when it falls on the water, it catches on the leash with hooks, and also does not fly far when casting.
There are two ways to solve the problem:
- Before a multi-component wobbler falls into the water, it needs to be stretched; this can be done by slowing down the line a little before the fall. You need skill and be careful not to cut or burn your finger on the fishing line;
- Use baitcasting reels. They solve this problem completely.
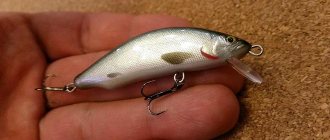
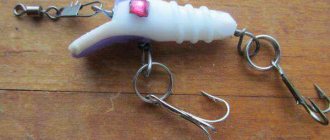
Single-component wobbler
A single-component wobbler, on the contrary, has a less active and attractive game, but creates a powerful wave and more noise, which is caught by the side line of the predator and attracts it. A universal option.
The body shape of the wobbler should be selected based on the food supply of the predator in the pond. The bait should imitate the natural prey of the body of water where you are fishing.
Wobbler blade material
Now a few words about the material and method of fastening the blade. As we already know, Lauri Rapala made his first blade for a wobbler from tin. However, later it turned out that the opaque “additive” gives the bait an unnatural appearance and clearly alarms the fish.
That’s why an almost invisible plexiglass blade appeared in the water. And now almost all wobblers made of wood or polystyrene foam are equipped with a transparent blade that is glued into a special groove. Metal blades remain only on the most powerful “magnums”, where the entire bait must withstand extreme loads, and on some single models.
However, the plexiglass blade is not very strong and sometimes pops out or breaks if handled carelessly. In this case, you have to glue it back or look for a replacement. It’s easier with a metal blade: as a rule, it is attached not only with glue, but also with self-tapping screws.
With the advent of plastic wobblers, the problem resolved itself. The blade of the required strength is molded integrally with the plastic body, then the body is painted, and the blade is left transparent. Such a blade can only be broken on purpose.
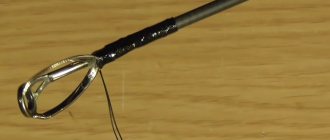
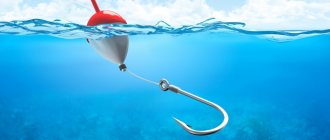
How to attach a wobbler to a fishing line
There are two methods of attaching to a fishing line, suitable for wobblers. Other methods often worsen his game.
Fastening with carabiner clasp. Fasteners are good to use with wobblers with a length of 5 cm and above; on smaller ones they can make it heavier and the wobbler will stop working.
The second option is to tie the wobbler with a Rapala knot.
With small wobblers and where a leader is needed, it is easier to use a fluorocarbon leader, tying it to the wobbler with a Rapala knot. The leash can be attached to the fishing line using a knotless clasp. With larger ones you can use classic steel and other leashes.
We recommend: Pike, lifestyle, habits and facts
Problems with wobblers
The advice applies only to branded wobblers from well-known manufacturers, who balance the wobblers at the factory and make them with stable quality.
| Problems: | Solution: |
| Wobbler has poor action or does not work properly | In most cases, the problem is related to a bent eyelet that attaches to the leash; check and straighten it. |
| The wobbler deviates when retrieving | Bend the eye of the wobbler attaching to the fishing line slightly either to the left or to the right. |
| The wobbler plays too aggressively | You can try lifting the eyelet that attaches to the fishing line up. |
| Replacing hooks on a wobbler | It is important to understand that the wobbler is balanced at the factory along with the hooks, and they greatly influence its operation. For this reason, when replacing, it is important to use hooks of similar sizes and weights. When replacing a hook type, for example a tee to a single, it is better to use a similar length and check the wobbler for play. The smaller the wobbler in size, the more critical it is about replacing hooks with non-factory ones. It is important to consider the weight of the hooks; this greatly affects the buoyancy or depth of the wobbler. |
Step-by-step guide on how to make a wobbler with your own hands
Every angler will be able to make wobblers for casting pike. The working horizon is from one to one and a half meters, the optimal length is about seven centimeters. So how to make a wobbler with your own hands? So let's get started:
- The profile of the future catchable bait is drawn on paper.
The template is cut out. The shape of the bait can be adopted from the Khamsin bait from the manufacturer ZipBaits or Kosadaka. Pike are great on such wobblers. They have a fairly simple shape, which will make your work easier.- On the Internet, the picture of the bait is copied and changed to the required size and printed on a printer. An alternative is to trace the picture on a transparent piece of paper directly on the monitor with a gel pen. In this case, the template will be more accurate.
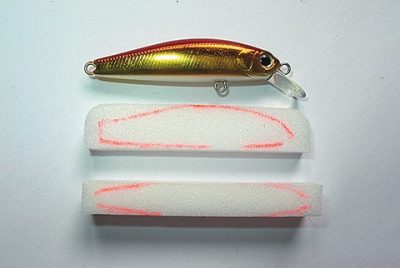
- The outline is transferred to plastic. At this stage, you already need to know the thickness of the body of the future bait. This is necessary in order to understand how many plates will have to be glued together, and where in the bait the equipment and fittings will be located. Khamsin can hardly be called a fat man; his body width is slightly more than a centimeter. In our case, we will need three plates. The thickness of one of them is six millimeters, and the remaining two are four millimeters each.
- PVC is cut. This is done with an ordinary stationery knife and on a hard surface. The more careful you are at this stage, the less you will have to trim the workpieces with the same knife or file. Two plates with a smaller thickness are set aside, and work continues with the central, thicker one, intended for hinges and loading.
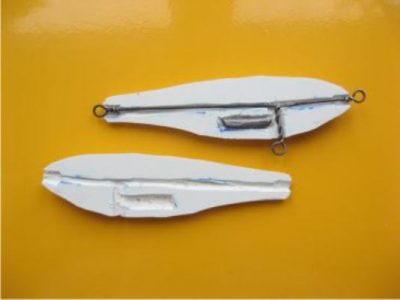
Three loops are twisted. The loop can be called correct if it holds well and sits firmly in the body of the bait. Ideally, it should sit straight and straight. In our case, a special loop is twisted, which has a twist along its main length, and at the end there is a small wire hook, and near the ring there is an untwisted section, which is intended for even mounting it into the body of the wobbler. The finished loops are set aside.- The plates are connected using glue and processed to the planned shape.
- A stationery knife is used to cut off the bulk of the excess plastic, and the remainder is removed with a file or needle file and sandpaper.
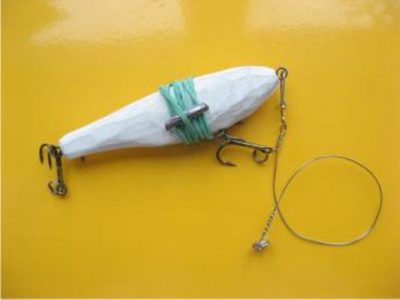
Loading is being done. There are different ways to calculate the amount of lead required. The simplest and fastest involves the use of precise electronic scales and a container of water. You can’t do without a Cheburashka weight with a wide eye, through the eye of which a piece of thin fishing line is passed and tied to one of the loops of the wobbler. This is followed by hanging rings and tees on the workpiece, which is necessary for a more accurate calculation of the load. Then, using tape, the end of the fishing line is glued to the electronic scales. The Cheburashka is thrown into a suitable container (a plastic bottle will do) and water is poured in. In order to measure the amount of lead required to immerse the bait, the scales are turned upside down and the wobbler is drowned in the container. The scales will show the exact load, only with a minus prefix.- After determining the required quantity, the halves are separated and you can begin loading. To more accurately hit the thickness of the plastic, lead buckshot can be riveted a little. You will need 3 g of lead. Buckshot of 8.5 mm diameter weighs the same. Buckshot is shaped into a flattened barrel using a small hammer. In this form, it fits perfectly into a 6 mm PVC plate.
- The future bait is leveled, primed and painted. You can refuse to paint the wobbler, and limit yourself to applying stripes and fins with waterproof markers.
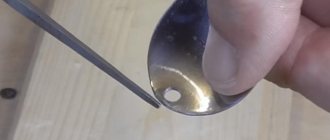
Making a blade
The hinges are screwed in and carefully adjusted to the desired position. Afterwards they are coated with glue and glued in place. If the cut under the blade was not provided for by the design, then it is made at this stage. The bait is sawed through with a hacksaw, the file expands and the cut is leveled.

A blade is cut out of polycarbonate (2 mm) and finished with a file and sandpaper. Advice: when making a copy of any famous wobbler, slightly overestimate the blade size. This increases the number of possibilities when adjusting the bait in the bathroom or on a pond.
If you are interested in our idea, all you need to bring it to life is PVC, a can of epoxy and yacht varnish. Believe me, any additional tricks will not make the bait more catchable.
Video on the topic:
How to make a wobbler from foamed PVC part 1/How to do wobbler PVC foam part 1
11:28
PVC wobblers (material)
17:06
Painting wobbler with their hands part 2
10:03
How to make a copy of the wobbler Megabass ITO SHINER/How to make a wobbler Megabass ITO SHINER
11:39
narybalke