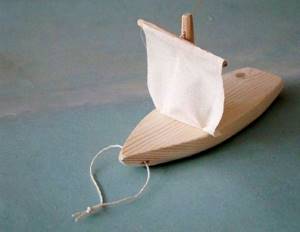
A boat made of traffic jams
There will always be bottle caps. This is the easiest method of creating crafts for little ones.

Three plugs need to be glued together - this is the base of the future ship. An ordinary toothpick will serve as the mast. A sail can be, for example, a piece of colored paper. We pierce the sail in 2 places with a toothpick, attach it to the central plug - our ship is ready to go.
To control the ship, you can attach a pin with an eye to the outer plug. Tie a strong thick thread with a spool behind the eye of a pin. Now the child can use a string to pull the ship where it needs to go or return it if it floats far away.
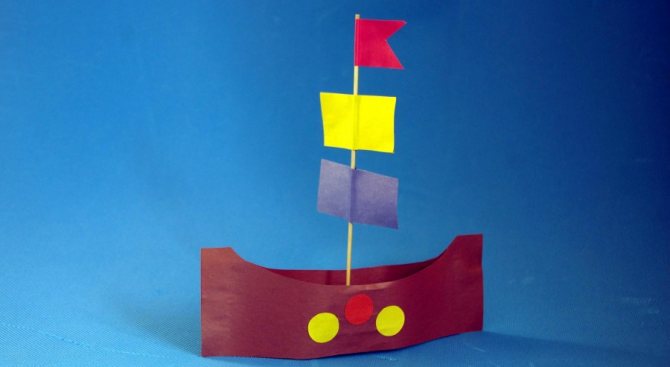
Paper sailboat
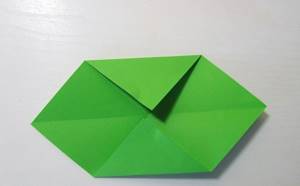
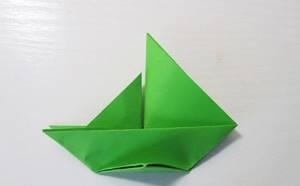
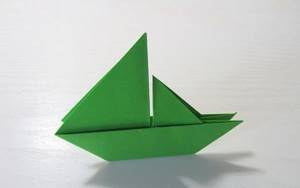
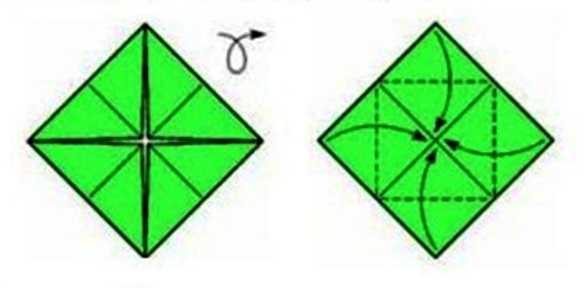
To make such a boat out of paper, take a square origami sheet. Thick double-sided paper looks more interesting - then the sail of the boat itself will be a different color. First, for convenience, mark the center of the square, and with it the vertical and horizontal in the middle.
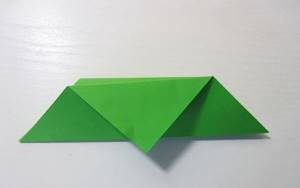
Fold the top left and bottom right corners, and then fold the shape exactly in half. Bend the bottom corners to make an isosceles triangle from the rectangle. Inside you will get a kind of pocket that needs to be straightened.
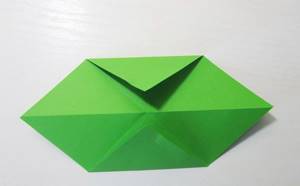
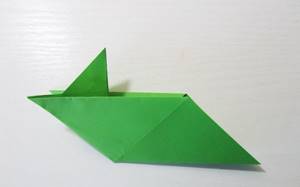
To do this, press the sides of the triangle and at the same time pull its base in different directions - a rhombus will come out. Now you need to form a small sail: to do this, bend the upper right triangle down in the middle and bend it back, stepping back a little. Hide the resulting fold, and with it the lower triangle-bottom, behind the sides of the ship.
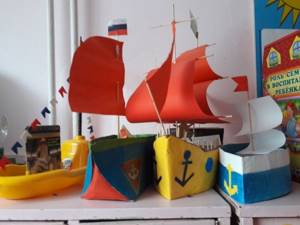
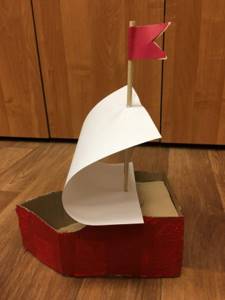
Cardboard boat
There are simply no options here; it all depends on your imagination.
For this we need milk packaging made of cardboard. One long side should be completely cut out; for beauty, the outer side can be covered with colored paper.
The side parts can be made curly, for example, the center can be made just below the nose. Decorate the craft with a picture and write the name. You can cut a small round hole - a porthole.
In the center we attach a mast made of a thin stick, with a sail on it. From the central sail you can stretch a rope to the bow of the ship and hang the 2nd sail.
To control, fix a strong thread with a spool on the nose of the product.
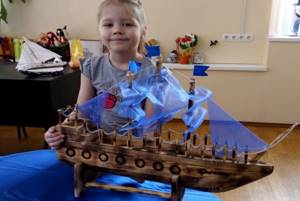
From thick cardboard, which is left over after purchasing equipment or telephones, you can make a more complex, but spectacular frigate.
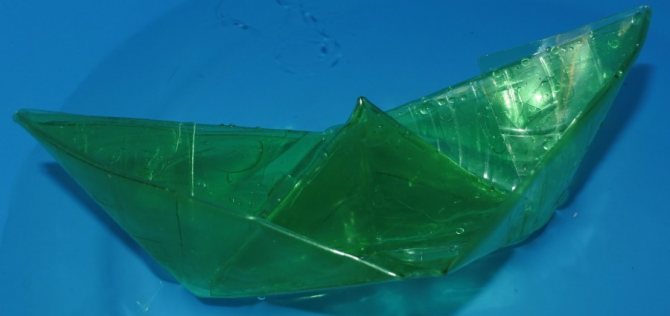
How to fold a paper boat that doesn't sink in water
Of course, any paper that comes into contact with water becomes soft and sinks. But there are a couple of secrets to avoid a shipwreck and our craft did not sink, but floated!!
For a finished paper boat, be sure to lubricate the outside of the bottom with special oil, such as Vaseline, thanks to which water will be repelled!!
And in order for the toy to float faster, it is better to make an additional sail.
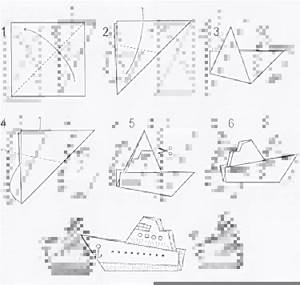
Manufacturing process:
1. Make a square out of paper. Bend it diagonally.
2. Fold a narrow strip of the upper right side onto the surface of the triangle and iron it thoroughly.
3. Fold the same strip back and iron it carefully again.
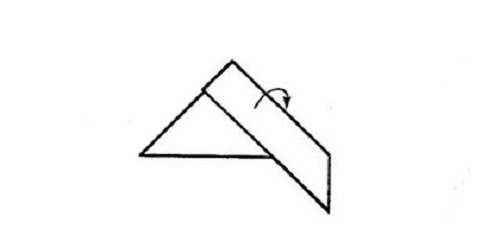
4. All that remains is to unfold the square and give it a shape.
Of course, if this is your first time folding such a product, difficulties may arise, so I recommend watching another video, it shows one of the ways to make a paper ship with a sail.
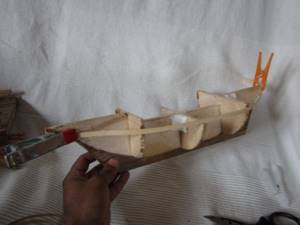
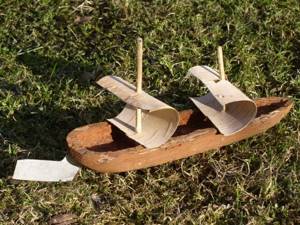
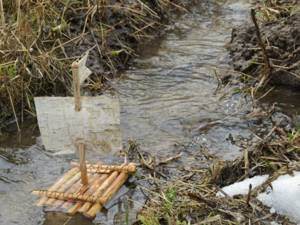
Wooden boat
You can collect small twigs that have fallen from trees in the square (park). Using strong thread or a glue gun, tie the branches together to form a raft. Attach 2 branches along the edges of the branches (across all of them) for the strength of the structure.
- Crafts from paper and cardboard - 110 photos of the best simple patterns for children and beginner craftsmen
- Crafts for girls: simple, beautiful and interesting crafts. The best ideas with explanations and step-by-step instructions for creation (70 photos)
- Coffee crafts: step-by-step instructions for creating three-dimensional figures from coffee (90 photos)
A popsicle stick, if split in two, makes an excellent mast. A piece of fabric or paper will make a sail. Wrap it around the mast and you can send the yacht on its way.
Step-by-step instructions for a DIY boat
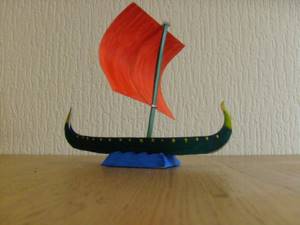
Do you like the fairy tale Scarlet Sails? There such a beautiful and graceful ship sailed with such luxurious sails. If you are looking for just such an option, you can watch this video:
And if you prefer to do something simpler, then this instruction will come to your aid and will come in handy.
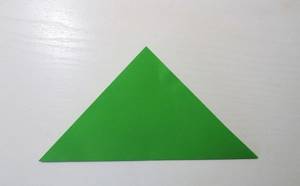
1. Make a square out of a regular sheet of paper and fold it in half to form a triangle.
2. Then unfold it to its original position and bend the sheet in half.
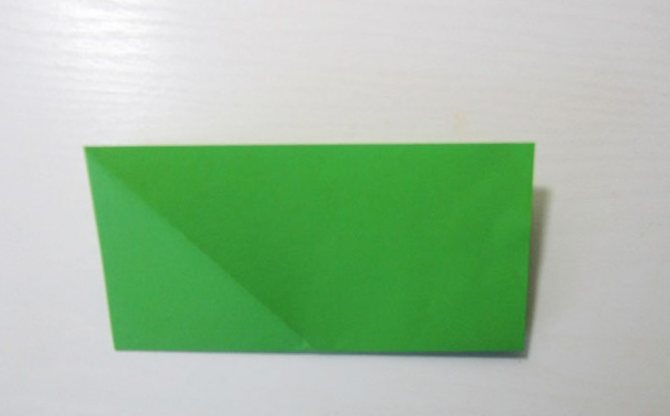
3. These are the lines you will get, one diagonal and the second horizontal.
4. Fold the leaf in half again.
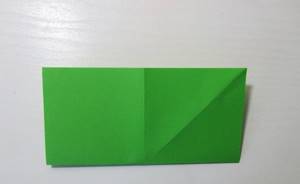
5. And where there is a diagonal, bend the ends to this line to make triangles with equal sides.
6. Now fold the sheet of paper in half in the opposite direction.
7. Unbend again to the starting position and follow further instructions.
8. Take the corner on the left and apply it to the center.
9. And then fold it in half, and the left corner will have to be bent inward.
10. Do the same with the right corner.
11. After this, you will have to bend the very bottom corner of the paper, you will get a base, which you will hide inside.
12. This is such a funny toy that will certainly delight your mischievous baby or toddler.
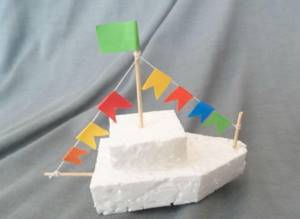
Styrofoam boat
Let's look at another DIY boat craft. If after purchasing there is still a polystyrene box left, do not rush to throw it away. This is an excellent material for building a yacht!
The small box can be fully used and a mast stick can be secured inside.
You can stretch thick threads from the mast to the corners of the boat and hang multi-colored flags on them.
You can cut a small piece out of large foam for the base. Glue 1-2 pieces of foam plastic on top - cannons. Use small sticks or matches to pierce the cannons; they can be colored with felt-tip pens in different colors: red, yellow, blue.
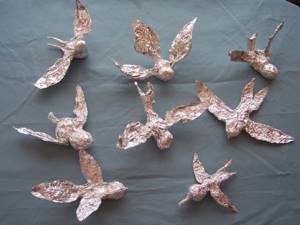
Crafts made from foil: master class and step-by-step instructions. 90 photos of ideas and finished products- Craft a tie: master class and tips on how to make cards and souvenirs in the shape of a tie (75 photo ideas)
- Crafts from socks: a selection of the best ideas and tips for beginners, which crafts can be made easily and quickly (75 photos)
Make a mast with a colored flag from an ice cream stick; it can be plain or paint a white piece of paper with pirate symbols.
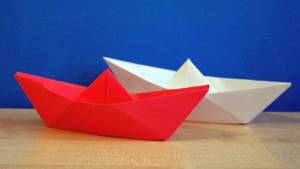
Classic paper boat
You will need a regular rectangle, which you need to fold in half and bend the top corners towards the center. Fold the free edges over the sides and tuck the corners into an even triangle.
Give it volume and fold it along the base to make a square - like in the picture. And then form a smaller triangle again, bending the bottom corners. And square the base again - the boat is almost ready. All you have to do is pull the edges to the sides and spread it until you get the perfect shape.

Matchbox boat
Bright, voluminous DIY boat crafts are made from matchboxes.
You will need:
- matchbox – 3 pcs.;
- cardboard;
- colored paper (yellow, red);
- straw for drinks – 1 pc.;
- scissors and glue.

Detailed instructions on how to make a boat:
The matchboxes need to be glued together: 2nd box with the short sides, and the 3rd one on top in the middle (looks like a typewriter). Wait until completely dry.

Cut a strip of colored paper equal to the width of the box and the length of A4.
Then you need to glue our 3 glued boxes on all sides, as shown in the picture. For example, you can take blue paper.
Cut a strip of dark (blue) color 1-1.5 cm wide from cardboard (thick paper). We bend it in the middle, we get the bow of the ship. Glue this strip to the sides of the boxes, and the ends of the paper should cover the matchboxes. The bow of the boat will be sharp and empty.
Draw the outline of the craft on thick paper (cardboard) - this will be the bottom. We fix the bottom with the side on the bow of the vessel.
It is convenient to make a mast from a plastic drinking straw; if not, you can twist a thin tube from plain paper. We begin to twist the sheet diagonally from the corner. Make a small hole in the top matchbox for the mast.
Lubricate well with PVA glue for better bonding and insert the mast into the box.
Sails can be made from 2 pieces of colored paper of different sizes, preferably bright yellow (red). On the sides of the short sides, you can use a hole punch to make even holes for the mast.
Separately, make a double flag of a different color (for example, blue), as shown in the figure.
We thread 2 sails through the holes, you can paint them. Glue a flag on top of the mast. Since our flag is double, it will hold the sails.
The kids love pirates, so they need to draw a pirate emblem on the sails.
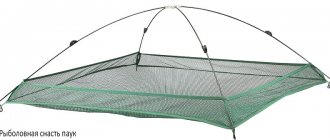
Budget carp fishing boat
Greetings, Samodelkins!
From this article you will learn how to assemble a fishing boat with your own hands from inexpensive parts, a budget option, so to speak. This type of boat is also called a carp boat. These boats are usually used to deliver bait and tackle. In the finished version, such a boat is not cheap, and in order to save money, the author of the YouTube channel “Radio-Lab” decided to try to assemble such a boat himself.
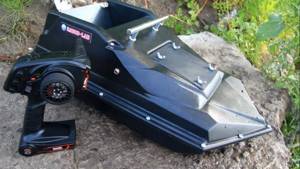
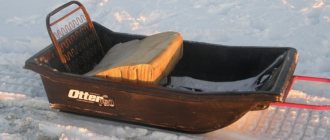
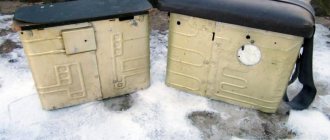
The hull for the future boat will be like this:
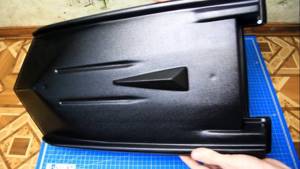
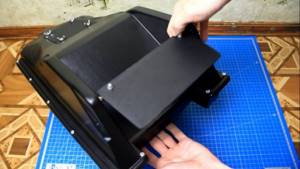
It seems that this type of case is called “Pyramid”. The bunker of this specimen is located in the rear part and is part of the body. The hopper has a side that can move and thus discharge is realized.
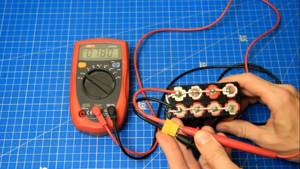
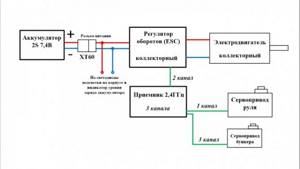
This case is made of ABS plastic. Thickness 2mm. The dimensions are as follows: length – 580mm, width – 290mm, height – 180mm. You can find different cases on the Internet and this is a matter of taste and goals. To control the future boat you will need this fairly inexpensive radio control equipment for 3 channels. The kit consists of a transmitter and receiver.
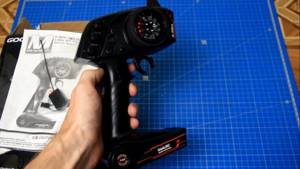
The throttle trigger will control the speed of the main engine, and the steering wheel will control the rudder. The opening of the bunker will be realized by pressing this button of the 3rd channel. This equipment is powered by 4 AA batteries. All the necessary information on settings and connection is in the instructions.
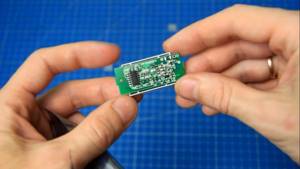
This speed controller for brushed motors will be responsible for controlling engine speed and powering the on-board network; it has a large current reserve and supports two 8.4V Li-Po banks for the 540 motor.
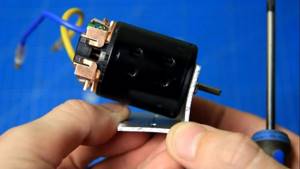
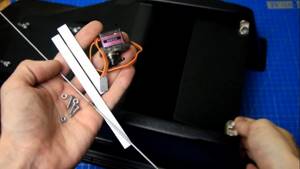
This regulator has a built-in 5V 2A BEC to power the receiver and servos. We will use the following size 540 commutator motor. You will also need a pair of servo drives.
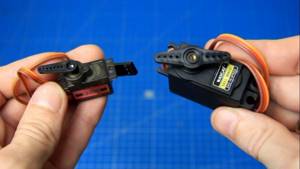
The larger servo will control the rudder, and the smaller one will control the bunker release. These servos have metal gearboxes.
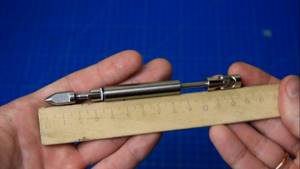
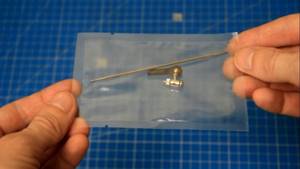
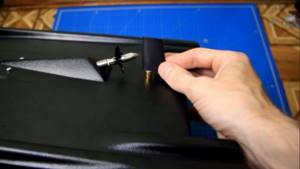
Next, we will need a sternwood with a suitable length and diameter with a cardan drive.
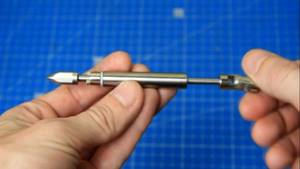
This deadwood is made of stainless steel. The length of the deadwood is 10 cm. The diameter of the deadwood shaft is 4mm, and the diameter of the motor shaft is 3.17mm. This is what everything looks like assembled.
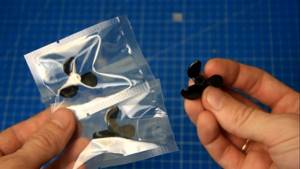
The author bought several propellers, they have 3 blades, made of plastic, outer diameter 32mm, shaft 4mm, positive direction of rotation.
We will use the steering wheel like this, assembled, the height of the steering wheel body itself is 36mm. Below is a set of steering rods.
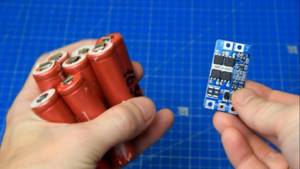
To assemble the battery, you need 8 Li-ion batteries of the 18650 format.
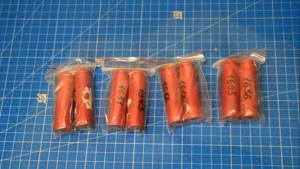
We will assemble a battery for 2 banks and 4 elements in each, abbreviated as 2S4P. To charge and balance the battery, you need a special charger CC-CV 8.4V 1A for a 2S battery and a BMS board with a balancer for 2S at 10A. To monitor the charge level of a lithium-ion battery, you will need a charge level indicator for a 2S battery.
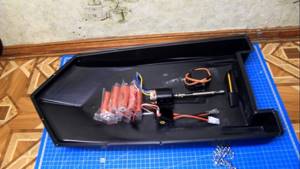
Well, these seem to be all the necessary spare parts for assembling the future boat. Now you can proceed directly to the assembly. First, you need to roughly position the main components in the hull of the boat.
Now you need to make a motor mount. An aluminum corner with an edge of 30mm and a thickness of 2mm is perfect for this.
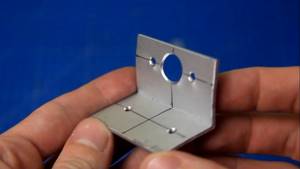
The motor will be installed on the resulting motor mount. Please note that the motor mount must be bent slightly so that the motor is at an angle.
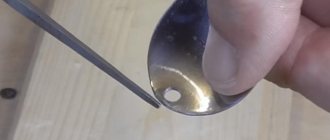
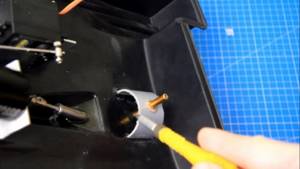
Next, we make a hole for the sternwood and mark where there will be holes in the body for attaching the motor mount.
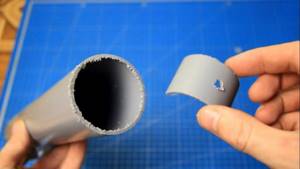
For additional fixation and rigidity, the author made the base of the steering wheel from a 50-gauge sewer pipe.
The next step
is battery assembly. Since a high-current Li-Po battery is quite expensive, as an option, we will try to assemble a power battery from 8 used Li-ion 18650 batteries.
To make battery assembly easier, you can use the following holders:
Now we will assemble the mechanism for opening the hopper with a servo drive. To assemble this mechanism, the author used pieces of aluminum, a bicycle spoke, and a few other parts:
The result is a fairly simple mechanism in which a servo drive moves a rod from a bicycle spoke.
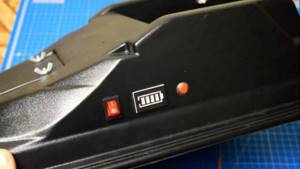
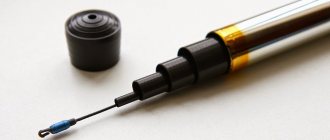
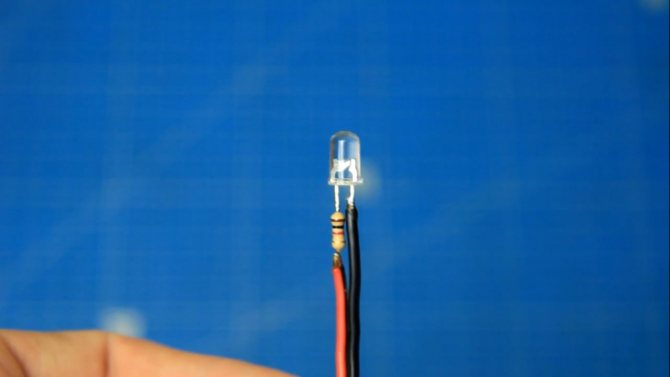
On the other side there is a 5.5x2.1 socket for connecting a charger. We will install LEDs on the front and rear walls of the case. The front is white and the back is red.
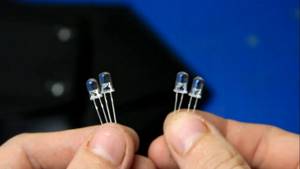
When installing LEDs, do not forget about the current-limiting resistor, in this case 0.25 W with a nominal value of 1 kOhm.
It is also necessary to organize protection of the propeller and rudder from possible accidental impacts. We will make it from aluminum profile strips.
Next we continue to assemble the electrical part. Be sure to observe polarity.
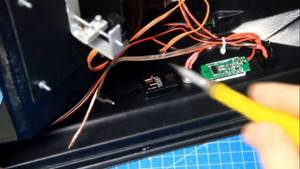
We solder the wires for charging the battery to the connector on the case, being sure to observe the polarity. Also, do not forget to connect the control wires from the steering servo and regulator to the receiver.
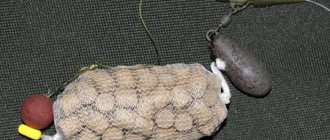
To prevent water from penetrating into the hull through the sternwood and the base of the rudder, fill them with Litol.

All that remains is to solder the LED power wires in parallel to the regulator power connector and solder the charging wire to the connector on the body. So, all the wires are in place. To easily carry the boat, I purchased this handle from a furniture fittings store.

The LEDs on the front and back light up, and when you press your button, the battery charge level is displayed.
For more information about the assembly and testing of this model, see this video:
After all the work done, I ended up with this homemade carp boat for fishing.

There are still some small flaws, the project is still a budget project, but it works fine. Try, collect and repeat. Thank you for attention. See you again! Source
Become the author of the site, publish your own articles, descriptions of homemade products and pay for the text. Read more here.
Original boat ideas
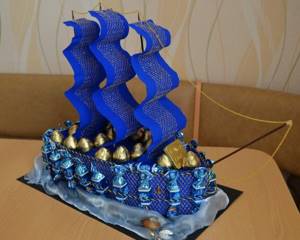
The base of a pirate frigate can be a plastic bottle or a shampoo bottle. Pierce them with a wooden skewer, glue on the sail and flag. Make sailors out of bottle caps, dress them with colorful outfits: headscarves and clothes (glue on a piece of fabric). Draw faces and attach the figures to the bottle or bottle.
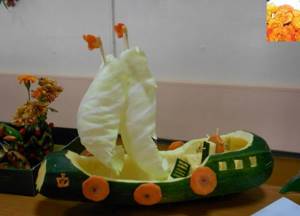
For example, raw zucchini is perfect for a deep boat. Cut out the center in the center, insert tubes with large leaves from plants (you can use paper) on the sides, plant sailors (pupae). It's easy to scrawl the name of the boat on the side.
Glue the ice cream sticks together, preferably in 2 rows in different directions. Attach the mast with a bright flag.
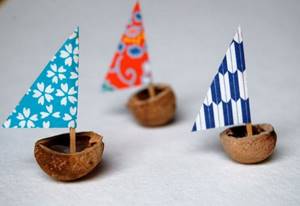
In the fall, you can take half of an empty walnut shell. Secure a branch-mast with plasticine (glue), pierce it with a yellow (red, green) leaf of poplar, maple, etc. Colored boats are very beautiful.
We present to your attention original photos of boat crafts made from different materials.
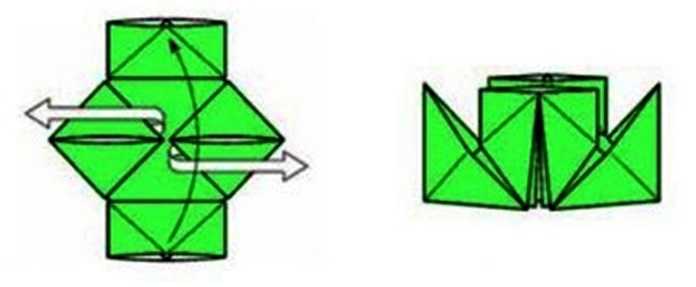
Two-pipe origami boat
For this vessel you will need a square piece of paper, so cut off the excess right away. Mark the center and main lines, bending along diagonals. Then - form a half-size square from a large square, bending all the corners towards the center.
Turn the resulting rectangular rhombus over and repeat the previous step again - bend the corners to the center again. And then - the same operation for the third time. Turn the boat over again, straighten the upper and lower corners, and also move the side corners to the sides - you're done!
Photos of boat crafts
Read here: Crafts from glue - simple ideas and instructions for creating decorations and useful things with your own hands (90 photos)
Paper steamship
Fold the square sheet of paper diagonally with the fold down, and then fold the bottom triangle inward. Take scissors and cut the corner to form a steamboat tube - and the boat is ready!
Method 2. Instructions for modeling a boat with two pipes.
This instruction will tell you how to fold a paper boat with two pipes, which is very similar to a steamboat. You may need scissors for this work. Therefore, the child must make such models under the supervision of an adult.
Step 1. To solve the question of how to make a paper steamer, take a landscape sheet, preferably A4 format. Taking it by the upper right corner, we connect the top of the sheet with the left side. Bend the sheet and cut off the rectangle formed at the bottom. After reversing, a square should form. Now take the upper left corner and connect it to the lower right corner. Iron the folded area. We unfold the product and get a square with a diagonal fold.
Step 2. We bend the corners of the square again towards the middle to get another square. We turn the workpiece again and bend the corners to the center again.
Step 3. Turn the square over one more time and perform similar actions with the corners.
More interesting: Handmade lamps
Step 4. Turning the paper ship over one last time, straighten the two opposite corners until you get a rectangle. The result will be a kind of ship's pipes.
Step 5. We take the workpiece by the remaining corners and unfold the boat, while the pipes are connected.
A steamer with two funnels is ready to set sail. A more detailed diagram of how to fold a paper boat can be seen in the video below.
Volume applique
In the senior group of kindergarten, you can conduct an appliqué lesson using not only colored paper, but also corrugated packaging cardboard. The top thin sheet must be carefully removed so that the bottom wavy layer of paper remains, very reminiscent in its structure of a wooden boat. For the sail, children cut out a large triangle along the contours. This will be the basis for the craft. A white mast made from a rolled rectangle is glued in the center.
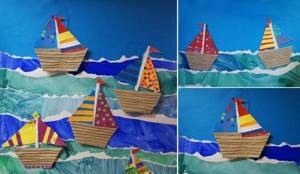
The sails are decorated in different ways. Confetti circles are attached to one side, and strips cut from colored paper are glued to the other. A triangular flag is placed on the top of the mast.
Particular attention is paid to the background. Before making a boat, you need to do some preliminary work. First, A-4 sheets are covered with a blue, cyan or turquoise background. After the workpieces have dried, the sheet is divided into strips using the tearing method. Due to the fact that the torn edges of the unpainted side of the sheet are visible, the illusion of white foam on the waves is created. Since preparation takes a lot of time, sea waves can be made in advance, the day before making the boat.
How to make a boat so that it looks three-dimensional? To do this, before gluing the vessel itself, you need to strengthen a small piece of corrugated cardboard at its location, and then glue the craft itself onto it.
Easy craft for water games
If you have accumulated a lot of wine corks, you can start making a flotation device with your child. This light boat consists of several parts.
This is a raft made of several corks, tied with an elastic band. Insert a wooden skewer or any other thin plastic tube into the middle piece. Sails in the shape of a trapezoid are cut out of kitchen rags using scissors. The last step is to attach the flag to the top of the mast. That's it, you can send the boat sailing.