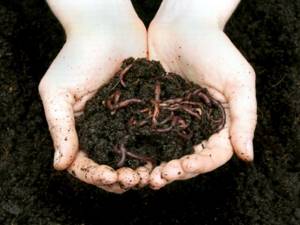
In the field of fishing, artificial and natural bait methods are used. No matter how interesting artificial bait is, you cannot completely abandon living creatures.
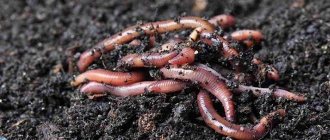
Frequent fishing trips require financial expenses. If the fish are caught commercially, they get bigger. Many types of fish are caught with worms, which are not always profitable or convenient to buy. Breeding worms at home for fishing is a good opportunity to get an unlimited amount of bait. You will no longer have to buy material, you will know that it is of high quality and even sell it.
The worm breeding business brings good money if a system of work is built. In winter, getting live worms is not always easy. Bloodworms are available for sale , but they are difficult to find. Winter fishing with available food does not always guarantee good catch. Breeding worms at home for fishing is a smart solution for the avid fisherman.
What you should know about earthworms
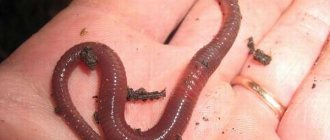
You can catch dozens of species of fish with a worm. We can say that earthworms are a universal bait. There are up to 2000 species of worms in nature. Many of them are not found in our climate. But those 100 species that were able to adapt to its conditions grow and develop normally.
Worms can come in different sizes. It is determined by the type of creature and its living conditions. The minimum size of an individual is 3-15 centimeters, but there are giants up to 40 centimeters in length. Worms are active at night, so they are not easy to spot.
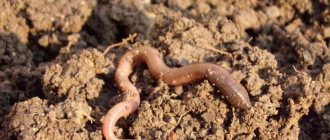
During their life, they pass the earth through themselves, forming humus. The creatures feed on organic remains of roots. plants, leaves. Not all the food that the worm eats is digested. When pieces of organic matter fall back into the soil, they enrich the soil with useful substances.
In places where there are a lot of worms, the vegetable yield is always higher than in places where there are no worms. After the rains, you can see earthworms lying right on the ground, being washed out of the soil by water. Raising worms in captivity is quite simple; they grow actively and are easy to care for. The main thing is to provide them with enough food and optimal living conditions.
What worms are used by fishermen
Specific types of worms can be used as bait.
In fishing, the following are in great demand:
- Crawlers or earthworms. They got their name due to the fact that they can get out of their holes after rain.
- Large worms that can reach a length of about 30 cm. They can act as bait for all freshwater fish.
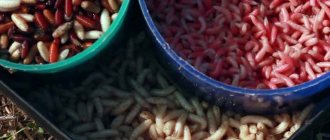
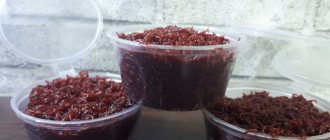
- Dung worms. Based on the name, it becomes clear where they live. They have a dark red color. Small individuals that live in colonies, which makes them easy to collect. They are considered an excellent bait for fish.
- Subfoliates. These dark purple colored specimens can be found in leaf piles, under logs and rocks. They are small in size. These worms are able to escape the hook, so fishermen use them infrequently.
Related article:
How to prune fruit trees correctly
Breeding worms
Characteristics of red worms
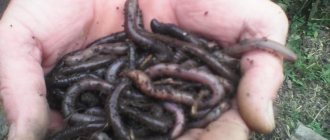
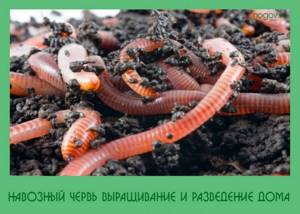
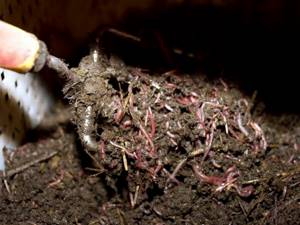
Men who fish at a professional level know that the most valuable material is red worms. They grow quickly; in one growing cycle you can get up to 30 kilograms of living creatures. Their body composition contains fats, minerals, carbohydrates, and proteins, which are useful not only for fish, but also for poultry.
By growing worms, you can provide yourself with bait for the entire winter and summer fishing season, and add vitamins to your bird’s feed. Worms eat organic waste and other debris. They can be fed with vegetable scraps, bird droppings, straw, meat industry waste, and animal manure. Maintaining the creatures is inexpensive due to their unpretentiousness.
What conditions do red worms live in?
Breeding worms at home for fishing is possible in the garden or on a specially designated piece of land. An important condition for the development of creatures is high soil humidity. Ideally, it will not fall below 70%. When the moisture in the soil is 22% and this continues for 7 days, all the worms will die.
A soil moisture level of 35% will slow their growth and you will end up with less mass than you would if you kept the soil moist. The second condition is an abundance of organic waste with a high nitrogen content. It is recommended to monitor the acidity of the soil; if it is higher than pH9, worms will not live in such conditions.
It's bad and when the acidity drops below pH5, the creatures will stop reproducing and die. The optimal acidity level is pH7. The worms should be kept at a temperature of at least 18 degrees Celsius, preferably a temperature of 24 degrees.
The fact is that when it is cold the worms stop eating and growing. They begin to burrow deep into the ground, where it is much warmer and fall asleep. They wake up two weeks before the start of spring. Their biological clock works perfectly, so they subtly recognize the seasons. Growing worms at home will be easy if you follow the care technology.
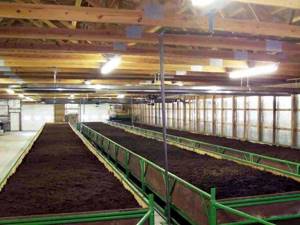
Technology for growing worms at home
In order to obtain the required amount of vermicompost to fertilize your garden, you should think about breeding earthworms at home.
The recipe for a fertile soil mixture is simple. You should add 1 kg of sand and 5 kg of vermicompost to 1 square meter of black soil.
How to choose a place
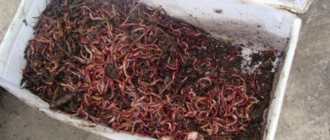
If you decide to start breeding worms, you should know that for this you need a mini-farm or vermicomposter. The worm coop can be placed anywhere: on the balcony, in the apartment, in the yard, in the garden, in the garage or any utility room. It should be a place without noise and vibration. During the processing process, the structure does not emit any unpleasant odors. The main thing is that the temperature in the room is within acceptable limits.
At temperatures above 36 °C the worms will die.
The food may give off an odor. In this case, it must be sprinkled with vermicompost or soil.
Types of worms
For breeding worms, wooden or plastic boxes made of food-grade plastic 30-40 cm high are often used. The containers must have ventilation. To do this, use a drill to drill holes in the top of the box around the entire perimeter and in the lid along the entire area. Boxes must be installed on legs at an angle. Then the vermicelli can drain through the hole in the bottom. Place the container to collect it under the hole.
Worms also do well in cardboard boxes. They feed on pieces of cardboard. True, the boxes get wet, and they often have to be replaced with new ones. An old refrigerator is also suitable for breeding. It is installed with the door facing up. Don't forget to make holes for ventilation.
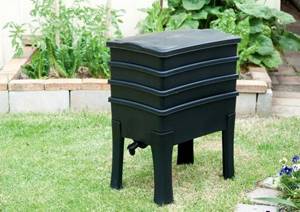
The most convenient, but expensive equipment for breeding worms is a special vermicomposter. It consists of several plastic boxes that are placed on top of one another. Each has side vents and slots at the bottom to allow water to pass through. The bottom drawer is placed on legs. There is a tap installed in its bottom for draining the vermicelli. The top drawer is covered with a blanket to maintain humidity and a plastic lid.
Instructions for making a homemade worm trap
Let's look at how to build a worm farm with your own hands, where to start making it and what tools you will need.
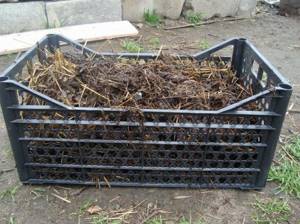
For a homemade worm trap, identical plastic food boxes are most suitable. They fit well vertically and fit into each other. The box must be solid, without holes, size 60 × 40.
The bottom box will be used to collect the soil solution, the top ones will be used to contain the worm. On top you can place three compartments for growing a worm. In the bottom drawer, use a drill to drill a series of holes on top of the sides. But you should not make holes in the corners (up to 10 cm), since the soil solution will drain through them.
In the second box you need to make the same holes, but around the entire perimeter. In the bottom of the second box we make slits parallel to the stiffening ribs using a grinder (approximately 8 pieces). Use a chisel to clear the surface of burrs. We produce 3 boxes of the second type.
At the bottom of the boxes we lay a row of wooden rods as thick as a finger. They will prevent the bottom holes from clogging. It is necessary to sew bags from high-density spunbond fabric. They are laid on top of the rods. It is necessary to cut out plastic mesh to move the worms into a new box. They are used when there is 5 cm left until the box is full, and continue to feed the worm. Then, when the box is full, the worms will be in the net and can be moved.
We repeat the relocation procedure three times until the worm is completely captured. The top cover is made of plywood. Using a drill we make its perforation.
What equipment will you need?
To breed worms at home, you need to purchase a small amount of equipment: scales, a wheelbarrow, a sieve, a shovel, a pitchfork, a bucket, thermometers for measuring soil and air temperature, a device for measuring soil acidity, racks, boxes for growing worms.
Soil selection
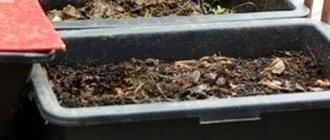
The reproduction and life of worms depends on the quality of the soil. Half the container must be filled with humus with the addition of crushed cardboard. The soil should have a moisture content of 70-80%. It's easy to check. To do this, take a handful of soil in your hand and squeeze it tightly. If 1-2 drops of water are released as a result of compression, then the soil has the required moisture.
Preparation of the worm farm
When starting a business, you should not immediately buy expensive vermicomposters. Use a wooden or plastic food box. It is necessary to make a hole in it for fluid drainage and ventilation. The room must have a temperature range of 18-25 °C, lighting of 60 W at 20 m, ventilation no more than 0.5 m/s. You should be aware that chlorinated water inhibits worms, so use water containers. Take care to protect worms from pests. They are eaten by moles, rats, and other rodents.
Purchase of breeding stock
You can buy worms for breeding both on the Internet and from local worm farm owners. When purchasing breeding stock, you should pay attention to the appearance of the worm. It should be red and mobile. The breeding stock includes at least 1500 worms. The calculation must be made from the following ratio: 1-3 families are needed per 1 cubic meter of soil for breeding.
How to check in
2-3 days after preparing the soil, it is necessary to make a hole in it and move the first inhabitants there. After this, carefully spread the soil and close the lid. After a couple of days you need to add food.
In order to determine the required acidity of the soil and check whether the worms will take root well in the new home, it is necessary to do a test colonization in a small container. Based on the results, you can determine whether the optimal acidity level has been reached or needs correction. The optimal acidity level for breeding worms should be in the range of 6.6 - 7.5 pH.
If there are a lot of dead worms, then the acidity needs to be changed. It is increased by adding straw, sawdust, and plants. To reduce the acidity of the soil, it is necessary to add chalk, limestone, and shells. Within a week after moving in, you need to check how the worms feel in their new home. If the surface of the substrate is clean and they are mobile, then the relocation was successful.
What to feed
What to feed worms at home? Worms are not picky about food. They feed on dead or beginning to rot plants. It is recommended to give potato peelings, cabbage leaves, banana peels, stale bread, tea or coffee grounds, straw, grass, water from a container washed from sour cream or kefir, and chicken droppings.
Worms can be classified as vegetarians. Citrus fruits, meat, and eggs should not be added to their food. You should not add fresh manure to the worms, as it generates heat up to 70 ° C.
All food you give to worms should be ground up. They cannot process it in solid form. The feed composition should be maintained at a constant level. Worms are better attuned to the food that they tried for the first time in their lives. When food changes, individuals must adapt over a period of time.

Rules of care
Growing and caring for worms at home includes feeding, maintaining a favorable temperature, watering and loosening the substrate.
The first feeding is carried out a few days after settlement. To do this, feed 3-5 cm thick is placed on a quarter of the surface and distributed evenly. Next time, the food is applied 5-7 cm thick over the entire surface of the box.
Feeding is added to the worms every 1.5 - 2 weeks, as they are eaten, until the box is filled to a height of 50-60 cm. The frequency of feeding depends on the number of worms and the temperature of the contents. Worms must be kept at a temperature of +15…+25 °C. Worms reproduce quite quickly, so it is necessary to have prepared boxes for transplantation. One family after overwintering increases 10 times.
It should be remembered that worms need moisture. Therefore, the substrate must be watered regularly. The optimal humidity should be 80%. This procedure must be done using a watering can with small holes and settled or rainwater at a temperature of 24 °C. Worms need oxygen, so if the substrate layer is 20 cm or more, it must be loosened regularly. This procedure is carried out with special forks with round ends. To do this, the substrate is pierced without mixing the layers twice a week to the depth of the worms.
As a result of their active activity, the substrate in the box is divided into three zones.
The top layer contains nutrients and organic residues. The middle layer is for worms to live in. The bottom layer is the most valuable. It collects all the products of soil processing, which are used as vermicompost and worm tea. As the worms work, the bottom layer constantly increases. The duration of the complete recycling process in one box is 3-4 months. After this, the worms with part of the old substrate are transplanted into another container, and everything starts all over again.
How to Grow a Dung Worm for Fishing
Dung worms are another favorite delicacy for fish. You won’t find such worms directly in the ground; they need to be dug up in a pile of animal manure or compressed and wet leaves. In appearance, dung worms are similar to red worms. The difference lies in the conditions of detention and the unpleasant odor that the yellow liquid emits. It appears when a worm is placed on a hook.
Breeding worms at home for fishing is possible in a special worm bin, also called a cultivator. To create it you need 500 worms, if the size of the structure does not exceed a square meter. Next, special soil is prepared, it should include sawdust, straw, hay, manure, and soil. Everything is mixed well and pressed.
The greater the pressure in the soil, the more comfortable it is for worms to live. Their habitat should be moist all the time, but without an excess of water.
Dung worm growing and breeding at home
Dung worm cultivation A golden-tailed or yellow-tailed worm is a bait with which you can catch any kind of fish anywhere at any time of the year. And the name “dung worm” is used only for camouflage.
Called "dung worm", "compost worm" or "yellowtail" there are two types of worms. They have the Latin names Eisenia foetida (foetida - smelly) and Eisenia andrei. E. foetida is characterized by striking yellow rings in the tail (the British name for this worm is tigerworm). E. andrei is colored a uniform light red color, and its rings are not so obvious. In addition, the E. andrei worm can withstand higher temperatures than its relative. Because both worms are so similar not only on the outside, but also in their requirements for living space and in their way of fate that they normally coexist side by side, scientists only recognized in the first half of the 70s of the twentieth century that we are talking about two different species.
Previously, the huge red worm, dendrobena, was also included in the group of dung worms. It was then given the Latin name Eisenia hortensis; but it falls out of this category because it is noticeably larger, thicker and, in addition, more fleshy than the first two types. For the angler, the difference between E. foetida and E. andrei is virtually irrelevant because both worms are excellent fishing baits. Scientists suggest that both worms taste different to fish because the composition of the very strong-smelling yellow tissue fluid that flows out of them when hooked is not the same. But there is still no evidence that specifically confirms this. Based on this, we will further consider both species as one - a dung worm.
Worms need warmth
Although dung worms are seen on all continents, their origin is believed to be the Mediterranean. Compared to second types of worms, they are very resistant to high temperatures. Life processes in their body occur most intensively at temperatures from 15 to 25°C, but they can also tolerate temperatures of about 30°C. In such conditions, a crawling creature with its favorite temperature of about 10°C would have already died in the distant past.
Simple habitats for dung worms are heaps of mixed compost, very rich in organic matter, in which even in winter, thanks to the heat released during decomposition, the temperature rarely drops below +15 ° C, especially if manure from feeding animals is included in the heap along with plant waste hay from horses or rabbits.
It is not uncommon for a good compost heap to contain so many dung worms (here Eisenia foetida) that there is enough of them not only for fishing on weekends, but also for feeding.
1000 descendants
In optimal habitat conditions, the dung worm remains active throughout the year, multiplying and producing up to four generations. Offspring appear on the 16-20th day after oviposition ends, and a single worm can produce up to 1000 offspring per year. For comparison: hatchlings emerge from the egg only in the 3rd-4th month. Dung worms have an average length of 6–8 cm; extremely rarely and under very favorable conditions they can be about 13 cm. The age of the worm is about 3 years.
The dung worm is like the Ferrari of earthworms. It lives intensively, at the same time consuming a large amount of energy, and therefore reproduces only in a nutrient-rich compost heap, systematically replenished with freshly cut grass, kitchen waste and falling fruit.
Dung worms do not tolerate cold very well. If, due to prolonged cold weather, the temperature in the compost heap drops significantly and remains below the freezing point for a long time, the worms die. If, along with this, all the worms in the compost heap are lost, they need to be bred again next year, due to the fact that spontaneous new colonization by migrating worms rarely occurs.
If the compost heap is sufficiently moist and rich in nutrients in summer, dung worms survive in it even in the heat. catchable baits and baits Any lift with a fork brings a lot of worms to the surface.
Easy to breed
If you need a lot of dung worms, it is easy to breed them in your garden plot and also in the basement of your own house. For independent cultivation in a special box or by introducing them into a dung heap, it is possible to buy dung worms via the Internet. Under optimal conditions, the first offspring should be expected after approximately 10 weeks.
Dung worms are dug out with a garden fork. While digging with a shovel, many worms are damaged.
Optimal conditions
The first condition for optimal dilution: the compost must be sufficiently wet, approximately as wet as a wrung out rag. If the compost heap is too dry, it will be colonized by ants, predatory beetles or woodlice. And predatory beetles and ants hunt for worms. Otherwise, the compost should not be too wet. Stagnant moisture is fatal to worms unless they can move into the dry parts of the manure pile.
The second condition is the highest possible content of rotted plant residues in the compost heap. The metabolism of dung worms is very intense: one individual per day eats rotted plant residues in an amount equal to approximately half of its own weight, and on warm days, even double its body weight. A kilogram of worms consumes 0.5–2 kg of rotted plant particles per day. Dung worms are practically not seen in simple garden soil, and they are completely absent in the sand, since there is too little edible material there. If there is not enough food in the compost heap, the worms will slowly “disappear.” Based on this, if you want to have a supply of dung worms at any time, you need to systematically supply the dung heap with new portions of food.
Any kitchen, garden and household waste is suitable for composting, especially worms love waste and peelings of unprocessed vegetables and fruits, coffee filters with their contents, wet tea leaves, last year's leaves and grass clippings, bedding on which small animals are kept, and mixed with straw the manure of herbivorous animals. Cut tree branches and shredded wood, shavings and sawdust help for loosening, but it must be untreated wood, not impregnated with chemicals.
If dung worms feel great and are provided with sufficient food, they form real “nests” the size of a child’s head, from which it is very soon possible to collect a supply of worms for fishing. Do not throw peels of oranges and other citrus fruits, cat litter, sauces and meat scraps from roasts or other highly peppered food waste, ash, and the contents of a vacuum cleaner into the manure pile. Manure from animals that have just been treated with anthelmintics is almost fatal to worms. Leftover medication will also kill worms.
Another good place to look for manure worms is in waste piles containing rotted corn silage. In order to store food for the winter for dairy cows, many farmers make huge silage pits filled with crushed corn in the fall. In the spring, the remains not eaten by cows end up in a huge compost heap, to the right and left of the silo, where it all slowly rots and thickly sprouts with thickets of quinoa and nettles. baits and lures for tench An incredible number of dung worms are often hidden in such deposits. In similar “gold mines” it is possible to extract kilograms of beneficial worms for free. In order to dig them up, it is necessary to use a pitchfork rather than a shovel, since a shovel cuts through many worms. Damaged worms die and doom healthy specimens to death.
Municipal people who do not have personal plots, in most cases, cannot build compost heaps. Fortunately, it is possible to grow dung worms in a box or plastic barrel in the basement or on the balcony. But still, you have to follow some rules.
aeration and coolness guarantee success in urban environments
Sufficient aeration is critical. Plastic containers must have ventilation holes not only in the bottom, but also in the side walls, otherwise the compost will begin to rot and smell bad. In addition, it is fundamentally important that the water that is formed during composting does not accumulate at the bottom of the container, but is allowed to drain. Despite the fact that dung worms love a wet environment, they cannot tolerate stagnant liquid.
The container with worms must be positioned so that it is protected from overheating. A cool basement, balconies on the north side or shaded throughout the day are optimal for this, especially in summer.
When planning to grow worms yourself, you need to create a “biotope” for them. A drainage layer of finely lumpy clay, fragments of broken flower pots or small broken bricks is placed at the bottom of the container. nozzles for crucian carp and bait Covering it with several pages of newsprint, pour a nutrient layer of rotted compost into the container, and on top - an aeration layer of soaked newspaper scraps, scraps of paper or sawdust. After this, the nutrient layer comes again, and at the end of it, the aeration layer; they are changed until the entire container is filled, not reaching the top by approximately 10 cm.
Feeding worms
As already mentioned, dung worms should be fed with vegetable kitchen waste. But vegetables attract fruit flies. Based on this, unprocessed vegetable waste and coffee grounds along with filters are better suited. In order to block access to flies, containers with nutrient medium should always be covered with corrugated cardboard, sawdust, several layers of newsprint or thick burlap. It is fundamentally important to completely replace the substrate for growing worms a couple of times a year.
Although you don't want to place the contents of the compost heap in a container with worms, you can store the worms for a couple of days in wet, untreated sawdust. Pieces of newspaper soaked in water and then wrung out are good as a substrate in a box of worms. Rotted leaves, additionally flavored with kitchen waste, are also a good substrate for worms.
If you don’t breed worms yourself, but only occasionally borrow from a friend who has a personal garden, store them in a huge bucket. A mixture of soil and damp leaves, with a couple of handfuls of compost added, will be enough to keep the worms alive for several weeks. But the bucket should be in a cool place, preferably in the basement. A small supply of worms for one fishing day can be stored in large boxes with moistened sawdust from wood not treated with chemicals.
With caution - danger of flight!
When storing and growing dung worms in closed containers, you have to face an important problem - constant readiness to escape if they do not like the conditions in which they are located. Too little food, too damp nutrient medium or a container with worms that is not tightly closed - and they leave the box, finding and using the smallest cracks. To avoid this, cover all ventilation holes with cloth or thick gauze. Along with this, the necessary air exchange will be provided, but the worms will not be able to escape.
A way out of this situation is to constantly illuminate the basement with a small energy-saving lamp. Because dung worms are afraid of light, they will not leave the box. The danger of escape also exists during fishing itself. The jar of worms, especially when fishing at night, must always be carefully closed, otherwise the worms will escape to freedom under the protection of darkness.
Breeding worms for fishing. Simple tips
How to make a worm trap
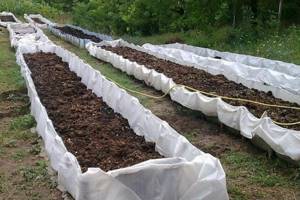
Dig a ditch in a shaded place; its size should not be more than 2 meters square. The top and edges of the ditch are filled with clay, its thickness is about 10 centimeters. Next, a layer of black soil is poured. Make sure that ashes from the fire, combustion products of firewood and other substances do not get into the ground; worms do not live in such an environment. The next layer is humus with sawdust and hay, straw (mix the mixture well).
This layer is pressed and leveled. In such a ditch you can grow not only dung worms, but also earthworms or earthworms. Keep in mind that each type of creature requires its own composition of the earth. Earthworms and earthworms do not like manure compost is added to the soil for them .
Breeding worms at home for fishing makes it possible to have fresh bait even in winter. Unlike earthworms and earthworms, dungworms do not fall asleep for the winter and do not freeze. This can be explained by the fact that the temperature inside the manure remains high.
For the winter, the worm house is covered with bags and insulated. At any time, you can open the structure slightly and dig up worms for fishing. When you cover the hole back up, the worms will develop further.
How to make a worm trap yourself?
To make your own worm cranks you will need:
- plastic boxes that are designed for transporting and storing vegetables (fruits);
Note: boxes are needed in quantities of 5 - 6 pieces and measuring 40 - 50 centimeters in length.
- drill;
- small wooden rods;
- sackcloth.
Manufacturing instructions:
- Take one box and use a drill to make holes on the sides.
Important: there is no need to drill the first drawer at the bottom.
- The remaining boxes are taken and small holes are drilled in each on the bottom side for ventilation.
- A single layer of rods is laid out at the bottom of each box.
- The top is covered with clean burlap.
Subsequently, prepared soil is poured on top of the laid burlap, the worms are moved into it, and the boxes are placed on top of each other.
Tip: it is recommended to cover the top drawer with a towel or light blanket to keep warm at all times.
Conditions for breeding worms: soil, temperature
No species of individuals will be able to take root if optimal conditions are not created for them.
For settlement it is important that the soil:
- It was wet.
Note: the ideal soil moisture for breeding and reproduction of each type of worm is 70%.
Advice: if a person finds it difficult to answer what moisture content the soil has, then you can test the mail yourself. To do this, it is recommended to take a handful of earth in your hand and squeeze it tightly. If a couple of drops of water are observed, the soil is sufficiently moist and suitable for use.
- Quite loose.
- Not sour.
It is noted that the best soil is taken next to a reservoir. In situations where the soil is highly acidic, it is recommended to add crushed chalk or sawdust.
In addition, the most important condition is maintaining a certain temperature. It is normal for the worms to stand at 19 – 28 degrees Celsius.
An important point: if the temperature in the room is below 18 degrees Celsius, this will lead to a decrease in the fertility of individuals by 5 to 7 times, and sub-zero temperatures and heat of more than 29 degrees will lead to their death.
In addition to optimal temperatures and suitable soil for cultivation, it is necessary to:
- lighting was in the range of 50 - 60 W;
- regular ventilation;
- absence of drafts and sudden temperature changes;
- complete isolation from pests, in particular rats;
Note: Rats and other rodents actively eat worms, especially earthworms.
- the water supplied to them did not contain chlorine or other chemical impurities.
An interesting point: it was noted that if the soil is moistened with rainwater, the fertility of the worms increases by 1.5 - 2 times.
How to check in?
Settling is allowed only 1.5 - 2 days after the soil has been prepared.
In general, this process goes through the following stages:
- Holes 3-4 centimeters deep are made manually in the soil.
If the box is 40-50 centimeters long, then it is enough to make 6-7 indentations.
- Rain, red and other species are taken, and then carefully moved into the prepared holes.
You need to move it gradually, first into one recess and then into another.
- The top of each hole is lightly sprinkled with earth.
- The box is covered with a blanket or lid, which provides the necessary air circulation.
An important point: you can feed only two days after successful settlement.
What to feed the worms?
When two days have passed since settlement, the individuals should be fed.
In general, they are unpretentious and are excellent food for them:
- White cabbage.
- Potato peel.
- Black bread.
- Straw.
- Banana peels.
- Rotting plant leaves.
The main thing to remember is that they are contraindicated for food:
- lemons, tangerines, oranges and other citrus fruits, including their peels;
- all types of meat;
- fish;
- canned food;
- sweets;
- eggs.
Note: It is also prohibited to feed these individuals with manure.
All food that will be used as feed should be:
- crushed;
- not cold;
- slightly damp.
Feeding needs to be done every 3-4 days, and the crushed food is laid out in an even layer on top of the soil.
An interesting point: they get used to any new food within 10–14 days.
How to breed worms in an apartment
Breeding worms at home for fishing is also possible in a city apartment. At first glance, this seems absurd and unsanitary, but there is an option to do this without harming living conditions. To raise creatures, enamel dishes are chosen, it can be a basin or a bucket. Worms also live well in an aquarium.
If we talk about a plastic or wooden container, then the worms will not live in it all winter. But, if we consider growing worms as a short-term measure, such a box can be taken. Now we need to start selecting land. Please note that the soil should not contain a lot of humus.
It is advisable that it not be there at all. Fallen leaves and tree roots rot under the influence of high temperatures. Humus, in turn, absorbs oxygen from the soil. If there is little oxygen, the worms will not be able to survive in such conditions. Carefully monitor the quality of the soil and choose the right food.
Where is the best place to breed?
There are no special conditions for choosing a room for organizing a farm; the main thing is that its area should be such that it is convenient and comfortable for you to work. It is advisable that the room be heated. You need to know that if the temperature drops to +4 degrees, then your charges will first decrease their activity, and then they will simply fall asleep. As a result, your business will completely stop. If you are going to breed earthworms all year, then the area of the premises should be larger, since the population will constantly grow.
Earthworms are bred in boxes. You can buy them, or you can knock them down yourself. Although this option is more troublesome, it has the advantage that you can make boxes of sizes that are better suited for your room.
How to feed worms
Worms feed on organic waste. You can give them peelings of any vegetables except potatoes, dairy products, unsweetened tea leaves, coffee grounds, steamed and dry oatmeal. Remember that dry food will dry out the soil, so more moisture is needed.
Food for worms is prepared at the rate of three palms of cereal per 15 liters of water. The feed is poured into the soil and mixed well. It is impossible for its remains to remain on the surface of the earth. If you see that the worms are entangled among themselves and gathered in a ball, untangle them and distribute them throughout the structure.
If a ball of worms lies for a long time, the individuals that are inside it will die from high temperature.
What do you need to breed worms?
When starting such a business, it is important to take into account many nuances: conditions for the reproduction of invertebrates, the characteristics of their life activity, temperature conditions and soil for comfortable reproduction, equipment, “housing” and, of course, food for the worms.
- The soil. Simply pouring earth into a container is not enough. The soil should consist of three tiers. Fertilizer (humus and worm tea) will accumulate in the lower zone, the worms themselves will live in the middle zone, and the upper tier is their “dining room”.
- Temperature. The most comfortable and optimal temperature regime for the reproduction of invertebrates is no less than +15 and no more than +25 degrees. Although some species tolerate temperatures from +8 to +30 degrees very well.

- Room. Keep in mind that worms reproduce quickly, so the room should be spacious with moderate humidity. A cellar, attic, garage or greenhouse is suitable. At temperatures below +5 the worms will hibernate, above +35 they will die.
- Equipment. You won’t need any special equipment here, just a standard “gardener’s kit.” These are a shovel, a wheelbarrow, a pitchfork, a scale, a bucket, a rake and a thermometer for measuring temperature. It would also be a good idea to get a sifting sieve.
- Fertilizers. Anything that grows and reproduces requires feeding the soil, and worms are no exception. Their activity depends on the quality of the soil, so it needs to be fertilized with humus, leaves, straw, sawdust, ground shells, lime and chalk.
Important advice: multiplied worms must be moved to other containers, otherwise, due to a lack of free space, invertebrates will simply stop reproducing. It is necessary to control these moments and prevent the formation of worm “balls”.
Conditions for breeding worms
Do not allow the soil to dry out. Checking its moisture content is quite simple: squeeze a handful of soil in your fist. If it turns into a lump, then everything is fine with the humidity. At the same time, it is recommended not to flood the nursery with worms when there is a lot of water - this negatively affects them.
It is recommended to keep containers with animals away from heating devices; high temperatures and dry air are harmful to them. The optimal temperature for keeping worms is from 17 to 24 degrees Celsius. Make sure the room is not cold. Temperatures that are too low will cause animals to eat little and go into hibernation.
You can keep red and earthworms in one nursery. But, when possible, allocate a separate container for each type of bait. When everything goes according to plan, a 30-liter nursery can produce up to a kilogram of worms per week.
In an apartment, the nursery can be placed in the utility room by first closing it with a lid. But, do not forget to make a protected hole in it for air to enter.
Reproduction of worms, nuances
Worms lay cocoons in the ground, from which new offspring emerge. Each female lays only 1 cocoon per week, but it produces up to 20 young worms. The more worms there were initially, the more young you will get.
The worms lay their last eggs around July, after which their body must recover. A month after laying, worms begin to appear. It takes them about 2 months to become fully grown.
During the period of active growth, young animals need to eat more and receive food rich in nutrients. Add soil with humus to the nursery; its layer should not be more than 10 centimeters.
The bottom of the box is covered with a mesh through which vermicompost is sifted out. It is an obligatory product of the digestion of these creatures. With good care, in one season you can get up to 30 centimeters of vermicompost and use it to fertilize your beds.
When cold weather sets in, the nursery with worms remains in place. The sides are insulated with sand and earth; the top can be covered with insulation, bags, and leaves. When enough snow has fallen, you need to pour a snowdrift on top. These measures will protect the worms from the cold and not disturb the usual rhythm of their life.
With the arrival of spring, the worms are used for their intended purpose; the surplus can be sold or placed around the garden. Leave a small number of individuals in the nursery so that they can reproduce again.
Check-in
Before you transplant the dung worms into the container, be sure to water the soil so that it becomes soft. The water temperature should be room temperature. Representatives of this species love high humidity, so to check whether a given soil is suitable for them or not, take a handful and squeeze - the water should seep out a little.
You need to populate dung worms as follows. Place them in a box on the surface of the ground and wait until they begin to hide. When the last worm is in the ground, pour a three-centimeter layer of food and cover it with a cardboard sheet. Place the box in a warm place.
When you notice holes on the cardboard gnawed by worms, this is a signal that they have already eaten the food you provided and it’s time for another feeding.
We do everything the same as the first time. We lay down the food, water it and cover it with a cardboard sheet. We do this until the box containing the worms is filled to the top.
This video shows how you can keep and breed a worm in an ordinary room.
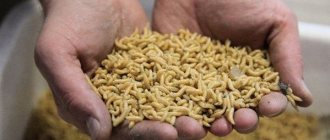
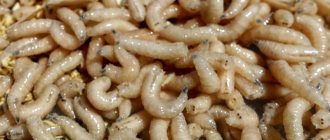
How to raise mealyworms for fishing
Mealyworms are another type of bait that is used in fishing. They appear as beetle larvae. It is not always possible to buy bait in the store, so it is easier to have a nursery with worms at home. A small plastic box is suitable for growing them. Small crackers, bran, earth, bread crumbs, and sawdust are poured inside it.
The layer of feed should be about 10 centimeters. You buy beetles, the more, the better. They lay eggs and within 2 months you get worms. The offspring are fed rarely, once every 2 days. Make sure that the mixture in the box has a humidity of at least 50%. The temperature for keeping mealyworms should be about 28 degrees Celsius. At low temperatures they develop poorly and grow slowly.
Growing worms for fishing at home is quite simple. They do not require serious care or maintenance costs. They feed on waste, which can be compared to garbage disposal. By growing worms for fishing at home, you will not need to look for bait in stores; you will know that it is always at hand and always of decent quality.
How often to water worms
Soil moisture has one of the dominant roles in the success of breeding packing material. A decrease in this indicator forces individuals to sink deeper into the ground, completely ceasing to feed. The substrate is moistened using a regular garden watering can, using water at room temperature for irrigation, which is first allowed to stand in the same room for three days.
Important! The optimal humidity of the substrate can be determined in a fairly simple way. To do this, the soil is squeezed in the hand, and the result of the positive moisture factor is considered to be the formation of a dense and non-crumbly earthen clod.
If the soil is over-moistened, drainage holes in the bottom of the boxes will help correct the situation, and excessive evaporation of moisture will be prevented by covering the newly watered substrate with the propagating material with a piece of corrugated cardboard or a special lid with fine perforations over its entire area. The boxes are checked for moisture every week, adding water to the soil if necessary.