Almost all fishermen, even those who prepare extremely scrupulously for fishing and have extensive experience in this matter, rarely think about such an important issue as preparing worms, but pay more attention to the choice of gear, bait and fishing location. And this is often the reason for unsuccessful fishing.
At first glance, worms are a ready-made bait and it seems that nothing can be done here, but if you know some methods, then any bait, including a worm, can be made much more effective.
How to store worms in winter
Regular worms remain the best bait for fishing even in winter. And when fishing for predatory species, it is generally irreplaceable. Chopped worms are often added to winter fishing baits. You can successfully store and even breed them even in normal home conditions. You need to know that the most ordinary raincoats are stored better; Californians and dungcoats are very sensitive, one might even say capricious. Also undemanding in maintenance is the “Prospector”, so beloved by many fishermen, which does not live in natural conditions, but is sold very often in stores. The Prospector is distinguished from other species by its slightly flattened tail with a yellow tint. The most suitable temperature for storage at home is from + 6 to + 20C.
In urban conditions, in winter, it is better to keep worms in a dark place (basement, pantry). It is not difficult to store worms in winter; they are unpretentious in care. They need to be fed periodically, and the soil moisture should be about 70 percent.
When storing at home, you need to shake the ground at least once a month, remove dying ones and those who have swelling of the transverse girdle. If you notice that the worms have begun to bunch up in a tight ball, this may mean that the soil is too dry for them. In this case, you need to carefully pull the ball apart and water the soil.
For winter maintenance at home, it is advisable to knock down a wooden box, but an ordinary plastic bucket will do.
It is necessary to make holes in the bottom through which excess moisture will drain.
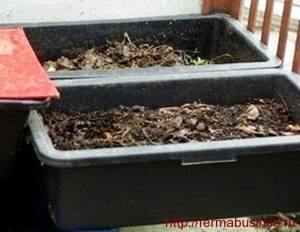
Storage in boxes
The container needs to be covered with some kind of net or gauze. The surface of the soil should also be covered with a cloth; this will not allow the soil to dry out, but will help create the most suitable conditions for the worms. The ground should be covered with layers of fallen leaves, which all types of worms readily eat.
At home, feeding worms for fishing is not difficult, the main thing is that the food should be crushed and moistened. A variety of kitchen scraps and even banana peels work well as fertilizing. Never feed salty foods or those that have too strong a smell. Watering with milk or broth is not recommended, as this can lead to flies.
The amount of feeding depends on how many worms you are raising, as well as on the temperature. The warmer it is, the better the worms eat. Feeding a couple of times a month is enough, but it is important to remember that the layer of feed should not be very thick.
Method of storing worms
A layer of earth about five centimeters is poured onto the bottom of the bucket. Then pour a layer of fallen dry leaves, preferably last year's, which have begun to decompose. The leaves are placed with a slight compaction in a layer of about ten centimeters. And so, alternating a layer of earth and a layer of leaves, they are slightly moistened, but you cannot overdo it with moisturizing.
At least four such layers are made. It is necessary to select dishes of appropriate volume in advance. The most important thing, and this is very important, is that the soil must be taken from the place where the worms were obtained. In other, unusual soil for them, worms will not live long. They may die within a few days.
Read! The use of soil in bait
Having prepared our storage in this way, we release the worms there. Closing the lid tightly, put it in a cool place, such as a cellar or basement.
You can also store it at home by finding a cooler place, away from the heating system.
Tips and tricks
If in the summer you can dig up worms directly before going fishing, then few people know how to preserve the worms in the winter so that they are mobile and attractive to fish.
We will give some simple but quite effective recommendations, the application of which in practice will increase the catch several times, even when other fishermen return home empty-handed. An energetically wriggling worm on the hook is a guaranteed bite. But how to make it move?
- The worm is best preserved in winter in a wooden or plastic container. If you store it for a short time, tea leaves and grated potatoes are enough to feed it.
- Place fresh worms in some container. Then tear open the tea bag containing the used tea and add it to the container with the worms. Sprinkle black soil (necessarily wet) or rotted manure on top. After a few hours you won’t recognize your worms; they will become stronger and more mobile.
- Add some grated beets to the jar in which the worms are located. In ten minutes the worms will come to life and will be mobile on the hook, attracting the attention of even the most passive fish.
- Freshly dug worms need to be given a little time to cleanse. This is done as follows: we place the worms in some container with moistened sand or grass. Pour one spoonful of milk or aromatic sunflower oil on top. After a few days, the worms will noticeably get stronger, clean up and become attractive to fish.
- If you notice that the worms are sluggish and constantly fly off the hook, you need to make them a little stronger. Just add the most common mint, which you need to rub in your hands until the juice appears. After a couple of days, the worms will smell like mint, get stronger and become elastic.
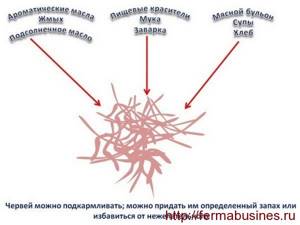
- When preparing to go fishing, it is advisable to flavor the worms a little; this is done simply. Brewed dill, garlic and grated mint are added to the jar in which they are located. This will give your charges a fairly attractive aroma that will attract all types of fish well.
- The container in which the worms are stored should not be airtight; in such a container they can simply suffocate. The lid must have small ventilation holes, but only such that the worm cannot get out through them. Instead of a lid, it is better to put an ordinary stocking or gauze over the jar. Just don't forget to secure it with an elastic band.
- Before fishing begins, the jar should be stored in a cool, shaded place. And when fishing, never forget it in the rain or in the open sun. It is better to leave it in the shade and covered with something.

Preparing the Worms
Following these simple rules will make it possible to store worms for a long time, and they can even begin to mate and reproduce.
How to preserve earthworms for fishing in hot weather?
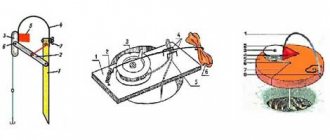
Method one. Canvas mitten
There are several steps you need to follow:
- a workwear mitten is filled with earth and worms. The hole is tied to prevent the bait from spreading;
- our storage is placed in the shade;
- When the air temperature rises, the mitten is lowered into the water for a short time. Thus, the top layer gets wet, but the soil inside remains dry;
- as moisture evaporates, the internal contents are constantly cooled, creating a comfortable temperature for the worm;
- After the fabric has dried, we repeat the same procedure. During daylight hours, the focus is repeated from 5 to 8 times depending on the air temperature, so it practically does not distract from fishing.
Method two. Plastic containers
Finding a small plastic bucket with a lid is not a problem now; it is perfect for storing worms as well.
Procedure:
- moist soil (necessarily not wet) is poured into which the bait is placed;
- dry grass and foliage are added on top . All this is closed with a lid with holes made for air access;
- the container is wrapped in a wet cloth and placed in the shade with good airflow.
Method three. Pit storage
Suitable for longer storage; reviews say that this method can keep worms alive for about 2 weeks.
So:
- take a small linen bag; women's tights or a men's sock are quite suitable;
- earth, moss, dry leaves are poured there and all this is slightly moistened;
- a hole about 25 centimeters deep is dug in the shade, into which the bag is placed;
- Cover the top with grass or leaves. In case of high heat, the storage can be slightly watered 2 times;
- worms are obtained as needed, but several at a time.
This will help make fishing more efficient
There are also little tricks that will make worm fishing more successful.
- Almost all fishermen simply dig up worms (or buy them in a store) and immediately go fishing. However, this is not entirely correct. A fresh worm is, of course, good, but if you devote a little time to it, your fishing will be much more effective.
- The purchased worms must be made a little more lively, made stronger and placed in a large container, because in stores they are sold in very small plastic boxes. Many experienced fishermen store this bait in canvas bags filled with soil. But a wooden box will also work. These materials practically do not emit foreign odors that repel fish.
- For some time, if there is no basement, worms can be stored at home in the refrigerator, in the compartment where vegetables are stored, usually the bottom shelf.
- The soil in which the worms are stored should be slightly moistened (but in moderation), and the lid must have ventilation holes.
- In order for the worms to acquire the required color and aroma, the following products must be added to the container in which they are stored several days before fishing: chicken egg yolk, flour, birch and oak sawdust, sunflower oil, macadamia, flavorings.
The best fertilizers
- If you store worms for more than a few days, you may need to feed them. You can give them regular kitchen waste with the exception of milk porridge.
- About six hours before fishing, it is advisable to move the worms to a warmer place and add natural aromatic substances to the soil; this can be anise or vegetable oil.
- In order for the aroma to last longer, place cotton wool at the bottom of the box in which you store the worms, after soaking it with the necessary solution, or tear it up and mix it with the ground.
- If necessary, before fishing, place the worms in a box with sawdust (kept in air for about a week so that the smell disappears), then it will be easier to pick them up with your hands.
- When fishing, take not only different types of worms (rain, dung...), but also those treated with different types. In this case, being on the spot, you yourself will determine which ones are more catchy on a given body of water on that day.
- It is better to string the worm not through its entire body, but only by making a puncture in its front part and approximately in the middle. With this method, the worm lives longer on the hook.
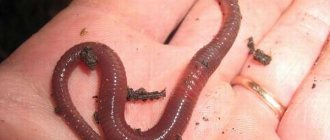
What worms to use for fishing
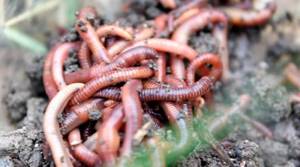
The best worms for bait are dung worms and crawling worms from hard, poor soil. Such worms hold well on the hook even if you attach them in a bunch; they are mobile, tenacious and secrete an odorous secretion that attracts fish. Rarer species of earthworms - green and ironworms - are excellent bait in their habitats. Varieties such as subleaf or white are most often used as an emergency, when all other worms have run out, and the fish in the reservoir have become more active, since most often they are inactive and do not hold well on the hook.
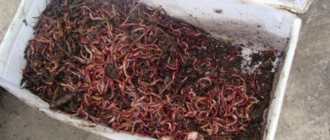
Of course, you don’t have to dig earthworms, but buy ready-made ones at the market or a specialized store. Such worms are grown artificially. There are several varieties of ready-made worms on sale - California red, dung white, yellow-headed and even groundbait, that is, the smallest.
Of course, whether to dig or buy, store or not, and what kind of worm to use are personal preferences, but a worm dug out from a dung heap with one’s own hands, fed with selected brewed tea leaves with cinnabar dye and anise oil will always be the best, if not for fish, then certainly Definitely for a fisherman.

Storage at home
If you live in a private house or have a summer house, then a fresh worm in the warm season is not a problem for you at all! It is enough just to dig a small hole in the shade and fill it with loosened soil and rotted leaves. Next, the resulting soil mixture is watered and is ready to receive inhabitants - worms! Do not forget to periodically water the hole and feed the worms. Most common kitchen waste works well for this. Even if it is very hot outside, the worms will be near the surface and it is not difficult to dig up as many of them as you need for fishing.
Spread out food on top of the ground
If it is not possible to organize outdoor storage or you need to store the worms in the winter, then you need to organize a home for your worms at home. A balcony or basement is suitable. The main condition is that the room temperature is within ten to fifteen degrees. If this condition is met, the worms may even begin to reproduce.
You can keep worms in a wooden or plastic box, but make sure there are no large gaps in it. You need to drill small holes in the bottom of the container for drainage. Holes are also drilled in the side walls. This is necessary for ventilation. Soil is poured into the container, fallen leaves, sand are placed in it, and the whole soil mixture is mixed. Another good option would be to purchase soil that is intended for flowers and sold in flower shops. Just remember to wet it before starting the worms.
Stored worms must be regularly fed with kitchen waste, tea leaves, cabbage leaves, etc. Food of animal origin should not be used as feeding, i.e. meat and fish. You need to make sure that your wards completely eat the fertilizer, otherwise it will begin to rot.
The soil must be kept moist all the time, and it must also be systematically loosened. Make sure that the worms do not form balls. If you notice this, be sure to stretch them, otherwise they will die.
As you can see, everything is simple and there is very little work, but as a result you will be provided with fresh bait for a whole year and you will not have to pay for it.
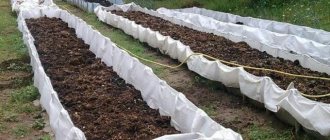
Avid fishermen fish at any time of the year. But there is one problem, namely the bait. If in the summer you can dig up worms in the garden or garden, in the winter you can only buy them in a store, where the price for them is quite high. But there is a way out, namely to make a supply of worms in the fall for winter fishing.
To ensure everything works out for you, do everything according to the instructions we offer.
- Take a plastic box (if you don’t have one, then you need to put together a wooden one). The dimensions should be such that approximately 25 kilograms of earth can fit into it.
- When the leaves begin to fall from the trees in the fall, you need to collect a little of it, about a third of the volume of the box. Make sure that the foliage covers the edges of the container. Pour good, fertile soil on top.
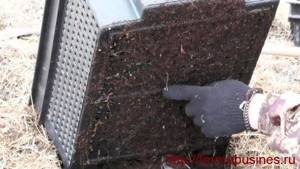
Holes for drainage and ventilation
- Dig up worms (ordinary earthworms or dung worms) for a container of this volume you will need 200 grams of them. Many may think that this is not enough, but keep in mind that in such conditions they will begin to bear offspring and you will definitely have enough of them before the warm season arrives.
Important! You cannot place different types of worms in the same container. This may lead to their death.
- Dig a small hole and place the collected worms in it. Fill the hole.
- Cover the box with a wet cloth or cover it with a cardboard sheet.
- Place the box in a cool, dark place.
- Make sure the temperature is not too low. Otherwise, the worms may die. The best place for storage is the basement.
- Periodically feed the worms kitchen scraps and sometimes grate the potatoes with them. You should not give leftover milk porridge to the worms.
- From time to time, water the soil with water at room temperature, but do not be too zealous. If the soil is too wet, the worms may die.
Good luck and good fishing!