How to make a fish trap with your own hands?
A fish trap on a river is necessary if you want to catch whole and unharmed fish. If fishing is a pleasure for you, you need fish to release, if you catch fish for further resale alive, and you don’t want to injure them, then you need to use simple, effective and easy-to-use traps. They can be created from various materials.
How to make a fish trap from a plastic bottle?

Making plastic traps is in demand because this homemade version of the model can be created anywhere. We take clean water in plastic bottles; they can be found in nature, purchased at the nearest store, or borrowed from people vacationing nearby.
A fish trap made from a plastic bottle differs in size. If you are planning a small catch, then take a base of 1.5-2 liters. If large production is expected, then 5-liter models are suitable for you.
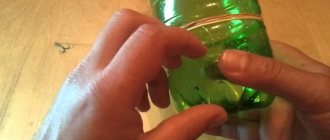
- Washing the bottle. First, the plastic attribute is thoroughly washed. It is important that there are no foreign odors on it. Remove any existing stickers. If the design is made from a vegetable oil bottle, then it does not need to be washed. This smell attracts fish.
- Remove 1/3 of it. Remove part of the bottle from the neck side. The area of the structure to be eliminated depends on the volume of future catch. As a rule, cut off 1/3 of the part, turn it over, and insert the neck inside the bottle.
- Fixation. The homemade model must be fixed in its original position. Wire is used for this. It is advisable to create 2 to 4 fixation points. It must be taken into account that this neck will then have to be removed. So don't overdo it.
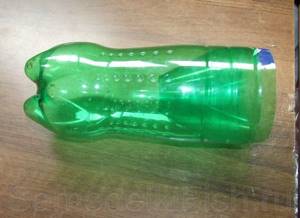
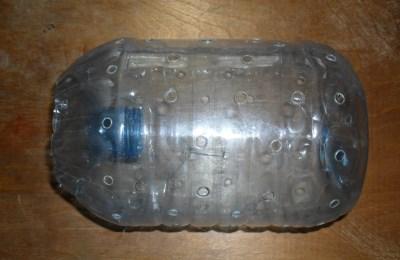
- Small holes. River fish traps should have relatively small holes. Then the bottle can quickly sink to the required depth.
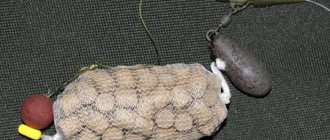
- Bait placement. A small amount of bait is placed in the created tackle. This allows you to speed up the fishing process.
- Adding cargo. It is best to place it inside the bottle. Such a load allows you to avoid snags during the dive and fishing process.
That's it, your fishing attribute is ready for use. The ways to use it are different. You can throw the model against the current and secure it with a rope on the shore. Can be placed in standing water in any position.
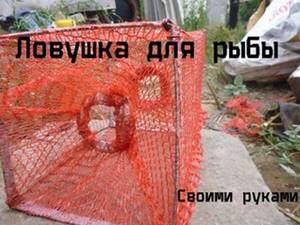
How to make a fish trap from a net?
The fish will have no chance of survival if you create a trap using a net. It requires a frame. You can create it from any hard materials at hand. This can be plastic, aluminum rods, corners, etc.
- We stretch the mesh. A do-it-yourself fish trap is created from a mesh in which the cells do not exceed 1 cm.
- Formation of funnels. It is necessary to create funnels from the same mesh as the form fitting.
- We insert the narrow part of the funnel into the mesh located on the frame. This must be done from two opposite sides.
- Bait. Once a fish trap is created, there should be no question about how to use it. It is important to place the bait inside and lower the model into the water.
- We lower the model into the water. If the frame of the trap is metal, then the immersion process should go very quickly. With a wooden frame, it is recommended to place additional weight on or in the trap.
Types of fish traps
There are a large number of different traps that you can purchase in specialized stores or make yourself. Let's briefly look at the most popular ones.
- Stationary traps. They are made once and last for many years. They are not put into water - they are constantly in it.
- Tunnel traps. This is a deadly maze for fish. After the prey swims inside, it gets confused in the maze and cannot find a way out of it.
- Spider trap. It consists of a screen and several arcs connected to each other at the top point.
When going for fish in a natural reservoir, do not forget about waterproof backpacks for fishing. You can store your bait in them. Even if there is a heavy downpour, all the things in the backpack for tourism will be safe and sound. You can always change into dry clothes, maintain your health and enjoy the exciting process of fishing.
A waterproof bag is the main assistant for any fisherman. If comfort and coziness are important to you, if you want to feel free near any body of water, then take care in advance of accessories that will turn the usual process of fishing into an exciting hobby that you cannot refuse.
First try making a fish trap with your own hands in a familiar home environment. Here you have at your fingertips all the necessary items and available materials. Choose a trap that you would like to use in nature. After the skills have been brought to automaticity, you can try to make a trap near a pond, just before you start fishing.
What is a fishing kukan
Kukan is a device for storing caught fish in water. It allows you to keep the fish alive for a long time, which means the fisherman has the opportunity to take the catch home in its original form.
It is a cord or cable with metal (less often plastic) fish fasteners suspended on it. The cord material can be synthetic or made of metal.

Most often used for spinning fishing from a boat. When catching fish from the shore in combination with a spinning rod, the kukan can be useless or cause a lot of trouble, since you will need to constantly move it or return for it during significant transitions. Sometimes this device is used for underwater fishing or fishing in special wading suits at a considerable distance from the shore.
Photo: Kukan for fish
What is it for?
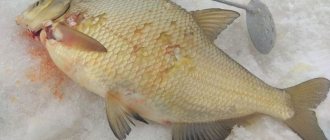
On autumn days in cool water conditions and even in summer, predatory fish (pike, pike perch, catfish, large perch, chub and others) caught and mounted on this device can live for several days. For longer storage, you need to choose a place in the shade and with running water.
When fishing for pike, a fisherman will definitely need a kukan for the following reasons:
- On it, the pike will remain alive for 1-2 days, whereas in mesh cages it can quickly “fall asleep”.
- The device will not cause major injuries to the pike, but in metal cages it will struggle and quickly get injured.
- On the kukan, the pike will not offer resistance, so there will be no obstacles to further movement on the boat. If you put a predator in a cage, it will constantly slow down the boat, disrupting the pace of fishing.
About
What is a fishing top?
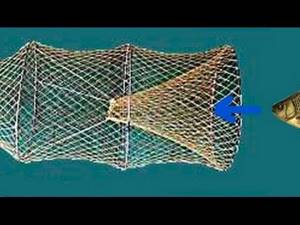
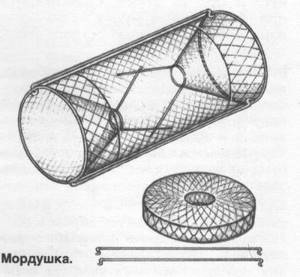
The muzzle, venter, or top is a trap with a funnel-shaped entrance. A fish interested in the bait swims through a gradually narrowing tunnel and gets inside the body, where the bait lies. When trying to leave the container, the fish is no longer able to find the hole through which it entered.

When removing the tackle from the water, the fisherman can get the catch through another hole, which remains closed while the tackle is working. If the homemade top is made from a ready-made container (can, plastic bottle), then it is advisable to provide a funnel attachment that will make it easy to remove it when taking out the catch.
How to do it yourself?
Traditionally, willow or other thin and flexible branches were used to make the top. To weave a funnel, a ring with a diameter of 5-7 cm was made, on which a vine for the base was secured. The base was braided with thinner strands, and it was given the shape of a funnel, expanding from the ring. Having made an entrance about 20-25 cm long, they began to weave the expanded upper part of the muzzle, spreading the warp rods to the sides and gradually bending them down.
The entrance funnel then ends up inside the wicker vessel, which again begins to narrow towards the top. In a simple method, the ends of the unbraided rods can be tied with a strip of strong bark or rope, closing the hole. In a more complex version, a ring of larger diameter was placed on this hole, and a lid made from a circle of thick bark or woven from a vine was attached to it. Similar designs are still woven in villages using wire.
From a plastic bottle
At a picnic by a pond, the muzzle can be easily made from scrap material using a water or beer container. The amount of fish that can be caught in 1 cast and the size of the crucian carp depend on its volume.
Top fishing methods
Fishing for top fish can be done with or without bait. Fish can be attracted by the smell of food or the structure itself (during the spawning period). But for successful fishing you need to know how and when it is better to catch crayfish or crucian carp.
With bait
The feeding instinct forces the fish to dig into the most inconvenient places if it expects to get to the food. Lures that many breeds find attractive are placed in the muzzle: bread or dough flavored with vegetable oil, and sometimes with odorous substances (anise drops, perfume, valerian tincture, etc.). Potato peels, egg shells, and dough are suitable for catching crucian carp. In addition to crucian carp, minnows and minnows are used for such bait.
They are caught with bait in the summer, throwing their muzzles into the shady corners of the reservoir. It is advisable to drown the top where the strip of coastal underwater vegetation begins. If it is possible to observe the reservoir during the morning and evening feeding of the fish, then the fisherman will be able to determine a more accurate location for casting the tackle: the tip is placed where the fish were playing.
Without using bait
Sometimes catching tops is possible even without using bait. The method without bait is used in the spring, when the fish goes to spawn and may find that such a convenient place is suitable for spawning. Different breeds of fish that prefer to spawn in thickets of plants can get into the snout at this time. The trap is placed where a concentration of crucian carp, bream, and ide is found. The spawning site is easy to determine by splashes of water.
On rapids, in small streams, venters are placed in a narrowing channel. Passing along the river, the fish is forced inside and cannot get out of the trap. With a little practice, you can determine the best way to place the top on the river: on the current or closer to the spawning grounds.
Types of traps
Let's try to understand in more detail how they work. If we try to create a classification, they can be divided into stationary and mobile.
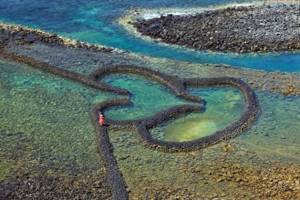
Stationary
In a sense, such traps can be considered hydraulic structures. As a rule, stakes are driven into the bottom first. After this, a mesh is pulled between them or a fence is placed.
One example of such stationary gear can be a catisk, which is made in the shape of a snail. In pursuit of the bait, the fish swims inside. However, subsequently she can no longer swim back, since she cannot find the road due to the rather complex shape of the boat.
One method of attracting fish is to open the valves at high tide or during the spring flood of rivers. When the water subsides, the fish remain inside the structure. Poachers use almost the same method. They apply it to fish that have come to spawn.
To do this, nets are stretched across the river, blocking the fish’s exit from the spawning site. Of course, this method will be effective when it comes to small rivers.
Mobile
These fish traps can be divided into two large groups:
Let us briefly describe here the principle of operation of both categories:
- When we talk about tunnel traps, we are talking about the following. As a rule, there is a closed volume. Bait is placed inside it. It attracts fish inside. The entrance there may be a cone-shaped hole with the sharp part inward. Another option occurs when a corridor is made to access the inner part, which has a shape sufficient to ensure that once a fish gets inside, it would not be able to get out. The principle of operation is in many ways similar to the stationary version. However, there is a significant difference: a mobile design is used here, which is easy to move to the desired location.
- Screen traps also have another name: spiders. Usually we are talking about a rigid closed metal frame, inside of which a mesh is stretched. The edges of the frame are connected together and this screen can be pulled up by them. In order to catch fish, the screen is placed on the bottom. At the same time, there should be bait inside it. Additionally, they throw odorous bait from above. They do this so that it leaves behind a trail of aromatic scent. The fish swims to this place and at this moment the screen is sharply raised.
How to catch more fish?
How to make a fish trap in 300 seconds!
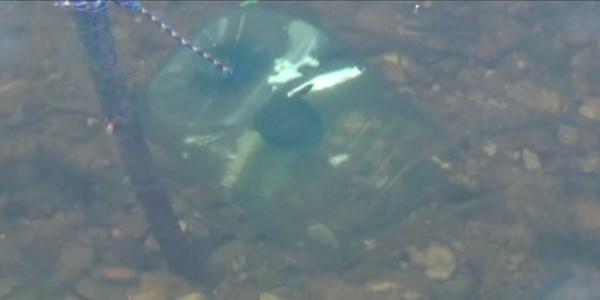
Today I will show you in a video how you can make a simple fish trap from a plastic bottle with your own hands at home. Today, waste in the form of bottles can be found anywhere, and even if we are talking about survival, then any bottle can come in handy. For example, you found a bottle on the road or in the forest, make a hole, take off your shoelace, throw a couple of worms or some flies, cockroaches into the bottle and voila... A catch is guaranteed!
More likely for catching fry, which could later be used as bait.
I’m walking in nature, and I have with me a scalpel, shurik, a step drill, pliers (pliers) and 5-10 meters of paracord.
you just cut an oval hole in the side of the bottle and that’s it, I caught it like that in childhood xD
You just press the neck inside the bottle and you get a classic trap with the correct entry device so that the fish don’t swim out, and not like here. In classic it should look something like this.
we did this thing, we probably caught 100-200 fish in an hour, although all of them were the size of half a match
It's a normal thing. You take one out of the water and there is a 5 kg pike perch! Curled up and waiting for you!
some kind of lifeless fish is falling out of this trap... it will probably die of laughter
if you look closely, you can see that she is stupidly bigger than the neck and couldn’t get there herself) she was caught with a fishing rod, and then they stuck her in there and proudly pulled her out on camera.
I'm not sure of success
As a child, I caught it on a can and a bottle with a hole simply cut out on top.
the cat was happy, up to 20 fish swam
In the village this was called a muzzle. This is poaching, by the way.
And we called it “Venter”. And what is poaching here? This is not a network that blocks the river across.
However, once caught, the fish cannot escape from this device. Sizes may vary.
In general, this is a dishonest way of fishing and falls under poaching. In the village, men are fined for this, and for each one separately.
You're a humanist, that is, a fisherman. Venter also has a certain cell size and any little thing can float out.
In any case, the muzzle is illegal, but it didn’t stop us from catching crucian carp and pike perch in the nearby swamps; for a number of reasons it was at the same level as a fishing rod in terms of efficiency.
They also did this thing, I forgot what it’s called, you take a plastic pipe, on which you make gaps for a rope, wrap it with rope, fasten it and put it on a stick. Live bait is attached to the rope (fishing line) and this is how the pike is caught.
Homemade trap for catching live bait in the water column
It happens that you come fishing and nothing bites, but you often watch how a perch or other predator chases the fry along the top. This is where the question arises, where to get live bait, because it is quite problematic to take a spider with you every time. So one fisherman came up with the idea of how to make a compact trap for catching fry from scrap materials. For these purposes you will need a minimum of materials; all of them can be found at home without any problems.
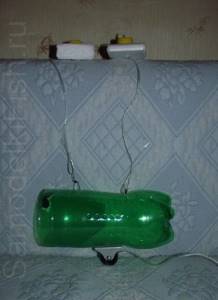
Video on how to make a bottle trap with your own hands
The main feature of such a trap is that it does not sink to the bottom, but floats in the water column. With this approach, you can catch much more fry, since they are concentrated in the upper layers. In addition, the trap can be adjusted in depth. The author used ordinary plastic bottles as the main material.
Materials and tools: - two plastic bottles (the larger they are, the larger the trap will be); - scissors; - an awl or a large needle; - a piece of foam plastic; - any metal object for a sinker; - scissors and knife; - rope and two carabiners.
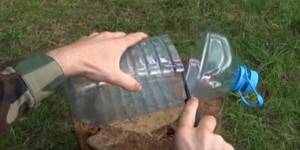
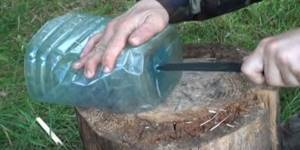
Step one. Manufacturing of blanks
The blanks will be created from plastic bottles. Take the first bottle and cut off its neck, that is, the narrow part. Next you need to cut the bottle at the widest part. You can see exactly how in the photo.
After this, take the second bottle and cut it at the widest part. As a result, you will get two elements, this is part of the bottle in the form of a watering can and part in the form of a vase or cylinder.
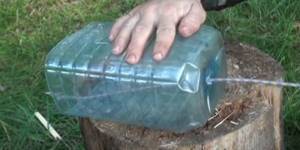
The main point here is that the watering can part of the bottle fits tightly into the second part of the bottle. As a result, an almost finished trap comes out.
The other ends of the ropes are attached to the trap. For these purposes, you need to make several holes in the bottle and install wire loops. The loops should be on the opposite side of the side where the sinker is installed. At the final stage, the main rope is tied to the load of the trap or any other place, by which the trap will be removed.
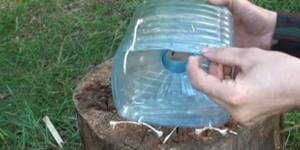
How the trap works
First, you need to put a piece of bread or flour in the trap. Then this entire system is sent into the reservoir. This can be done not only from a boat, but also from a steep bank, a bridge, or even simply by throwing a trap into the water from the shore.
In order for the fry to be removed, you need to remove the insert part from the bottle. Now the fry can be removed and moved to a larger container where it can live longer.
In this simple way you can always catch live bait. Source
Receive a selection of new homemade products by email. No spam, only useful ideas!
*By filling out the form you agree to the processing of personal data
Hiking options for fishing without a fishing rod
If a tourist encounters a body of water on his way, and the only suitable items are gauze or a mosquito net (mosquito net), a kettle or a saucepan, then this is a good chance to catch a few small fish. To turn a dish into a fishing tool, you need to do the following:
Stretch the gauze over the pot and secure it to the rim to prevent it from being pulled together by water.- Make a cross-shaped cut in the center of the fabric to get a 4-5 cm hole,
- Put chopped worms, grasshoppers and bread inside,
- In shallow water, dig the structure into the ground.
This is interesting: Hunting for beginners: what you need to know, useful tips
After some time, the pan will be filled with minnows - now you need to carefully close the hole and pull the pot out of the ground. A glass jar with a PVC lid will also help on your hike - a hole is made directly in the plastic and the bait is placed inside.
There is no need to bury the dishes in the bottom, but the effect is known. You just need to tie the jar to a pole and pull it out sharply when the prey swims inside the trap.
If you have a mesh or thin fabric of decent size in stock, you can make a flat trap - a screen. To do this, a frame is made from branches, onto which the material is stretched, and a feeder is placed in the center.
Expert opinion
Tarasov Dmitry Timofeevich
Master of Sports in mountaineering. Author of scientific articles on the topic of survival in the wild
The structure is lowered to a depth of two meters using cords tied at the corners, which are attached to a long stick. You won't be able to catch a lot of food, but you can catch fish soup.
Of course, you can buy fish traps in a store, but homemade ones create an atmosphere of creativity, and using the fruits of your labor is much more enjoyable. Especially in pristine nature.
A homemade fish trap, the article briefly describes how to make a fishing “face” from paste material. You'll definitely catch it by ear.
There is a category of people who are ready to live in a natural environment with a minimum of means for survival. There is some extreme in this.
And until you try this lifestyle (or game, whichever is more convenient for you), you will not understand all the charm of this way of existence. For example, in our team there are a variety of people: from very young people (18-19 years old) to adults under 60 years old, who occupy almost all social niches in “city” life (students, managers, directors, etc.).
d). But what united us was that several times a year we get together, plan a common route for several days, and hit the road.
The main rule that everyone in our group follows is that we get our own food. We take practically nothing with us, only the essentials, since situations are different.
So, the ability to get food in the forest or on a pond is the key to survival in a difficult situation. Many people who in ordinary life did not believe in themselves, after such hikes acquire some confidence in their abilities, which as a result affects their future lives.
DIY fish trap - Versha for 20 years
Any information about obtaining food and fire in the wild will always be useful. The knowledge gained is worthless, but survival skills can be very useful. Today we will look at the technique of making a fish trap from Talnik *
, popularly referred to as
“Versha” *
.
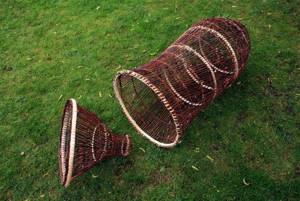
* “Versha”
is a fishing trap made from willow twigs. It has the following types: an elongated funnel, a bottle or a round elongated deep basket, where a conical funnel with a narrowing inward is installed on the entrance side. Once a fish gets inside, it is almost impossible for it to swim back out. Considered poaching gear.
And a little more about Versha
- remember that in many regions of Russia, according to local fishing rules, fishing on Versha is prohibited. Therefore, before fishing with Vesha, you need to carefully study the issue of the legality of its use in a particular region! First of all, we want to share our experience, manufacturing techniques and various nuances of making tops . We in no way promote top fishing; we allow its use only in extreme situations that require emergency measures in the harsh hour of survival!
Before you start cutting the willow twigs, you should remember that you need to cut only those stems that grow in a bunch of 3.4 or more.
It is impossible
to cut off lonely growing stems , since next year the bush will not be able to produce new shoots and
will die
.
There are many techniques for weaving Vershi, but we will show only the one that seemed to us the simplest and most effective. We select longer talnik rods
, so you can get by with fewer of them.
We use this year's willow shoots, as they will be more elastic and easier to weave with each other. We identify them by their rich green color.
Tough, dark green shoots
, we use it only for the frame.
We made Vershis of different sizes and came to the conclusion that to create a good catchy Vershi, you will need from 80 to 150 willow rods.
Let's break down the creation of Versha into stages and analyze each of them separately:
- At the first stage, we clear the leaves from the rods. We do it simply with our hands. Fresh leaves, with a movement of the hand down the stem, quickly fly off.
- But this technique has several disadvantages:
- The first is that this design will not be as durable due to the connected parts of the top.
- Second, the cleaned Talnik rods will not be the natural green color, but the white color of wood. The fish will be reluctant to enter such a top.
- Third, it takes more time both to remove and to knit.
Frame preparation stage:
- We prepare the place for the top frame. In fact, where it is done is not important, the main thing is that the place is level, dry and not completely hard, so that you can stick solid rods into the ground in a circle. First, we outline the diameter of the entrance of the top on the ground, sand, or in our case, river pebbles and poke 10 - 12 of the strongest and longest
rods in a circle.
Our diameter was about 120 cm.
Distance between rods
was about
12 - 15 cm
from each other, depth
5 -7 cm.
If it doesn’t go any further,
you can sprinkle it with pebbles.
The final stage of frame formation:
- Let's move on to the top part of the top. We won’t linger here for a long time, you just need to tie the upper part of the top
with a soft and elastic waistband rod,
using 2 simple knots
. Also, then with the help of this knot, it will be possible to adjust the length of the Vershi. At this stage, the formation of the Vershi frame can be considered ready!
The next and most important stage of weaving tops is best learned in the video
presented below, as well as consolidate the information read above.
extremely careful
at the stages of starting weaving and finishing weaving Especially in the part that encloses it, the weaving of the entrance to the Versha, the so-called lid or the neck itself, where the fish will enter.
If you, dear subscribers and readers, liked the information and learned something useful from it, please like it
and write a “Comment” what you think about this article. This will greatly help the development of the channel. We will also be happy to donate, everything goes towards new projects, filming and equipment: https://www.donationalerts.ru/r/lesnue
Sber-Card:
4276 1607 4589 6085
And as always, we were with you
“Lesnye”
From the grid
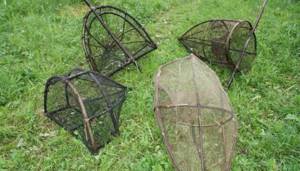
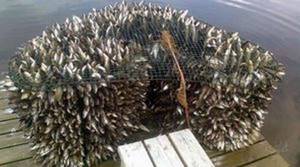
You can also assemble a fishing trap from other materials. They are often made from old cages or from mesh on a wire frame. To make such a homemade product you must have:
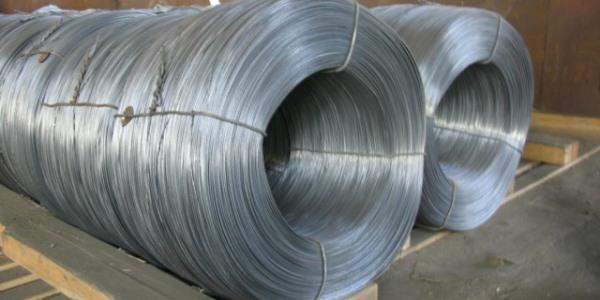
- Rigid steel wire.
- A piece of durable mesh with a fine mesh.
- Thin nylon cord or fishing line.
To make a fishing trap out of this, you need:
- Form 3 rings with a diameter of approximately 40 centimeters and one with a diameter of 15 centimeters from the wire - this will serve as an entrance for the fish.
- Cut 6-8 pieces of wire about 45 centimeters long.
- With their help, successively connect large rings together so that they form a cylinder. It is necessary to place wire spacers around the perimeter of the rings at an equal distance so that the structure is even. If the top is not tough enough, you can add 1-2 more ribs between the rings.
- Wrap the resulting cylinder with mesh so that approximately 30 centimeters of free fabric remain at the ends.
- Using a nylon cord, tie a mesh at the back end of the trap, forming its bottom. In this case, it is recommended to pass the cord through the cells as often as possible and subsequently tighten the fabric tightly like the neck of a bag. It is better if the bottom is pulled tight.
- Attach a small ring to the edge of the fabric at the front end: first wrap the mesh around the wire twice, then, passing the cord through the cells, carefully tie the fabric around the perimeter, distributing it evenly. Thus, it forms a funnel through which the fish will pass.
- Along the perimeter of the small ring, tie 3 or 4 pieces of cord 40–60 centimeters long at an equal distance from each other.
- Tie the second edges of these sections from the inside to the middle or far ring, fixing the small ring inside the trap parallel to the large ones so that the mesh funnel is directed inward and pulled tight.
- Tie several meters of rope to the front edge to pull the trap out of the water.
If you have sufficiently elastic wire, the frame of such a top can be made in the form of a spring, which will allow you to reduce the transport length many times and lay it out directly on the reservoir, however, not every material is suitable for this
To start fishing with such gear, you just need to put the bait inside and lower it into the reservoir parallel to the bottom. Thanks to the funnel directed inward, the fish will easily swim into the trap, but will not be able to get back out.
These muzzle sizes are designed for relatively small prey, but if you want to catch a larger trophy, all elements simply need to be increased proportionally.
For fishing for crucian carp and other medium-sized fish, it is enough that the largest desired specimen can easily swim into the entrance hole without getting stuck in it. If you plan to catch a predator, for example, pike or pike perch, it is necessary to select the correct length of the trap so that the fish does not rest against its end without going completely inside.
Expert opinion
Tarasov Dmitry Timofeevich
Master of Sports in mountaineering. Author of scientific articles on the topic of survival in the wild
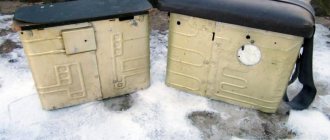
An excellent material for making fishing muzzles are mesh housings from air filters of buses and heavy-duty vehicles. One trap will require two filters - one is used to make the outer frame, and the other is used to form the bottom and funnel
In general, making your own fish traps is not too difficult, especially if you have all the necessary materials and tools at hand. You can catch both live bait for donks and girders, and quite decent-sized fish.
This is interesting: Providing first aid for injuries to the abdomen or limbs
However, it is important to consider that in many regions of the country, the use of muzzles, tops and other traps is considered poaching.
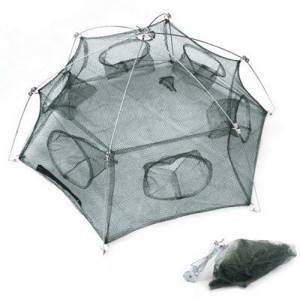
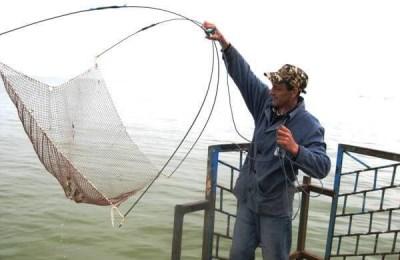
Malyavochnik
This fish trap is known to many as a “spider” or “net-lifter”. Nets of this design are used for commercial fishing in the sea and freshwater bodies.
The use of classic spiders without express permission is prohibited by law. But here’s a smaller version – the little one, with a working area of less than 1 square meter. m. can be used for catching live bait.
Nowadays they are sold in fishing stores. Their prices vary between 800-1500 rubles. So you can just buy a mini spider. But you can make this trap yourself.
To make it you will need:
Nylon net with small mesh- Nylon rope
- Needle and nylon thread
- Steel wire, diameter 4-6 mm
- Copper or steel tubes, the internal diameter of which matches the diameter of the wire used
- Welding machine or soldering iron
First you need to purchase a nylon mesh with a fine mesh, 7*7 or 8*8 mm in size. I don’t recommend using nets with a larger mesh, as the fry will easily crawl through it.
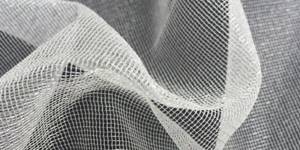
Nylon mesh
It is also not advisable to use a smaller cell, because it will be difficult to remove the trap from the water. If you haven’t been able to find the net you need, you can make the working surface of the trap the way we made them in our fishing childhoods.
An old curtain was taken, dyed a dark color using dye, and in this form it was used as a mesh. The option is strange, but for lack of a better one, it has the right to life.
We cut out a square of 100*100 cm from the net and sew the edges with nylon thread to form pockets.
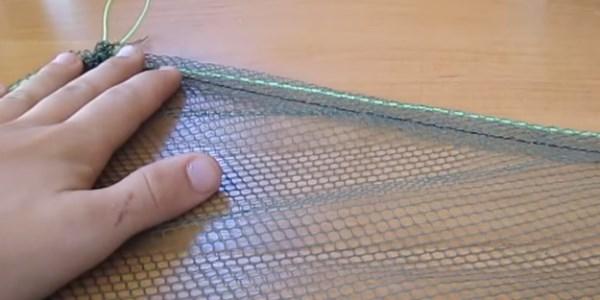
Cutting a square from the net
We thread a nylon rope around the perimeter and make loops at the 4 corners, through which the net will be attached to the metal frame.
Now you need to make the frame itself. It must be made from elastic steel wire. You can buy it at the market, or just find it somewhere.
Steel wire
It is necessary to make two semicircular arcs from steel wire, the diameter of which will be slightly larger than the diagonal of the mesh (we measure from the end of the loop to the end of the loop).
At the ends of the arcs you need to make hooks by bending about 2-3 cm of wire. After this, you need to cut the arcs in half using a grinder or a regular metal saw.
Next you need to make a mounting cross. Copper or steel tubes are connected to each other in the shape of a cross using a soldering iron or welding machine.
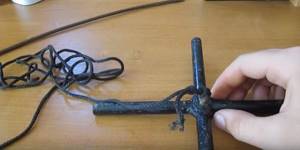
Making a cross
The length of each side should be about 8 cm. In the middle, a fastening loop is soldered or welded to the crosspiece, to which the rope will be tied.
If you don’t have a welding machine or a soldering iron, you can twist the tubes together with wire and make a ring out of it.
All elements of the malyavochnik are ready. Now it needs to be assembled. The halves of the wire arcs are inserted into the crosspiece.
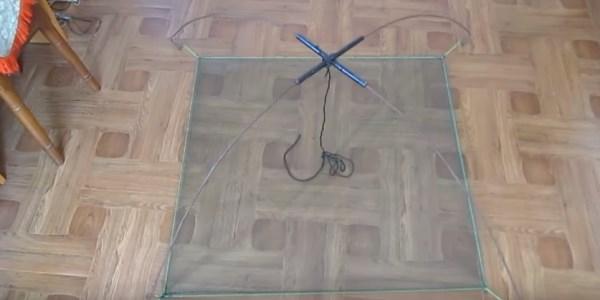
What does a finished baby doll look like?
Rope loops are draped over hooks. That's it, the little one is assembled.
Design and manufacturing
Initially, oval and round hoops made of wood were used to make the frame of the hemstone.
Currently, hoops made of metal or plastic have begun to be used. They are also called frame rings or catels. To increase the service life of the hemstone, if you make it yourself, use metal hoops made of stainless steel.
But there is a cheaper option: you can apply waterproof paint in several layers to an ordinary metal hoop, having previously treated it with fine-grained sandpaper and degreased it. This must be done because the mesh that covers the frame instantly rots at the points of contact with metal covered with rust.
The design of a modern hemline (only one wing is shown for a better understanding of the design): 1 – floating cord; 2 – load cord; 3 – wing; 4 – arc (plastic tube with a diameter of about 20 mm); 5 – coils (plastic tube with a diameter of about 16 mm); 6 – “throat”; 7 – “barrel”; 8 – kutets (kutek)
To tighten the frame of the hemstitch, it is necessary to use threads of sufficient strength and thickness. Monofilament or mesh will no longer work. Gradually moving away from the entrance, the diameter of the frame hoops decreases and reaches the narrowest part, called the coddle or coddle. Sometimes this area is called motney.
The design of the fence is designed in such a way that the fish, encountering an obstacle in the form of stretched “wings” on its way, will immediately fall into a special chamber. The “wings” are attached to the inlet and form a rectangular mesh. The design of the trap chamber is based on the ease of getting into it, but it is almost impossible to get back out.
The simplest measure
Merezha is the oldest fishing trap, one of the first invented by man. The first hems were woven from flexible branches, then frame structures with mesh appeared, which are actively used to this day.
Merezhi are sold in fishing stores, but you can also make them yourself.
The simplest one can be made from an ordinary plastic bottle or eggplant.
Below, I will tell you in detail how to make a trap.
Tools and materials
Cut off the neck of the plastic bottle at the point where it begins to narrow. This can be done with scissors or a sharp knife.
We make a hole in the bottom of the bottle.
We thread a rope through it and tie a locking knot at the end with a figure eight knot.
Next, insert the cut top of the bottle as shown in the photo.

We make holes along the edges and sew the neck to the base with pieces of rope or wire.
That's it, the meringue is ready! Bait is placed in the mesh and the trap is lowered into the water. The fish, lured by the smell of bait, swims inside and, not finding a way out, remains trapped. The fisherman only needs to occasionally take the homemade net out of the water and extract the catch from it.
How does the hem work?
If you want, you can make a larger hem by making it not from one, but from two identical eggplants. You can see how to make such a trap with your own hands in the article about crayfish traps. The design is similar!
The good thing about a bottle trap is that there is always material for it, literally under your feet.
And if you come fishing and find that you forgot your bait fish at home, or you simply can’t catch live bait with a fishing rod, you can find a couple of plastic bottles on the shore of a reservoir (unfortunately, they are found almost everywhere), and in a matter of minutes you can make one with your own hands an effective trap.