Undoubtedly, the range of modern fishing stores is very extensive, and the possibility of ordering and purchasing via the Internet only expands the horizons. However, you can easily replenish your fishing arsenal with effective homemade products, ranging from baits with sinkers to all sorts of useful devices such as cooers and holders for spinning rods. This will not only save money, but will also certainly bring some pleasure from the creative process itself. Moreover, often homemade fishing products turn out to be better than store-bought alternatives.
In this article we will tell you how to make irreplaceable elements of gear at home - sinkers and ready-made jig heads.
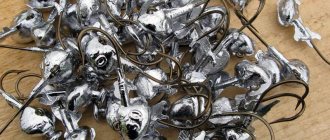
Jig head molds
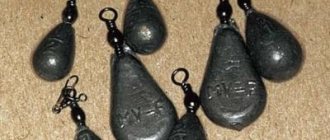
Molds for casting lead weights can be open (molten lead is poured from above) or closed, consisting of two connected parts. The simplest form can be “constructed” from ordinary foil. To do this, first make a small funnel and insert a wire into it to create an eye. We press the mold at the top and fill it with lead. The output is a simple cone-shaped sinker. Instead of wire, you can insert a treble hook and end up with a “carrot” for winter fishing.
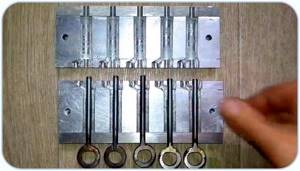
High-quality and more complex sinkers are cast in a two-piece mold. Lead is poured into such molds through small holes, and the air comes out through special vents.
Molds for casting weights are made from the following materials:
- aluminum;
- steel;
- gypsum;
- various polymers;
- special heat-resistant silicone.
How to choose a jig head
Choosing a jig head by weight is very important for normal play, long casting and its rapid fall to the bottom.
The weight of the jig head and the size of the hook determine which category of spinning fishing of the same name it is used in:
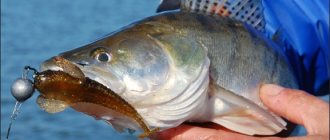
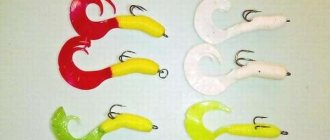
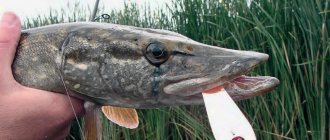
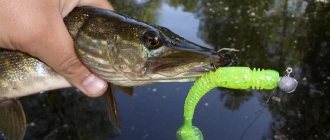
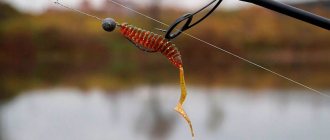
- The smallest solid and articulated heads with small hooks weighing up to 3 grams are used when fishing with nanojigs. Such heads are used for baits of the smallest sizes when fishing for perch, ide, and chub .
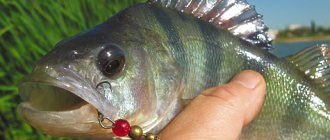
- Heads weighing from 3 to 7 grams are ideal for equipping baits for microjig, the objects of fishing for which are large and medium-sized perch , small grass pike.
- For light jigs, use heads weighing from 10 to 15-20 grams .
- In average jigs, heads weighing from 20 to 30-40 grams . They catch a variety of fish with a medium jig - pike, perch, pike perch .
- When fishing with large baits for heavy jigs, the largest heads with impressive hooks and weighing over 40 grams . This type of jig is used to catch large pike perch, catfish and trophy pike .
The weight of the jig head is also selected taking into account the depths at the fishing site:
- Up to 2 meters – 3-8 grams;
- 2-4 meters – 6-10 grams;
- 4-6 meters – 12-16 grams;
- 6-10 meters – 18-22 grams;
- Over 10 meters – 20-30 grams.
Choosing the right head by weight saves a lot of time and allows you to fish more perceptive places - if you use a head that is too light and takes a long time to submerge, the angler will end up spending significantly more time fishing the place than using a heavier one.
But at the same time, a very heavy head in shallow depths will significantly speed up the fall of the bait and reduce the number of bites that most often occur during the smooth lowering of the bait during the pause between reels or after casting. It is also undesirable to use heavy heads in places with a lot of aquatic vegetation and snags - this will lead to frequent snags and breaks.
Jig fishing video for beginners:
Metal mold
The most durable forms are, of course, metal products. Preference is given to aluminum or steel. If you have the tools and skills, you can make such forms yourself or buy them in a store.
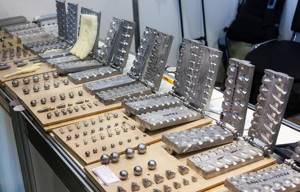
When starting casting, the aluminum molds need to be slightly heated so that the lead fills the container tightly, and subsequently the future sinker does not have any defects. Metal molds will last a very, very long time, so if you need to frequently cast sinkers, it is better to use this option.
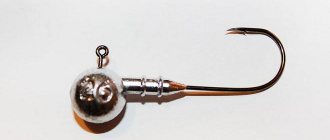
Tool kit for making jig heads
To make jig heads you will need the following tools:
- side cutters (we will use them to bite off excess lead);
- round nose pliers (needed for making ears in Cheburashkas);
- file (processing of the resulting product);
- container for molten lead or tin.
Making jig heads
It is better to make sinkers and jig heads outdoors. It doesn't hurt to wear protective gloves, since working with molten metals is quite dangerous.
As already mentioned, metal molds need to be heated before use. The melt itself should not be too overheated. Eye wire, hooks or swivels are placed in the mold, then lead is poured.
The mold of the two halves is separated after the metal has completely hardened. When the product has cooled, you can begin to remove the excess and process the sinker using a file and sandpaper.
Homemade mold for casting sliding weights
Hello, dear readers and DIYers, as well as fishing enthusiasts and professionals! In this article, the author of the YouTube channel “Folk Craft” will tell you how he made a mold for casting lead weights at home.
The homemade product is very easy to make and does not require complex machines.
Materials. — Aluminum plate 12 mm thick — Thumbscrews — Steel rod — Bolts.
Tools used by the author. — Grinder — Dremel — Screwdriver — Drills, pliers, wire cutters — Tap. Manufacturing process. To begin with, the author cut several blanks from an aluminum plate 12 mm thick. Four rods and two plates. Marked and drilled holes for screws at the ends.
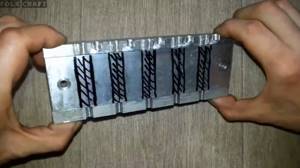
Now I pulled the main plates together and drilled molding cavities with a diameter of 12 mm.
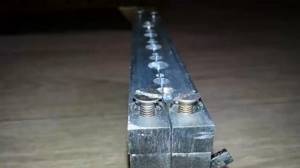
All that remains is to drill the injection channel with an engraving machine and install the pins. To make them easy to remove, they should be lubricated with laundry soap.

After the metal has hardened, you must first remove the pins from the mold.
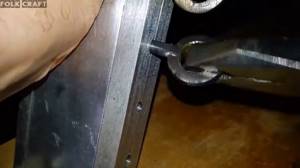
Next, simply remove the finished weights and bite the sprues.
The author's video can be found here.
Source
Become the author of the site, publish your own articles, descriptions of homemade products and pay for the text. Read more here.