Live food
It is the staple food for fish because it contains all the nutrients that fully satisfy all its needs. More often, various flours are used as it:
- bloody;
- meat;
- fish;
- krill
But independently grown maggots, bloodworms and worms are also used to feed fish that feed on bottom dwellers.
At the very beginning of their development, the larvae of all fish, hatched from eggs, need plant food and bacteria. If there is insufficient food supply in the reservoir, then it must first be created. Over time, older fry switch to larger and higher-calorie food - plankton and benthos.
Zooplankton breeding
It is bred all year round, and the process does not require any additional financial costs. It is enough to dig a groove 60 cm deep in the warm season or select a container with the same depth for winter breeding, and introduce the simplest ciliates - slippers and daphnia crustaceans.
They are either caught in a natural reservoir or purchased in a store. In the first case, there is a high probability that cyclops and hydra will be caught with them, which pose a mortal danger to the larvae. Do not forget that an ordinary pond also contains pathogenic microbes and viruses that can destroy all the fish.
Therefore, experts advise growing healthy live food yourself according to the following instructions:
- dry hay (30 g) is poured into 1 liter of water and boiled for 30–40 minutes;
- leave it for 5 days;
- then pour water with microorganisms into the mixture - 4 drops of water per 1 liter of infusion, and so that they do not die of hunger, add feed yeast (0.1 g of yeast per 1 liter);
- after 7 days, the larvae are fed with the prepared food.
A fish breeder shares his experience in growing live food in the video below:
Breeding live food at home
The method, as a rule, is somewhat labor-intensive, but quite justified. It is difficult to argue with the benefits of live food for aquarium fish, and if you breed them at home, you can be sure that such food is safe for your fish. After all, this way the risk of introducing an infection into your home pond, which is always something to be wary of when purchasing live or frozen food, is practically reduced to zero.
Basic rules for growing various live food crops:
- Do not overdo it with the nutrient substrate. If fertilized too much, the crop begins to multiply rapidly, and then also rapidly die from lack of oxygen and poisoning by its own waste.
- Periodically change the water in containers where you breed live food.
- Do not keep the entire crop in one container, so that, in the event of the death of some part of it, you can easily renew the population from the reserve breeder.
Daphnia
Daphnia is an ideal live food for fry and most types of fish. In nature, in warm weather, it can be caught in small, sun-warmed reservoirs with stagnant water. In favorable conditions, daphnia will live with you in winter, and you can always provide your pets, especially young fish, with valuable, fresh, live food.
It is better to catch crustaceans intended for breeding in reservoirs where there are no fish - this way you do not risk introducing an infection. Place the caught daphnia in a previously prepared container with settled water. Crustaceans are very sensitive to the amount of oxygen, so an aerator is needed. The water surface must be large enough. They do not like overexposure; the ideal temperature for breeding is from 22 to 25 degrees. A fifth of the water should be changed daily.
For feeding, you can use yeast (a pinhead-sized amount is diluted in a spoonful of water and introduced into a dispenser container). Don't be afraid of cloudiness - it will pass quickly. You can also use water tinted with blood (from washing meat or fish) - add very little of it, no more than a tablespoon. Juice from cabbage, beets, and carrots is also suitable for food - a teaspoon per 5-6 liters. Make sure that the water does not spoil - it should not give off an unpleasant odor, because crustaceans filter the liquid by eating excess bacteria.
Daphnia is an excellent live food for all types of fish, especially for feeding fry in winter. It can also save you from “blooming” water in the aquarium - just release the crustaceans there for a couple of days, and they will clean everything efficiently.
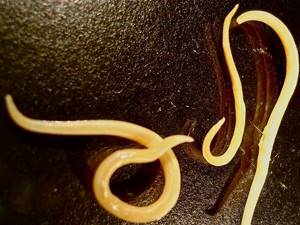
Nematode worms
A common, easy-to-raise live food. They live in moist humus. In order to get worms for the initial live culture, you need to collect last year's wet leaves, separate the nematodes and place them in a bowl with a mixture of flour and milk. Place a twig or piece of wood in a bowl. After 3-5 days, multiplied worms will begin to gather on the piece of wood. They are collected with a brush and fed to the fish.
The culture lasts for about a month, then the nutrient substrate must be changed.
Drosophila flies
An initial culture is not required for their breeding - these insects appear as if on their own wherever there are rotting vegetables or fruits.
To breed them, you need to place any fruit puree mixed with oatmeal flakes and yeast in a closed breeder. The first flies will appear in a couple of days, and after 8-10 days there will be enough of them to feed your pets.
Vitamins
Be sure to introduce vitamins. Especially if the fish stocking density is high. Pastes made from plant materials are used as vitamin complexes:
- pondweed;
- duckweed;
- cabbage leaves;
- nettle;
- milky ripeness of corn;
- representatives of legumes - lupine, vetch.
Vitamin B12 (cyanocobalamin) is added. It is needed for proper protein metabolism, and, therefore, has a direct effect on the growth of living beings.
What grains are best added to fish food?
Of the wide variety of cereal crops, the following are best suited for fish:
- Wheat. It is the main diet. From 1 kg of wheat, carp absorbs about 50% of nutrients - these are the best indicators. However, the diet should not consist only of it, the fish begins to suffer from obesity, its growth slows down;
- Rye. This is a little favorite product of fish; they eat it very poorly, although the protein is absorbed by 70%.
- Barley . In terms of nutritional value, it is not inferior to wheat, but the vegetable protein contained in it is absorbed less well by fish, as a result of which the weight gain is less. In addition, it is poor in vitamins and elements, enzymes. Before crushed barley is given to fish, it is cleared of films (chaff), otherwise it can injure the digestive tract.
- Corn. It is used only in crushed form and added to mixed feed, since it contains very few nutrients, but, on the other hand, is rich in carotenes;
- Oats. It is used only in feed mixtures; it must first be cleared of films. This cereal is the least nutritious of all the representatives, and the fish growth on it is insignificant. Add it in small quantities.
- Soy. This is a vegetable protein that contains amino acids, but it contains toxic substances. They must first be neutralized by heat treatment.
- Peas. It is also rich in proteins and is not inferior to cereals in the amount of macro- and microelements.
- Cake, meal. These are products of processing of oilseeds. Sunflower and soybean meals are usually used. When using the first components, they are checked for the presence of gray rot, which is very toxic. Before use, soy components are subjected to heat treatment.
Raw grain is not recommended to be fed to fish. It must first be prepared: crushed, steamed or germinated.
Feeding carp with grain
They feed him only crushed wheat. The rule that is followed here is that the smaller the size of the fish, the smaller the grain fraction. Adhere to the following instructions:
- 500 gram carp and larger ones are suitable for grains measuring 8 mm;
- individuals whose weight reaches 150-500 g - 6 mm;
- for representatives weighing 40-150 g, it is enough to crush the grain to 4.5 mm;
- small fish weighing 10-40 g require a size of 3.3 mm.
Additionally, read here about the intricacies of carp breeding at home.
This type of fish likes raw grain, but it is better to pre-process it, which improves their taste, since at high temperatures some of the starch is broken down into sugars.
To do this, the grain is poured in a layer of no more than 1 m into a suitable container and filled with hot water (90°C). Stir, cover and leave for 4 hours.
It is better to germinate wheat rather than heat it. In this form, carp eat the grain almost completely. The main thing is not to overexpose it, it is enough for the sprout to reach a length of 2-4 mm.
From an economic point of view, it is more profitable to purchase industrial feed. It costs less than grain, does not require pre-treatment and gives greater growth. However, in nutritional value it is still inferior to natural food of plant and animal origin.
It is recommended to alternate feeding - industrial food with grain. As a treat, carp are given a white loaf, which they eat with great pleasure. To prevent pieces of bread from “furrowing” over the entire surface of the reservoir, it is placed in feeders made from a plastic pipe.
The breeder will tell and show you what he feeds his fish in his home pond in the video below:
Storage rules
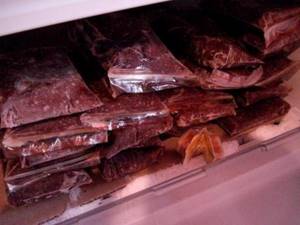
The debate among aquarists between proponents of live and frozen products has been going on for many years, and there is no sign that it will end anytime soon. It cannot be denied that all live nutritious foods can also be frozen. Most live crustaceans, larvae and worms used to feed aquarium fish are sold frozen. You can bring them home and immediately place them in the freezer of your home refrigerator, and then remove food from there as needed.
Proponents of frozen foods argue that the risk of disease and infection of fish in this case is much reduced. Their opponents respond to this by saying that currently mosquito and midge larvae come for sale mainly from commercial farms, free from industrial and bacterial pollution, and supporters of live food breed them themselves at home. After trying different types of food, you can decide for yourself what is best for you personally.
Freezing live food
How to store and use feed:
- Storing frozen foods is very convenient: they take up less space than live food, are always edible, and are always at hand.
- Live dust feeding is done by collecting water containing the protozoa using a pipette and placing it in the aquarium. Ciliates are an excellent food for the fry of many types of fish.
- Never place frozen food cubes directly into the aquarium. Such food must first be thawed, rinsed under running water and brought to a temperature close to room temperature - only then can it be fed to the fish.
- Live daphnia and cyclops can be stored in the refrigerator for several days. To keep them fresh and suitable for fish consumption, it is necessary to regularly replace the water in the container with plankton, and also remove dead specimens from the bottom of the container.
- For aquarists who incubate live food, this is the easiest way, their fish food is always at hand and is stored perfectly (alive and fresh).
Live food contains many ingredients necessary for the normal life of aquarium fish and the development of their immune system. This cannot be achieved by using only artificial and dry food. And, as we have seen, growing food yourself is not that difficult. We wish cheerfulness, beauty and health to the inhabitants of your aquarium!
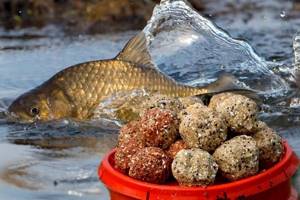
Basic food recipes
To create the ideal food for pond fish, you need to know what nutrient standards they need.
We recommend reading the article, which will additionally tell you how and what to feed pond fish.
For carp fingerlings
Nutrient standards for carp fingerlings weighing 1-25 g, that is, young animals of the current year, grown in a pond:
- crude protein - 26% or more;
- fat - at least 4%;
- fiber - no more than 9%;
- calcium - 1.2%;
- phosphorus - 1%.
For them, the ideal food is the VBS-RZh-81 commercial feed. Which includes:
- meat and bone meal - 1%;
- herbal flour - 2%;
- fish meal - 3%;
- yeast - 4%;
- crushed wheat, which can be completely replaced with wheat flour - 11%;
- wheat flour - 12%;
- soybean meal - 17%;
- crushed barley or millet - 20%;
- sunflower meal - 30%.
For commercial carp
Nutrient requirements of commercial carp grown in pond farms:
- in crude protein - 23% or more;
- in lipids - 3.5% or more;
- fiber - no more than 10%;
- calcium - 0.7%;
- phosphorus - 0.8%.
These fish are fed with MBP commercial feed. It contains:
- chalk - 1%;
- wheat bran or wheat or barley grain – 4%
- hydrolytic yeast can be replaced with protein-vitamin concentrate (PVC) in a ratio of 1:0.7 - 4%;
- soybean meal - 5%, can be replaced with peas in a ratio of 1:1.5;
- peas - 10%, which can also be replaced with soybean meal, but in a ratio of 1:0.7;
- fishmeal or krill meal - 16%;
- wheat - 20%;
- barley - 20%;
- sunflower meal - 20%, it can be replaced with soybean meal (1:0.75).
Each type of fish requires menu adjustments, since they all have different needs for vital substances and have their own food preferences.
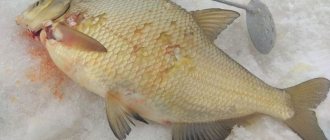
Food for crucian carp
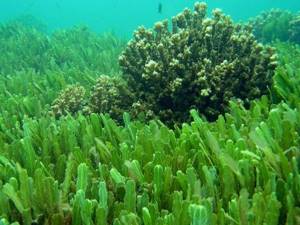
Under natural conditions, the menu of crucian carp is varied. It eats duckweed, algae, bloodworms and a variety of bottom creatures. But at the initial stage, while the reservoir is just populated by representatives of the animal and plant world, the fish must be fed.
Crucian carp are fed from the end of spring, when the water temperature is +10°C, until the beginning of autumn. In extreme heat or cold, his appetite worsens, so when feeding, it is necessary to take these factors into account and adjust portions.
Feed base:
- rye;
- steamed beans;
- bran;
- corn;
- boiled potatoes.
Of the living creatures, they are fed larvae of dragonflies and beetles. They are collected by hand. They breed or buy bloodworms, dung worms, and minced meat for them.
The grain is pre-crushed. Plant raw materials are mixed with minced meat, meat and bone meal and bran. Brew with boiling water and leave for half an hour. Then small balls are rolled from the mass and fed to the fish. It is recommended to add to the balls: fresh chopped grass - green mass of dandelion, nettle, duckweed or worms, chopped bloodworms.
Experts do not recommend using compound feed. It settles to the bottom and negatively affects water quality.
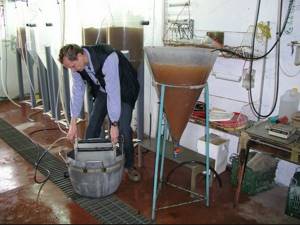
The fish are fed 2 times a day, at the same time, so that they develop a conditioned reflex. The feed is diluted with water, placed on a metal tray and lowered and raised using a special mechanism. In the evening, the feeding area is illuminated with lamps.
The optimal amount of food for a single feeding is 5% of the total mass of all crucian carp in the pond. That is, if there are 20 crucian carp in a pond, each weighing 100 g, then 5% of the live weight is 100 g.
We also recommend reading an interesting article on how to properly breed crucian carp.
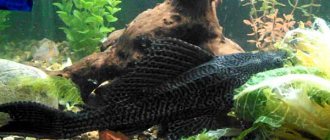
Catfish food
Clarium catfish are usually grown in artificial ponds. However, its exact nutritional requirements have not yet been identified. Therefore, fish farmers feed it with carp or trout food. It has been proven that catfish gain weight faster on the last feed. To accelerate growth, the probiotic “Subtilis” is added to the diet.
However, some fish farmers use trial and error to formulate their feed. They mix dry raw materials, vitamins, minerals with water or whey to a dough-like consistency. Then it is passed through a meat grinder and dried in a dry place. It is crushed into granules and fed to the fish. For example, a feed mixture is prepared from the following components:
- chalk - 1%;
- herbal flour - 2%;
- blood meal - 2%;
- vegetable oil - 2%;
- yeast - 4%;
- barley flour - 5%;
- wheat flour - 8%;
- sunflower meal - 20%;
- soybean meal - 26%;
- fish meal - 30%;
- vitamins;
- cobalt chloride - 0.03%.
How to make live food with your own hands
Those aquarists who are the happy owners of a spacious apartment, an empty attic, a garage or free space in the basement can start breeding live food that fish will readily eat.
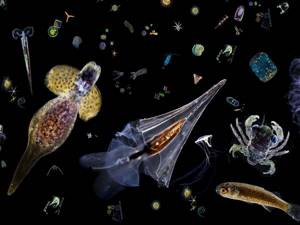
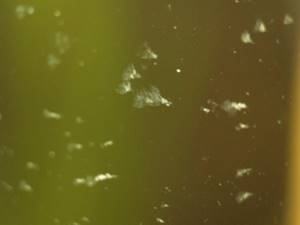
The smallest organisms floating in water are called plankton. Plankton includes tiny insect larvae, small crustaceans, algae, which are readily eaten by a variety of fish, and ciliates, an excellent food source for young fish. If the owner of the aquarium is keen on independently obtaining fish food, then the net for catching it should be made of a very dense mesh (with a mesh size of up to 1 mm and no more), and after bringing home the catch should be washed in several clean waters. You can also buy live plankton in special stores - such food is sold in plastic bags filled with water.
Did you know? The Russian orbital station Salyut-5 flew into orbit of our planet and back, carrying a guppy astronaut fish on board. Together with the rest of the team, the inhabitant of the aquatic environment felt great during the flight, and then landed on Earth alive and healthy.
Self-breeding ciliates-slippers
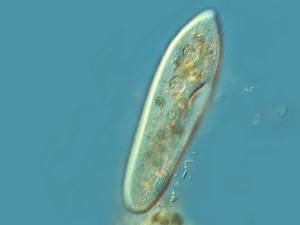
The slipper ciliate (Paramecium caudatum) is often the very first food for baby fish. As the fry grow older, they begin to need other food. Breeding protozoa yourself is not at all difficult; it is an effective and safe (without the risk of spreading infections) way of obtaining food.
In order for reproduction to be successful, you need to make a nutrient medium in the incubation container. To do this, you can add the following products to the water:
- cream or milk;
- dried banana or pumpkin peels;
- a bunch of dried grass;
- juicy carrots cut into circles;
- granulated combined food for carp fish.
The readiness of the nutrient liquid can be determined by the appearance of the smell of fermentation.
There are several different methods for breeding slippers.
On a banana peel
Banana peels make an excellent nutritional liquid.
If you want your fish to be healthy, active and beautiful, feed them with rotifers, slipper ciliates, cyclops, daphnia and gammarus.
Method No. 1
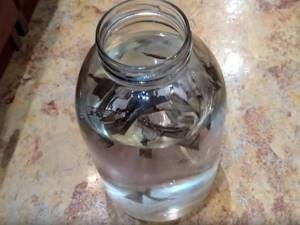
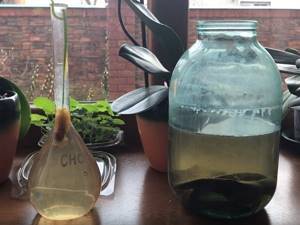
Banana peels are collected in advance, dried and stored in a hermetically sealed jar. When the time comes to start breeding the slipper, the aquarist takes out a dry banana peel, rinses it thoroughly in clean water and places it at the bottom of a three-liter jar in which he will incubate the protozoa. For a container of this volume you need to take approximately 1/6 of the peel of one banana. Water taken from the bottom of the existing aquarium is poured into it in an amount of 100 ml.
Soak banana peels in water
This water usually contains many ciliates, and this number of maternal individuals will be enough for their further reproduction. After this, the container is filled with settled water up to the neck. The incubator jar is placed on a windowsill or other place where it is light and the air temperature is above 20°C.
In a warm “nutritious soup” the number of shoes increases exponentially. The warmer the air in the room, the faster the process.
The largest number of protozoa is recorded approximately between the 14th and 21st days after setting up the incubator. This high level of live dust in the water will last for about 20 days, after which the number will gradually decline.
Video: breeding ciliates on a banana
Method No. 2
If the aquarium is expected to replenish soon and future fry need live food, you can get ciliates faster. Place dried banana peels in a saucepan and add boiling water. When preparing, the proportions specified in method No. 1 are observed. The mixture of liquid and crusts is left in a closed pan to infuse and cool. The cooled steamed crusts (along with the liquid in which they were boiled) are poured into the incubator, a little aquarium bottom water (with ciliates) is added there and topped up with water.
The most popular aquarium fish are: cichlids, clownfish (macracantha), diamondback piranha, plecostomus catfish, Maori wrasse, pipefish, labidochromis yellow, angelfish, red badis (Dario dario), arapaima, surgeonfish, arowana, discus and mollies .
As in the first case, a warm and well-lit window sill is chosen as the location for the incubator. In this case, the peak of slipper reproduction should be expected on the sixth or seventh day. There will be a lot of them, but protozoa incubated in this way do not live very long. Aquarists take this into account and place several of these fast-growing incubator jars at certain time intervals. This technique helps to obtain a large amount of live dust by the scheduled date.
Breeding slipper ciliates on banana peels
Did you know? UK resident D. Hiscott is the owner of the largest home aquarium for freshwater fish on Earth. The house for the fish turned out to be in the form of a cube 4 m long and 2 m 10 cm high. About 20 tons of water are placed in the aquarium, and many breeds of fish and other river inhabitants (pike, catfish, river stingrays, turtles, and so on) live there at the same time. The cost of a transparent house for freshwater fish is 5,000 British pounds.
In a dairy environment
This method is also simple - the simplest microorganisms multiply well in a fermented milk environment. To do this, add two drops of whole milk or cream (not sweet) for each liter of aqueous solution to the incubator container every 7 days.
Milk or cream must be added to the aquatic environment only in the specified proportions; when the water is oversaturated with milk, rapid proliferation of bacteria begins and, accordingly, their absorption of oxygen necessary for the existence of shoes. When protozoa are grown on bacteria, they need good lighting.
Ciliates-slippers
In the hay
Several bunches of fresh and green grass are taken, dried in the shade until they turn into hay, and then finely chopped with a knife. Add 2.5 tbsp. spoons (10 g) of chopped hay into a small saucepan and pour 1 liter of water, then bring to a boil and cook for 20 minutes over low heat. Boiling kills harmful microorganisms on the grass, but bacterial spores remain alive after heat treatment. At the end of cooking, the broth, covered with a lid, is left to infuse. After a few hours, add 1 liter of settled water.
Place the container in a warm and bright place until bacterial spores develop. On the fourth day, bacterial spores will turn into hay sticks, on which protozoa will multiply. When the hay infusion is ready, it is removed to a cool place inaccessible to daylight.
The shelf life of this infusion is up to 30 days. As necessary, the stored infusion is added to the container with incubation of the shoes; the protozoa happily eat hay sticks.
Breeding slipper ciliates in hay
Did you know? The huge marine aquarium is located in America (Georgia) and was built thanks to the charity of millionaire B. Marcus. The area of this (always open to the public) structure is 200 thousand square meters. m, the cost of its construction amounted to 290 million US dollars. The huge aquarium building is home to 120,000 thousand marine inhabitants.
On the algae
Chlorella and scenedesmus algae are also good for this purpose. To obtain a nutrient medium, for each liter of these algae add 1 granule of a special combined food for fish from the carp family. A few ciliates are added to a container with this solution along with water from the aquarium and placed in a warm but dark place. It must be taken into account that protozoa grown in this way live in a semi-dark environment and do not like daylight, as they have negative phototaxis - they move away from the light source.
Aquarists use algae food when raising capricious, shade-loving aquarium inhabitants or their fry. The lifespan of protozoa obtained from algae is approximately 20 days. If desired, this period can be extended - to do this, place the jar with the culture in a colder place (refrigerator, basement). At temperatures above 10°C, protozoa on algae quickly die; the most suitable temperature for them is 3-10°C.
Plants such as coryfolia, Pogostemon Helfera, Pogostemon erectus, Lomariopsis, Hemianthus Cuba, Echinodorus, Pogostemon octopus, Sagittaria, Marsilia, Java moss, Aquascape, Cryptocoryne and Hornwort in the aquarium play an important role in the life of its inhabitants.
On the bottom water
Here is another effective, but not very well known method of breeding shoes.
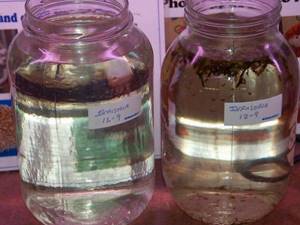
Every week, the aquarist cleans the aquarium, while he collects bottom water along with fish waste. This water is very good for producing ciliates. Dirty aquarium liquid is poured into light plastic bottles and left in the sun. After some time, the liquid inside the bottles turns green (blooms), and a little later a green sediment falls to the bottom of the containers. At this time, the liquid is simply teeming with ciliates; if desired, they can be seen through a magnifying glass.
After the green sediment has fallen out for seven days, the ciliates are not additionally fed; they feed on the decomposing green mass.
Important! Self-collection of live dust in ponds and lakes is an interesting activity, but we must not forget that parasitic flukes (Dactylogirus and Gyrodactilus) can live in large natural bodies of water. They are not dangerous for tropical aquarium fish, but it is better not to pollute aquarium water and not to fish in untested water bodies.
Home breeding of other live foods
In addition to ciliates, you can also breed other live food for fish at home: daphnia, artemia, rotifers, tubifex and others.
Breeding Artemia at home
Artemia (Artemia salina) are microscopic crustaceans that live in salt lakes. Before placing them in the aquarium, you should pour them onto a sieve and rinse thoroughly to remove salt under running water. Artemia is suitable for most fish species as food and is the safest live food, as are the larvae of this crustacean, commonly called nauplii. They are considered one of the best and purest fish foods. They are free of parasites and bacteria and have a very high protein content. Including nauplii in fish food promotes fish health and growth.

The only obstacle is that the nauplii need to be bred independently at home. However, canned brine shrimp eggs are now sold, which can be stored for a very long time in a dry environment, as well as a professional larval hatching kit. These kits can be purchased at most professional pet stores, brick-and-mortar and online.
The operating instructions for the kit are very simple (see manufacturers instructions for details). For breeding you need:
- glass vessel with a capacity of up to two liters,
- water, sea salt,
- thermostat,
- effective aeration system,
- light bulb or other light source,
- mesh filter.
Artemia eggs are placed in well-aerated salt water at a temperature of 26-28°C, from which nauplii emerge after about a day. They always head towards the light source (light bulb), so they are easy to find and catch with a net. After a cleansing rinse in warm water, they can be given as food to even very demanding fish.
Breeding Artemia at home
Breeding microscopic nematodes
Panagrellus, Turbatrix (Anguillula) and Rhabditis are microscopic nematodes. This is a nutritious food for juvenile fry that can be grown at home. For dilution, you need a glass jar or plastic container in which oatmeal or wheat bread soaked in milk or yogurt is placed. Also, some nematodes need to be placed on the products for reproduction. The temperature in the room where micronematodes are bred must be kept at least 20°C.
Adult nematodes collect on the sides of the container, from where the aquarist can collect them using a knife blade. A container for breeding microscopic nematodes does not smell very good, but if the jar is tightly closed with a lid, the smell does not penetrate into the room. Micronematodes for reproduction are taken from familiar aquarists or purchased at pet stores.
Did you know? To purchase the most expensive fish, known as the dragonfish or arowana, for your aquarium, you need to pay approximately $80,000. Moreover, unusual coloring of the fins, tail or scales can increase this cost. Among this expensive breed of fish, there is a variety, the platinum arowana, whose price is $400,000.
Reproduction of fruit flies
The fruit fly, Latin name Drosophila, is an insect with a body length of only 3-4 mm, breeds on rotting fruit debris. In late summer and autumn, fruit flies can be found on overripe plums and apples.
It is most convenient to grow them in a bottle or tall jar, at the bottom of which are placed chopped fruits, grated carrots, boiled dried fruits, or a mixture of corn flour, baker's yeast and mashed potatoes.
A bottle with bait is placed in a place where there is a mass outbreak of Drosophila flies, and after a few days the neck of the bottle (with the caught insects) is tightly tied with a bandage or gauze. Flies living in a bottle lay eggs, from which larvae hatch and eventually turn into pupae, and a little later into adult insects. The entire development cycle of Drosophila can be observed using a magnifying glass; it lasts (depending on the species) from two to four weeks. The temperature for breeding fruit flies should be between 20-24°C.
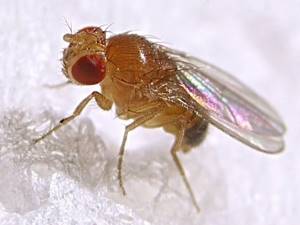
Subsequently, the insect food is made liquid and poured through gauze attached to the neck. From one such breeding jar you can get from 200 to 300 insects per week. After 2 months, the jar is completely freed from insects, washed well and a fresh stock is made for breeding fruit flies.
Useful tips
When organizing feeding, adhere to the following recommendations:
- To facilitate the task of feeding, feeders are installed. You can make them yourself or buy them ready-made in the store. There are several types of them. Some are fixed at the bottom and are called stationary, others are lifting; before distributing food, the feeder is raised to the surface.
- Automatic feeders are usually used in fish farms. Feeding with these devices helps to know the required amount of food for the fish. If after 4 hours there is food left, then its portion is reduced. Food should not be in the water for more than 1 day, otherwise it will turn sour and the fish will not eat it. Consequently, the food will continue to rot in the water, which will negatively affect the microflora of the entire reservoir.
- The diet of fish raised in ponds and industrial cages (pools) differs. The first, even with high planting densities, have enough natural food. It serves as the main source of vitamins, amino acids, and minerals.
This article will tell you how to grow fish in a pool.
Preparing fish food with your own hands is not an easy task, because it is necessary to take into account the characteristics of the fish being raised and their daily needs for vitamin and mineral components. By following the recommendations listed above, you can learn how to prepare food that will provide your fish with everything they need.
0
0
Copy link