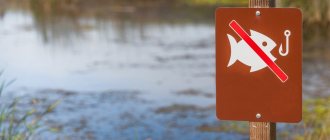
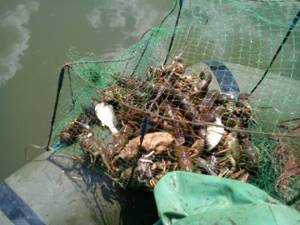
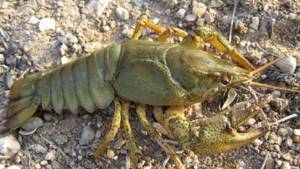
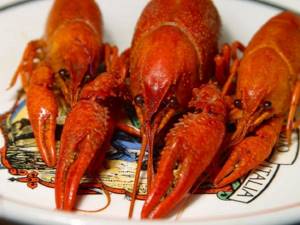
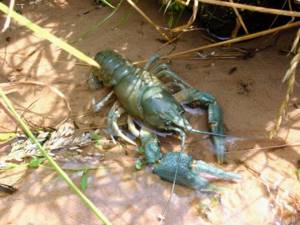
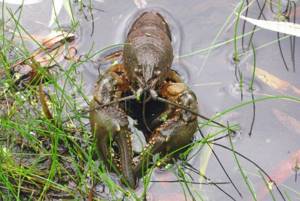
Crayfish are an excellent snack for beer, but due to its high price, this product can be called a delicacy. One evening with friends can cost a pretty penny. Therefore, there is a desire to catch these underwater inhabitants yourself and eat them with pleasure.
To start catching crayfish, you need a special device, namely a crayfish catcher or, as it is also called, a crayfish catcher.
Today we will look at several types of this gear, and also tell you how to make a crayfish trap with your own hands and how you can lure crayfish.
Types of crayfish
There are several types of crayfish:
- From a plastic bottle
- Screen
- Versha
- Inkwell
All of the above can be done with your own hands. Only for some you will need some parts; if anything, they can be found in any hardware store. All cures are time-tested, just some are more effective.
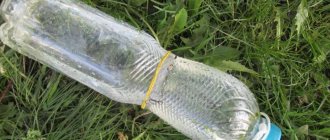
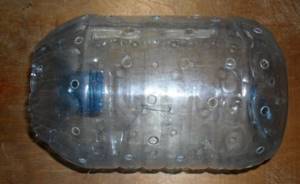
Rachevnya from a plastic bottle
This gear is considered the simplest of its kind. But despite the simplicity of execution, it can please you with a good catch.
To make a crayfish shell with your own hands from a plastic bottle, we will need:
- 5 liter plastic bottle
- Scissors
- Fishing line or wire
- Awl
- Nail
- Rope
So, let's start assembling the shell.
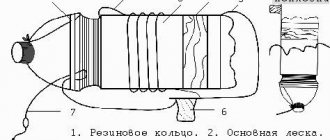
- First of all, take the bottle and cut off the top part of it (along with the neck). This is approximately 5-7 cm from the beginning of the neck.
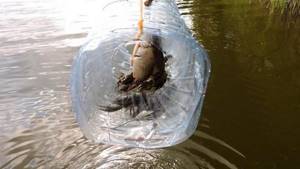
- Turn the top part over and insert the neck into the inside of the bottle. Thus, the cancer will crawl into the bottles and fall into the middle, and to get out it will have to try really hard.
- We need to connect these halves together using fishing line or wire. We make holes for connections with an awl.
- Now you need to make holes in the bottle itself for better air release. To do this, heat the nail and start making holes.
- At the bottom we attach a weight and a hook for bait. It is more convenient to do this by removing the top part of the shell and then fastening it again.
- In the place where the two halves join, we tie a rope or thick fishing line, 3-5 m long.
Read here Putting on a pike - how to make and correctly throw a bait on a pike yourself (80 photos + video)
Already near the reservoir, we attach the bait to the hook, hold the trap by the rope and throw it directly into the water. On the shore we tie the cord to a peg or tree. We are waiting for the catch.
Step by step guide
- The first step is to get rid of excess plastic material. To do this, cut out the neck in the narrowing area of the container, capturing a small rim.
- We equip the base of the bottle with small diameter holes , allowing air masses to find a way out and increase the rate of sinking of the bottle to the surface of the bottom of the reservoir.
- The neck should be inserted with the opposite side into the container and secured with ordinary fishing line.
- We equip the bottom of the bottle with small diameter holes through which a wire should be threaded, which will serve as a latch for the bait.
- Having made another hole in the bottle, we thread a rope through it to ensure convenient lifting of the device from the reservoir.
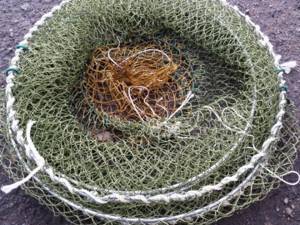
Shell made of nylon mesh
The rachevnya, made on the basis of a nylon mesh, received the second name “inkwell” among the people. To make such a trap you should stock up on:
- fine nylon mesh;
- wire cutters;
- thick wire – 5 mm;
- strong nylon thread.
The detailed step-by-step guide provided below will allow you to make a rachevnya without unnecessary difficulties:
- Using ordinary wire, we construct two rings
Using ordinary wire, we construct two rings. The diameter of one of the rings should be about 40 cm, and the second should not exceed 19 cm.
- The large ring is covered with a nylon mesh , maintaining an intermediate distance for the thread to pass through the hole (about 3 cm).
- To prevent the trap from folding when immersed in a pond, spacers should be made. This design involves the use of three pieces of wire, each about 20 cm long.
- One of the ends of each wire must be fixed to a ring of a larger diameter , and the second end is secured to a smaller ring using wire cutters.
- The inkwell is covered with the edges of a nylon net , making a path around the holes and along the circumference of the rim.
- To make using the trap comfortable , you should build a kind of handle from wire and fix it to the crayfish trap.
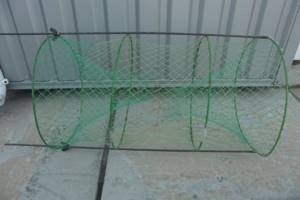
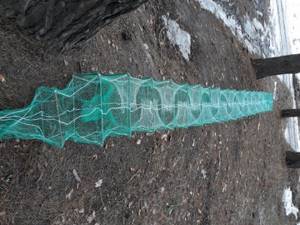
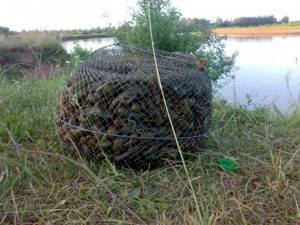
We use metal mesh
Traps made of metal mesh are easy to manufacture. Even a beginner can do this design. A metal rack will be quite durable and can last for quite a long period of time.
To build a trap you cannot do without:
- strong wire;
- nylon thread;
- metal scissors;
- metal mesh with a width of 1 m;
- protective gloves.
Following the step-by-step guide will allow you to build a fishing device quickly:
- You should have a cone-shaped shape with the top cut off.
Using metal scissors, we separate a piece of mesh (80x100 cm) from the roll.
- Having given the mesh the shape of a cylinder, we fix the edges together using ordinary wire with a diameter of at least 25 cm.
- Having outlined on the surface of the mesh the location of a semicircle with a radius of 25 cm, we cut it out. Having placed a point in the central part of the radius, measure 5 cm from it.
- The formed circle , the radius of which is 5 cm, is cut out with metal scissors.
- The result should be a cone-shaped shape with the top cut off.
- A cone is lowered into the inner part of the cylinder, pointing its sharp end down. The extreme points of the cylinder should be connected to its body using wire.
- The opposite side of the product is equipped with a cone-shaped mesh figure.
- In the central part of the cylindrical shape, a rectangle (15x20 cm) is drawn from the mesh.
- Using wire cutters, bite off the wire on three sides. There should be a kind of door that facilitates the passage of the bait into the trap.
- The door should be secured with wire where the cuts are made.
- The extreme sides of the crayfish are equipped with a rope , which will facilitate the process of removing the crayfish from the reservoir.
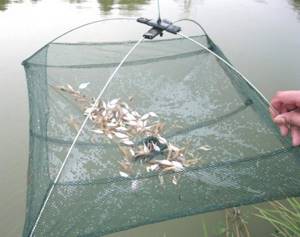
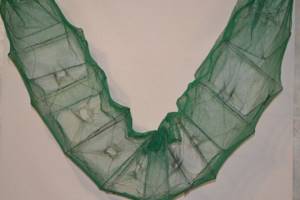
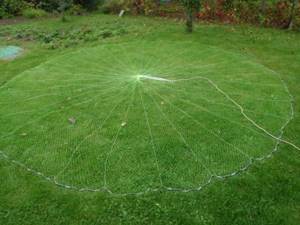
Screen
This trap is somewhat similar to a net, and is also quite simple to make.
For it we will need:
- Wire with a diameter of 4-6 mm and a length of 1.5 m
- Rope mesh with small cells
- Rope
- Pole (strong stick)
Let's start making.
- We make a ring from wire. We weld the ends or tighten them well together.
- We stretch the mesh over the circle, but do not stretch it too much, it should sag a little. We fix it on the hoop.
- We take 4 pieces of rope 40-50 cm each and tie them to the ring. We tie the hanging ends together and fasten another rope on top of the common knot. The result is a structure that holds the main part.
- At the fishing site, we tie our structure to the end of the pole. We place bait wrapped in fabric at the bottom of the net and immerse it in water.
We need to check our crayfish trap every 30 minutes. It turns out that when we lift the trap, the bottom of the net is pulled back and the crayfish can no longer get out.

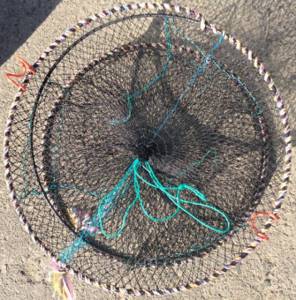
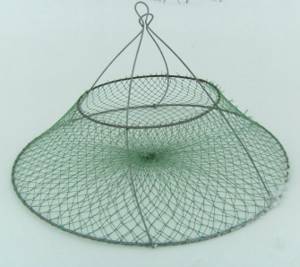
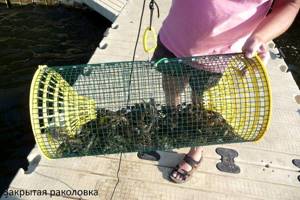
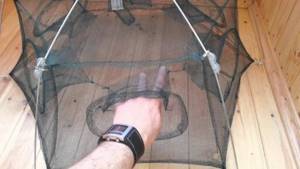
Inkwell
This type of trap is the most effective and popular. It is easy to move and also shows a good catch. This is, one might say, an improved version of the screen.
To make a folding shell with your own hands we will need:
- Wire with a diameter of 3 mm
- Rope mesh
- Electrodes (not needed) – 4 pcs.
- Rope
The designs and sizes of the crayfish shell may vary, it all depends on which one you want.
- We make 2 rings from wire. One with a diameter of 40-45 cm, and the other - 20-25 cm.
- We stretch the net over a large hoop and tie it.
- We take 2 more pieces of wire and make V-shaped handles from it. We attach them to the lower hoop. They will allow us to collect supplies.
- We attach the small ring to the mesh, at a distance of 15 cm from the large one.
Before fishing, we put bait on the bottom and immerse the trap in the water.
Note!
- A nod for do-it-yourself winter fishing - how and what to make good gear from. 115 photos and video tips from the pros!

Do-it-yourself spinners - types, features of homemade spinners and their assembly (100 photos and videos)
How to minimize fishing costs? Useful tips from experienced fishermen and an overview of current solutions (65 photos)
If you want to fish from a boat, you can tie a fishing line with a piece of foam plastic to the handles, and if you plan to fish from the shore, then attach a stick or rope to them, which can then be fixed on the shore.
Tactics and techniques of fishing with crayfish
You should choose the right place where crayfish are found and place the crayfish trap in the late afternoon, because arthropods prefer to go out to feed in the dark. Cloudy weather sometimes confuses them: when there is no bright sun, catching crayfish can also bring good results. But the main catch is still at night.
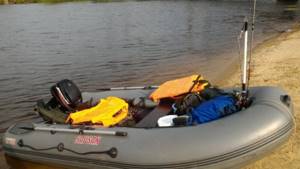
The technique comes down to correctly placing the trap in the chosen location. This can be done both from the shore and from a boat.
If near the shore there is a sharp drop into the depths or other obstacles that prevent you from entering the water, take a long but strong stick with something like a slingshot at the end. This slingshot clings to a rope tied to the trap, and gradually the crayfish is taken to the selected promising place. Then, by tightening the rope, the trap is slowly lowered to the bottom. It is better to tie the other end of the rope to something on the shore. Crayfish, even in large numbers, are unlikely to steal the crayfish trap, but such a precaution will never be superfluous. This type of casting requires some skill, so it is better to have a partner.
Installation is even easier from a boat. Having arrived at the chosen catching place, the trap is carefully lowered to the bottom, and a float made of a piece of foam plastic or an ordinary plastic bottle is tied to the end of the rope.
The open shell is checked approximately once an hour. This should be done carefully, being careful not to stir up the water. It is left closed for several hours, often until the next morning.
There is no need to put a large amount of bait. Especially if the design includes a nylon pocket. The goal is to attract the crayfish, not feed them. One small fish, a piece of meat or offal, a piece of rye bread with garlic is quite enough. Severely rotten fish or meat should also not be placed. It is believed that crayfish love it, but in fact this opinion is erroneous. If arthropods have a choice between rotten meat and fresh meat, they will choose the latter.
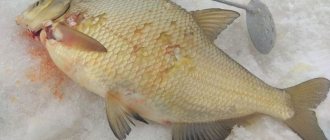
Bait
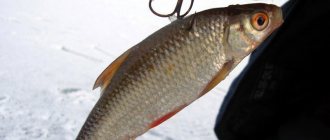
Crayfish are pond nurses, so they prefer to feast on corpses. That is, meat, and in particular rotten meat. To catch them, you can also use fish (sprat, capelin, etc.), chicken offal and even bread with garlic.
We wish you a good catch!
Lures for crayfish
Experienced fishermen believe that the most effective complementary foods for crayfish are:
- Canned peas are an excellent bait for crayfish.
Rye baked goods combined with garlic. After making a small indentation in fresh baked goods, rub it with garlic (at least 2 cloves are required, which will increase the speed of distribution of aromas in the water area). If the crayfish catcher is immersed in a body of water for a long period of time, there is a risk of the flour product quickly becoming soggy. In this situation, it is advisable to wrap the delicacy in nylon fabric.
- Fish meat (bream, roach) or chicken. An important condition is the freshness of the delicacies cut into portions.
- Alternatively, you can catch frogs for free and, after removing their skin, offer them to crayfish as lunch.
- In the cold season, you can use canned peas as bait , placed in a mesh of gauze folded in the shape of a bag. You can enhance the effectiveness of the product by adding a little dried dill to the mesh.
- Fishermen also actively offer crayfish a mixture of makukha with grasshoppers and mixed canned food of various types of fish.
Photo of a do-it-yourself shell
Note!
Do-it-yourself boat motor - tips for beginners, projects, drawings and step-by-step description of the construction of the main components and elements (video + 120 photos)
Feeder for winter fishing - secrets of use and techniques for feeding fish in winter (115 photos)
Bottom gear - the most effective types of equipment and features of casting techniques (95 photos and videos)
Help the project, share on social networks 
0