The sharpness of a fishing hook directly determines how successful the catch will be, but many of them have to be sharpened before being attached to the fishing line. Hooks may not be sharp enough due to poor stamping of the tip and groove; this phenomenon is especially often observed in small-sized products. They also gradually lose their sharpness during use. You can make your own hook sharpener. Sharpening can also be done using a needle file or an abrasive stone.
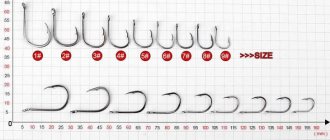
When opening a new package of hooks, you should check how sharp they are. To do this, you can lightly run the sting over the surface of the nail. A sharp one will stick to the nail and dig into it, and an insufficiently sharp one will slide along the nail. You can run the hook over your palm; the sharp one will cling to the skin. A non-sharp hook will tear the nozzle, so it should be sharpened.
Why sharpen hooks
In my opinion, sharpening hooks is only relevant at the fishing spot, if you arrived, and the hooks turned out to be dull due to an uninspected inspection, and there is no opportunity to change them. In all other cases, there is no point in sharpening, it’s easier to replace them with new ones. But sometimes there are situations when it is not possible to replace the hook, for example on some baits: for example, silicone fish, winter balancers, jigs, so it is still necessary to have this skill.
Unfortunately, it is practically impossible to sharpen a good modern hook from a well-known manufacturer at home, let alone in the field, but some are possible, it all depends on the type of material from which they are made.
Self-production
In order to do this, you need at least minimal experience in metalworking, as well as minimal knowledge of steel grades and the features of its heat treatment. When choosing a material, you should pay attention to carbon, low-alloy and alloy grades. Poor metal quality will have a negative impact on the quality of finished products.
Important! It must be taken into account that further features of heat treatment depend on the grade of steel.
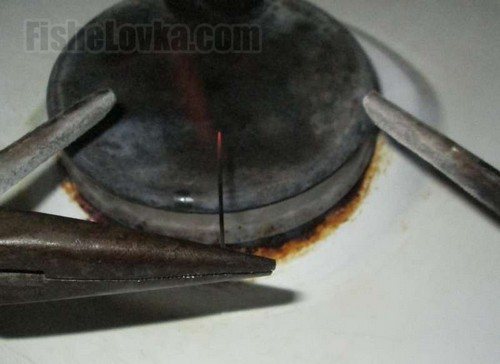
Photo 1. Heat the needle in a flame.
The easiest way is to use a ready-made wire made of steel of a suitable grade as a manufacturing material, and while the metal is not hardened, you can form a hook using pliers, thin-nose pliers, and other similar tools. The choice of shape is limited only by the angler’s imagination, although, of course, it is worth taking into account the attachment or bait that will be used, as well as the type of fish. If it is not possible to use ready-made purchased wire, you can use what you have on hand. Nails do not fit well, but ordinary sewing needles are usually made of suitable grades of steel.
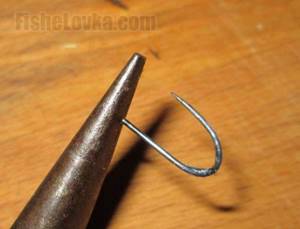
Photo 2. Bend the needle into a hook.
Next, a ring or spatula is made. The spatula is simpler in this regard, and the hook itself is lighter. A few hammer blows are enough to make it. It's more difficult with a ring. The wire must be pressed tightly and burrs must be removed in a timely manner.
Important! Before making a ring, it is better to practice using ordinary paper clips, since this usually does not work out the first time.
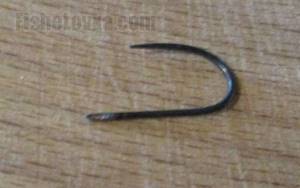
Photo 3. Finished hook.
After the hook has already acquired its shape, the turn of heat treatment begins. First, hardening is carried out. Heating, as well as whether the hooks will heat in oil or water, depends on the brand of metal. Rapid cooling after intense heating makes the steel hard, but at the same time brittle. The so-called tempering and annealing will help reduce fragility - heating to lower temperatures compared to hardening, followed by slow cooling in air or in oil.
In a similar way, you can make both hooks for catching peaceful fish and offset ones for predators, or you can make options with a wide ring specifically for jigging. In this case, you make an offset hook with your own hands in exactly the same way as a regular one, however, it uses much more wire, and when choosing a shape, you need to take into account the features of the silicone bait.
How to sharpen hooks
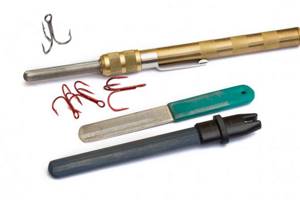
There are quite a lot of ways to sharpen a fishing hook; you can use special sharpening stones, a regular whetstone, even any stone, it all depends on the hardness of the hook.
I personally use the following sharpening tools, one cheap Chinese one or diamond ones, they all do their job perfectly.
The main thing is that the grain size of the bar should be in the region of 500 - 600 grid. Some fishermen use files and needle files or nail files, in principle everything works, it depends only on the hardness of the steel of the hook.
We recommend: How to choose and how to tie fluorocarbon fishing line?
The sharpening process is as follows: three or four quick passes along a special groove on the hook, moving from the bend to its tip; if the hook is old, then much more passes are needed.
Watch the video below, everything is shown in detail:
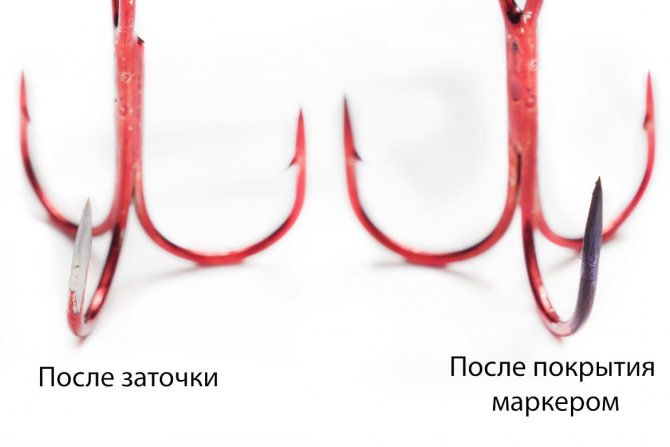
It is necessary to take into account that many hooks have a special protective coating that protects it from corrosion, so sharpening destroys it and the hooks begin to rust. To protect against corrosion, you can paint the erased area with a regular permanent marker of a suitable color; this will protect it from corrosion and extend the life of the hook and sharpening.
Methods of knitting reinforcement
Some articles claim that knitting reinforcement is easy and simple. This is true if you need to fix 5-10 rods. For large volumes, you need to have practical skills, but they do not appear easily and simply, you need to train your eyes and muscles, and bring your actions to automatism. Only after this will knitting be truly simple and of high quality.
Before starting to work with a grinder, cut the coil of wire so that the length is 15–20 cm, the specific values depend on the diameter of the reinforcement.
. Bend the wire in half and place it on the palm of your left hand - the workpieces will always be nearby, no need to make unnecessary movements, waste energy and waste time.
Blanks
The number of blanks is approximately 40–50 pieces, choose as many as are comfortable to hold in your hand. If the ends are tangled, then straighten them with the nose of the hook, the wire should pull out easily and one at a time, the ones located nearby will not fall to the ground.
. With your right hand, pull one wire out of the bundle, bend the ends with the fingers of your left hand, and reduce the bend radius with your right hand. There is no need to make the radius very small, as this makes it difficult for the nose of the hook to hit it. You have to take aim for a long time, adjust the position, and only after that the crochet hook can take its working position.
Techniques for tying reinforcement
. Bend the tip of the wire at an angle of approximately 90°. It is very important to correctly determine the length of the bent part; the number of turns of the hook and, accordingly, the knitting speed depends on this. The length depends on the diameters of the reinforcement being connected; it should exceed their sum by about a centimeter. If everything is done correctly, tying occurs after 2-3 turns of the hook.
. With your left hand, place the bent tip of the wire under the reinforcement; the bend should rise slightly above the surface of the upper rod.
The wire needs to be hooked under the reinforcement
. Hold the long ends tightly with the fingers of your left hand, and pull the hook toward you with your right hand. The effort is average, you need to straighten the wire and press it tightly to the reinforcement. Pull the wire until it rises about a centimeter above the mesh. The hook position should be vertical. Here it is important to regulate which side the wire is pulled from.
Use a hook to tighten the wire
. Place the ends of the wire against the hook and begin to rotate it. Tighten until the force increases slightly. Don't do it too hard, the wire will break and you'll have to do it all over again.
Crocheting wire
Strength is determined empirically; after several matings you will already understand how to work correctly and rationally. All movements will become optimal, unnecessary ones will be eliminated.
Knitting reinforcement using a hook
Don't rush or be nervous, knit at a calm pace. Ill-considered movements only bring harm. As soon as the twisting begins, immediately release the ends of the wire in your left hand. The nose of the hook will pry them off and bend them into a horizontal position, so you won’t have to adjust anything later.
Knitting reinforcement
Reinforcement tying scheme
Switch to a semi-automatic hook only after you have solid practical experience with a regular one. This tool requires more precise adjustment of the wire length; if the condition is not met, the work does not become easier, but becomes more complicated than it would have been simple.
Before choosing a specific method, you should know that the strength of the connection should ensure the stability of the frame only during concrete pouring. The presence of spiral protrusions on the surface of the reinforcement greatly simplifies the process - you just need to press the rods tightly against each other and they automatically interlock.
How can you fix the reinforcement?
Knitting fiberglass reinforcement
This method is now almost never used on construction sites, but about 40 years ago it was the main method; this was the only way frames were made at industrial enterprises for reinforced concrete structures. Welding ensured adequate strength for the large reinforcing chords. They were prepared in a separate workshop and then transported to the filling line.
Welding reinforcement
Knitting with wire did not provide rigidity; often the rods were displaced from their original position. As a result, marriage appears.
But this method has several significant drawbacks.
- Firstly, you need to keep a welding machine and long cables at your workplace, which makes the work much more complicated; you have to drag them between fittings, untangle them, etc.
- Secondly, there is a high risk of damage to the protective insulation of cables from the sharp ends of the rods, and this is extremely dangerous for the life of the welder.
- Thirdly, not all construction sites have electricity.
Knitting can be done manually, semi-automatically or automatically. The last option is used only by professional builders who constantly perform this operation. The manual method using ordinary hooks can be considered the simplest and most accessible. As for the knitting speed, it depends not so much on the tools and devices, but on the professionalism of the worker.
Knitting reinforcement
It is the second method that we will dwell on in more detail; industrial options have nothing to do with individual developers.
Experienced builders know that the quality and speed of knitting directly depend on skill; the tool factor is of secondary importance. Always keep this in mind; you should not buy expensive devices.
We invite you to familiarize yourself with: Garmin navigators for hunting and fishing
| Type of knitting tool | Brief description of technical parameters |
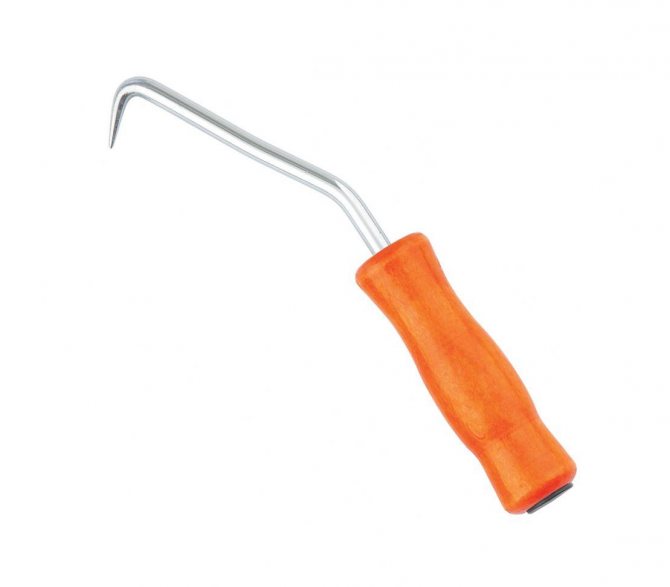
Ordinary | The simplest, cheapest, but very effective device. It is made of wire and bent at certain angles in several places, thereby facilitating and speeding up the process of twisting the wire. The handle rotates around its axis, the end of the hook is ground into a cone. The form of the crochet hook has been tested for many years by thousands of workers; the version used today is considered the most convenient and simplest. During production, be guided by the achievements of the collective mind. |
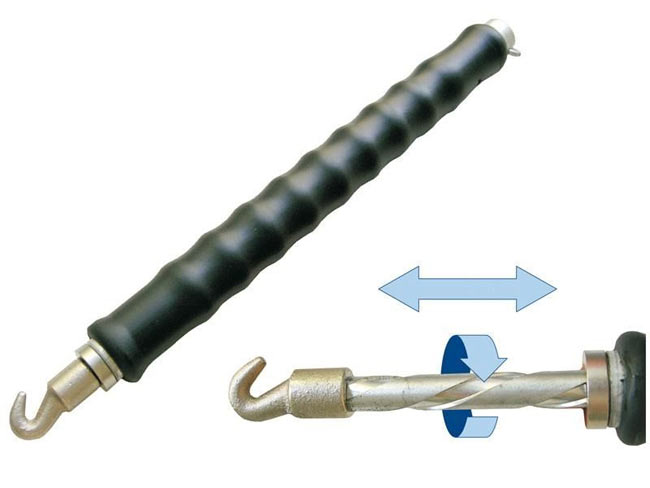
Semi-automatic | An industrial device, there is a screw thread inside the handle and on the shaft. The hook only rotates in one direction when the handle is moved up and down. When initially tensioned, the wire immediately begins to knit; the number of movements of the handle depends on the professionalism of the workers. The most experienced ones know how to select the length of the ends so that complete knitting occurs in one movement. In experienced hands, such a device significantly increases labor productivity with excellent quality. |
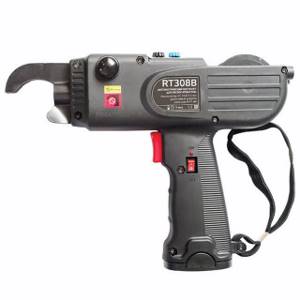
Auto | Invented for professional builders, but not popular among them. Due to the large mass, it is difficult to work with, only special wire is needed, it requires great precision in the location of the reinforcement, otherwise it often makes gaps. In addition, the cost of such an imperfect instrument is not affordable for everyone. When knitting, it takes a lot of time to replace the spools; the machine cannot be used in the rain. We have listed the most important disadvantages, but there are also less significant ones. Conclusion - since professionals do not use it, then such an invention can be considered in vain. |
Hook from a screwdriver for tying reinforcement
All of the described tools use tying wire with a diameter of 1.2–1.5 mm. It is drawn from low-carbon steel and additionally annealed. This technology makes the wire very soft, but with sufficient tensile strength. This is very important; stiff wire is difficult to work with. In addition, it cannot withstand repeated twisting and breaks.
How to check a hook for sharpness
There are a lot of ways to check the sharpness of a hook, you can look at your nail to see if it scratches your nail, you can try to pierce your skin, you can look through a magnifying glass, in my opinion, all this does not reliably show how sharp it is.
I advise you to simply buy one high-quality hook with a factory sharpening and compare how it feels with it; with experience, you will immediately understand how sharp the hook is.
Testing on a nail is not a bad way, but it depends on the type of sharpening; it may not work with some hooks. When checking on a nail, the hook should not slide over the nail; the sharp hook will immediately bite into the nail. Watch the video below:
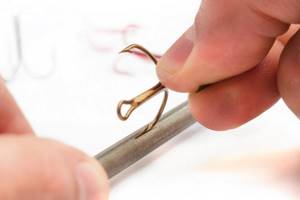
Main types of offset printers
A hook that has a Z-shape with a bend in the fore-end at the top is called offset. This hook was first used in the USA at the beginning of the 20th century. Since then, it has been continuously improved for use in combination with other equipment.
What motivates anglers when using an offset hook in fishing?
We suggest you read: How to make a knot on a hook
The big advantage of using them is:
- The hook allows you to use it for catching fish in dense thickets.
- It allows you to reliably attach any bait, while preventing it from slipping off the hook. This is convenient when fishing with heavy weights over long distances.
- Its shape allows it to easily penetrate the side of the prey's mouth.
- Allows you to firmly hold prey when fishing.
Offset hooks are divided into two types:
- Worm-shaped.
- Coolheads.
These two types are very different from each other. Their differences lie in the dissimilarity of the design and the type of bait used.
Large-faced offset baits are used to attach massive silicone baits.
Moreover, the size of the hook itself is selected so that there is a reserve so that during the bite the bait does not slide down and at the same time the sting is exposed.
If a fisherman uses silicone worms as bait, and they have a thin body, then it will be rational to use worm offsets.
When using offset baits in fishing, most fishermen adhere to the rule that the width of the hook in the hook should always be about 2 times greater than the width of the bait itself.
The invention and the beginning of mass use of these hooks gave impetus to the creation of new types of baits and equipment.