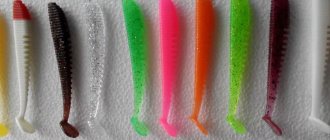
Those who want to make a Uralochka lead jig from scratch with their own hands and evaluate the vibrations of the Uralka when watching the video have come to the right page.
At the end of the topic, material is given related to balancing a reelless jig at the desired angle in space and methods of tying the loop of a jig to a fishing line are shown.
Using the example of making a lead jig from Uralochka with your own hands, the topic dedicated to homemade lead jigs almost ends.
But I must warn you: the materials on all the pages of the large topic with the technical processes for making lead jigs with your own hands, including ural jigs, are closely intertwined with each other.
Therefore, someone may have to get acquainted with the missing theoretical material on the previous pages of the section, which are looped with links at the bottom of each page. The link to the section is displayed in the sidebar to the right of the text.
The page you opened reveals the technical process of making a lead Ural jig with your own hands using a cold method without using any molds. It is for this reason that the output is homemade uralochki and other lead jigs of the most varied shapes and weights.
As for the manufacture of Ural jigs, below is theoretical material that will help novice fishermen understand the shapes and settings of jigs.
At the end of the page, those interested can learn how the angle of inclination of the uralochka relative to the horizon plane is adjusted by changing the bend of the suspension loop to the fishing line of the tackle.
Video: Homemade jig Uralochka
In order to better understand the presentation of further material, look in the first half of the short video at the vibrations of a homemade Ural jig. The action of a hand-made bait is controlled by a nod spring of a spring system set in a straight line.
On my summer and winter fishing trips, homemade massive Ural jigs are usually used for catching fish in the current. If in the summer, then with a side fishing rod.
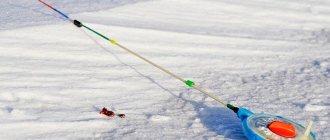
But the Uralochka jig, which is relatively lightweight in water, is very good in the reelless version of catching fish in winter fishing. You can watch the vibrations of several reelless jigs in another video at the bottom of the page.
Fishing technique with Uralka jig
The best jig for perch is considered to be the Uralochka, model 1 is one of the most catchy. When the fisherman attaches the bait to the line, it is positioned at an angle. The perch is large, so you can change the action of the jig as necessary. It is not necessary to move it frequently to achieve a high oscillation frequency. It is enough to swing the rod smoothly, because even small vibrations lead to a bite.
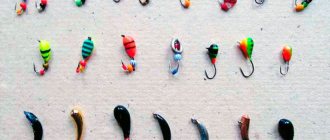
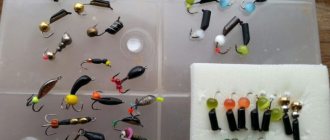
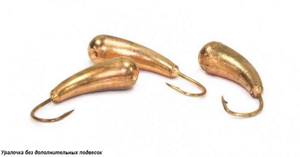
In stores there is a tungsten jig for sale PIRS Uralka. It can be supplemented with beads, beads and other attachments.

Features of the “game” of the bait
In winter, fishing can be successful; jigs for winter fishing should be chosen based on the preferences of the fisherman. Slow retrieving is effective, so Uralka is suitable for lovers of quiet fishing. In order to obtain vibrations with a low frequency, the basic model is supplemented with large beads. It can be replaced with a small plastic ring.
Once the base model is updated with elements, its game changes. She will become more active, her movements will be more expansive.
The Uralka with “paws” is noisier and will attract even inactive fish. Perch responds well to playing with bait. The game continues for a long time even when the rod stops completely. This Uralka is similar to underwater insects; the fish notices the “legs” from a great distance. To get the maximum effect, you need slow wiring; dotted wiring with pauses has worked well.
Uralochka is used without additional suspensions; the baits sway rhythmically and clearly in the water column. When loading, fishermen slow down their progress. This behavior of the bait is typical for highly curved products. They tremble even with a slight movement of the rod.
In order to “pacify” the bait, the jig should be supplemented with a parachute. It is made from pieces of wire, plastic wings and beads. All elements are fixed with glue. This design makes the game smooth, the swaying will be uniform.
Preparation of Uralochka jig
To make Ural jigs of different sizes and weights with your own hands, we will make a blank from lead in the form of an elongated cone with a truncated apex.
To do this, we place a round lead rod on the plate, put a metal plate on it and roll the lead back and forth under the pressure of our hands on the plate, gradually shifting the force to one of the edges of the rod.
As a result, we will get a long workpiece suitable for sequentially making with our own hands several uralochkas and other elongated lead jigs of different sizes and weights.
Next, we carry out the actions necessary to make the Uralochka jig of the required shape, then we cut the workpiece. Then we roll out the end of the long rod to make the next uralochka.
If one of the fishermen finds it not very convenient to handle a long lead rod, then first cut the round rod into pieces equal to the size of the jigs. Then work with each urinal individually, but then more lead will go into waste.
If any of the fishermen do not yet know how to get a round blank from scraps of lead, then let them open the topic Lead for a homemade jig.
Making a Uralochka jig
The sequence of making a Uralochka jig with your own hands is shown in the pictures on the left.
At the initial stage of making a lead jig, we will give a thinner section of a cone-shaped workpiece (position “a”) the same shape as a cone, but only with a sharp apex (position “b”).
This operation can be carried out using a small hammer, which will require a longer finishing process of the finished Uralochka jig.
You can roll out the body blank of a future homemade lead Uralka jig with an almost sharp top using the method proposed above. The diameter of the apex of cone “b” should not exceed 1.5-2 mm.
Let's continue the sequence of making a Uralochka jig from a lead rod further.
Let's support the end of the cone on a wooden block and bend the uralochka blank. The bending angle of a homemade lead jig is selected based on the fishing conditions, your taste, or it should at least approximately correspond to that indicated in position “e”.
You can select the form for making a Uralochka jig with your own hands from the pictures of the previous page of the topic, or go down below the text.
Seasonal features of using this jig
Ural baits work well in all seasons, providing active play in warm and cold periods of the year. It is often possible to achieve a good catch not only in summer or winter, but in every season.
Read more
What is a nailball jig?
Ural baits provide active play in warm and cold periods of the year
Winter
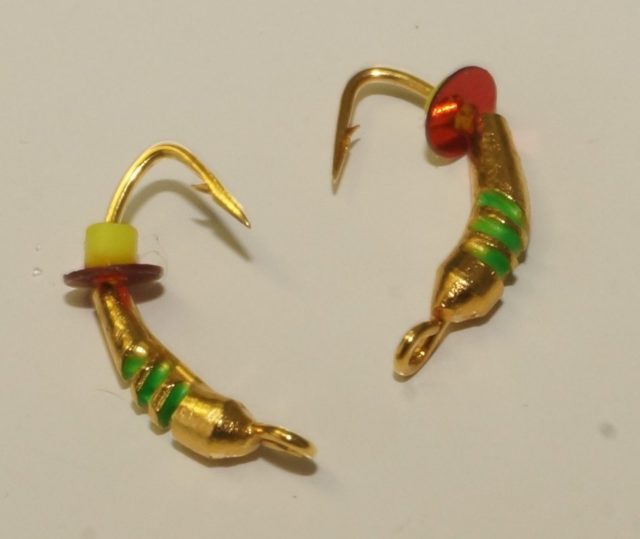
Winter fishing is complicated by the tendency of the inhabitants of the reservoir to stay in the bottom layers of water, where the water remains warm and saturated with oxygen. For winter fishing, it is better to use large, heavy bait. In still water, a jig weighing 1-1.5 g is suitable, and on a river with a strong current, the winter jig “Uralka” should be heavier - about 2 g. The weight of the bait is due to the need for fishing at great depths.
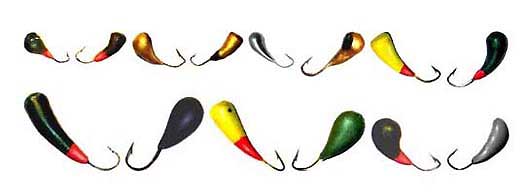
Uralochka jigs for winter fishing are more effective when the body is painted in bright colors: red, silver, gold. A good bite is observed with black bait, which breaks the rule. Fishermen love to use it on rivers with clear water.
Important! Just choosing a color is not enough; it is important to take into account the characteristics of the bait. On the hook, the bait should show an active and attractive game.
Summer
At the end of summer, the fish begins to prepare for the arrival of cold weather and wintering, which makes it hungry.
The choice of bait is based on the angler’s preferences in the catch:
- small baits are effective when catching ruffe;
- medium sizes help in catching roach and small perches;
- Trophy perch and bream are caught well with a large jig.
Medium-sized baits are used more often; they are universal in most reservoirs. It is better to use brown and red jigs for bream and crucian carp.
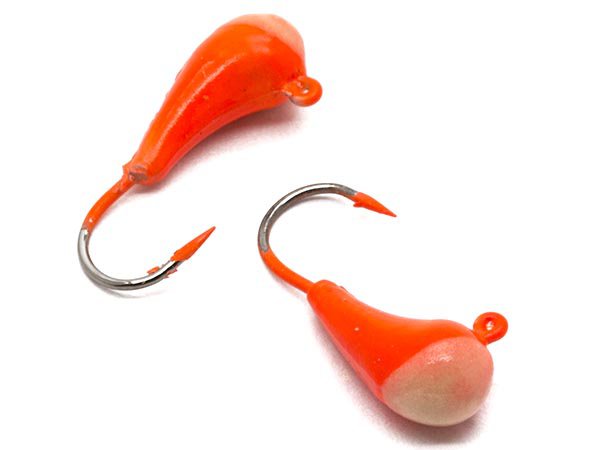
It is better to use large, heavy bait for winter fishing
Puncture of uralochka for passing fishing line
The hole for winding the fishing line in a home-made lead jig can be pierced with a thin awl or a needle held in pliers.
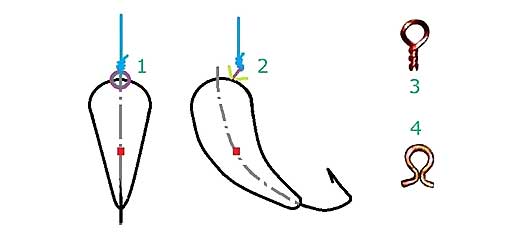
Punctured channel holes for passing fishing line in Uralochka jig blanks of various shapes are shown in Figure 1 with blue lines “d”. The main thing here is not to make a mistake in choosing the place where the fishing line enters the body of the jig, since for any jig this point will be the reference point.
Incorrect location of the starting point for puncturing the channel for passing the fishing line will lead to the skew of the finished jig in the water space or will not correspond to the angle of inclination selected for it in space.
At this point, making the body of the Uralochka jig with your own hands can be considered complete. All that remains is to solder a suitable hook into the finished lead jig blank.
Soldering a hook into a Uralochka jig
Soldering the hook into the lead jig uralochka can be done either before separating the workpiece from the rod, which already has the finished shape of the jig, or after.
To solder a hook into the nasal end of a future homemade urinal to a depth of 3-4 mm, use a thin awl or a thick needle to pierce a blind hole (position “c”).
Before separating the lead jig blank from the rod, I would first pierce the channel that serves to pass the fishing line through the ural, then solder in a hook of the required size (“g”). It will be more convenient this way.
It is clear that at the end of the hook shank the fastening spatula or ring must be bitten off.
Tinning - soldering a hook into a small frame
If the hook is soldered into a lead jig Uralochka using acid flux, then the soldering area or the entire jig Uralochka is washed with warm water. Before you begin, familiarize yourself with the consumables for soldering and tinning the hook.
The channel pierced for the hook shank to enter into the body of a homemade lead jig is shown in blue “g”. The end of the hook shank must be well tinned before soldering into the body of the hook.
After the hook is securely sealed into the lead jig, we can consider that the “Uralka” has been roughly manufactured. Try turning the soldered hook around the longitudinal axis. Then the lead uralochka blank is separated from the rod.
Separating the urinal from the workpiece rod
The operation of separating a small piece with a soldered hook from a solid workpiece can be carried out using a thin knife and a hammer on a wooden block. But we cut to length not only the configuration of the homemade lead uralochka itself, but we also borrow 3-4 mm of length from the mass of the workpiece rod.
This reserve will allow us to set the desired shape for the rear end of the bait in the future and (most importantly) to balance the suspension angle of the lead jig in space (usually the suspension angle of the bait jig is chosen to be close to 45 degrees relative to the horizontal plane).
This is followed by finishing the body of the home-made Uralochka jig and sharpening the hook tip. But this is only if the hole for the line to pass through is correctly pierced in the jig.
If, when suspended on a fishing line, a self-made ural jig hangs crookedly or not at the angle we would like, then read the rest of the text on the page.
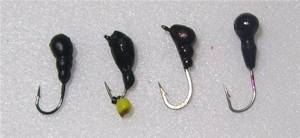
Appearance of homemade “Uralochka”
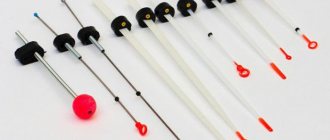
The appearance of homemade ural jigs and the position (angle of inclination) occupied by the baits in space under fishing conditions are shown in the photograph.
All we have to do is finish making the little urinals with our own hands and correctly balance the lead lures in space at the appropriate angle of inclination.
The angle of inclination of any lead jig, including a homemade “Uralochka”, can be slightly changed using the advice in the article Eliminating jig defects. But for large jigs this issue is better addressed on the next page of the topic.
What kind of fish to catch
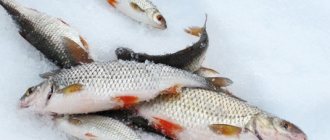
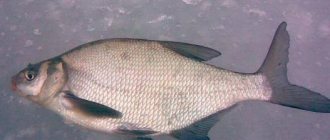
Fish are caught with baitless jigs the first time they go out on the ice. The roach reacts the worst to this tackle. Bream, white bream, and silver bream rarely bite, you have to adapt to them, but the aces can do it. Sometimes carp bite.
Pike perch are caught well. They catch grayling and chebak.
Perch is an adventurous jig fisherman. He is the most interesting to play with. Each fisherman has his own catchy jigs, his own pendants, used specifically for perch.
The list of fish that can be caught this way goes on.
"Crap"
Balancing the Uralochka jig
Properly balanced with artificial baits, the reelless jig “Uralochka”, suspended on a fishing line, should take approximately the same angle of inclination in the water space as shown in the photo.
But to do this, you need to choose the right fulcrum on the body of a self-made lead jig. And the fulcrum for any jig will be either the entrance of the barrel bore pierced in it for passing the fishing line, or a loop soldered into the body of the jig.
Well, so that everyone can understand why the fulcrum point is mentioned here, it should be added that the center of gravity of any body suspended on a thread will always be located under the suspension point.
Therefore, by changing the location of the suspension point of the lead jig, we can also change the angle of inclination of the longitudinal axis of the homemade uralochka.
This is the balancing of the body of the jig relative to the space surrounding it. Read more about balancing the Uralochka jig below in the text.
Angle of inclination of the Uralochka jig
Next, we’ll start adjusting the angle of inclination of the self-made uralochka jig.
The magnitude of the angle of inclination will entirely depend on where on the body of the bait we mark the entry point of the hole intended for passing the fishing line.
In the photo, the uralochka is shown in a reelless version with light artificial attachments on the hook, which will have virtually no effect on the angle of inclination of the jig in the air. But they will largely correct the fluctuations of the reelless urinal in the space of water.
It is the point at which the jig is suspended from the fishing line that will set the angle of inclination of the longitudinal axis of the fishing line to the horizontal plane. At the same time, in principle, we should not worry about where this hole will come out from the bottom of a homemade lead jig.
Be it in the area of the back end of the bait you made yourself, somewhere on the side or in the middle (or even in the next apartment). Only the aesthetic qualities of the jig may suffer from this, but will not in any way affect the running properties and the angle of inclination of the uralka in space.
Therefore, I repeat once again: the place from which the puncture hole begins (the highest point of the barrel channel for the passage of fishing line) must be approached responsibly.
For the Ural jig (and any other) this point will be the reference point. Here you can simply solder a loop to tie the fishing line.
For a reelless jig with a loop, the angle of inclination can be adjusted within small limits.
It is clear that one of the guidelines when choosing a support point for a homemade Ural jig will be its longitudinal axis, or rather, the plane of the longitudinal section, along which the correct puncture of the body of the jig should be carried out.
As for another guideline, so that you don’t have big problems in the future, it’s better to refer to the positions of the drawing. It shows different angles of inclination of the same jig.
How to tie a Nailball
A nail ball is a jig with an eyelet (ring) used to attach it to the fishing line. We have already talked many times about how to tie a jig of any type, how to tie a devil. Let's show this using the example of the Nail Ball:
- We pass the line of the winter fishing rod through the eye of the jig;
- We tie a knot using one of the methods described in the video below;
- We tighten the knot after wetting it with water;
- Trim off the excess end of the fishing line.
Adjusting the tilt angle of the uralochka
For me, the position of the uralka, shown in the top two positions of the drawing, will be more correct, both in the non-reeling version of using a jig for fishing, and when fishing with a large uralka with a bunch of bloodworms in a good current, where the nose of the jig is noticeably raised by a stream of water.
By the way, if you solder another hook into the reelless “Uralochka”, you will get a ready-made “goat” jig. Her preferred position when fishing is shown in the bottom position of the image.
In order to adjust the required angle of inclination of a fishing rod with an already pierced hole or a soldered loop, hang the bait on a fishing line (thread) and adjust the angle of inclination of the jig, gradually removing part of the lead from the back or nose end of the jig.
Or vice versa - by soldering a layer of solder in the right place on the surface of the jig. Nowadays I never carry out this operation, since everything is already done automatically.
If, when adjusting the angle of inclination of a self-made reelless jig, you do not want to change the weight of the jig, then to make the adjustment, simply pierce a through hole in another place, or re-solder the loop.
It remains to deal with one more question: what is the best way to tie the ural and other jigs to the fishing line. The answers to these questions are given on the next page.
But first, watch my video showing the oscillations of reelless jigs, including the Uralochka, under the control of a side nod with a homemade spring of a spring system, which is no less than four decades old.
DIY making
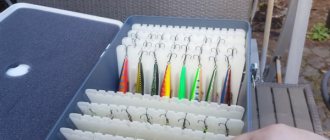
Fishermen resort to various tricks, using jigs and other types of these devices. Sometimes there are negative reviews regarding the quality of such products. When going to the store, do not hesitate to ask the seller any questions you may have; you can ask him to show you a particular product. You can build a nailball jig with your own hands if you don’t want to spend money on finished products or if you want to give this device some special features.
To make such a bait, you will need glass beads and tungsten balls with a diameter of 2.8-4 mm. You will also have to stock up on a set of hooks from 14 to 18 numbers. The body of the spinner is made of tungsten. Take a wire of this material of suitable diameter. You can pick up steel wire, but it is lighter and not entirely suitable for the job. It is the tungsten ball that manages to provide the bait with optimal weight, depending on the body and the material from which it is made.
The most affordable option is to attach a hook to the body. In this case, it is worth leaving a gap for the ball to move. The body of the bait should not extend beyond the bending area of the hook. It is better to paint the prepared bait in a dark color - black or green . It is advisable not to move the jig more than 350 times in a minute.
You won’t have to resort to any extraordinary actions when catching perch, since this predator is extremely primitive compared to other types of fish. If you have to hunt white fish, stick to a relatively simple set of movements. They do not need to be stopped even after the jig sinks to the bottom.
It is important to organize breaks, otherwise fishing will not be effective. Fishing for roach involves a vertical position of the fishing rod while playing with bait. Movements must be longitudinal as well as transverse. Due to this, fish can be attracted faster.
Bites may be barely noticeable. The main thing is not to miss the moment. If you are catching bream, it is better to raise the fishing rod at an angle of 160°, and the vibrations should be no more than 150 times per minute. It is important to choose a nod that can take into account the weight of the jig and the conditions in which fishing takes place. The highest quality and most effective nods are considered to be those made from the spring of a mechanical watch.
Tying a Ural jig to a fishing line
The Ural jig is tied to a fishing line in two generally accepted ways:
Through a through hole pierced in the bait, we tie the jig to the shank of the hook, for which there are many types of fishing knots.
According to the second method, the fishing rod can be tied to the fishing line using a loop or ring soldered into the body of the jig.
The second method of fastening on a fishing line, which allows you to change the position of the jig in the water space relative to the suspension point within small limits, is more preferable for tying large small fishing rods in which it is more difficult to pierce a through hole.
To do this, solder a loop of thin hard copper wire or a twist of a ring on top of a self-made Uralochka jig.
Tying a Uralochka jig with a loop and a ring
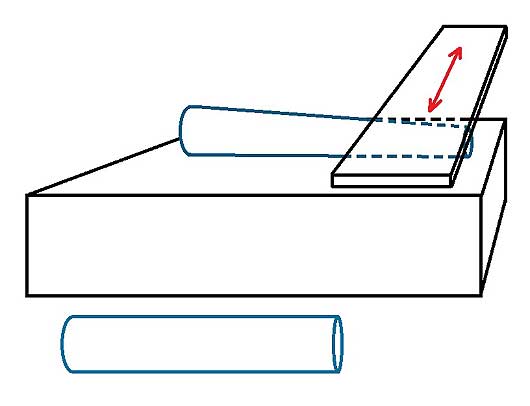
Let's take a closer look at the second method of tying a small jig to a fishing line, where you should distinguish between two priority positions of the oval ring of the soldered loop: along or across the body of the bait.
If you tie a jig to a fishing line, then the center of gravity of any bait (shown in the figure as a red square) always ends up under the suspension point or, in other words, under the fishing line knot tied to the jig.
Based on these considerations, by changing the position of the uralka’s suspension point by bending the loop or ring, we can also change the position of the jig in the space surrounding the bait.
If we are more interested in adjusting the angle of inclination of the jig relative to the horizon plane, then the loop for tying the fishing line should be soldered across the longitudinal axis of the “uralochka” (1).
In this case, due to a slight bend of the loop (2), it is possible to adjust the angle of inclination of the ural jig tied to the fishing line in space, which will affect the characteristics of its wiring in the water.
To eliminate the lateral distortion in the water space, the uralochka is tied to the fishing line by a loop with an oval located along the longitudinal axis of the jig. Then, by forcing the loop to bend to one side, the spatial position of the uralochka can be leveled.
Methods for tying jigs, hooks and spinners are described in detail in the topic “Fishing Knots”.
You can watch the oscillations of several jigs, including a small jig tied to the eye at the top of the jig, in another video on this page. Only here the nod spring is rearranged perpendicular to the whip of the winter fishing rod and lowered vertically down.
Types of baits
Despite the differences between the types of baits, they have common characteristics:
- standard shape: long drop with a slight bend;
- the ability to play and create vibration fields around. The fish feels vibration in the side stripe and acts on the prey as a bite activator;
- frisky game of bait;
- can be used for fishing both at shallow depths and near the bottom in deep-sea holes.
Fishing with bait
The role of the nozzle is to deliver food to the bottom of the reservoir. An exclusively single hook is attached to the jig, and you should choose a small nozzle. The hook also contains cambrics with beads of different colors; they additionally attract prey.
When inserting attachment equipment, it is important to make smooth movements with a greater amplitude in comparison with non-attachment models. Some fishermen cast the tackle and wait for a bite without any movement of the bait, but such tactics can only provoke very hungry prey to bite.
Baitless fishing
Uralka reelless jigs are only slightly inferior to baited tackle in terms of attractiveness from the point of view of fish. The design has a single hook to which multi-colored beads are attached. It is better to use a jig that is curved and longer than in the nozzle version, which will help the bait stay in the desired water horizon.
Read more
Methods for attaching maggots to a hook
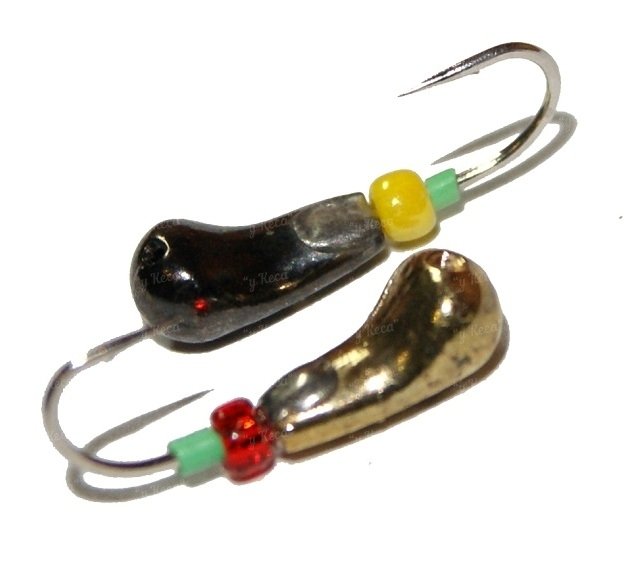
Additionally, cambrics with beads of different colors attract prey.
Quickly moving the fishing rod leads to high-frequency vibrations of the jig; it begins to move in the horizontal and vertical plane. Such a varied game often turns out to be effective in conditions without bite.