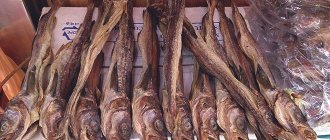
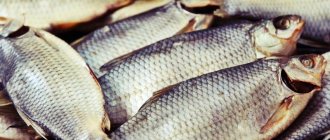
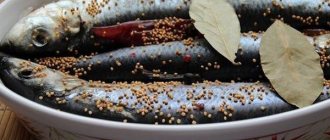
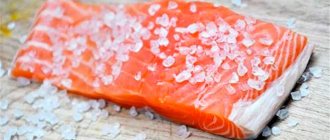
What fish can be dried: list, names, photos
Drying and drying fish are methods of preparing it for subsequent storage. The difference is this:
- drying is a preparation process in which fish can be salted or unsalted. The resulting unsalted product is a kind of semi-finished product that requires further preparation. Salted dried fish can be consumed immediately.
- drying - drying of raw materials, which must have previously been salted. The meat seems to mature in the process. After drying, the product becomes suitable for consumption without additional processing.
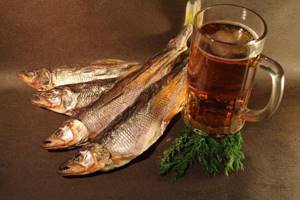
Usually when we talk about dried fish, we mean dried fish, which is considered an ideal snack for beer. Many types of fish are suitable for preparing dried fish. The main thing is that it is of medium size (no more than 1 kg) and not very fatty, since the thicker the carcass, the more salt is required, and the longer the drying process will take.
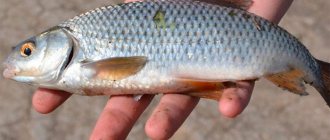
You can use both river and sea fish. The following river species are considered most suitable for these purposes:
- rudd
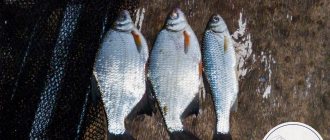
- bream
- ram
- roach
- vobla
- saberfish
- Vomer
- perch
- zander
- carp
- white bream
- pike
- gudgeon
- crucian carp
- ide
- blue
- carp
Please note that only fresh river fish, which is no more than a day after catch, is suitable for drying. Otherwise, the product may spoil before it has time to cook.
Dry fish
Among the variety of sea fish for drying, it is preferable to use:
- mackerel
- capelin
- bull
- smelt
- sprat
- herring
- sprat
- samsa
- sea bass
- red mullet
- osprey
- horse mackerel
- sea ruffe
Before using frozen sea fish, it must first be thawed at room temperature.
How to salt and dry fresh fish: preparation for drying, salting recipe
Before drying (curing) fish, it must be properly prepared.
This process includes several stages:
- treatment
- pickling
- soaking
The processing is as follows:
- Select carcasses weighing up to 1 kg. If you have a lot of fish, it is advisable to sort them by size, as they will take different times to cook
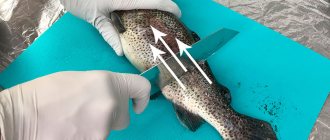
- Gut the carcasses. For large fish, it is better to make the cut on the back, in its thickest part, and for small fish, on the belly. Some fishermen prefer not to clean the fish, believing that the tripe makes it meaty and fatty. This product will have a slightly bitter taste. But on the other hand, specimens of the spring catch contain caviar, which is very desirable in dried fish. However, the one that feeds on vegetation still needs to be cleaned, otherwise the algae inside the carcass will begin to decompose and rot.
- If you decide to dry a large fish uneviscerated, use a syringe to pour a strong salt solution into its belly through the mouth opening.
- For large specimens, cut along the back for quick drying
Salting:
- Before drying fish, it must be well salted. The purpose of this process is to remove excess moisture from the raw material.
- In this case, oppression is necessarily used (150 g per 1 kg of fish), which is necessary in order to prevent the appearance of cavities in the raw materials where putrefactive bacteria can develop
- Also, salted raw materials must be kept in the cold so that the unsalted parts of the fish do not spoil.
There are different methods of salting. The most suitable for home use are:
dry (suitable for large fish):
- Gut the carcasses, then generously rub with salt on all sides, also pour into the gills
- prepare a basket or box with holes
- cover the bottom with thick fabric (burlap or canvas)
- lay the fish in layers, be sure to place the belly up
- generously sprinkle the layers with salt (for 10 kg of fish approximately 1.5 kg of salt)
- put in a cold place for 5 – 7 days
- the resulting liquid will flow through the holes (take this fact into account when installing the box)
wet:
- Pour coarse salt into the bottom of a vessel (such salt is absorbed more slowly, but draws moisture out of the fish faster)
- Rub the inside of the gutted fish with salt
- fold in layers (“jack” and so that the back of one covers the belly of the other), generously sprinkling each with salt. In this case, place larger fish on the bottom, and small ones on top.
- salt should cover the carcasses evenly, but not lie on it in a heap (on average, 20% of the weight of the fish). Each subsequent row of salt must be increased by 15%. And the latter should cover the fish by 0.5 cm
- Place a plate or an inverted lid with a weight on top. At the same time, the carcasses should not fit tightly against the walls of the dish so that air flow remains possible
- refrigerate for 3-7 days depending on the size of the fish
brine (in saline solution) – suitable for small fish (up to 0.5 kg):
- make brine - dissolve enough salt in water so that an egg placed in a container floats to the surface
- put fresh fish in there. In this case, the brine should cover it completely (approximate volume - 1 liter per 3 kg of raw materials). The fish can be immediately strung on ropes and salted directly in the bundles
- cover with a net and put oppression on top
- keep it like this for 3 days in a cool place
During salting, you can add a little sugar, bay leaf, pepper and other spices to taste. Fish topped with horseradish leaves turns out aromatic. You can check if the fish is salted like this:
- press your finger on the back. If a hole has formed, it means it’s ready.
- holding the head and tail, stretch the carcass. Salted fish will have crunchy vertebrae
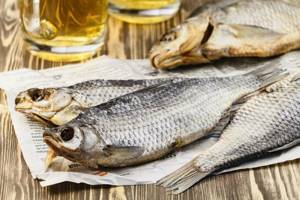
Soaking:
In order to remove excess salt from salted fish, it must be soaked in fresh water. In addition, this process will saturate the carcasses with liquid to preserve flavor and desalinize the surface layer so that they do not become soggy when finished. Do it like this:
- remove the fish from the brine and let it sit for about an hour so that the salt is evenly distributed throughout the meat
- rinse in fresh running water and thoroughly remove mucus
- fill with cold water and leave it like that, periodically changing the water (on average, the number of hours is equal to the number of days of salting). It is believed that when the carcasses begin to float, they are ready for drying
- wipe dry and place on a paper towel to drain excess moisture
Now the salted and soaked fish can be hung out to dry.
Dry salting
This salting method is most often used, as it is very simple. The dishes should be chosen so that the carcasses can easily fit in it (a wide pan or cup). You should pour a thin layer of coarse salt on the bottom, lay a row of fish, cover it with salt so that it is completely covered. The next row should be laid on top in the same way. And so you need to lay out the carcasses in rows, generously sprinkling each of them with resin.
We recommend: Three rules for using a triple brush for suede and nubuck
After the last row is laid, you need to put a plate or lid on top that fits freely into the pan and press it down with pressure (for example: a jar of water or a weight).
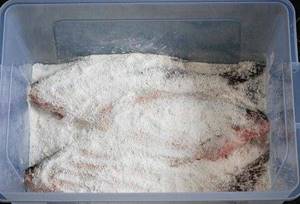
Place the dishes in the refrigerator for 4-7 days (depending on the size of the carcasses). After the specified time has passed, the fish must be taken out, the salt washed off well, and then soaked in water (4-7 hours), changing it several times. In this case, the number of hours is equal to the number of days of salting.
After this, you can dry the fish. It should be hung in a well-ventilated place. In summer you can dry it outside, and in winter a balcony or kitchen is suitable for this. You can dry it on the veranda or in the summer kitchen. The main thing is that it should not be exposed to direct sunlight. Carcasses can be hung by piercing a wire through the eyes, or you can make hooks from paper clips, with which they are hooked onto the upper lip, and the other side is hung on a stretched cord or fishing line. You can hang the fish by the tails, but in this case the fat and juice will flow out, and it will turn out drier and fresher.
Where, how and how long to dry dried fish?
Some people like very dry salted fish, while others prefer soft, as if under-dried, dried fish. Drying, in essence, is an incomplete process of drying a product.
Main drying conditions:
- relatively low temperature
- quite a long period
The best time for drying fish is considered to be autumn and spring (before spawning) for two reasons:
- fish during this period is especially fatty and tasty
- there is no heat, in which carcasses can deteriorate during prolonged drying
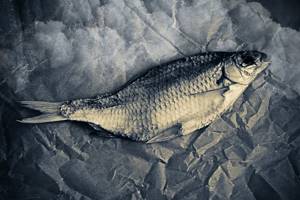
Process features:
- It is best to dry fish outdoors under a canopy, away from sunlight
- depending on the size of the specimens and weather conditions, the product is ready in 7-15 days
- Large specimens take a long time to dry and may deteriorate before they have time to dry. Therefore, they need to be dried at low temperatures (preferably in a cellar). The process takes up to 3 weeks
- in winter, the process should take place in a room that needs to be frequently ventilated, creating drafts so that the fish is exposed to air. In addition, it is necessary to periodically spray the room and carcasses with cold water, since when heating the air in the apartment is dry, and at low humidity the fish will not dry, but dry.
- It must be taken into account that drying in a warm room occurs faster, and the fish does not have time to acquire the amber color and transparency that is so valued
- Well-cured fish does not have the smell of raw meat, and the back remains a little soft
- the finished delicacy should be stored wrapped in paper or canvas
- dried fish can be consumed immediately, but lovers claim that for the best taste it needs to be “ripened” for at least two weeks in the cold and wrapped in parchment
Content
- How to dry fish at home
- How long to keep fish in salt before drying
- How long does it take to dry fish?
- How to persuade your wife to dry fish in the apartment?
- How to check dried fish for doneness?
- Video: How to dry fish at home
- What recipes do you know?
Striped robbers? Pike? Good pike perch? It doesn’t matter what you caught, what’s important is that if you decide to take your catch home with you, what should you do with it? Today we will tell you what to do with it, and how to do it without smelling so that your wife doesn’t kick you out of the house.
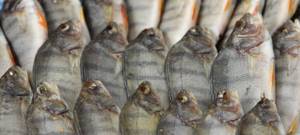
How to dry fish in the summer without flies landing?
When drying fish in the summer, there is a high probability of spoilage of the product by fly larvae. The aroma released by fermenting fish is very attractive to insects. To prevent this from happening, take the advice of experienced fishermen.
Before hanging fish carcasses to dry, lightly grease them (optional):
- vinegar solution (3%)
- sunflower oil
- weak solution of potassium permanganate
- a mixture of vegetable oil and vinegar in a ratio of 1:3
In addition, dry your catch this way:
- hang the fish out to dry late in the evening - then there are no flies. During the night, the carcasses will dry out, and their gills will become covered with a dry crust. Insects will no longer be scary
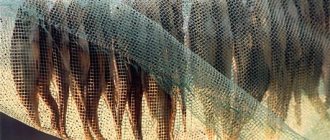
- cover the drying fish with a gauze cloth so that there is free space between them (use small spacers for this)
- Keep in mind that the longer the fish dries, the less attractive it becomes to flies. Therefore, it is very important to protect the product in the first days
Many fishermen use special boxes for drying, which are very easy to make yourself:
- make a box out of slats
- cover it with gauze or mesh
- make one side of the box with a lid so that you can take out the finished fish as needed
Treatment with a mixture of vinegar and oil
Another way is to treat carcasses with a special product. It is prepared from vegetable oil and vinegar in a ratio of 4:6. To prepare the mixture, first pour 6 parts of vinegar into a container, then 4 parts of vegetable oil.
After the fish has been soaked, it should be allowed to dry a little, then each carcass should be taken and immersed in the prepared product, which must first be shaken thoroughly. There is no point in shaking in advance, since the oil will still end up at the top. This product repels flies well, but does not in any way affect the taste of the fish.
Treatment with the mixture must be repeated daily. The carcasses can not be removed from the rope, but treated with a soft brush. Each time, dipping the brush, you need to shake the product and sweep over the carcass three to four times from head to tail and along the sides. The head, tail, and fins need to be treated.
If the entrails have been removed from the fish, pieces of cotton wool soaked in the mixture can be placed in its belly and under the gills.
For three kilograms of fish, a half-liter jar of solution is enough. For large specimens, more product is needed: the same weight may require up to 1 liter. If the fish is small, you can put it in a jar half filled with fly repellent, close it and shake it a few times. Then let it drain a little and hang.
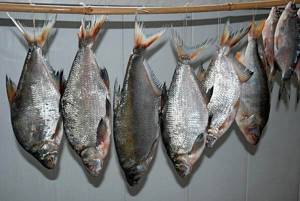
Not a single fly will land on processed carcasses, even if it flies close
If flies continue to land on the fish after treatment, the procedure should be repeated again. For small ones, two treatments every two to three hours are enough, for large ones – three to four.
Wasps require more thorough treatment because wasps are not as sensitive to odor.
How to dry fish correctly: head down or up?
Often a dispute arises between fishermen about how to string a fish on a rope: through the tail or the head? In fact, both of these methods are correct, and the choice of drying depends on your preferences:
- head down - the fish will dry more evenly and faster, since the moisture will drain through the mouth. The final product will be less fatty, and such fish will be stored longer. In the fall, it is recommended to hang it this way, because during this period the fish is very oily and can take a long time to dry.
- head up - the fat remains inside the carcass and saturates the meat. This product will take a little longer to dry, but it will be more fragrant. This is how it is recommended to dry low-fat fish. However, if it is not gutted, then the bile found in the tripe can negatively affect the taste of the finished product, and it will be bitter.
How to salt fish for drying or wet drying
For drying, choose not very large fish up to half a kilogram. In the hot season it is necessary to gut it, in the cold season - not. There is no need to wash the fish, just wipe with a dry towel to remove excess moisture. For cooking, be sure to use coarse salt. Any other method will not work, since our goal is not to add flavor to the fish, but to remove moisture from it. Such fish, salted for drying, will have an excellent smell and taste. The only downside of coarse salt is that it dissolves slowly, but absorbs more moisture.
Next, we do this: pour salt into a bucket or basin (if you don’t have either, you can take a pan), but not too much. The fish should be laid out so that the head of one touches the tail of the other. Salt each layer well. After the fish is finished, you need to pour enough salt on it so that it covers the entire surface. You can add a little sugar for taste. Cover with a lid and place under pressure. The heavier the pressure, the tastier the fish will be. It prevents air from leaking into the container and prevents the growth of bacteria. After about 5 hours, the fish releases its juice - brine. It needs to be kept in as cool a place as possible, maybe even on ice.
How much salt should I salt fish for drying or drying? It takes about two to three days to salt in this way. After this time, the meat of well-salted fish becomes gray. The next stage will be preparation for stringing and hanging. Salted fish should be soaked under running water until it begins to float. The fish is hung in the following way: special hooks are passed through the eye and hung on a rope. The fish must dry after soaking, so it is better to hang it out overnight to prevent flies from sitting on your catch. In the morning, to repel flies, the fish are sprayed with a solution of vinegar and water. Drying or drying lasts up to eight days, it all depends on the size of the fish.
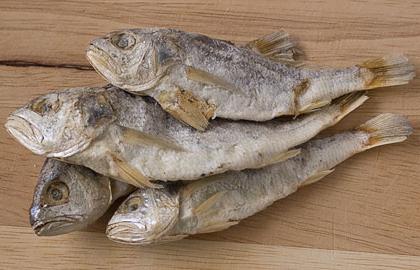
Is it possible to dry fish without scales?
Usually, when drying fish, scales are not removed for the following reasons:
- it protects the internal tissues of the carcass from deformation and contamination
- when salting, this will protect the meat from being severely corroded by salt
- the absence of scales will lead to excessive drying of the product
Drying fish
In some cases, the scales are removed from the fish. As a rule, this is done with large specimens or for the purpose of more convenient use of the finished product. However, experts say that such fish is less tasty, as it turns out to be too dry and unflavoured.
Keep it at its best
To what condition you dry fish is a matter of taste. Some people like it with cheese. Some are drier. But no one likes to dry up like a mummy and crumble into salty dust. My advice to you: you can dry the fish anytime, anywhere - put it on a piece of newspaper and turn it from side to side once a day. It’s better to remove it, mommy, early (hard, but pliable), wrap it in a rag or paper bag and put it in the bottom of the refrigerator... If, of course, there is something left to put.
To preserve fish on hot summer days, I top it with nettles. The belly and gills are also stuffed with nettles. In this way, you will increase the shelf life of your catch several times; To prevent scales from the fish from scattering in different directions and from getting on other products, the fish is placed briefly in cold water before cleaning. After this it is cleaned. Wet scales stick to the knife blade.
Fish with small scales, for example, perch, are first dipped in boiling water for a few seconds. After the scalding procedure, the scales can be easily removed from the fish carcass; Also, the fish cleans very well after treating it with vinegar, and in order to prevent the fish from slipping in your hands, your fingers are first dipped in coarse salt.
How and how long to dry fish in an apartment, on a balcony in a garage?
Often, city residents have to dry their catch indoors, especially in winter. At the same time, there are often cases when the fish turns out to be tasteless or even spoiled. To prevent this from happening, and to prevent your efforts from being in vain, consider the following features of drying indoors:
- Before salting, it is better to remove the entrails from the fish. In an apartment, gutted fish is guaranteed to be salted and not spoiled
- after salting and soaking, hang the carcasses over the bathtub to drain the liquid
- Start the drying process in the evening: hang the fish and open the window at night. This will reduce the unpleasant smell in the apartment
- the balcony on which you dry the fish should be well ventilated. If it is glazed, then open the windows more often. In summer, be sure to provide protection from insects. No matter what floor you live on, the aroma of fish is sure to attract flies
- In winter, you can hang the fish in the kitchen above the stove, but not very low (at least 80 cm). So it will dry in 3-7 days
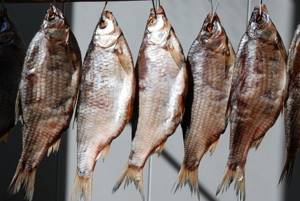
Drying fish on the balcony
- For drying indoors, you can use a fan to circulate air
- some dry fish behind the refrigerator, hanging it on the radiator
- Keep in mind that during the drying process, moisture and fat will drain from the raw materials. Therefore, place some container or cover the floor
- be prepared for the fact that during the first few days of drying there will be a specific fishy smell in the room
- It is impossible to say exactly how long the fish will dry indoors. This process can take from 3 days to two weeks. Check the readiness of the product by periodically tasting it.
Preparing a simple remedy to protect fish from flies
In this case, we will need 6 parts of vinegar. You can use absolutely any vegetable oil – 4 parts. These two simple ingredients need to be mixed correctly. First, pour the vinegar into a glass jar and add oil to it.
At the same time, it will definitely gather on top. Don’t rush to stir it in vinegar right away; you won’t be able to do it anyway, and it will definitely float up again. All this can be done slowly.
To treat 3 kg of any small fish, you will need half a liter of such a protective mixture, and the same amount of large fish will need a little more - from 0.7 to 1 liter.
When you salt and soak the fish, be sure to dry it a little so that the water and salt drain from it and do not get into this protective mixture. They can greatly weaken its effect.
How and for how long to dry fish in the oven?
Using an oven is a simple way to speed up the process of drying salted fish in an apartment.
The correct way to dry it in the oven is as follows:
- gut the fish
- salt and soak the carcasses in the usual way
- turn the oven on convection mode
- set the temperature to low (about 40 degrees)
- place the fish on a baking sheet, having previously covered it with parchment or foil
- Place the pan in the oven, leaving the door ajar about 7 cm
- After a couple of hours, cover the fish heads with foil so they don’t burn.
- leave to dry for another 3-4 hours depending on the size of your fish
- take them out and string them on a wire or rope
- dry in a well-ventilated area or outside (it will take about a day)
You can get an excellent snack for beer by drying too small a fish in the oven. This is done simply:
- prepare 500 g of very small fish (smelt, sprat, samsa)
- remove scales if necessary; carcasses do not need to be gutted
- rinse well
- dry thoroughly with paper towels
- mix 1 tsp. salt, 0.5 tsp. sugar and 0.5 tsp. lemon juice
- distribute the spices evenly over the fish, rubbing them in thoroughly
- cover with a plate and refrigerate to marinate overnight
- grease a baking sheet with vegetable oil
- Place the fish in one row so that they fit tightly together
- preheat the oven to 200 degrees
- place the baking sheet there for 15 minutes
- after this time, carefully turn the fish over to the other side
- bake for another 15 minutes
- cool
Salt in brine brine
This method is also good for home use. It allows you to get evenly salted fish in a shorter period. To do this you need:
- Prepare a supersaturated saline solution (brine). To do this, dissolve the salt in water, gradually increasing the concentration. The solution is considered ready if a piece of potato or a raw egg does not sink in it. You will need approximately 1 liter of brine per 2 kg of raw materials.
- Pour a thin layer of salt into the bottom of a wide container.
- Place the carcasses in a container.
- Pour brine so that it covers the fish completely.
- Cover with a plate or lid and put pressure on top.
- Place the container in the refrigerator for 3-4 days (depending on the size of the fish).
- After the required time has passed, remove the carcasses from the brine and soak in clean water for about 30 minutes, changing the water every 10 minutes.
We recommend: Thermal film instead of third glass: we insulate the house quickly and effectively
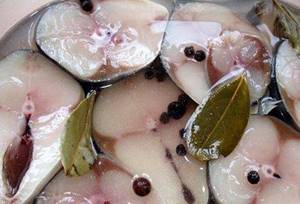
After this, let the water drain and dry, hanging in the same way as with the dry salting method.
How and for how long to dry fish in an electric dryer?
Many people use an electric dryer to speed up the process of drying and drying fish. Such a device is convenient in that elevated temperature and forced ventilation help accelerate dehydration of the product.
Features of this method:
- It is not necessary to marinate the fish for a long time, 7 hours is enough
- at 50 degrees the fish is dried for about 5-7 hours. At a higher temperature, the carcass can simply steam and the meat will separate from the bones. Some advise not to turn on the heating awning at all, but to set the device to the blower mode. This way the fish will dry longer – about a day.
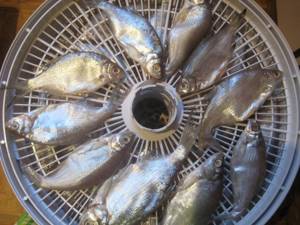
Drying fish in an electric dryer
- To speed up the process, you can dry the fish not whole, but by cutting it into layers
- Dried fish, pieces of which were marinated in a marinade of 0.5 cups of lemon juice, 5 tsp, is very tasty. salt, 2 tbsp. chopped parsley and 1 chopped onion
How and how long to dry fish on a radiator?
During the cold period, when the heating season begins, it is convenient to dry salted fish using hot radiators. Typically, the product is ready in 4 to 8 days using this method. There are several options for such drying:
- under the battery - lay the carcasses on the floor on a double layer of paper or cardboard. When one side of the fish is dry, turn them over to the other.
- on the battery - cover the radiator with a rag so as not to get it dirty. Hang a bunch of fish on it like a Christmas tree garland. After a couple of days, turn the other way
- near the battery - hang the prepared fish on the clothes dryer and place it next to the battery
With this method, you need to ensure that the fish does not dry out. Otherwise, the meat will separate from the bone, and it will not be very tasty. If the radiators in your apartment are very hot, place the fish half a meter away from them.
How and how long to dry fish in the microwave?
The microwave oven is difficult to dry fish. This is due to the fact that for this process it is not so much temperature that is important as air circulation. And it is almost impossible to achieve this in a microwave. In addition, while this kitchen appliance is operating, you cannot open its door, as is the case with an oven. And there will be no additional air flow.
Therefore, only a convection microwave is suitable for drying fish. The temperature should be set low (no more than 40 degrees), and the fish should be laid out in one row. Drying time depends on the size of the fish and the features of your oven.
At the same time, there will always be a high probability that your fish will simply be baked and not dried.
How to properly dry perch, crucian carp, sabrefish, kutum, roach, bream: tips and recipes
Each fisherman has his own method of salting and drying his catch. It is believed that different types of fish require their own drying subtleties. We bring to your attention some tips on drying fish from experienced fishermen.
Perch is one of the most common fish in our reservoirs. Not everyone likes it, since its meat is not very fatty, even rather dry. However, properly cured perch has a pleasant, specific aroma and excellent nutritional properties.
How to dry perches correctly:
- carry out the process in spring or autumn, since in the summer heat the scales of this fish turn into a dense crust, and the meat inside begins to deteriorate
- Before salting, large specimens are cleaned of entrails, small specimens are not cleaned
- stack the carcasses in rows, generously rubbing and sprinkling them with salt and sugar (500 g of salt and 5 tablespoons of sugar per 2 kg of fish)
- keep in the cold under pressure for 3-4 days
- soak in fresh water for about a day
- dry for about a week
Crucian carp is a popular fish that is very tasty when dried. It must be gutted before drying, otherwise it will be bitter. For pickling, take 1 kg of salt and 1 tbsp. sugar for 7-10 kg of raw materials. They dry, as a rule, for about 6-7 days, head down, placing spacers in the gills.
Chekhon is a valuable commercial fish that has an elongated shape and resembles a saber. When dried, it has wonderful flavor characteristics, although not everyone likes its bony nature.
Features of preparation and drying:
- You need to clean the fish from the insides very carefully, without damaging the film inside the belly, because it prevents fat from leaking out of the meat
- for salting, take about 100 grams of salt for 1 medium carcass
- Some fishermen do not soak the fish in water after salting, but only wipe it or put it under pressure to remove the moisture
- dry for about 10-14 days, while the first two days - head down so that the liquid flows faster than glass, and then change position
Kutum is a rare Caspian fish, very tasty and valuable. Its meat is tender, without small bones. But it is very difficult to properly salt and dry it due to its high fat content and meatiness. Therefore, when salting, do not spare salt and dry it at a low temperature.
Roach is a type of roach that belongs to the carp family. Very often used for pickling and drying. It is usually salted for about 3 days, then soaked for about 6 hours. This way the fish turns out lightly salted and tender. It is dried for 13 to 30 days.
Bream is probably the most popular fish snack for beer in our area. We offer several ways to dry it.
Method 1 - Volga-Akhtuba (suitable for drying at the fishing site)
- gut the fish
- spread the carcass along the ridge
- roll in salt on both sides
- hang in the sun and wind
The bream dries very quickly, but does not have a special taste or aroma.
Method 2:
- gut the carcass, being sure to remove the black stripe along the ridge
- rinse thoroughly inside
- take 250 g of salt per 1 kg of raw materials
- salt the carcass well
- place in an enamel bowl, the bottom of which is also covered with salt
- place the weight on top
- after 2 days, rinse the fish
- hang to dry at a temperature of about 15 degrees for 7 - 14 days
Method 3:
- Gut the carcasses
- make a saline solution (2 cups of salt per 2 liters of water)
- put bream in it
- press down with a weight on top
- salt like this in the cold for at least 2 days
- rinse well in cool running water
- dry in the shade for 2 weeks

Carp is very tasty when dried. However, not everyone knows how to dry it correctly:
- remove scales and gut
- cut off the tail and head
- salt using dry or wet method for 10 days
- strain
- mix salt with saltpeter (0.5 - 1% of the volume of salt)
- rub the fish well
- dry in a ventilated area for at least 2 weeks
Not everyone knows that dried salted fish can be consumed not only as a beer snack. Try to diversify your menu:
- grind dried carcasses into flour and add the resulting powder to soups, salad dressings, fish cakes
- cook fish soup based on this fish (salt the dish with caution)
- prepare a paste for sandwiches: mix chopped fish with sour cream, mayonnaise, herbs and a clove of garlic
- make a casserole: soak the fish in water for about a day and cut into pieces, place on thinly sliced potatoes, pour in a mixture of milk and eggs, bake in the oven
