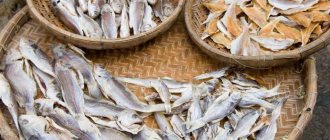
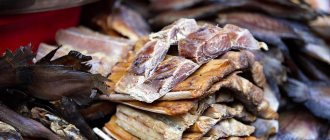
Drying is a very popular way of preparing fish, especially among fishermen. In this form it can be stored for a long time, and it makes an excellent snack.
The drying process is preceded by salting, after which the fish is soaked in cold water for two hours and dried under natural conditions for 4 to 10 days. To do this, hang it upside down in a draft in the shade. The smell of dried fish attracts flies, and they quickly flock to the drying area. And here the relevant question for fishermen and ramming lovers arises: how to dry fish so that flies do not land.
What is the difference between dried fish and dried fish?
People are little interested in the differences between drying and drying if it does not prevent them from enjoying their favorite taste. For those who have decided to learn the intricacies of preparing dried fish at home, it is important to understand that drying is only a certain stage preceding the drying of salted fish. While dried fish is unlikely to transform into the dried stage. Let's look at the main differences between harvesting methods:
- Both salted and unsalted fish are dried. An unsalted product is a semi-finished product intended for preparing soups and other fish dishes. Salted fish can be eaten immediately.
- Only salted fish is dried. During the cooking process, the product ripens, acquiring the required characteristics. Immediately after preparation, the product can be eaten.
This is interesting! Polyunsaturated fatty acids preserved in dried fish stimulate the functionality of the hematopoietic system and protect the body from the occurrence of malignant neoplasms.
Advice from experienced housewives
When preparing dried fish, we recommend taking into account the following nuances:
- The best time to prepare the product is autumn and spring, since during these periods the fish itself is fattier and turns out much tastier.
- To prevent wasps and flies from landing on the carcasses, we hang them out at night. This way, they will have time to weather and dry before the morning and will not attract insects. Additionally, you can coat the product with a mixture of sunflower oil and vinegar (3:1).
- If during soaking some carcasses floated, this “indicates” that they were poorly salted. They should be dried separately and also eaten first.
- You should not dry the product in the summer, because under the influence of high temperatures the carcasses will turn out bitter or completely rotten.
To properly dry fish at home and get a tasty and aromatic product, you need to follow all the main stages of its preparation, as well as follow our recommendations for preparing the product, salting it and drying it.
How to properly dry fish at home
At home, a natural drying method is used. To get a truly high-quality, shelf-stable and tasty product, you should approach the preparation process correctly. The following points require special attention:
- After soaking/salting, each carcass must be pierced and strung on a strong fishing line. Make punctures at the location of the eyes. You can also thread the fish lips through a paper clip and then hang the resulting hooks on a string. Attention! Carcasses should not touch.
- To ensure that a large carcass dries evenly, place spacers in the belly using matches or toothpicks. Small fish can be dried on a special mesh stretched over a rigid frame. To prevent the fish from going rancid, boiling and leaking fat, it needs to be hung away from direct sunlight (the drying area is dry and well ventilated). It is important to ensure the temperature is not lower than 18 C° and not higher than 20 C°.
- In the warm season, you can dry it directly in the open air: in the shade of trees, under a canopy, in a gazebo. In the autumn-winter period - on a glazed loggia, attic, kitchen.
- You should not hang your catch in areas where paint and varnish products are stored or where renovations have recently been made and the smell of paint has not had time to dissipate. The fact is that the fish will instantly “smell” of acetone and it will be impossible to eat it.
During storage, the workpiece dries even more, losing any remaining moisture day by day.
Which fish is suitable for home salting and drying?
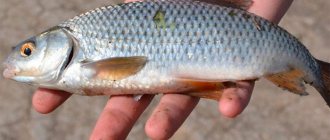
For home salting and drying, you can use both freshwater and sea fish. The most suitable for these purposes are:
River/pond inhabitants: rudd, bream, bream, roach, ram, roach, sabrefish, perch, pike perch, womer, carp, pike, gudgeon, crucian carp, ide, bluegill, carp.
Important! Only fresh freshwater fish is suitable for drying. If the catch has been stored for more than a day, it cannot be used for harvesting.
Sea inhabitants: mackerel, capelin, smelt, gobies, sprat, herring, sprat, samsa, sea bass, red mullet, rock, horse mackerel, sea ruffe.
Important! When using frozen sea fish, it is first defrosted naturally. To do this, the carcass is left at room temperature until it is completely thawed.
How to properly prepare fish for salting
Salting is the most important stage in preparing the product, removing excess moisture from the fish. Before salting fish for drying, you need to carefully inspect and select carcasses no heavier than 1 kg.
Important! If you find black spots on a carcass, it is better to put it aside, because black spots may indicate that the fish is infected with helminths or dangerous infections. Yes, after salting, worms do not pose a danger to humans. But opisthorchiasis or diphyllobothriasis, which are difficult to diagnose, lead to the development of dangerous conditions and loss of ability to work.
If there is too much fish, it should be divided into sizes, since each size requires its own cooking time.
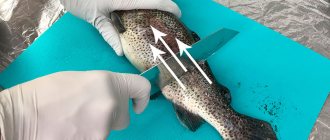
Then each carcass must be cleaned of dirt, mucus and gutted. Do not remove the scales. For large fish, cut into the meatiest part of the back, cutting through the meat all the way to the spine and separating the ribs on one side. Small - on the abdomen.

Some fishermen refuse to clean them, believing that the tripe makes the product more oily. This fish turns out to be bitter due to the bile, and this is not to everyone’s taste. However, if we talk about the spring catch, when the fish is filled with healthy and incredibly tasty caviar, it is better to dry it entirely.
In this case, a dense saline solution must be poured into the mouth opening of each large carcass using a syringe. Also, to speed up the drying process, it is better to cut large specimens along the vertebra.
Attention! If the fish is a “vegetarian” and eats exclusively algae, it should be gutted in any case. Otherwise, the plant food will simply decompose and rot inside the carcass.
After completing the above steps, you can start salting the fish using any of the following methods described below.
Wet method or salting in brine
To properly salt raw materials using the wet method, you need to follow the instructions:
- Pour a layer of coarse table salt onto the bottom of the container (the coarser the salt, the more moisture it will absorb);
- rub each carcass with salt from the inside and place it “jack” in one layer on the salt (the back of one covers the belly of the other);
- Place the larger fish on the bottom and the smallest fish on top;
- Cover each layer of fish with an even layer of salt - about 20% of the weight of the fish; each subsequent salt layer should “grow” by 15%; the thickness of the latter is at least 5 mm;
- cover the top and press down with pressure, at the rate of 150 g per 1 kg of fish (the carcasses do not rest against the walls of the container so that the flow of air is not impeded);
- Keep the container in the cold for 3–4 days.
Summer salting methods
You can salt fish for drying in the summer using a dry method, suitable for large specimens, or a hanging method, used for small or medium-sized fish. Let's look at both options in more detail.
Dry
As a rule, the dry method is used for large specimens that are gutted and have cuts along the back.
To do this you need:
- prepare a box or basket with holes, cover the bottom with burlap;
- place gutted, generously grated and salted carcasses there in layers, back down;
- Sprinkle each layer of fish with salt (per 5 kg of fish = 0.75 kg of salt);
- put in a cool place for a week.
When installing the box, it should be taken into account that the resulting brine will flow through the holes. So you should not use the dry method in the living room.
Provesny
The hanging method is another option for wet salting. String small fish onto rods or strong fishing line and lower them into brine so that the carcasses practically do not touch each other.
When brining uneviscerated medium-sized carcasses, their peritoneum is first filled with a strong saline solution. It is administered using a syringe through the oral cavity.
Tuzluchny
The brine method involves salting fish in brine and is used for specimens weighing up to 0.5 kg.
Procedure:
- prepare brine - dissolve salt in water until an egg placed in a basin floats to the surface;
- for convenience, carcasses can be strung on a fishing line;
- place the prepared fish in a basin so that it is completely covered with brine;
- cover with a net and press down with pressure;
- keep in the cold for at least 3 days.
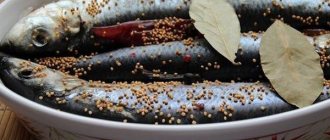
Spicy
- place the carcasses in a “jack” type container;
- Sprinkle a layer of salt on top;
- Place 2-3 bay leaves, peppercorns, half a teaspoon of coriander on the salt.
Repeat until the container is completely filled, cover with an inverted dish on top and put pressure on it. Leave in a cool place for 4 days. After drying, such fish has a spicy aroma of spices.
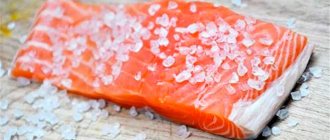
Salmon method for fresh fish
Lay the carcass flat and rub on all sides with a mixture of sugar and salt in a ratio of 1:3. Wrap it in a piece of natural fabric and place the resulting cocoon in a plastic bag. Place in the refrigerator for 72 hours.
Turn the package from side to side every 12 hours. After removing, rinse the fish under running water and dry on a waffle towel.
There is no definite answer to the question of how much to salt fish before drying, because a lot depends on the size of the waterfowl, the salting method and the temperature. According to general data, at a temperature of 20 C°, the process takes:
- about 1 hour – for small fish;
- no more than 3 days – for specimens weighing up to 0.5 kg;
- from 5 days to a week – for large fish.
You can check the readiness of the product by pressing your finger on the back of the carcass after salting. The resulting hole is evidence that the fish has been salted properly.
Also, the completeness of the salting process is indicated by the crunching of the vertebrae that occurs when the carcass is stretched by the tail and head.
Soaking after salting
Before drying, you need to remove excess salt from the fish that was absorbed during the salting process. Otherwise, the pulp will dry out, become oversalted and take on a “rusty” appearance. Since the quality, appearance and taste of the product depend on the soaking process, special attention should be paid to this.
First, the carcasses need to be removed from the brine and allowed to rest for about an hour (during this time, the salt will be evenly distributed throughout the entire flesh). Then rinse for 15 minutes to remove excess salt and proceed to the soaking process, using cold fresh water for this purpose.
Note! The ideal option is to keep the fish under running water. If this is not possible, it is enough to replace the water with fresh water several times. The fish, ready to dry, will float to the surface.
You need to soak the fish for the same number of hours as the days it was salted. As an example: after 3 days of salting, soaking lasts 3 hours. During this time, the carcass will not only get rid of excess salt, but also gain elasticity.
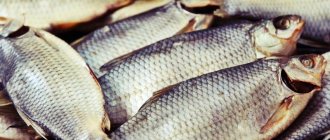
What is drying
There is nothing difficult or impossible in drying fish; anyone can do it. Essentially, this harvesting method involves soaking a fish carcass in salt and then drying it under natural conditions.
Slow drying makes the fish not only salty, but also spicy, piquant in its own way, its taste is very rich (concentrated). In this case, the following comes out with the product:
- Protein tissues, saturated with fat, become more elastic and dense.
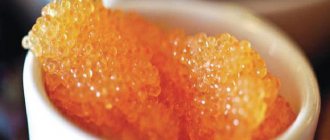
- The pulp acquires a translucent, orange-yellow hue.
- Caviar (if any) is dried and compacted, turning into a full-fledged delicacy.
Preparing fish for proper drying
Before drying, the soaked fish is wiped with a napkin and laid out on parchment designed to absorb excess moisture. Then they are strung on twine or strong fishing line and hung directly on the street, under a canopy or in the house, for example over a bathtub. This is necessary for the liquid to drain.
Often, experienced fishermen cannot come to a consensus regarding the position of the fish after soaking. It really doesn't matter how you dry the fish, upside down or upside down. It all depends on a person's personal preferences.
Head down - moisture leaves through the mouth, and drying occurs more smoothly and quickly. The result is a high-calorie product with a long shelf life. The method is recommended for the autumn period, when the fish is especially oily and takes longer to dry.
Tail down - the fat does not leave the carcass, saturating all the flesh. The result is a tasty, especially aromatic product. It is important to take into account that the drying process may take a long time and use the “tail down” method for non-fat varieties.
Only after the fish stops dripping can you begin drying.
Large fish
When drying large fish, keep in mind that the thicker and fattier the meat, the more salt it will need. Therefore, professional fishermen do not recommend drying fish weighing more than 1 kg; they need to be salted.
- First, large carcasses need to be crimped. To do this, make a cut along the back and lay it out. When placing medium-sized fish for salting, place them with their belly up.
- Sprinkle a small amount of salt into the mouth and gills.
Large specimens of fish need to be salted for 10 to 15 days, and soaked for about 5 days.
How to dry fish: basic methods
During the drying process, the air temperature in the room or outside the window, humidity level and air availability are taken into account. Owners of private houses hang carcasses in shady areas of the garden or in attics, under a canopy or on a covered veranda.
Residents of city apartments hang “fish” garlands throughout the kitchen, bathroom or loggia. At the same time, household members rarely express delight at the carcasses dangling directly above their heads.
But an electric dryer or oven will help cope with the dissatisfaction of the other half. Let's take a closer look at the features of the most popular drying methods.
On open air
The most popular method that allows you to get the most delicious and healthy product. The best time is spring, when the air is already warmed up to 20 degrees. The carcasses are hung under a canopy or in the shade so that the sun does not cook them. If the weather suddenly turns bad, the workpieces can be brought indoors.
In a cool cellar
When hanging fish in the cellar, you need to be prepared for the fact that at the end of the process it will need to be additionally dried. To do this, after 3 weeks from the start of drying, the carcasses are brought into the kitchen and placed closer to the radiator or stove.
This method should not be used for large specimens. They still won’t dry out as expected, but they will acquire a bitter taste almost immediately.
On the balcony and loggia
A great option if it’s winter or just bad weather outside. It is important not to forget that liquid will leak out of the fish and to substitute containers in advance.
If the balcony is not ventilated, open the windows and install a fan during drying. Hang the fish along or across the wall - whichever is more convenient for you. Typically, drying takes up to 15 days, but, under the influence of certain factors, the duration of the process may vary.
In the attic
A well-ventilated, dry attic is the best place to dry fish. Protected from the sun and precipitation, the carcasses are dried naturally.
However, before placing the workpieces in the attic, you should carry out a wet cleaning there and make sure that there are no insects and rodents.
In the oven
Drying in the oven is a popular method that allows you to get fish ready for storage in just 48 hours. Place a layer of fish on a rack lined with foil. To avoid baking the carcasses, set the temperature to 40 C.
To ensure ventilation, you need to leave the oven door ajar about 7 cm. After a couple of hours, cover the heads with foil so as not to burn, and dry for another 5 hours. Then the carcasses are hung in a dry room, where they “reach condition” within 3 days.
In an electric dryer
Perhaps this is the most useful device in the household, used for drying fruits, vegetables, mushrooms and fish. The most important thing is that the device is of the convective type and has a function to turn off the heating.
Setting the temperature to no more than 30 C, the fish is dried for about 48 hours. This method has a serious drawback - during the drying process, the whole apartment will become saturated with the smell of fish.
It is important to understand that drying fish using an oven, dryer or other household appliances is not the best option. In this case, the product loses the lion's share of its taste and aroma.
Attention! Do not dry fish in the microwave under any circumstances. With the door open, the device will not turn on, and with the door closed, the carcasses will not dry out, but will simply be cooked.
How to store dried fish?
Drying fish at home is not difficult. Time after time, experience accumulates, which helps to obtain a fragrant delicacy. You should know how to store it so that it does not spoil.
The fish is stored at a temperature no higher than 10 degrees. It is convenient to store the product in the refrigerator in the apartment. The carcass should be wrapped in paper.
You can also store it in a ventilated attic or on a balcony. Each fish must be wrapped and placed in a wooden box. If there is no box, it is recommended to use a linen bag.
Drying time for fish
In the warm season, drying takes less time than in winter. The size of the carcass is also important. So, the duration of drying under natural conditions (outdoors):
- In spring or summer, if it is not damp outside and there is a slight breeze, the drying process takes no more than 8 days. For small fish - less than 48 hours.
- During the winter cold it takes about 45 days - during this time the moisture will simply freeze out of the carcasses. In a heated room, the process will be reduced to 1 - 2 weeks.
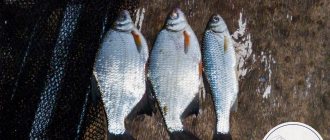
Even after the specified time has elapsed, the readiness of the carcasses must be checked: dried fish is dense, elastic, without salt crystals on the surface and has a strong skin.
Useful tips
It happens that during the drying process the fish turns out to be tasteless or spoils literally within a month. To protect your catch from such troubles, just adhere to the following recommendations:
- When laying out carcasses for salting, place the largest specimens on the bottom.
- String fish of the same size onto one fishing line, which will ensure uniform drying.
- A toothpick inserted into the abdomen will greatly speed up the process and make it more effective.
- If during storage the fish begins to smell musty, it is enough to rinse it in a weak saline solution and repeat the drying procedure.
- It is better to hang carcasses on the balcony after sunset. During the night, the fish will become weathered and will no longer attract insects.
- Some people advise drying fish without scales, but during the cooking process the product loses its aroma and becomes dry and tasteless.
- The best time to prepare the product is spring or autumn.
Where to store dried fish
The shelf life of the product depends on its storage conditions. You can wrap the fish in parchment or natural fabric and seal it in a plastic bag. To store, place in the freezer.
The condition of the packaging must be checked regularly. If condensation appears on the bag, it means the “cover” of the fish needs to be replaced. If you miss the moment, the product will become saturated with moisture and become damp.
By placing the finished carcasses in linen or paper bags and hanging them in a cool place, you can enjoy your favorite product for six months. If you store fish in a hermetically sealed jar, the product will not lose its beneficial and tasteful qualities for 5 months.
How to dry fish in summer without flies landing
In the summer, flies literally swarm over the fragrant carcasses, trying to cling to them with their larvae. To prevent flies from landing on fish, you can prepare any solution suggested below and lubricate each carcass with it:
- vinegar solution 3%;
- sunflower oil;
- weak solution of potassium permanganate;
- a mixture of sunflower oil and vinegar 1:3.
The most important thing is to protect the fish from flies in the first days; it is during this period that the meat dries out and becomes unattractive to buzzing insects. It is preferable to hang the fish in the evening, when flies do not fly. In addition, hung carcasses can be covered with gauze.
Ways to protect fish
Fishermen and jerky lovers have come up with a huge number of ways to prevent insects from appearing on carcasses. Proven methods of protection include:
- gauze;
- umbrella;
- box.
Each type of protection copes with the task 100%, so you can choose the method that you like best.
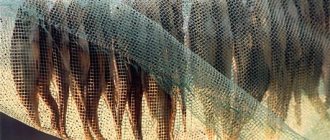
Gauze
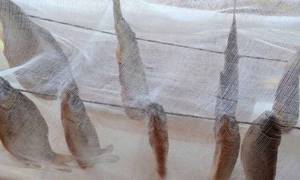
The simplest way to protect fish is to use a fine mesh or mosquito net. The carcasses are hung and then covered. If you don’t have a net at hand, you can use gauze.
Important: to prevent the fly from reaching the carcass, it is recommended to install wooden spacers.
If everything is done correctly, the drying process will proceed correctly, and insects will not be able to lay eggs.
But the gauze “works” as long as it doesn’t stick to the fish. When it sticks, the protection disappears completely.
Umbrella
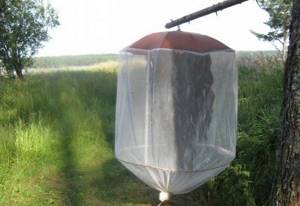
An original way to protect fish carcasses from flies is to use an umbrella. To make the structure you need to prepare:
- umbrella;
- mesh;
- wire.
When the necessary accessories are ready, you can begin manufacturing the structure:
- We attach a hook to the outside of the umbrella. It can be made from rigid wire.
- We sew a mesh around the perimeter of the umbrella. It turns out to be a kind of veil.
- The next step is to make a wire ring. Its diameter is the same as that of an umbrella.
- We retreat 30 cm from the bottom edge of the mesh. At this level we fix the finished ring. It can be sewn on with thread.
- We hang it in any convenient place. The main thing is that it is in the fresh air.
When the design is ready, you can tie the fish and hang it in the center of the umbrella. The final step is to tie the lower end of the mesh into a knot. This can be done using a rope.
Such a protective product allows you to protect fish carcasses from insects.
Important: hang the structure on a strong beam, nail or hook so that it does not fall.
Box
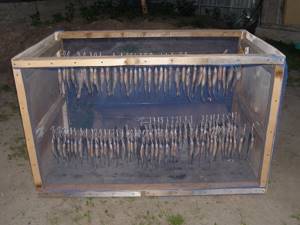
The most durable and difficult to manufacture is the drying box. To build it you will need:
- net;
- beam;
- plywood or slats;
- pens;
- clamps;
- rods;
- hinges for doors.
Manufacturing:
- The size of the box produced directly depends on the number of fish.
- First, the frame is assembled. For reliability and speed of collection, it is better to use self-tapping screws. The side walls are attached to the frame, in which small holes for the rods are pre-drilled. It is on them that the fish will be suspended.
- The front and back walls are covered with mesh. As for the door, it will be on top. For convenience, handles are screwed to it.
Important: to ensure that there is no hole between the wall and the door, use a rubber seal.
When the structure is assembled, you can hang the fish.
It is best to do this in the evening, when fly activity is minimal.