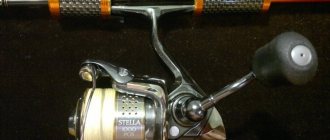
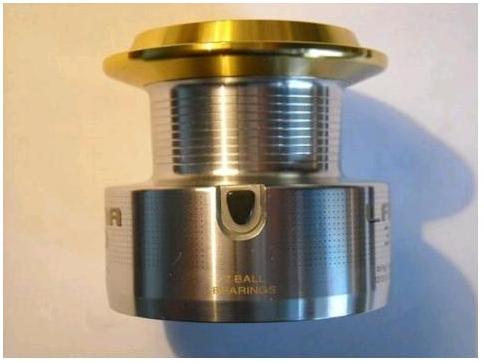
REEL Spool REPAIR
We remove it, sort it out from start to finish in sequence so as not to confuse anything. It is no secret that bobbins are ground and then milled on machines. In addition to good processing and assembly of the product, there are also minor “non-small” defects, in the form of burrs and small chips. There may be chips inside the reel (if the body is metal), not to mention the spool. We remove burrs and chips (if any). The clutch washers also need to be inspected to see if there are chips between them, which significantly affect the operation of the clutch. Using a sharp knife or diamond file, we smooth out the burrs, wash everything and assemble it.
CASE AND INTERNAL MECHANISM
Some reels come with spare washers for the final drive.
You need to add the washer correctly; a SC or a micrometer will not interfere with this to determine the thickness of the washer. Some washers are so thin that which one is thicker cannot be determined by eye or touch.
We add and assemble the housing, but instead of the rotor it is advisable to install its imitation. That is, some kind of bushing or something similar, in order to simulate the load that the rotor gives when it is screwed into place (pulls the gear to the top). If the rotor is installed right away, then you may not notice when the gears “bite” each other, when we went too far with the thickness of the washer - the rotor hides the feeling of “biting”, but without the rotor we will feel it immediately.
But as a rule, they cannot choose the backlash well in the “main gear” pair. Unless there's DIGIGEAR. Other gaps remain. The fact is that the fits under the bearings in the housing of some reels have such a tolerance that the bearing simply falls out under its own weight.
On the other side there may be a bushing. You can do the same with her. But it is better to replace it with a bearing of the appropriate size. This prevents the fit on the gear and not on the body, as many people think, and improves the smoothness and durability of the mechanism as a whole. As a result, the play remains only in the bearing fits on the gear, and you have to put up with this. In some cases, this can be eliminated by placing fluoroplastic film around the bearing circle.
If your reel has a rocker mechanism, then the backlash can be eliminated on the rocker gear if it is on a rolling bearing and not a sliding one. But basically it does not require any modification.
We repair spinning reels
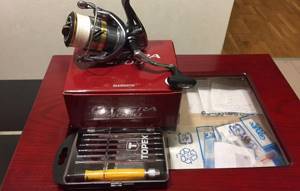
Repairing fishing reels with your own hands is difficult, but it is possible, the main thing is to have everything you need at hand:
- lubricant;
- small screwdrivers (phillips and flathead);
- electrical tape;
- patch;
- needle file;
- sandpaper;
- small pliers;
- two-component glue;
- pin.
Let's start repairing the fishing reel. Before disassembling it, we clean it of dirt. When carrying out repairs, be careful and attentive. The reel is the most complex mechanism in a spinning rod.

Main breakdowns and solutions:
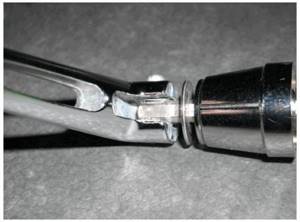
- The line is caught between the line roller and the lever, where the gap forms. This unit is disassembled and the flaw on the roller head is filed using a file.
- If the spring of the line guide arch is broken, it is quite possible to replace it with a pin. It won't last long, but it will help out for the first time.
- When the coil rotates tightly and sticks, you need to add lubricant to the gearbox. To do this, slightly unscrew the bolts on the cover. The lid opens slightly and the lubricant is dropped into this gap.
- If the spinning rod is handled incorrectly (it falls), the bow may become deformed. If this happens, it is removed and leveled. This may have to be done more than once.
- If the gearbox cap is lost, the place where the cap was located is sealed with electrical tape or tape. If this is not done in time, sand getting into the coil will lead to serious damage that you cannot fix yourself.
For more complex breakdowns of spinning reels, it is better to contact specialists.
How to properly disassemble a coil

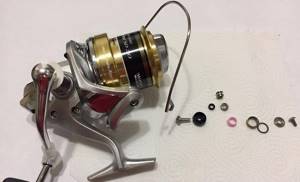
When disassembling a fishing reel, it is important that all parts are laid out in the correct sequence. This will be needed in order to assemble it correctly. Disassembly sequence:
- The brake nut and spool are removed.
- The gear and washers located under the spool are removed.
- The handle unscrews.
- The clamping nut in the reel mechanism is unscrewed.
- The rotor is removed.
- The line laying arm is removed.
- The line laying mechanism is removed.
- The roller for passing the fishing line is disassembled.
- The reverse stop bolt is unscrewed.
- The switch is removed.
- The plug bolt is unscrewed.
- The plug is pulled out.
- The coil wall is removed.
The main mechanism follows. It consists of a runner and two gears. It should not be removed unless necessary. The coil is assembled in the same way, but in reverse order.
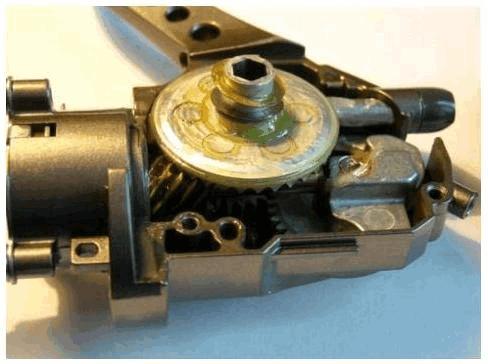
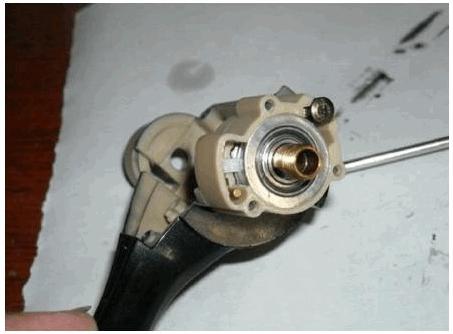
LINE ROLLER ROLLER MECHANISM
Some reels do not seem to have a self-resetting bow, but when fishing lures that offer a lot of resistance when retrieving, it can be noticeable that the bail does not close completely. Since the force created by the bait is very significant and the line passing through the roller pulls the bow. Many people stretch the spring, but this does not solve the problem.
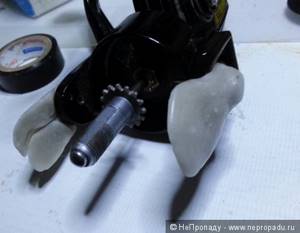
It will be much better if the step against which the T-shaped rod rests is cut off by about 2-3 mm with a homemade cutter (see photo), (if the reel has a graphite rotor), and a piece of tube or rod of a suitable size is placed on the rod. Length equal to the length of the cut step. Thus, the zigzag wire will hold the bow closed with great effort.
VIDEO CLIP
Many people cannot understand why the video is noisy? It looks like there is lubrication and is not worn out. The main reason is that the roller itself has significant play. And if there is no transverse one - the roller is on a bearing, then the longitudinal one is essential. If you spin the roller of a reel with a piece of paper along the groove, it rotates well, but if you twist it with pressure to the side, the roller moves (warps and practically does not rotate), the same effect occurs when fishing. Consequently, the roller and washers wear incorrectly.
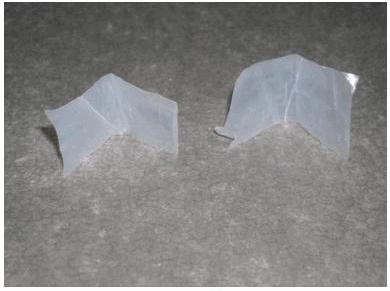
This can be corrected by knocking out washers from the same fluoroplastic film, which are slightly larger in diameter than the diameter of the roller and fit into the cup for grinding. Washers are added on both sides until the play in the roller disappears (we check the rotation with the same piece of paper as we go). It is also advisable to polish the sides of the roller to a “mirror” (Goya paste, but better diamond), smoothing out uneven surfaces. Otherwise, the sides of the roller will cut through the film.
There is a reel from the Orion 102 spinning rod, which is generally not needed. Selling... but no one needs it used, and it’s a lot of hassle for pennies. It would be a shame to throw it away.
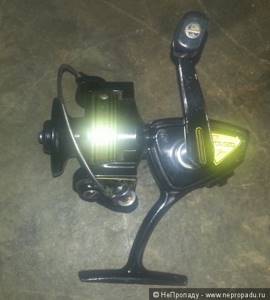
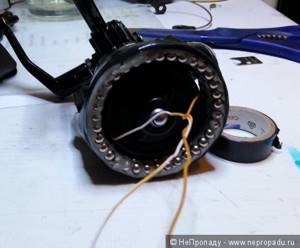
An idea appeared. The rod is a piece of PVC tube with rechargeable batteries, a flashlight and a USB output. Wind the wire onto the reel, and instead of the line supply frame, screw on a disk with neodymium magnets. Actually the questions themselves: What kind of wire (material, thickness, is it possible with plastic insulation) How many coils to wind to get an output more or less close to 5v. Does the number of magnets matter, and if so, how. Update!
It was just boring to sit like that, so I started trying.
I wound a wire from an internet cable, I forgot the name. About 30-40 m. Magnets - neodymium balls from a toy.
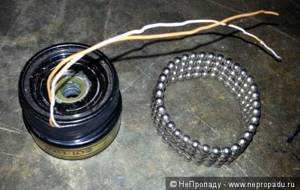
The balls were fixed with polymorphus.
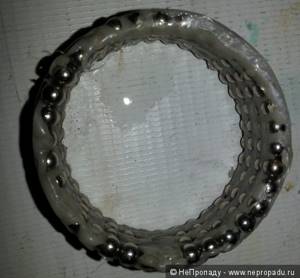
From it I made claws for fixing them in places where there was a frame.
I connected everything with electrical tape.
Result: spins very well. But there is no current. There is none at all. Where did I go wrong?
Update
Thanks to those who explained the errors.
A proposal was repeatedly received, in my own words, not to engage in nonsense, but to install a motor using a coil exclusively in the form of a gearbox. I could have done that, but I didn’t want to. Therefore, I remembered where hands grow and came to the following:
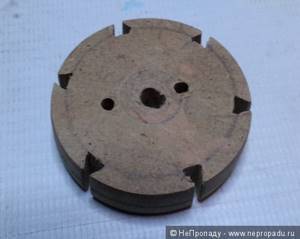
Using a jigsaw, I cut a circle from a piece of MDF with a diameter equal to the reel bobbin. I made holes that later had to be expanded.
And wound up the wires. Views from above - from below.
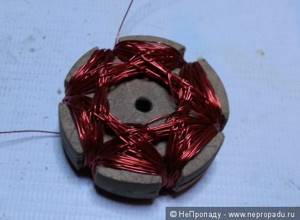
So the question is, will this work? or better yet, rewind it somehow differently.
And another question.
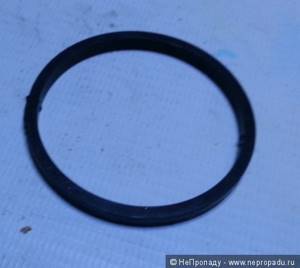
I found this magnet made of flop in a box of trash. Will it not work as well as the previously tried ball magnets? Or does it make sense to use it?
Added
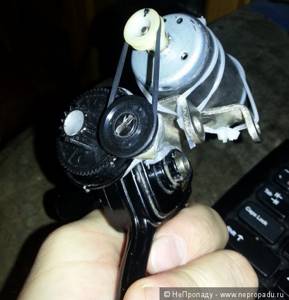
I completely went through the reel mechanism, in the direction of throwing out everything except the gearbox. Before continuing experiments with independently twisting the generator and applying magnets, I tried attaching a motor.
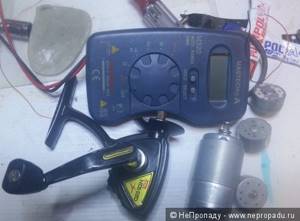
Result: the motor is from the Sidi Roma, when twisting the handle with the tongue to one side - 1v maximum. A 12v motor, under the same conditions, reaches 5v. In general, for normal operation, additional gearboxes and speed boosters are required.
In the meantime, I came to the conclusion that a spinning reel is an excellent inexpensive workpiece for tools such as a dividing head and a miniature hand drill.
"Continued torment"
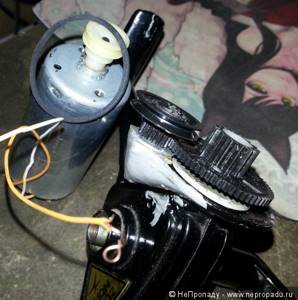
I also added a gearbox made from gears from a VCR, it seems. I don’t know the ratio, but the motor already produces up to 23 v. All that remains is to glue it yourself and start screwing the battery.
Additive
I glued together the final diagram.
20-25v outputs into the lungs. All that remains is to come up with a rectifier, attach a battery, etc. But in principle, the idea has already been implemented. The conclusion is this: in the conditions of a survivalist, you can’t make a charger for a mobile phone or a flashlight from scrap materials, but if you prepare in advance, you can do it. It turns out to be a good device, but inconvenient to store and carry.
ROTOR GEAR
The rotor bearing is installed in a cup (usually made of metal). With the help of film, if tolerances allow, it is also placed back into the cup with a little effort. Thus, the bearing does not sit tightly in the cup.
In some reels, the rotor is mounted on one head bearing, in others on a bearing and a bushing. In this case, the sleeve can be secured with film in the reel body. This will eliminate the lateral play of the rotor.
If the rotor is mounted on 2 bearings, this is even better. In this case, if tolerances allow, the bearings can be sealed directly on the rotor. This operation will eliminate longitudinal and transverse play. The knocking noise under load is precisely because of this damned lateral play. This is especially true for reels with a graphite body. Where the rotor gear is placed on one head bearing, and on the other in a plastic protrusion. Thus, under load, the axis of the rotor gear moves at some point relative to the axis of the adjacent gear and a knock is felt. This can be corrected by adding a Teflon bushing with a protrusion (if any) to the body, the dimensions allow and, of course, without compromising the reliability of this unit. If the rotor gear sits tightly, but there is a knocking noise under load, then the cause may be the bearing: its wear, poor quality (the inner ring wobbles greatly relative to the outer one). It's just a matter of replacing the bearings.
The overrunning clutch does not need modification. Unless the burnt cup is hanging around like crazy in the body. If you look from above, there is play left and right. In this case, we insert small strips of some kind of nylon around the cup, usually 6 pieces are enough, measuring approximately 5 by 10 mm. It all depends on the thickness of the material, the size of the coil, the coupling cup, etc.
We insert it in a circle between the body and the cup so as not to disturb the alignment of the coupling.
It may also be that the rotor is fixed, but under a small load it moves in the opposite direction (does not scroll) by about 0.5-1cm. Folding the antennae on the separator “sho” for the elephant. It is best to choose a tighter spring, naturally within reason, otherwise the bushing will quickly wear out. If the spring pulls the separator in the opposite direction, the reel's stroke will become harder, because the clutch will brake the rotor gear sleeve.
REEL HANDLE
Many people don’t pay attention to the reel handle—they put it on, screw it on tighter than ever, and that’s it. However, the problems are more than they seem. On many reels, the handle folds into the stowed position using a button and there is already play in this place under load. Even if it’s not there initially, after a few fishing trips it appears, seemingly insignificantly, but the play from the handle boss adds up to what’s at the connection.
As a result, it is already noticeably felt and gets on your nerves. It seems to us that this is play in the main gear, we put washers in, but it still does not disappear. As a result, the gear teeth wear out greatly and the reel becomes partially unusable. Traditional riveting of a wedge does not solve the problem, but only breaks the connection. Some people immediately knock out the wedge and tighten it tightly with a screw; this generally prevents the handle from becoming loose in this place.
RESULT
Modifying the coil is an interesting thing, but we must take into account that after this the stroke of the coil may change. And in the case of an endless cable, you will most likely have to adjust the winding of the fishing line/cord with washers.
In general, the quality of some reels is surprisingly disgusting. In addition to shavings in the mechanism, I came across the fact that two identical coils have different numbers of bearings. One has 8, the other 5 + 3 bushings, or maybe the bearings in one reel are of different quality.
I even had to repair the reel handle, which broke when hooking a small zander.
Source: fishinform.blogspot.ru
More details in the book: Mikhail Rassolov “Treating the Coil” (PART - 1, PART - 2).
Tags: [fishing]
SHARE WITH YOUR FRIENDS
How to disassemble a coil
Before planning to repair a fishing reel with your own hands, you should worry about the availability of the necessary materials and tools. For these purposes, the fisherman will need a small and medium-sized figured and flat screwdriver, pliers, tweezers, an awl, a soft and hard hair brush, an oil can, a piece of rags, as well as any type of cleaning agent containing alcohol and a special mineral oil intended for lubricating rubbing parts. device details.
It is convenient to carry out repair manipulations on a desk under a bright lamp with a white spectrum of light, on a backing made of a sheet of white paper, where small parts and connecting elements of the product will be clearly visible.
Disassembling the coil
The coil is disassembled according to the clear algorithm presented below. In the process of performing work, it is important to remember the order of the sequence of operations and scrupulously delve into the nuances that contribute to the accuracy of the work associated with the application of efforts to disconnect the threaded, bushing and locking connections of the elements and assemblies of the product.
- unscrew the nut of the brake system and the spool;
- remove the gears and washers located under the spool;
- remove the reel handle;
- unscrew the clamp nut in the mechanism;
- disassemble the rotor;
- dismantle the line-laying bow;
- dismantle the line guide latch mechanism;
- dismantle the line pulling roller;
- unscrew the screw of the reverse locking device;
- dismantle the switch lever;
- unscrew the plug screw;
- dismantle the plug;
- dismantle the wall.
Disassembling the line roller
After manipulating the parts and the body of the mechanism, we proceed to disassembling the line layer. It is not possible to construct an unambiguous algorithm for dismantling the parts of this element, due to significant differences in the design of the device in each version of the device. To ensure the reliability of the work, it is recommended to take step-by-step photographic recording of each operation performed, which today is quite accessible to the average person using a smartphone for these purposes.
Having recorded the disassembly process in photographs, after diagnosing and repairing the spinning reel, the fisherman can easily cope with its reassembly, bringing the product back to its original and functional form without errors.
The most popular problems and their repairs
In continuation of the article, we will look at a number of the most common problems with inertialess motors. These problems, which are not critical for the complete failure of the mechanism, can be associated both with defects in the materials of the product and with incorrect operation of the device. After all, the unfavorable conditions under which the meat grinder units operate, such as high humidity, abrasive sand particles and elementary dirt, certainly only have a negative impact on the operation of the unit as a whole, despite the scrupulousness and care with which it is treated.
But often, in fishing practice, even if the minimum rules for using inertia-free gear and regular maintenance of gears and bearings are observed, these troubles occur due to exhausted periods and resources exceeding the maximum capabilities of the components and parts of the product. The presented reel breakdowns should not confuse or unsettle the fisherman, because he should be able to put the device in order on his own, which is quite doable.