Types of bait for a float rod with a feeder
Complementary foods are used depending on the type of reservoir.
It is divided into 3 varieties:
- Open. Here the feeder needs to be thrown into standing water and shaken with the filling. The bait will spread around the feeder. Here you need to quickly reel in the line and hook and direct them into the middle of the floating bait.
- Closed. This variety is used in small currents with bait in the form of worms or bloodworms, which will move quickly in the water and attract the attention of the fish.
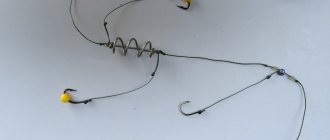
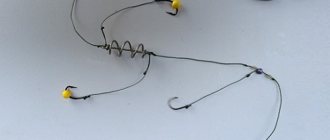
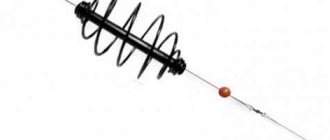
- Spiral. This variety is universal. It is used in calm water, as well as in small currents. This feeder with a float is a sliding one and is very simply and conveniently attached to the fishing line. One of the negative factors here is the problem of the leash getting caught. This can be circumvented by knowing the mounting patterns.
This feeder with a float is of the loaded type. The main weighting agent is lead. They are used for fishing in deep water bodies. There is not much noise created here that could scare away the fish.
Let's celebrate! Since a large impact on the water creates strong noise vibrations, and there is also a risk of complementary food being thrown into the water.
The feeder is an excellent means of delivering food to great depths, where it will be easier for the fish to navigate.
Open and closed
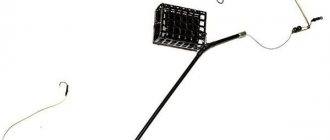
There are two main types of fish feeders: open and closed. If you are hunting fish in a pond with stagnant water, the first type of feeder is better suited. All the fisherman need to do is throw in the tackle and then with a sharp jerk empty the feeder by pulling the tips. After this, you can reel in the fishing line by lifting the hook with the nozzle. In turn, a closed feeder will fit perfectly into fast-flowing rivers. The bait will be washed out of the container, leaving a “tasty” trail for the fish. Moreover, as a rule, live food is placed in closed feeders - worms, bloodworms, etc. It makes sense to fill the feeder immediately before casting, so that the bait does not run home. An alternative type of feeder is the float type, which is capable of balancing in the water between the bottom and the surface.
How to make a float rod with a feeder?
You can make this fishing tackle yourself. Moreover, it is possible to make it more resistant to currents or other water obstacles.
It’s easy and simple to do, and the end result is a mini-feeder:
- You will need 1 wooden stick (can be used for sushi), which can be painted with water-based paint or black varnish;
- Then you can cut a strip 1 centimeter wide from any plastic bottle;
- You need to pierce 7 holes in it with a distance of 1 centimeter;
- You need to insert a wooden stick into the hole located in the very middle;
- One side of the plastic tape needs to be sealed with glue on one end of the stick;
- Both ends must be equipped with nipples, and the fishing line must be passed through them between the sinker and the float.
Technology for making a do-it-yourself feeder for catching crucian carp
You need to start working by winding the wire around the device. It is better to hold the end of the wire with pliers, pressing the wire against the device. The number of turns depends on the size of the feeder being made. Usually 7-12 turns are enough.
When the spring reaches the desired size, cut off the wire and proceed to the next stage. This is the giving of a barrel shape to a wire structure.
It is not difficult to give this look to the feeder. It is necessary to increase the central coils, and moving to the edges of the spring, gradually reduce the diameter of each coil.
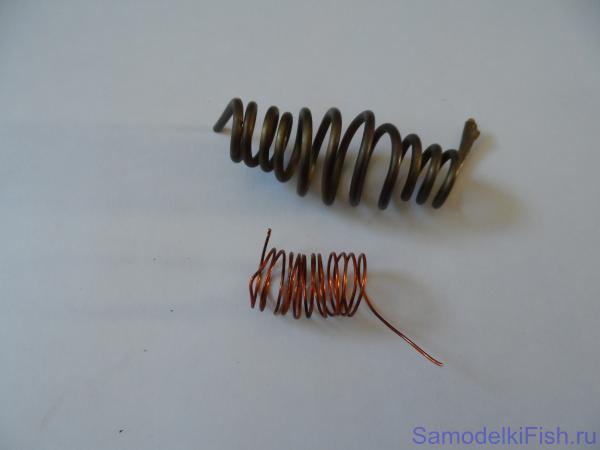
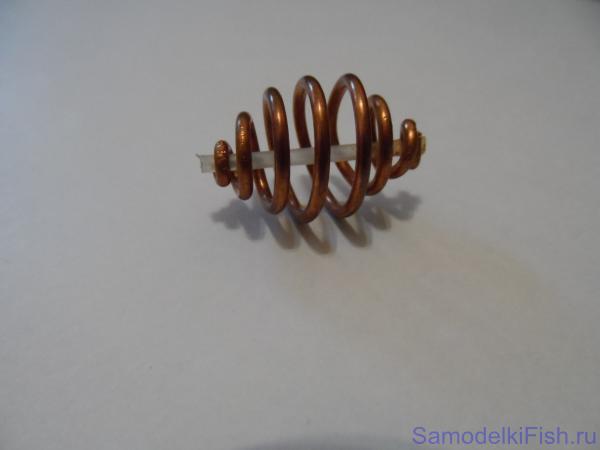
It is more convenient to carry out the work using round nose pliers. Excess wire is removed from the edges with wire cutters. Now you need to insert a tube into the spring so that the fishing line can move freely when a fish bites. To do this, a plastic rod or metal tube is inserted inside the spring.
The outer coils of the spring are used to crimp the tube. If a metal tube is used, it is better to insert a piece of electrical wire insulation inside it.
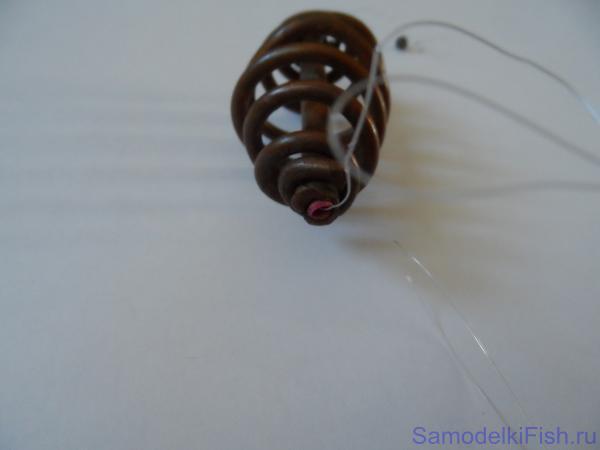
This will prevent the line from breaking. Excess tube is cut off with a knife or bitten off with pliers. The result is a nice looking feeder that will deliver food to the fishing point.
Fishing technique and tactics
First you need to choose a place to bite, and also study the habits of the fish. Take a feeder and fill it with complementary foods.
The following ingredients can be used as complementary foods:
- Oatmeal or coconut flakes;
- Bran;
- Dry bread scraps and crackers;
- Floating boilies or pallets;
- Birdseed.
After filling the feeder, you need to throw it into the fish habitat. Then you need to keep a very close eye on the feeder and float. If it becomes clear that the fish has swallowed the bait, it will move in a certain direction.
Good to know! It will be necessary to make a sweep in the opposite direction. There are 2 types of complementary feeding techniques. This is casting bait with a float to feed a point and hook fish. Another method is carried out by tracking the movement of the fish and throwing bait into a place located next to it.
Fishing technique
We will give only general recommendations and advice, because each case is individual.
- The bait, if it is not completely ready, is mixed using water from the reservoir where you will be fishing, before unwinding the gear.
- Be sure to study the bottom topography near the fishing spot, for example, using a marker float or sinker. The stepped wiring method is widely used.
- The initial feeding is carried out using 5-15 casts of a fishing rod with a feeder, and: it should not be packed tightly and the amount of feed should not be too large.
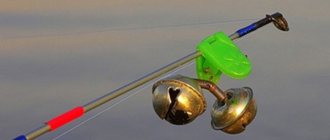
- Use the bell as a bite marker only in extreme cases: twilight, early morning, fog, fishing from a high cliff. Its ringing can scare away fish and irritate nearby fishermen.
- To constantly cast the feeder into one place, you need to throw the tackle and put the fishing line behind the triangular stopper on the reel. Make all subsequent casts along the same landmark on the opposite bank so that the tackle with food flies along the same trajectory in both planes.
- Having found a place where a fish stops or exits, feed it by casting a tackle or several balls of bait, just do not overfeed the inhabitants of the water column.
- If there is no bite for 10-20 minutes, try changing the nozzle, the consistency of the bait (perhaps it is slowly washed out), the place of casting or fishing, periodically move the nozzle, it should not lie on the bottom and wait for the fish, change flavors, use pheromone additives.
Pros and cons of a float rod with a feeder
Pros:
- Lightweight and easy to use equipment;
- It is universal (designed for any type of fish);
- Quick replacement and repair of gear;
- During fishing, the line gets tangled less;
- It can be made very quickly from available materials;
- Has a very low price.
Minuses:
- Most suitable for feeder rods;
- It is necessary to understand fertilizing;
- You need to secure the line and hook very tightly;
- Float rods are not designed for long casts.
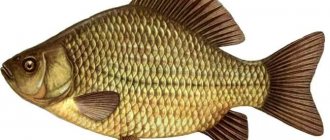
Equipment of a float rod for crucian carp
There are 2 options for equipping a fishing rod for crucian carp:
- The first option is the simplest and most banal: a hook, a sliding float, a sinker, a reel and a fishing line.
- The second option requires more detailed equipment.
Let's consider both options:
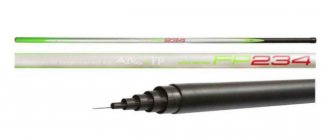
Fly rod equipment
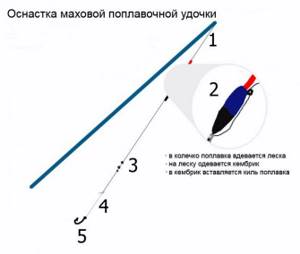
Connector
Allows you to quickly change equipment. At the same time, saving time when the intense biting began. The connector is attached to the end of the rod.
Connectors are divided into the following:
- purchased separately for the rod;
- fixed by the manufacturer;
- homemade;
The first type includes plastic latches glued to the tip of the rod. Try on their rod when purchasing, otherwise you may make a mistake in diameter. By the way, plastic connectors perform better when fishing than homemade ones. This is due to the fact that they fray the line less.
High-quality fishing rods already have connectors installed. Nowadays you can even find cheap fishing rods on sale, in which the role of a connector is played by a special rope glued to the fishing rod.
As for homemade products, fishermen often use copper wire. It is bent in half and tied with thread to the tip of the rod. Instead of wire, they also use carabiners with thread, which is glued to the rod.
fishing line
Use a fishing line 0.16-0.2 mm in diameter for large individuals. 0.10-0.14 mm for medium and small crucian carp.
Float
When choosing it, you should adhere to the following rule regarding the length of the fishing rod:
- up to 5 meters: load capacity no more than 0.5-1.5 grams;
- 5-6 m rod with a float weight of 1-3 grams;
- 7-8 meter rods: choose 3-5 gram floats;
- rods for 9-10 m: floats weighing 4-8 grams;
If you look from the point of view of choosing the shape of the float, then you choose from the following criteria:
- The shape of the float resembles an inverted teardrop , which tapers towards the antenna. Installed when fishing on lakes, stakes and rivers with weak currents. A distinctive feature of a float of this shape is its excellent bite sensitivity.
- Olive-shaped. Floats stable on water in currents and strong winds. Such floats work better on drowning. The weight of such floats is from 0.5 to 1.5 g. The shipment is additionally secured.
- The shape resembles “barrels” and “eggs”. They do not have such distinctive features from the forms described above, but they are irreplaceable in strong currents and gusty winds.
Sinker
One or two beads of 0.05 or 0.5 grams are enough.
Leash
Select 0.2 mm less than the diameter of the main line. Suppose the fishing line has a diameter of 0.18 mm, then the leash will be 0.16 mm. Wire length – 10-30 cm.
Hook
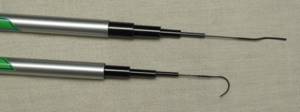
You need to focus on the size of the fish. Often, tentatively choose hooks No. 5-6. The weight of such floats without loading is 1.5-2 grams.
The simplest way to measure the bottom depth in a fishing area is to use a large shot attached to a hook or swivel.
The method is a little more complicated, but it will be more reliable when you use a weight and a large float, into which two holes are drilled at an angle of 45 degrees from different sides. The holes in the middle of the float should connect. When the depth is measured, the line slides freely in the float. When begging the rod, the line jams and you can very accurately measure the depth to the bottom.
Regarding the first and simplest option for equipping a fishing rod, everything is similar here, only there is no need to use a connector and a leash. The float is fixed in the required range thanks to 2 pieces of wire insulation on the fishing line, which are jammed with pieces of matches.
Feeder equipment
Read a great guide about making the 11 best feeder equipment yourself.
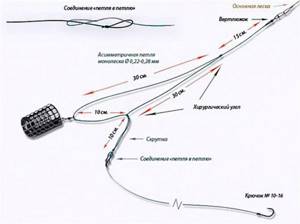
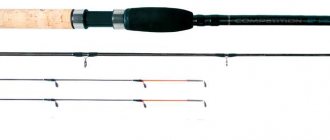
- For feeder fishing, choose a rod with a test weight of 40-100 grams and a length of 2.1-2.4 meters. If the current is strong, the load is increased, and accordingly the rod is taken with more dough.
- The fishing line is selected with a larger diameter , around 0.15-0.25 mm. The spool size for it is 2500-3000. Hooks are already taken No. 8-14. Although number 8 is often enough.
A little advice: such equipment makes it possible to feel the slightest bite.
Spinning equipment
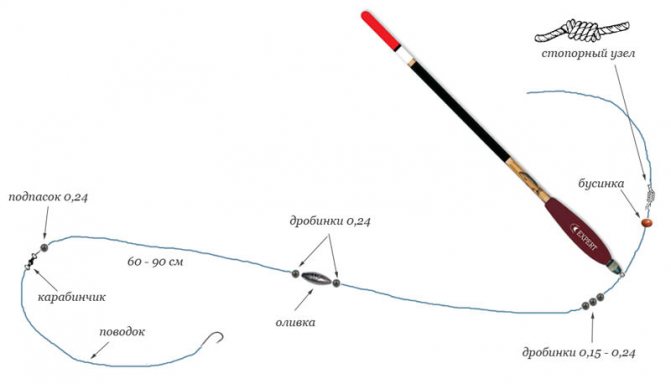
Here, simply making a quick cast with a sharp hook will not work, since crucian carp leads a smooth life in a school and digging in the mud. He walks along his favorite paths, looking for bloodworms.
Therefore, adhere to the following rules:
- They are often caught using a spinning rod in places where crucian carp weighing 100-200 grams and has a body the size of a palm are often caught.
- The bait should lie on the bottom. Therefore, they do standard wiring at the bottom.
So, the rod is used with 5-7 grams of dough, as well as with a fast action. Choose a rod with a monolithic glued tip. The weight is 1.5 grams, the hook is No. 5, which is tied to a leash 10 cm long.
Reviews from fishermen
The feeder is made from scrap materials – it couldn’t be easier. Even just for fun, it’s worth testing your creation while fishing and seeing the result. Angler experience comes through experimentation. Grade:
Mikhail, 35 years old
I recommend trying this fishing tackle for fun. Shows itself well on the lake. The catch I brought home was wonderful. This is despite the fact that all day I caught only with a feeder. I recommend. Grade:
Alexander, 28 years old
An interesting thing to try in fishing. You can actually do this yourself, and it will take a little time. After reading about the behavior of the fish and its preferences, you can create a special food for which the fish will go. Grade:
Nikita, 27 years old
I bought this feeder for money, but then I decided to make it myself. It turned out no worse than the purchased model. They are purchased by those who are too lazy to bother with the material. But, making a feeder is very quick and easy. It really helps you get a good catch. Grade:
Ilya, 45 years old
Very good thing. I make it with my own hands from metal wire, I put bait inside. I won’t say that it greatly affects the catch, it can be obtained using other methods. The main thing here is the choice of a reservoir and a place for biting. Another important thing is the fishing rod. It should be comfortable and functional. Grade:
Stanislav, 38 years old
Good to know! According to numerous opinions of fishermen, such a feeder is very effective and easy to use. Reviews show that this is an effective way to catch both predators and ordinary fish. The main thing here is to know what kind of feeding is suitable for a certain type of fish, as well as its habits.
Methods of attaching feeders to different types of fishing rods
Of course, this is a very important step, because the quality of your fishing will essentially depend on it. So, let's look at the most famous methods of installing a feeder.
Donkey
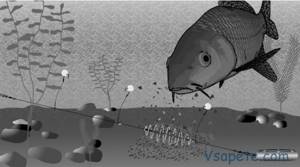
Bottom fishing is an integral part of the life of any self-respecting fisherman. Today, fishermen most often tie the feeder to the very end of the working line. This is done using knots, loops, or using special gear (carabiners, swivels). Of course, the use of a carabiner promises the fisherman a more convenient replacement when necessary, so these types of mounts are more often used. In addition to the feeder itself, several leashes with hooks are tied next to it on the main fishing line in the form of a garland. At the same time, it is very important to make sure that they do not intertwine with each other.
Feeders
Attaching the feeder to the feeder rod depends on the conditions in which the angler is, as well as his preferences. But we will talk about the four most commonly used methods of attaching the feeder to the feeder, and their differences from each other.
Inline editing
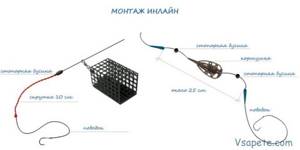
The trick of this type of fastening is that the feeder is not static, but glides easily and unhindered along the fishing line. In order to select the interval of movement of the feeder along the fishing line, stop beads or knots are used. So, a swivel is attached to the main fishing line, then a special stopper is placed above the swivel, to which the feeder itself will be directly attached. Approximately 30 cm from this stopper, a carabiner is attached using a loop, and a leash is attached to it (it is desirable that the length of the leash be the same, about 30 cm). Thus, we obtain a design in which the feeder will slide from the stopper to the carabiner. This installation is not complicated, but it is very effective in terms of catching fish.
Helicopter
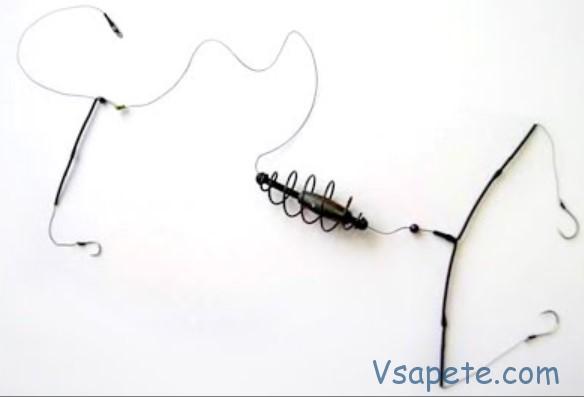
A special feature of installing helicopter gear is that the feeder is tied to the end of the fishing line and you don’t have to hook the fish yourself. Very effective for fishing in places with strong currents. So, take a fishing line equal to 40-50 cm and fold it in half. Next, it is attached using a swivel to the main fishing line. Thanks to the figure-eight knot, this piece of fishing line is tied, while the upper part of the knot should be about 1-2 cm, it is in the upper part of the figure-eight that a leash up to 1 meter long with a hook is attached, and the feeder is tied to the bottom of the figure-eight. The method of tying the feeder does not matter (it can be a carabiner, a loop or a knot). Thus, when the fish bites, it hooks itself due to the weight of the feeder.
Loop paternoster
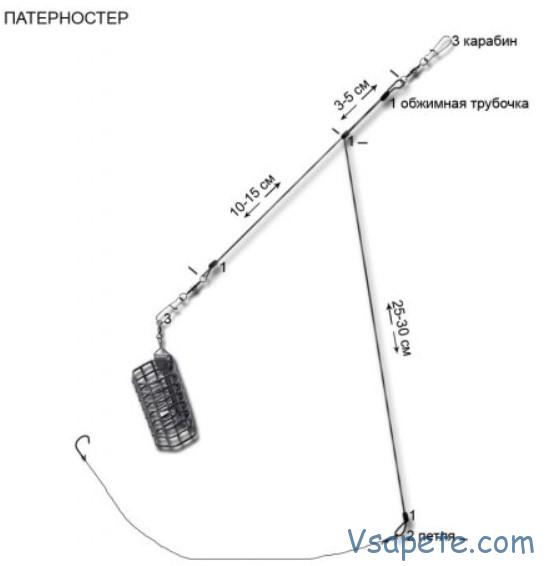
Also a very popular method of rigging, and a very simple one at that. Many anglers believe that they should start feeder fishing with this type of equipment. Having measured about 50 cm of fishing line, a large loop is knitted at the end. Then it is cut, and one part should be 2 times longer than the second. You get a fishing line with two ends; a reel is attached to the short one using a swivel. And on the long one, a leash is also attached using a swivel. The equipment is ready for use. As you can see, the method is really not complicated and at the same time very popular with all anglers.
Gardner's loop
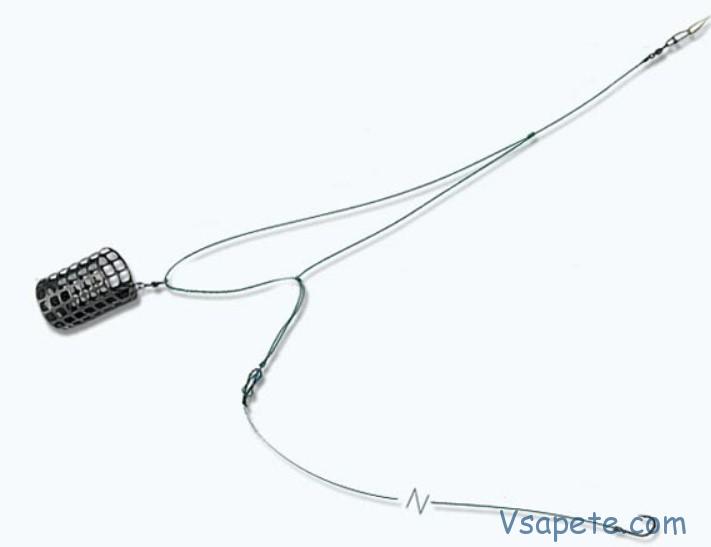
It is often called similar to the paternoster rig, but if you look deeper, it is not so. A previously prepared loop with a diameter of about 30 cm is knitted onto the main fishing line half a meter from the edge. A feeder is threaded into this loop using a swivel, so it can easily move throughout the entire loop. A leash with a short hook is attached to the edge of the fishing line (several hooks can be used if desired).
As you can see, there are many ways to install feeders, and surprisingly, they all cope with the assigned tasks very well. Therefore, if you are a novice fisherman, then these tips will certainly help you.
