The original tackle, which differs in design and method of fishing from the usual fishing rods, is a boat or a water kite. You can return home with a good catch if you prepare the tackle for fishing conditions and learn how to control it.
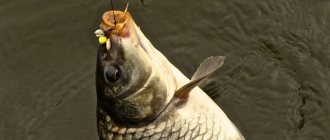
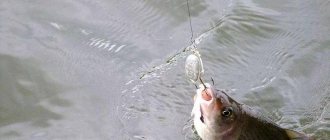
There are real legends about boat fishing among fishermen. This tackle is called a water kite, sled, etc. in different regions. It is designed for catching cautious fish species that feed near the surface away from the shore. Such representatives of freshwater ichthyofauna include chub, asp, and ide. Often smaller fish are caught on the hook, for example, bleak, dace, sabrefish, rudd. The operating principle of the boat is based on the windage of a flat board. Getting into a body of water with the current, it can itself move away from the shore at a certain tension of the fishing line. The tackle is equipped with several leashes (3-5 pieces), on which natural or artificial baits are mounted. There are many varieties of boat, but it is important to achieve complete mutual understanding between the cunning tackle and the fisherman. Only then will success be guaranteed.
Water kite device
Of all the types of boats, it’s worth focusing on two modifications. One of them resembles a kite, and the other can easily be classified as a catamaran. You can make the tackle yourself.
water serpent
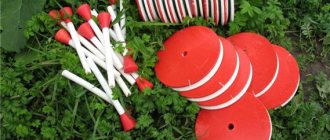
The traditional design of a water kite is a wooden plank equipped with simple fasteners. It should be made from wood species such as balsa, beech or oak. Approximate dimensions look like this:
- workpiece length - 200 mm;
- product width - 100 mm;
- material thickness - 15 mm.
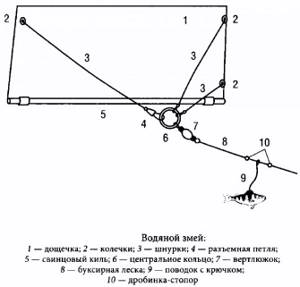
The shape of the workpiece can be rectangular or trapezoidal. The lower part of the base is surrounded by a lead plate, which allows the plank to form a mini-water sail. Holes are made in two corners of the workpiece, to which a piece of fishing line or rope 160-200 mm long is attached. On the opposite side, a hole is drilled in the middle part of the board, which serves to tension the equipment. The main line is connected to these two leashes (putts) through a metal ring. A leash with hooks and attachments is attached to it.
Catamaran design
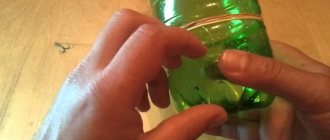
The most common gear is called a sleigh, catamaran or boat. It uses two supporting elements. They can be made of wood, foam plastic, plastic bottles, etc. As an example, consider the structure of a wooden catamaran.
- First you need to select two dry planks of light and dense wood with a thickness of 12-15 mm. Both blanks should be in the shape of a trapezoid. The main plank has base dimensions of 230 by 340 mm. The height of the structure is 120 mm. The auxiliary wooden element is made 95 mm high, and the dimensions of the base are 205 by 300 mm.
- To connect the boards, two metal rods with a diameter of 6 mm, having threaded ends, as well as nuts and washers are required. The structure is assembled in such a way that the planks are parallel, and there is an angle of 90° between them and the rods. The distance between the wooden elements is 130 mm, and the metal studs are located at the same distance from each other. Lead strips are glued to the bottom of the planks, which should load the boat by about 2/3.
- The line is attached to the water kite through a hole in a small board. It is drilled at the top of the element (20 mm from the edge) at a distance of 65 mm from the vertical center line. Leashes are tied to the main line 1-2 m apart.
- The length of the leashes is selected in the following way. The shortest one is located near the boat, and each next one should be longer than the previous one. It is important that in the working position the baits located on the leashes simultaneously touch the surface of the water. This setting can only be achieved directly on the pond.
Catching fish with a water snake. An effective way to catch fish in summer. Photo. Video.
All the details about fishing with a snake.
In rivers with fairly fast currents there are a sufficient number of predatory fish. Fishing with live bait is not very convenient - fast water gets in the way. Spinning requires skill (all because of this current). The most convenient and catchy type of fishing is fly fishing. Many will immediately notice: for this fishing you need a fairly expensive fishing rod and reel; you need to be able to handle gear; the main line (cord) has a complex structure, etc. This is partly true, but you can fish with a fly without a fishing rod at all and without any special skills, and a tackle called a “water kite” will help the angler with this. This gear is also called a “boat” or “sleigh”.
Availability in reality.
The most important thing is that this type of fishing is much cheaper than a fly fishing rod and more productive than the latter. Yes, and almost anyone can make a “sleigh.”
What kind of fish are caught with a water kite?
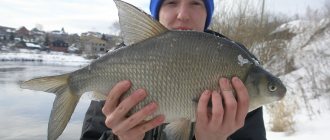
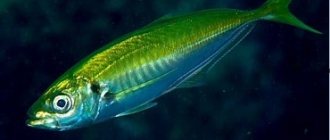
With this tackle you can catch the same fish as with fly fishing - grayling, chub, perch, asp, dace. Fishermen on the Volga even managed to catch roaches.
What does the tackle consist of?
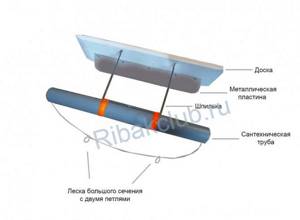
This tackle consists of a floating “sled”, a fishing line with leashes (it is better to attach the leashes to the main fishing line with swivels) and a reel. The design of the “sled” is not very complicated. They consist of two elements fastened with a metal “U” shaped pin, which has threads at the ends. A board about 10 cm wide and 40-50 long is screwed to the ends (too short one will sway too much on the wave). The holes for the pin are drilled into the top of the board, and a metal plate of a certain weight is screwed to the bottom of the board. A plastic plumbing pipe (diameter 5-8 cm) with ends plugged with foam plastic (so that it floats like a float) is screwed to the jumper of the “U”-shaped stud (the other side) with electrical tape. A thick fishing line with two loops (one closer to the left side and the other to the right) is attached to the ends of the pipe for attaching the main line with leads. The board must be oiled and painted so that it does not swell from water. The leashes have different lengths - the closer they are to the angler, the longer, the further away, the shorter. This is necessary so that the flies are on the surface of the water and in the area of the “Water Serpent” and near the fisherman holding the line at waist level. Leashes are placed at any distance, but usually it varies around one meter. The number of leashes should not exceed ten (you need to check how many are allowed in your river). The reel should be large enough, about 40-50 cm long and 6-8 cm wide, and be fairly light and buoyant. Foam strips are attached to the sides of the reel to engage the leashes when winding and unwinding the gear.
Fishing with a water kite, technique.
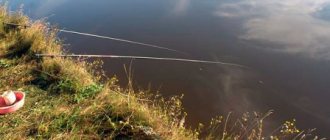
And now a little about fishing technique. Fishing is carried out from the shore, by boat, by walking in waders a few meters from the shore. The last method is the most preferable for beginners, because... allows you to more conveniently manage the gear. Let's look at the last example. The fisherman enters the water and launches a “sleigh” to which the main fishing line is attached to one of the loops (they are responsible for which direction the boat will float). Next, he carefully unwinds the reel and unhooks the flies from the foam. As soon as the tackle floats a sufficient distance, the fisherman makes a loop of the line on the reel (so that it no longer unwinds) and begins to twitch with flies. When biting and hooking a fish, the fisherman releases the reel into the river, giving him the right to float with the flow, and he begins to pull the “water kite” towards him by sorting out the fishing line (“sleigh” is closer, and the reel floats further away). He takes off the fish and releases the line back, pulling up the floating reel. With proper skill, the line does not get tangled and everything works out very quickly. Several fish may be caught at a time. Recently, so-called “reversible sleds” have appeared, which, when the fishing line is released and a sharp pull, float first in one direction, then in the other, and there is no need to knit two loops on them.
The replant will definitely come in handy
It is advisable to have a small landing net and a cage for storing caught fish. Happy fishing!
Fishing technique
Skillful handling of the boat requires some preparation and skill. First you need to test your skills without setting bait. The basics of ship craftsmanship look like this.
- First, a small supply of fishing line is unwound. The tackle can be equipped with a short rod with a spinning reel or a large reel.
- Then the boat lowers into the water. At the same time, it must take the correct position and begin to float downstream.
- As soon as the line is stretched, the boat moves away from land, rushing to the opposite bank of the river. Using the main line, you can adjust the distance of the gear from the coastline.
- You should practice not only releasing the water kite, but also the fishing technique. Usually the fish greedily grabs the bait floating on the surface of the water away from the shore. At such a moment, many anglers have an instinctive desire to hook it. This can only be done by sharply lifting the rod upwards. Then you need to quickly pull the prey to the shore. It is best to place the fish in the landing net and then remove the hook from it without removing the boat from the river.
Using a water kite for fishing, you will have to constantly move along the shore. The bait should be placed at the most promising points so that it floats naturally with the current.
How to make a fishing boat
This fishing device has several names, but mainly it is called a “water kite”, and also traditionally a “boat” and this name is much more suitable. Tackle is made from any material that has positive buoyancy.
Basically, it is wood or foam. It is desirable that the structure have a certain weight, otherwise it will not be stable on the water, especially in the presence of wind and waves. Drawings of such gear can be easily found on the Internet.
At the same time, you should not try to repeat the first drawing you come across. It's better to start by reading the reviews.
The simplest "ship"
To make a simple tackle, you need to have:
- A couple of planks of arbitrary length, up to 15 mm thick.
- Drying oil.
- Waterproof paint (oil-based), soft shade.
- A couple of M6 threaded studs and four nuts for these studs.
- A regular bracket with an M4 nut and a screw to secure the structure and the main line.
- Lead weight.
- Nails or screws for fastening.
- Glue (waterproof).
- Drills of the appropriate diameter.
If all the components are prepared, then you can begin assembling the structure itself.
The order is as follows:
- The finished boards are covered with drying oil, dried and covered with soft oil paint. The tackle should remain visible from a distance, but not scare away the fish.
- Elements similar to trapezoids are cut out of wooden planks. There should be oblique cuts on the side faces. In this case, it is better to first prepare the boards of the desired shape, and then open them with drying oil and paint.
- Holes are drilled in wooden blanks for their fastening.
- The two workpieces are connected using studs and nuts.
- After this, the bracket is attached. Holes for attaching it should be made on both sides so that the bracket can be rearranged if necessary, since you have to fish both on the left and on the right. The bracket is attached to the side where the water flows. This allows you to launch the “boat” in any direction of the current.
- Finally, a lead weight is attached to the bottom of the structure using glue. The load will make the structure more stable.
And here's what you need to know: Do-it-yourself bait for silver carp
The ship is ready for use; you just need to attach the equipment elements to it.
DIY reversible boat
In the process of using the “boat”, experienced fishermen had an interesting idea, which led to an improvement in the design of the gear. The improved boat consists of:
- From the lead board.
- From the main float.
- Made from leaf springs.
- From a special switching device and a limiting element.
- From the towing line.
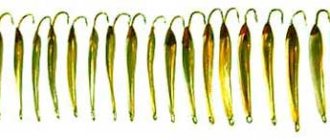
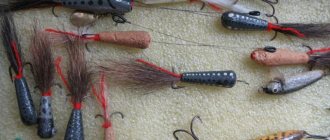
- From flies.
The springs included in the design serve as a kind of shock absorber that smoothes out strong jerks of the fish during bites. The float is included in the design of the reverse mechanism, and also gives the entire structure more stability.
The safety bracket prevents the line from tangling with the controls. The switching device is designed to change the direction of movement of the “ship”.
Manufacturing stages
- For the construction of fishing gear, you should take well-dried wood. To give the structure a small lifting force, it is given the desired shape.
- To prevent the structure from floating to the surface of the water, a redan is attached to the lower end of the board.
- The wooden base is impregnated with drying oil and painted with waterproof oil paint. The underwater part is painted blue, and the surface part is painted white.
- A hole with a diameter of 8 mm is drilled in the middle of the board to attach a lead weight.
- At the upper end of the board, between the springs, a strip of cork is attached, where the flies are supposed to be stored.
- The spring is made of stainless steel strips, 0.8 mm thick, 10 mm wide and 320 mm long.
- The float is made of polystyrene foam. It, along with the switch and springs, is attached to a wooden base.
- A strip of stainless steel is taken and a switch is made from it. Strip thickness 1 mm.
- The safety bracket is made of copper wire, 2 mm thick.
Springs made of stainless steel plates are bent so that the switch rises above the waterline to the height of the underwater part of the float.
Such gear is capable of moving both in the direction from the shore and vice versa. This allows you to control the movements of the tackle. As a rule, a simple structure is always located at one point.
Reversible model
Trying to improve the ancient gear, craftsmen began to change the design features of the boat, adding new elements and developments. As a result, they invented something more functional, powerful and efficient. The modern modernized version includes:
- Lead board.
- Main float.
- Plastic springs.
- A special mechanism for switching and limiting speed.
- Towing line.
- Front sights.
The presence of springs provides a kind of shock absorption, smoothing out strong jerks of aggressive prey during intense bites. The role of the float is to notify the fisherman about a bite that has occurred, as well as to improve the stability of the product.
The safety bracket is used to prevent frequent tangling of the fishing line with the control elements. Changing the course of movement of the tackle is carried out by a special switching element.
A modernized boat is being created using the following technology:
- Well-dried wood is used as the main raw material, which is given the appropriate shape. A redan is fixed at the lower end of the product, which prevents the gear from floating to the surface.
- Then the workpiece is carefully treated with drying oil and waterproof oil-based paint. The part that is under water should have a blue tint, and the part that is above water should have a white tint.
- To fix the lead weights, 8 mm holes are made in the middle of the board, and a cork strip is fixed in the upper end part between the springs.
- Stainless steel strips can be used to make springs.
- A foam blank is used as a float. The element itself is placed on a wooden base near the switches and springs.
- The safety bracket is created on the basis of copper wire. Its thickness is 2 mm.
Homemade springs must be bent in such a way that during operation the direction switch rises above the waterline to the height of the underwater part of the float.
And here's what you need to know: Fishing in Finland - features, rules, license, lake and river fishing in Finland
This option can move both from the shore and in the opposite direction, which makes it more functional. In turn, simple models move only to one point without changing course.
Making your own tackle
You can learn more about the instructions for making a homemade boat on fishing forums, where various diagrams and drawings are offered. Indeed, despite the abundance of store-bought products, many craftsmen refuse to buy them, trying to make the design on their own.
To perform this task, you can take any available material that is characterized by good buoyancy.
As a rule, this is a piece of wood or foam with a certain weight that gives it stability on the water. Instructions, diagrams and drawings can be found freely available on fishing forums, although you can borrow them from experienced colleagues.
It makes no sense for a beginner to spend a lot of time and effort on building a complex structure. Instead, it is better to try to invent the simplest boat using:
- Several boards of arbitrary length and thickness up to 15 mm.
- Drying oil and waterproof paint with a soft shade (an oil composition can be used).
- Several M6 threaded studs and four stud nuts.
- A conventional bracket with an M4 nut and a screw for fixing the structure and equipment.
- Lead weights, nails or any other fixing elements.
- Waterproof glue and drill bits.
And here's what you need to know: Fishing in the Kurgan region. Map of fishing spots...
After preparing such available tools and materials, you can begin assembling the structure itself, following a certain step-by-step guide.
The first step is to cover the finished boards with drying oil, dry them and treat them with a soft paint that can remain resistant to water. During the painting process, it is necessary to make the structure visible to the fisherman, but practically invisible to the inhabitants of the depths.
Using cutting tools, it is necessary to cut several elements resembling trapezoids from wooden planks. Oblique cuts are made on their side faces.
The first step is to prepare boards of different shapes, and then cover them with drying oil or a coloring compound. After performing such actions, holes are made in the workpiece to attach both structures to each other.
The fixing elements are studs with nuts. The next step is to attach the bracket.
As a result, a lead weight is attached to the bottom of the product, providing the necessary stability.
That's all, the simplest boat design can be considered ready for use. All that remains is to test it for performance and launch it into the reservoir.