Of course, it is better to see once than to hear or read. Therefore, how to fly fish, namely how to cast, is best watched on video. But nevertheless, what the casting technique should be can be explained well in a printed article. If you have seen fly fishing for the first time, you are probably interested. Fly fishing is mesmerizing.
The concept of “Russian fishing” does not include the expression “fly fishing”. Most likely, it is associated with aristocratic Western fishing. Although this type of fishing has long passed into the hands of the people and ceased to be a privilege of the ruling class. In addition to the fact that this is an unusual piece of equipment, the main component of which is a cord, it is also necessary to undergo a certain training course. Learn to fish, although it sounds strange.
Fly fishing
The types of fishing that are familiar to us do not require preliminary preparation, which is probably why there is an opinion that it is difficult to learn how to cast. Not difficult. An ordinary coordinated person will be able to understand how this is done in a short time. But you will have to finely hone your technique over and over again.
Where to train
An experienced instructor or an experienced fly fisherman can help teach casting techniques, who will suggest the right actions and correct mistakes. If there are none, then you will have to study the technique yourself.
Many instructors prefer to train in a gym where there is plenty of space or on dry land. But there is an opinion that the technique is grasped only if you start training on the water. There is also a high probability of getting mechanical damage to the cord. But the cord is still an expensive component of the gear. Therefore, go straight to the pond, don’t be shy and try it.
The video shows a short master class on learning to cast:
You should not attach bait during training; if you catch fish, the process will distract from your training. your initial goal is to ensure that the cord lays flat on the water.
If you conduct training according to all the rules, then you need to start by honing individual elements.
Fish with us
Fly fishing is a very ancient activity, and by now it has already come a long way in the evolution of gear and casting methods corresponding to it. Once upon a time, in the seventeenth century, before the invention of the fishing reel, people fished with long 5-6 meter rods with a fixed cord equal to the length of the rod.
In the simplest case, simply tilt the rod over the water and let the wind carry the fly to the fish's resting place. In case of a bite, the rod was simply placed on the water, and the fish tired itself, dragging it along with it. (Perhaps this is just speculation among fly fishing historians, but this version seems plausible and, in any case, witty).
If you wanted to cast further, you lengthened the cord (it was already difficult to lengthen a wooden rod due to its excessive weight), and used its weight to cast the fly at a distance slightly greater than twice the length of the rod, feeding the rod back and then swinging it forward, which is already very similar to modern ring or spey casting. Of course, a rod weighing a kilogram or more can hardly be operated with one hand, so it seems that the two-handed casting technique developed first. One-handed fishing rods came much later - after the invention of the reel, and then after the use of lighter materials, primarily bamboo, for their manufacture. Accordingly, one-handed casting appeared later, but the “bamboo revolution in rod making” helped to catch up with this gap, so quickly that, for example, in the United States, it was one-handed tackle that was the generally accepted standard in fly fishing for a very long time, and two-handed tackle, which was more traditional for the Old World Salmon tackle has only begun to gain admirers in the United States in recent years.
In the previous issue, as I remember, we collected one-handed tackle, so now we will talk about casting with a one-handed rod. You can take your first steps either on the lawn or near the water, but in the latter case it is best if it is a gentle grassy bank near a quiet pond or river, preferably in the absence of strong wind.
Preparation
So, assemble the fishing rod by first cleaning the joints and lubricating the “male” halves of the joints with paraffin (an ordinary household candle is what you need) - for a reliable connection, and preferably with mutual rotation of the sections for a better fit (the same rotation is also necessary when disconnecting sections). If the fishing rod is new, be sure to remove the protective film from the handle - it was intended only to keep the handle clean in the store. Otherwise, water will get under it and ruin the plug, the quality of which any fishing rod manufacturer is so proud of. Set the reel to spin with your left hand if you are right-handed, and vice versa. In the USA, for example, they often do it differently, which leads to the need to shift the rod to the other hand after casting, and in case of a successful bite, to fighting the fish, holding the rod with the “wrong” hand. Which, believe me, is very inconvenient. A conical leader with a leash should be attached to the end of the cord; the standard length is about one and a half rod lengths, at the end of the leash there is a small (very small) piece of fur. Or a fly with a broken hook (where does a beginner get this?..) Why exactly one and a half lengths? It can be longer (and this often happens in real fishing), but with longer undergrowth, a beginner may have problems turning the line. It can be shorter, but then the energy of the cord is not sufficiently extinguished and its reversal may turn out to be too fast and “nervous,” which is also not good.
If your rod has a fly ring near the handle (to keep your hands free when moving from place to place - many tackle manufacturers strive to create this convenience), do not use it. The fact is that in the “fly on the ring” position it is inconvenient to handle the tackle - the junction of the line with the undergrowth ends up somewhere between the rings of the fishing rod, and not outside the tulip, and in order to release the line, you will have to lower the rod to the ground, move to tulip and carefully pull this joint through the rings. And while standing in the water, these manipulations are completely impossible, since you hardly want to put the rod and reel in the water, and without doing this and pulling the leader towards you, you risk breaking your valuable rod. In addition, as a result of bending over the tulip, unnecessary residual deformation remains on the undergrowth. Therefore, it is better to always keep the joint outside the tulip, throwing the leader over the reel and hooking the fly to any ring of the rod.
There are many methods for learning to cast. Some of them are considered outdated, some argue with this. For example, during the reign of soft laminated bamboo rods, during training, students were forced to hold a book under their arm, thus prohibiting elbow movements. The Austrian school of fly casting, on the contrary, requires active movement of the whole hand, first pushing the rod in a horizontal direction, and only then changing its angle in the vertical plane. Some training straps fix the rod to the wrist, blocking the movement of the hand, while others, on the contrary, believe that the help of the hand in accelerating and stopping the rod is absolutely necessary. Undoubtedly, the casting style depends on many factors, both objective and subjective - weight, length and rigidity of the rod, habits and motor skills of a person, his aesthetic inclinations. I will try to explain as simply as possible the things that I read about in a variety of sources, and which I came to understand from my own experience. And we won’t draw the watch dial, which is so common when explaining casting techniques.
Initial position.
So, release nine meters of cord (the length of the leader and leash are not included in these meters) behind the tulip (why nine? Because the elastic properties of the rod are optimized for the weight of the first nine meters of the cord corresponding to the class). Then, shake hands with the rod - say hello to your new friend by hugging his handle. And without releasing the handle, place your thumb on top of it, on the opposite side of the reel. This is a takeover. Generally speaking, the grip can be different, for example, with the index finger on top of the handle, or by squeezing the handle from the sides with the thumb and forefinger. The choice is yours, but after going through all these options, I settled on the first one. If only because when you want to pick up a class 8 or 9 tackle for pike or salmon, other grip options will disappear by themselves.
The grip must be strong - the rod should not wobble in the palm when swinging, but on the contrary, the movement of the hand should be completely transmitted to the rod. Place the cord in front of you. On the lawn it's simple - place the fishing rod on the grass, take the end of the leader and move it away from the fishing rod. If you are near the water, do the following: the cord lies in a neat pile on the water; take the rod, lift it vertically, then place the tip behind your back so that part of the tulip line hangs slightly to the side behind your shoulder, and immediately make an energetic short swing forward and up, followed by a sharp stop of the rod.
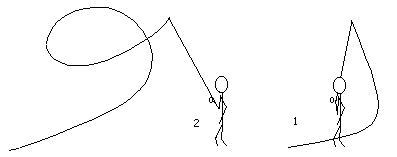
The cord will rise into the air and then lie in a straight line in front of you. This is a roll cast. More about him a little later. Well, now...
Overhead cast.
In English this is called overhead cast. Generally speaking, English terminology in fly fishing is primary for obvious reasons, and it would be nice to know it. Therefore, I will sometimes dilute my text with it in order to introduce the reader to generally accepted vocabulary, thereby facilitating his perception when subsequently reading English-language literature on fly fishing.
So, the cord released behind the tulip is in front of you. Press the line running from the reel up the rod with your index finger to the handle. Next is this. Are you right-handed? Then forget about your left hand, or hide it in your pocket so it doesn’t get in the way. Stand comfortably with your knees slightly bent, your right leg slightly forward if you are right-handed. We're going to lift the cord into the air, unwrap it behind our backs, and place it back in front of us.
Your hand is in front, relaxed; the fishing rod is its continuation, the tulip touches the water. Slowly but with acceleration, raise your arm, the elbow remains in place (the biceps works, the shoulder joint is relaxed). With the rod in a vertical position, when your palm is level with your ear, about twenty centimeters from it, at the moment of maximum speed, tense your hand and complete the movement with a sharp (really very sharp) stop. If you did everything correctly, the cord will gently rise out of the water, accelerate and fly over your head. When the rod stops, the line continues to move, forming a casting loop. The loop moves through the air, unfolding and eventually straightening out behind your back.
Everything you have just done is called backcast, literally - casting backwards. Here I remember the wonderful writer Vladimir Nabokov, who grew up in a family of Russian Anglophiles and then wrote a lot in English, who once noticed that the English language has an amazing ability to convey thoughts briefly and succinctly. This primarily concerns sports terminology. And now I have the feeling that the term “backcast” more accurately conveys what is happening than the phrases “back cast”, “back throw” or “back swing”. But whatever the name, I hope the action itself becomes clear to you.
Fly fishing is a funny thing. Sometimes you don't have to do anything to make things happen. After stopping the rod, in order for the line to fly back and effectively unfurl, you just need to freeze and wait. Well, almost freeze. Almost, because for the subsequent forward cast we will need a small swing of the rod, and to ensure this, it must be pulled back behind the back. Little bit. Why wait? Unfolding the loop. And how long to wait? And wait as long as necessary. Let's remember the school physics course. Pendulum oscillations. The longer the thread, the greater the oscillation period.
So it is here: the longer the cord behind the tulip, the longer the time it takes to turn around. But one more thing. The speed of the line depends on the speed of the hand and, accordingly, the tip of the rod. The higher the speed of the cord, the faster it unfolds. But there is no need to calculate this analytically. You just need to wait until the cord “almost unfurls.” It's clear? I doubt. To illustrate these words, American instructors often refer to the Latin letter “J”. The pause ends when the cord is in the shape of the letter “J” in flight, positioned horizontally, with the curl upward.
J”, and having something like the letter “U” laid on its side in the air, you will snap the whip, breaking the sound barrier, with a high probability of the fly snapping off somewhere back and the entire cord falling in a shapeless heap at your feet.
The pause ends, and you need to make a forward cast. It should be short and light. The elbow is at the side - in no case raised to shoulder level. Stop the rod when it passes the vertical position. As the cord moves forward, a loop is first formed, then it unfolds into a straight line and, as is, is lowered horizontally onto the water. As the line falls, slowly accompany it by lowering the rod tip. So, as a result, the line will be in front of you, and the tip of the rod will touch the water (lawn). Thus the cycle of raising and lowering the cord is completed.
Once again I want to draw attention to stopping when the rod passes the vertical as a key element. Without a confident sharp stop there will be no turn and, therefore, no flight of the cord. Now practice. Achieve a smooth and accelerated lifting of the cord into the air, its reversal behind your back and alignment again in front of you. So, a smooth rise up and back, lifting off the water, acceleration, stopping (quick tension and immediately relaxing all the muscles of the shoulder, elbow below), forming a loop and turning it around, a very small swing (10-15 degrees. It can also be subconscious , beginners always gravitate towards “carrying" the rod beyond the vertical. But it is better that it be controlled from the very beginning. If only so that in the future it will be easier for you to master, if you want, the technique of ultra-long casting. And, if you believe According to the great authority in this field, Lefty Krech, to obtain high line speed you need a long swing, which is achievable by moving the rod back almost to a horizontal position. But don’t try to do this now. Just control your swing), a very short forward swing with acceleration, again stopping, again forming and turning a loop, dropping the cord and accompanying it with the tip of the rod.
Mistakes when performing this exercise are almost inevitable. Here is a brief description of them and ways to overcome them.
Casting errors
The cord does not completely come off the water/lawn and then falls into a heap, moving somewhat towards you. The reason is a weak rise without acceleration. Or there has been a slowdown in your movement. You need a more energetic swing of the fishing rod, with a noticeable acceleration until it stops.
The cord rises from the water/lawn too quickly and flies into your face. The reason is too sharp a jerk with the rod. This happens especially often when using soft rods. You need to act smoothly, with acceleration.
The cord rises, flies over your head, flies in a big wide loop, then falls into a heap behind your back. The reason is a sluggish swing of the rod or an ineffective stop, or both. There may be an illusion that if you raise the rod higher, the line behind you will unwind before it can fall. And to do this, you instinctively raise your entire arm, elbow to the level of the shoulder joint, or even higher. This is a big misconception. Raising your arm will not achieve anything, except perhaps rapid fatigue of the muscles of the shoulder joint. The elbow should remain down and the shoulder joint should be relaxed. Once again: for the loop to unfold, the rod must be stopped vigorously. When stopping, you need to tense the shoulder muscles - biceps and triceps, in addition, the wrist should also be very “hard” so that the hand in the wrist joint does not fall, and the thumb lying on top of the rod handle provides a powerful support for the rod, preventing it from uncontrolled movement due to inertia.
Poor rotation of the loop during the backswing. The reason is the same - sluggish stopping of the rod. Do you see now how important this is?
The snap of the whip as the loop turns. Reason: shortened pause before forward swing. You need to wait until the letter “J” is formed.
The cord falls to the ground behind your back and gets caught in the grass. The pause between the back swing and the forward swing is too long.
Poor turn of the loop, falling into a heap on the water after swinging forward. Possible reasons: a sluggish stop of the rod when swinging forward, a low flight of the line behind your back, with its subsequent flight up in front of you. To avoid the latter, you need a timely stop when swinging back, and the direction of movement of the cord preceding it is back up. Then, after an effective reversal, the cord will move in the absolutely opposite direction - forward downwards.
Idle cast
Having overcome these mistakes, you can begin to do what fascinates everyone who watches fly fishing - false casting. This is a way to keep the loop in the air. Then, when you start fishing, it will be necessary to extend the line and aim to cast the fly. And also for other purposes, which are too early to discuss. How it's done. It's actually simple if you've mastered the previous technique. First, lift the cord into the air. Then turn the loop behind your back. Then swing the rod forward, a hard stop - it is needed when swinging in any direction. And only then do the differences begin. Instead of accompanying the fall of the cord onto the water/lawn, you need to wait a pause until the cord is formed into a horizontally located “J” and make a short swing back, smooth, energetic, with acceleration and subsequent mandatory rigid stop of the rod at the vertical, which is already familiar to us. This completes the idle casting cycle. Practice.
And some advice right away. Despite the need for strong acceleration and hard stopping in different phases of the cast, try not to apply too much force. It's too much. The hand should not get tired. Muscle tension is short-lived. Casting line is the rod's job, that's what it's made for. Don't bother him. Remember your childhood, swings. You didn't get tired swinging, did you?
Tip number two. Not everything will work out right away. This does not mean that you need to lay down your bones and try with all your might to achieve the ideal in the first training session. The feeling of casting comes gradually. You need to make small progress every time. Therefore, the workout should not be longer than 40 minutes. Otherwise, you will get tired, lose control of your movements and multiply your progress by zero. There should be at least three or four training sessions before you decide to tie a real fly to the leash instead of a piece of fur.
Now a little about the casting loop and how to make it better. The loop, if formed, can be different: wide (open loop), narrow (tight loop) and overlapping (tailing loop).
A good loop is usually a narrow one. It is dynamic, flies quickly, overcomes head or side winds, and turns well. To form it, you need to move the rod tip in a straight line. Beginners, due to lack of coordination of movements, tend to lead the rod so that its tip describes a convex arc. This is what makes the loop wide. The opposite mistake is more likely to occur among the more experienced and consists in the fact that, in an effort to ensure a narrow loop, they lead the tip of the rod along a concave curve. As a result, when the loop is deployed, the leash with the fly clings to the cord. Keep this in mind and strive to provide the loop you need right now. And it is not in vain that the caveat is that the best loop is not always a very narrow one. It happens that you need to very gently place the fly on the water, and then a slightly wider loop will ensure a lower speed and a quiet presentation to shy fish. In other words, the loop should be under your control, and you now know how to do it. And one more thing - you shouldn’t discount the bending of the rod during the casting process. This does not mean that it needs to be taken into account in any special way. You just need to remember this and monitor your loop, optimizing the trajectory of your hand, and therefore the rod tip. I must also say that the length of the arc significantly depends on the rigidity of the rod. A soft (slow) rod requires a long trajectory to return energy to the line, while a hard (fast) rod manages to return the impulse to the line faster, that is, on a shorter section of the arc. Therefore, balance the length of the arc with the properties of your gear.
That's all I wanted to tell you about fly casting for beginners. Practice slowly and patiently. Ask an experienced friend about your mistakes - you know better from the outside. Don’t rush to catch fish, don’t be distracted by it even if it tempts you during training. A little time will pass, you will master a couple of basic casts and quickly realize that you still know too little to successfully present a fly to a fish standing where it wants it, and not you. Therefore, to be effective in fishing, you need to be skilled at casting. And this comes from tireless training. Patience and enjoyment. These are compatible things, no doubt...
Publications on the topic:
- Fly casting - video from Igor Tyapkin
- Fly fishing: Master class from Alexander Kibko
- Fly casting: Spey and more...
- About fly fishing in simple terms. Equipment for the first cast
When preparing this article, materials from the Internet sites www.flyfishinghistory.com, www.flyanglersonline.com and www.sexyloops.com were used. Author Andrey Sokolov www.fishing.org.ua
Source
What casting techniques exist?
There are several casting techniques. I’ll name just a few: horizontal, vertical, ring, overhead, arc, double pull-up, and so on. Different casts for one-handed and two-handed fly fishing. The more casts a fly fisherman has, the more successful the fishing will be. Therefore, it is not enough to master one cast, you must constantly improve. You need to start mastering casting by using a dry fly. Only then move on to feeding bait for deep fly fishing - wet flies, nymphs and streamers.
In this video you can see various casts and see how the cord works:
When casting, the cord forms a loop, which varies in shape, size and direction. It is important to give the loop acceleration, otherwise it will not fly. Rapid acceleration will also not give results, but will lead to tangling of the gear. Fish can be caught by fly fishing and in the wind, which leaves its mark on the formation of the loop.
To obtain a narrow loop, the tip of the rod during acceleration should follow a line as close as possible to a straight line. And only after completing the accelerating movement, that is, before the next forward stroke, is the rod moved back a little more, giving room for the unfolding cord.A typical mistake is the elbow pressed to the body, remaining almost motionless during the swing. In this case, the tip of the rod describes an arc, as a result of which a wide loop inevitably appears. The same error occurs if the rod continues to accelerate to a position greater than 13.00, for example, up to 14.00 (the exception is special equipment for long casts). As a rule, this happens when the arm is not trained enough and the hand does not hold the rod in the desired position.
You should pay attention to the force of the swing. If in the acceleration section the line does not receive the necessary energy, it does not unfold, and if the acceleration is too powerful, the rod is overloaded, and a so-called “reflected” traveling wave appears on the line, distorting the cast. When swinging the rod back, the force should be no more than that required to fully deploy the line.
When mastering forward swings, you need to know some of their features. The fact is that in fly fishing there are so-called “wet” and “dry” casts. In the first case, the fly should submerge in the water (sink), in the second, it should only touch the surface of the water.
In “wet”, after each backswing, there is a forward swing, lowering the line and fly onto the water. For the fly to sink, it cannot be dried, that is, kept in the air for a long time. In “dry” casting, before lowering the fly into the water, it is first dried by performing idle air casts (what is called holding the top), when the line and fly are thrown forward, then back again - and so on several times in a row before lowering the bait into the water .
As you can see, fly casting is based on alternating back and forth strokes. It takes a certain amount of time, a pause, to unfurl the cord after swinging back. Properly pausing between back and forth strokes (or sending the line) is one of the most important elements of casting. If the cord at the back is not straightened enough ( Fig. 2, a
), the rod, when swinging forward, does not work with the required load, that is, it is not loaded with the full length of the cord.
In addition, due to the double acceleration, which acts on the part of the cord that has not yet been straightened, there is a danger of the front sight breaking when passing through the rearmost point. A pause that is too short is almost always accompanied by a characteristic click of the undergrowth with the fly overturning ( Fig. 2, b
).
If the pause is too long, the cord straightened from behind begins to fall, the rod is unloaded and the forward swing is performed with a large loop, and sometimes the cord behind touches the ground ( Fig. 2, c
).
Taking a pause is learned in practice. We can advise a novice fly fisherman to use a count - one, two, three...
Mastering the “holding the top” technique, or idle casts, is as follows. Pull out approximately 6-8 meters of cord and, making movements between 11.00. and 13.00, as shown in Fig. 1
, try to ensure that the cord behind and in front flies along the required trajectory in one specific plane.
The tip of the rod and the hand should draw a figure-eight figure (Fig. 3)
.
Dry casting can be considered mastered if you can change the plane of flight of the cord at will, as well as perform dry casting with a cord 12-15 meters long.
Next stage
- learning to use the second hand. You will need this for longer casts - over 12 meters.
The most common is the so-called Scandinavian style. It differs in that during the casting process the cord is fixed not at the handle, but in the left hand, which, during the swings and the casting itself, performs the technique of pulling the cord (Fig. 4)
. In this case, the left hand can perform two tasks. The simplest thing is to keep the line under constant tension so that you can fully use the catapulting property of the rod. Another and the most important, but at the same time the most difficult for a beginner, is to give the cord additional acceleration.
There are simple and double pull-ups. In the first case, perform one pull-up for each pair of back-to-front strokes; in the second case, pulling up both when swinging backwards and when swinging forward (or when throwing out the cord). As a rule, now they almost always practice a more or less pronounced double pull-up, and “shooting” casts are performed only with a double pull-up.
At first, during single casts with a line length of 8-10, then 10-12 meters, they simply master synchronized movements of the left hand, ensuring that the line does not lose tension. If the left hand with the cord remains motionless in one place, when swinging forward, contact with the cord is lost precisely because of the weakening of its tension (Fig. 5)
. This slack should be eliminated by pulling the cord with the left hand.
Having mastered the rhythm of movements of the left hand without pulling up, you can move on to performing the pull-up itself. First, with the movement of the palm, 10-15 centimeters of the cord are briefly pulled up, then the sections of the cord being pulled up are gradually increased to a maximum of one to one and a half meters with double pull-ups.
It is advisable not to overdo it and not to make too strong strokes - this will lead to the formation of a wide loop, and a good cast will not work.
Where to start
The first steps in learning to cast should begin with mastering the simplest techniques:
For example, this: raise the cord above your head and rotate it, preventing it from falling to the ground. This exercise is called “holding the air.”
Another example: an important point when learning the “overhead cast” is to grasp the moment when the line is completely extended behind your head. You can only feel it, the form will pull back. You won't be able to see it. As soon as you turn your head, you will lose control of the cord.
Training must begin with learning techniques with one hand. Connect the second hand at later stages. Spey series casts are made with two-handed rods. These are more difficult casts. You can watch this on video:
First learn short-range fly casting. They move on to further, more complex ones later.
Let's say you have learned not only to cast a fly, but also to send it to the required distance. But that is not all. You must be able to present the fly, not slam it down onto the water as hard as you can, but gently lower it. The bite can occur when the fly splashes down or at the moment when it begins to sink. It happens. that the fish grabs the bait on the fly, jumping out of the water.
At the first stage of mastering fly fishing, be prepared for the fact that there will be a large loss of flies. The main reason is that flies will cling to coastal bushes and branches. At the first stage, you don’t have to hook a fly at all; one hook with a piece of foam rubber will be enough.
Fly casting for beginners
Only after the casting has been completed can you equip the fly fishing tackle with a fly and try to catch fish. But until this moment, a beginner will have to put in a lot of effort and do repetitions - master the basics of casting, develop muscle memory... There are difficulties here, many people have a question: is it worth doing this... But everyone who has mastered fly fishing claims that this species is not only dynamic and exciting, but also productive in terms of results...
Why fly fishing is effective
The speed of catching a reservoir, the frequency of casting in fly fishing is higher than in spinning. This gives an advantage. The fact is that in fly fishing they don’t keep the fly in the water for a long time; if there is no bite after the first few strips, they recast. The absence of a quick bite means that there are either no fish within a radius of one and a half meters, or this bait and fishing technique did not tempt it.
Recasting in fly fishing by spinning standards is done instantly.
While the spinner tries to seduce the pike with his slow retrieve, then reels in the bait and prepares for a new cast with the reel, the whipper manages to fish a decent area.
In fly fishing, the likelihood of finding fish faster is greater. But for this you need to at least confidently use the tackle, cast far, accurately and without problems.
Smoothness and smoothness again
If you do it as in spinning - move the rod back at 40 degrees and further, then forcefully send the bait into the distance, then in fly fishing you will most likely quickly catch all the bushes, but with tangled, overflowing equipment.
To prevent this from happening (or to happen as little as possible), you will have to wean yourself from the usual sharp spinning movements and create a new muscle skill - do everything smoothly.
You need to remember the first rule - make smooth movements, forget sharpness, as in a spinning rod.
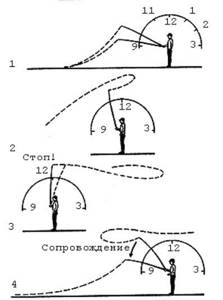
Conventional casting technique
It will be easier to master the fly casting technique if you perform the movements on a count. A simple cast - “swing-throw”.
- One - the rod rises up quickly, but smoothly, and only leans back slightly. In this case, the cord is pulled from the water.
- Two – the flight of the cord under the influence of the first movement, it is almost extended.
- Three is a fishing rod, accelerating smoothly, and at the same time moving forward quite quickly. The cord opens completely in one line and follows the rod forward to the water.
- Four - the line rolls beautifully onto the water, the fly splashes down in the chosen place.
If you do this, which in general is not difficult to train, the line will lie perfectly on the water and the fly will not shoot back. But you will have to repeat simple movements: “one-two-three-four” many, many times in a spacious place free of snags.
How to train fly casting
- To master it, it is better to purchase a fishing rod of class 6 - 7. It is suitable as a universal one for training, for catching small fish, and if necessary, it will also fight with a trophy.
- When mastering fly casting, you should use only a floating line, and a light fly with minimal windage.
- In the first stages of training, instead of a fly, it is better to tie a piece of material of similar windage or a bunch of threads, without any metal. Simple precautions will reduce the likelihood of snags and prevent injuries from the front sight.
- It is better to work with fly fishing in polarized glasses. They not only give you the opportunity to look under the water, but the main thing for beginners is that they protect their eyes from the cord, which is very important at first.
Below are a few more recommendations for mastering fly fishing gear and casting training.
Don't rush to be disappointed
At first, all beginners make one significant mistake. After watching a video about fly casting and fishing techniques from the masters, they immediately try to repeat everything they saw. At the same time, nothing necessarily works out even on the third or tenth attempt. This leads to some uncertainty and a desire to throw the fly fishing rod into the closet or drown it in the river, just to never pick it up.
The wrong tactic - trying to figure out everything in fly fishing at once - leads to a bad result.
You need to do the opposite - gradually, step by step, stage by stage, mastering the skill. Success will definitely come, it can’t be otherwise.
Fly casting movements – nail and tooth
When making the very first training movements of fly casting, trying to pull the line in line with the fishing rod, you should pay attention to the execution technique.
- Take a hammer and hammer a nail into the wall. Remember the movement of your arm and hand. Repeat the same while holding the rod in your hand and moving it forward.
- When moving the rod back, make a movement with your hand as if you were pulling out a tooth, and with special zeal, for example, from your boss. Excessive diligence in pulling out the tooth thoroughly will not hurt, but you need to do it smoothly...
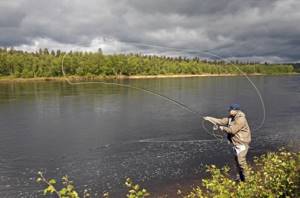
Just a short cord and rest
The next significant mistake of newbies in fly fishing is to try to immediately cast further, and with each new attempt to increase the distance.
You need to start with the shortest cord. Only after mastering the technique and making a hundred successful casts can you increase the length of the cord. But only half a meter.
Then again fifty casts, but better yet more, and no more than half a meter increase in length...
Thus, it will be possible to reach decent ranges, but with some basic equipment... But trying to master everything in one continuous workout in a day is also wrong. You need rest, repeated training and more rest - only then will your head and hands develop the correct memory. More training sessions separated in time, and when the line is three lengths of the rod correctly, without bushes and tangles, put on the water - you can start fishing.
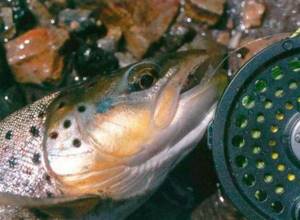
How to catch
After you have learned the casting technique, you need to start fly fishing. But even here, newbies face undercurrents. Another important point is to perform timely cutting. You have to catch it on time. If you get nervous and pull ahead of time, the fish will release the bait. If you are fishing on rivers with a strong current, then the current can slow down the hooking and the fish will spit out the bait. Or the fish will be caught by the eye or cheek and fall off the hook when fishing.
Sharp hooks are very important when fly fishing. Check them often and sharpen them if necessary.
Fishing
The fly fishing technique also involves the correct process of landing fish. As soon as you feel a poke or a bite, it means that the moment of fishing has come. In order to get a few moments to think about the situation, you need to press the cord against the form with your finger. There are several ways to play:
- Pull the cord with your second hand and fish out the fish by intercepting a piece of the pressed cord;
- Remove the slack of the cord with a reel and fish it out with the elasticity of the form.
When fishing, you must constantly monitor the fish. If you give it complete freedom and wait until the fish gets tired, it may go under the snag and, as a result, fall off the hook.
It helps a lot when landing landing nets. If you calmly take her into the landing net in the water, then she will not have the opportunity to break the form with sudden movements.
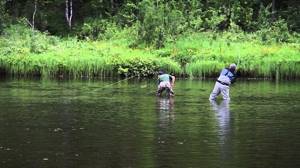
The landing net should always be at hand
Where did fly fishing originate?
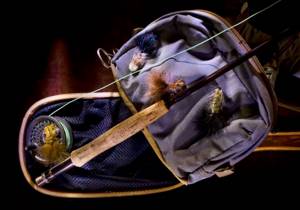
Fishing gear and fishing methods are deeply rooted in history. And this trend could not ignore fly fishing. It is generally accepted that fly fishing is exclusively English tackle. However, it is worth noting that the great merit of the British lies precisely in the dissemination and popularization of fly fishing, since the method itself was known to the ancient Egyptians (and this is 4000 BC). Of course, the gear of that time was radically different from modern fly fishing, but the principle of having a cord and a fly with a hook was already established.
But let's return closer to our time, to England. Fly fishing in this country had already begun to develop into an exact science of fishing in the early 1800s, with the origins of basic knowledge 200 years earlier.
Thus, one of the first books about fly fishing, written in 1486 by Juliana Berners, the abbess of the monastery of St. Alban the British, has survived to this day. She described in it a dozen flies that were successfully used at that time among English fishermen.
The entomologist Taverner also made a serious contribution to fly fishing, who in 1600 published a book about aquatic insects and methods of imitating them with artificial materials. This once again established the fly as a key bait in fly fishing. Of course, the first prototypes of flies were much simpler than modern ones (made of Lurex, with feathers of tropical birds, etc.). Gradually, fly fishing began to migrate to America, where the production of gear was put on stream.
The methods that guided the peoples who have inhabited our country since ancient times were used. In particular, the northern peoples harvested grayling on the rivers using a net, where the leashes had hooks wrapped in ordinary dog hair. And this was quite enough to stock up on enough catch for the season.
By the way, our grandfathers and great-grandfathers were also familiar with fly fishing. They just used a regular bamboo spinning rod with a Neva reel for this. The fly was simply floated down the river, where it could fall into a pool or backwater, in which the desired grayling, trout or ide sits.
What kind of fish to fly fish for?
What kind of fish can you catch when you first start out with fly fishing? If you did not specifically come for salmon and grayling, but are learning the basics on a river or stream in central Russia, then you will catch chub with a dry fly. In the spring, roaches will bite on the nymph. You can catch perch with a streamer in shallow water.
If you fish with a dry fly, you need a special compound that needs to be used to treat it so that it does not get wet. The fly must be dried regularly by unhooking it from the fly rod. Experienced fly fishermen dry the fly with idle casts.
Folk saying: If insects fall into the water, catch them from above the water.
Fly fishing gear
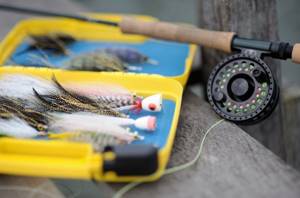
The fly fisherman is forced to constantly move, standing waist-deep in waders in the middle of the river flow. Therefore, all his things are simple, light, practical, and most importantly - reliable. Likewise, the fly fishing tackle itself does not have anything superfluous that can interfere or complicate the fisherman’s work.
Rod
A fly fishing rod has its own classification. So, grades 1-4 are focused on light flies. The length of such sticks is from 1.8 to 2.1 meters. But class 3-4 has larger sizes, and its strength allows it to work with medium-sized streamers. These classes of rods will be a good choice for beginners who want to join the culture of fly fishing and master the basic techniques of working with tackle.
Rods of class 5-6, with an average length of 2.7 meters, are already for trained fishermen, ready to meet significant opponents. Such a rod allows you to cast at 18-20 meters, which will ensure you reach the best places where the fish can stand. This class is the most universal, because These rods are successfully used by both beginners and experienced fly fishermen.
Sticks of grades 7-9 are real “heavy” artillery. You really need to grow up to them, since making long casts with such a rod is not very easy. But it will bravely withstand a fight with a real trophy in the form of a strong salmon, pike or catfish. Note that for each class a certain type of cord is oriented, which will best reveal all the capabilities of the gear.
Coil
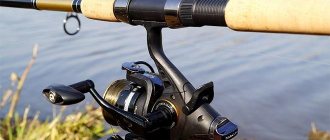
The most famous type of fly fishing reel is the inertia reel. It resembles our “Neva”, only it has much more variations in technical design. To choose the right line for your tackle, pay attention to the mark on the reel. Usually the manufacturer mentions this in the form of marking the required cord class. The presence of a clutch and the capacity of the spool are individual for each angler.
Fly line
To assemble a balanced fly fishing tackle, you must comply with the manufacturer's requirements. So, in addition to marking the cord on the reel, there is a special AFTMA system - a table that indicates the correct relationship between the class of the cord and the fishing rod.
The cord is also classified according to the degree of load: 1-3 class for light flies and modest fish, 4-5 class is a transitional stage to 6-7 class, which can work in windy conditions and allows you to cast the bait further under 20 meters. As for grades 8-9, such a line is prepared for trophy fishing and allows you to cast a fly at 25-30 meters.
Leader or leash
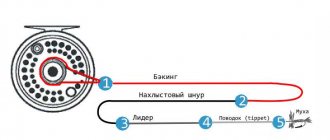
In fly fishing, the presence of undergrowth is necessary to improve the performance of the bait on a leash. Since the main cord is quite thick, the leader is first attached to it (with the thick end), and the thin one is already fixed with a leash. This “whip” allows you to actively work with the tackle and correctly deliver the bait to the fishing point.
Fly fishing flies
The number of fly fishing flies invented by anglers is simply countless. However, we can distinguish several groups that they imitate: flies and emedgers - insects, nymphs - larvae, streamers - fish fry. The variety of shapes, sizes and colors is all at the discretion of the fly creator, because it is much more important to learn how to work with it correctly so that the fish mistakes it for a living creature.
Fly fishing lures
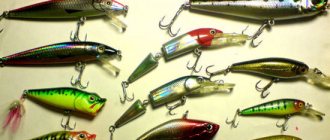
The main lures for fly fishing are artificial flies. This type of bait in its appearance resembles an insect or beetle, which are collected by fish on the surface and in the water column. Flies can be different in size and weight, being determined, like hooks, by a certain numbering. The higher the number, the more massive and heavier the front sight. In addition, flies are divided into two types: dry and wet.
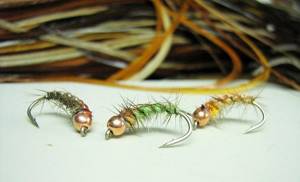
Important! Dry ones are used for fishing from the surface, and wet ones in the water column.
Experienced fly fishermen tie their own flies, preparing the bait for specific fishing conditions and fishing styles.
Casting and fly fishing techniques
Well, when we figured out the fly fishing tackle and its choice, it’s time to learn how to cast. In fact, learning how to make a proper fly cast is not as difficult as everyone thinks. Fly casting is not much more difficult than spinning, so don't be afraid. Just half an hour of practice and you will master the skill of casting fly fishing gear.
How to properly hold a fly fishing rod . You can actually hold the rod in any way that suits you, but there is a correct way to keep finger and hand fatigue to a minimum.
To properly grasp a fly rod, grasp its handle, extend your thumb along the side of the rod, and your index finger on top. This type of fly grip allows you to significantly reduce the load on your hand and fingers, which will allow you to make more casts without fatigue.
But many people find this method inconvenient and hold the tackle incorrectly. Yes, perhaps out of habit, holding the tackle this way will seem really uncomfortable, but over time you will get used to it and you will have a trump card - correct fixation of the tackle in your hand will not allow your hand to get tired quickly.
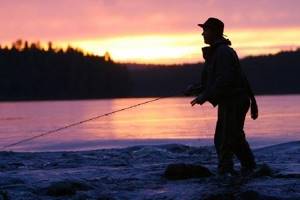
Casting technique. The casting technique requires certain skills, but you will learn it quickly. Before casting, you need to wind about 5-8 meters of cord from the reel and let the bait drift with the current so that it completely pulls the coiled supply of cord along with it. If you are fishing on a lake without a current, then the line is reeled in by swinging the rod back and forth.
To cast the bait, we need to swing the rod, almost the same as when casting a spinning rod. When the coiled cord is stretched, swing the rod back. You must swing so that the angle between the water and the rod is 90-105 degrees and stop it in this position.
Now is the most crucial moment. When fishing with a spinning rod, you make a swing and immediately send a spoon or other spinning bait further from the shore. When casting with a fly tackle, during the backswing you must wait until the entire line moves behind your back and only then make a forward swing. This is exactly the pause you need to learn to take, and the rest is elementary.
When swinging forward you should stop the rod at approximately a 40 degree angle to the water. At the same time, in the final phase of casting, stop the rod abruptly, but gently, so that the cord aligns itself by inertia and lies exactly at the point you intended. The finishing motion when casting a fly rod should resemble driving a nail in with a small hammer.
Fly casting range is usually 10-15 meters. Beginners often think that casting should be much further, but they are mistaken, 15 meters is the normal casting distance for fly fishing.
You can practice making such casts not only on a pond, but also on any site or even in the yard of your house.
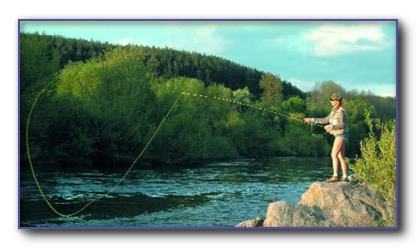
Fly fishing technique. For beginners, I highly recommend starting with dry fly fishing. To do this, you will need a floating line and a water repellent dry fly pre-treatment. This is done so that the fly remains unsinkable longer.
The main rule for guiding a dry fly is that it should float as if it were not tied to the line at all, that is, its movement with the flow should be natural. But at the same time, the cord should always be taut so that you can always feel the bite and make the hook in time.
In some cases, fly fishermen imitate the movements of the insects their fly is camouflaged as. These are short, barely noticeable fly pulls or small jerks. These movements must be very careful so that they do not scare away the fish, but, on the contrary, provoke a bite.
And in order for the resulting theory to be better remembered in your memory and you can better understand what was said above, I recommend that you watch a video of the fly casting technique and fishing with this tackle.
