Necessary materials
Fabrics
It is important that the hiking backpack is durable and waterproof. Therefore, the choice of fabric is approached with special attention. The following materials are suitable for its manufacture:
- avisent - was developed for the army and has the appropriate characteristics: durable, lightweight, inexpensive, withstands low temperatures, allows water to pass through, frays when cut;
- cordura - also invented for the army: available in different densities, water-repellent, does not crumble, expensive, heavy, does not tolerate low temperatures;
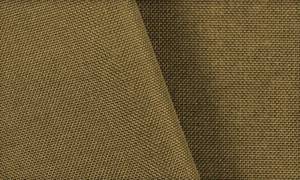
- oxford - a fabric with a matting weave and nylon content: light, inexpensive, heat-resistant (does not lose properties from -50 to +110 degrees C), waterproof, fades when exposed to direct sunlight;
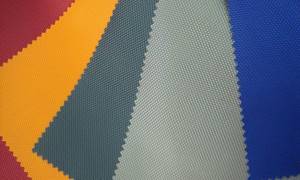
- polyester - for greater strength and moisture resistance, it is treated with polyvinyl chloride: cheap, lightweight, does not change properties in frost and sun, does not deform, does not crumble, does not withstand heavy loads, does not protect from moisture.
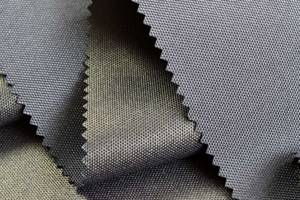
Advice! When choosing a material, you should take into account the planned loads and conditions of use.
Accessories and additional materials
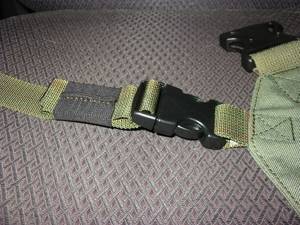
- thin nylon (with a width of 150 cm) - 70 cm;
- Isolon (foam) 10 mm thick - 1 sq. m.;
- sling 25 mm - 7 m;
- sling 45 mm - 2 m;
- fastex 25 mm - 2 pcs.;
- fastex 45 mm - 1 pc.;
- tightening buckle - 14 pcs.;
- stop clamp - 1 pc.;
- zipper 30 cm - 1 pc.;
- zippers 20 cm - according to the number of pockets;
- aluminum tubes for frame D4, length 70 cm - 2 pcs.;
- cord D3 - 1.3 m;13. tape for finishing seams - 2 m.
Long transitions
Let's return to more sophisticated and prepared tourists. For longer journeys, taking more than a week, it is necessary to slightly increase the displacement.
However, you should not approach increasing your luggage with fanaticism. Experienced tourists who have climbed more than one pass share their opinion that a multifunctional tourist backpack with a capacity of 90 liters will help out in all situations.
It is this displacement that is the best option, which does not turn the trip into carrying heavy loads.
Fabric calculation
The simplest and most accurate method for calculating fabric is to lay out the layout on graph paper using a scale (cutting) ruler. This way you can calculate the required amount of material as accurately as possible.
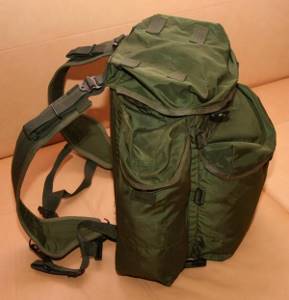
In this case, you will need 2 m of fabric with a width of 150 cm.
Important! Sewing such a product will require at least 3 square meters. m. of base material.
Extra options
Now let's move on to considering additional equipment parameters. We mean pockets.
They can have different shapes and be located anywhere: on the side, back, bottom, top and even inside the backpack. Remember that pockets are necessary for the necessary little things that may suddenly be needed and must be quickly removed.
However, think about how many obstacles in the form of impassable windbreaks and dense tree branches in the thicket of the forest you may encounter on your way. If there are a lot, then it is better to abandon overly complicated models, so as not to regularly get caught on branches by the overgrown sides.
Let's listen to the advice of professionals who do not recommend choosing a tourist backpack with impressive side pockets. Besides the fact that they are not practical to carry through the forest, they will not allow you to attach a rug to your luggage if necessary.
Although such models also have their advantage: they help to carry skis in the winter season. An exception in this case may be the side compartments, which increase as they are filled, and when empty they look like a folded accordion.
Back pockets, on the contrary, are a must. Valve designs have proven themselves especially well, instantly helping to remove a flashlight, spare batteries, map or phone.
Flap pockets in some models can accommodate warm clothes, which is very convenient in the changeable climate of mountain passes. One movement and, without opening your backpack, you throw a warm down jacket over your shoulders.
Next, we'll look at some other additional features and tell you why they're useful.
Step-by-step cutting and sewing of a hiking backpack
Below is the construction of a 90 liter backpack.
Initially, the details are drawn on paper, cut out and cut out of the material. To make it more convenient to cut the paper pattern, pin it to the fabric and trace it with chalk, adding allowances.
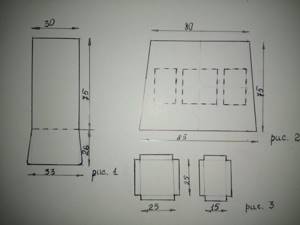
For sewing you will need the following parts:
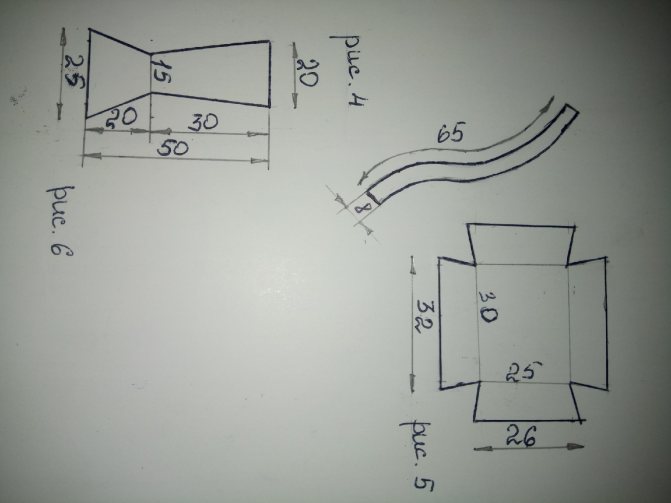
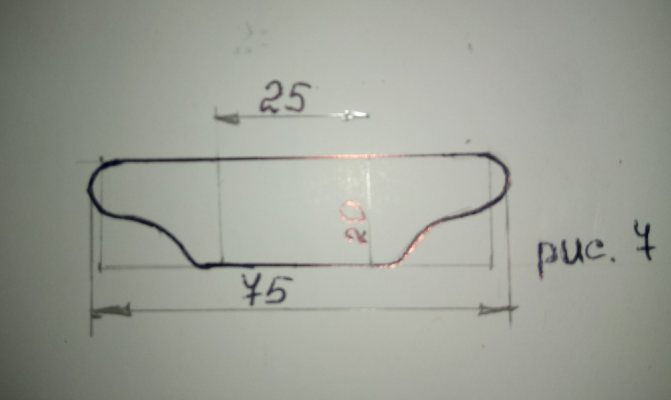
- the back and bottom of the product are made one-piece, the height of the part is 101, of which the back is 75x30, the bottom is 30x26x33;
- the main part is in the shape of a trapezoid with dimensions 80x75x85.
- one pocket measuring 25x25, and two - 25x15;
Reference! The number of pockets depends on the desire of the owner, but 3 pieces are sewn on as standard.
- the straps are drawn curved with a length of 65 and a width of 8 and are cut from all three materials;
- valve 30x25 with folds, cut out of thin nylon and stitched at the corners;
- the back cover is 50 high and 20 wide at the top and 25 at the bottom, cut from nylon and isolon;
- the belt is cut out, as well as the straps, from all materials with a length of 70;
- tube 110x75, cut out of thin nylon.
Important! All dimensions are indicated in centimeters and do not take into account seam allowances; usually add 0.7 - 1 cm.
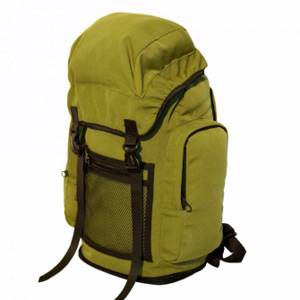
According to the marks, pockets with sewn-in zippers are attached to the “body” of the backpack. Two slings 2.5 cm wide are sewn vertically between them and horizontally above and below the pockets.
From the upper corners downwards, two slings 25 mm wide are attached to the back and the top is left open so that the frame can be inserted there later. Tightening buckles are attached to the sides at a distance of 30 and 55 cm from the bottom on both sides and two to the upper corners. And two slings on top and bottom. Retreat 25 cm from the top and grind the handle in the center. The straps are adjusted under it, having previously assembled them from the main fabric, thin nylon and isolon between them. Adjust the overlay by covering the ends of the straps, leaving the sides open for the belt along the bottom.
The valve is assembled so that it looks like a box; narrow tightening buckles are sewn into the seams at the corners, with which it will be attached to the base. Sew in the zipper by making a slit in the center.
Connect the back and base of the backpack to each other , folding them face to face. The main seams are reinforced with braid.
The tube is ground down and a drawstring 2 cm wide is made on top. A rope is inserted into it and the ends are threaded into the stop clamp. They grind it to the backpack and insert aluminum tubes into the tunnels made earlier.
Having collected all the parts together, you should carefully examine the product and, if something is missing, add it.
Reference! When making your first backpack, you should try your hand at mock-up cheap fabric.
Frame models
Why are frame models so popular among tourists?
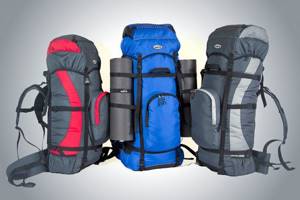
The soft travel backpack is equipped with a removable metal frame made of tubes, giving the luggage a cylindrical shape. Well suited as equipment for extreme stormtroopers, as well as for long expeditions. Easily transforms into a regular backpack bag; if desired, such equipment can be supplemented with numerous functional pockets. Based on frame models, there are many variations with accessories, as well as convenient additional compartments.
And if you need a good tourist backpack, then we advise you to take a closer look at frame models.
Useful tips
Recommendations from professionals are always useful:
- You can cut the fabric with a special soldering iron, in which case the edges will melt and will not fray;
- to get a backpack with a volume of 75 liters, reduce the main part on all sides and the height of the back by 10 cm, and the length of the tube part by 20 cm;
- shoulder straps are placed at a distance of 50 cm from the bottom for height 170 - 180 cm, for greater height - 55 cm and for shorter height - 45 cm;
- It is better to sew with strong nylon threads;
- To make the seams stronger, it is better to sew with a zigzag or double seam.
For example, increase or decrease the size and number of pockets. A backpack sewn by yourself will become an indispensable companion on any hike. Subscribe to our Social networks
How to darn woolen socks by hand?
Sleeveless vest made of thick yarn knitted for women
Why I decided to sew a backpack with my own hands, and not buy a ready-made item
This canvas backpack from Aliexpress traveled with me throughout Thailand and Abkhazia, and I also constantly used it at home when grocery shopping. I got so used to this comfortable thing that I was very upset when I saw how it was already starting to come apart at the seams. This thing was no longer subject to repair, and its appearance was worn out. So I decided to find a replacement for him.
Having searched the vastness of Aliexpress for similar backpacks, I read all the reviews on them. Unfortunately, most of them said that all these bags are not reliable: handles break and locks often fail. After weighing the pros and cons, I decided that I would try to sew a backpack with my own hands. This way I will definitely be confident in the quality of the item and will make it the way I like and feel comfortable. And since I have an old backpack, I used it as a sample for the pattern.
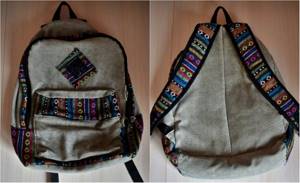
Let's sew with me! For me, this is my first experience in sewing such a thing, so it was interesting for me to work on it. I’ll say more - I sat at the sewing machine until well after midnight. The time it took me to sew was about one day with breaks for personal and family matters.
I’ll say right away that sewing an aliexpress backpack turned out to be not an easy task. Therefore, I advise you to take up sewing if you have some experience in sewing. For beginners, this master class will be more difficult to master.
