Wobbler vibration parameters
Frequency shows how many oscillations our bait makes per unit time, or how quickly it oscillates. Accordingly, active high-frequency wobblers are distinguished - with fast play, normal - with normal play, and passive low-frequency wobblers - with slow play. Depending on the frequency, each bait has its own “music” of water vibrations.
Amplitude shows how far to the sides our bait deviates, or how widely it oscillates. Accordingly, narrow-playing, normal and wide-playing wobblers are distinguished. The wider the wobbler moves, the stronger the water vibrations it creates, which means the fish hears it better.
In this case, the general nature of the game in terms of frequency and amplitude can be anything: from rare but sluggish vibrations to fast and sweeping ones, including cross variations.
What kind of wobbler action best attracts fish? Since various models still “coexist”, it is absolutely clear that there is no universal bait, each is good for its own conditions. At the same time, even during the day, the tastes of fish change, and sometimes, oddly enough, even the “wrong” game brings success.
But in most cases, certain patterns still apply, which have been noticed by more than one generation of fishermen. If you compare the oscillation activity (frequency and amplitude) of different wobblers, you can evaluate their play as lazy, average or active. The general rule of choice is this: the more passive the predator, the lazier (and smaller in size) our wobbler should be. And vice versa: the more active the predator, the more “mobile” the bait should be. Indeed, an energetic wobbler can be heard from afar, and if the predator is hungry, he will not be lazy. A well-fed fish is more likely to react to close and leisurely prey.
Specific predators also have their own preferences. Perch, for example, in most cases prefers a wobbler with fast small vibrations, similar to a fleeing fry. Asp, chub, and pike perch are also partial to the same “quivering” baits. But pike, on the contrary, more often bite on wobblers with slow and sweeping vibrations.
Light and sound play of wobblers
The characteristics of the wobbler also include light (optical) and sound (acoustic) play.
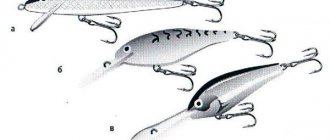
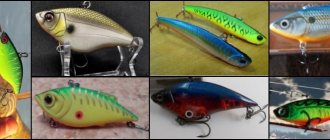
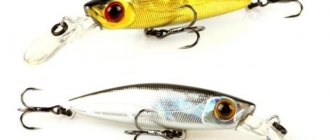
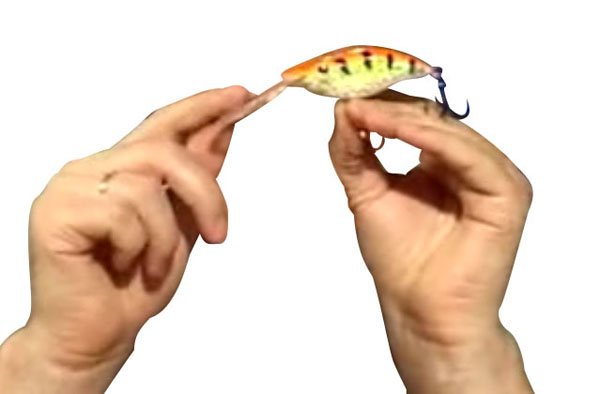
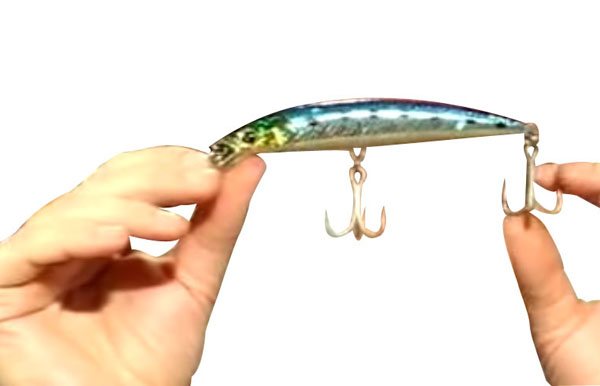
The light play is created by the painted surface of the wobbler when moving and depends on the specific color of the bait. Fish perceives this game through vision. The light play should attract the predator from afar and not scare it away close, and most importantly, provoke it to bite. That’s why wobblers have so many colors for different fish and different conditions. At certain moments, metallized, matte, holographic, translucent or some other lures provide optimal light play. To make it easier for the fish to “aim,” some wobblers have a thick black dot applied to them on the sides (Fig. 1).
Fig.1. Wobbler BOMBER Long A with an “aim point”.
This point should be close to the center of the swing and close to the bottom hook. Then, as practice confirms, in a flashing bait the predator chooses to grab precisely this clearly visible and relatively motionless “aiming point”, and the hook located nearby successfully detects the fish.
Acoustic play is the most important characteristic of wobblers. All water vibrations are perceived by the predator with the help of its main organ - the lateral line. At the same time, the general noise from the bait is not only the vibrations of the wobbler body, it is also supplemented by the sounds that arise at the joints, and in acoustic models there is also noise from the built-in rattles.
Although virtually all wobblers are acoustic. Shake the bait in the working position and you will hear the hooks and winding rings rattle in the same way as specially designed rattles. True, the point here is not just volume, but also “musicality”. A good wobbler should produce such a consonance that actively attracts a wide variety of fish in a variety of conditions. Therefore, some models of baits even have two rattles with different “settings”.
Fishing with a wobbler depending on the type of bait
The technique of fishing with a wobbler always depends on its shape. Let's consider the main technical features of wiring, based on the type of product.
Minnow is the so-called twitching form.
Important! Twitching is a jerky style of retrieve that gives the wobbler a scouring motion, similar to the behavior of a disoriented fish.
For this style, gear with a fast action is used, and it is the spinning rod that bears the main responsibility for the competent execution of wiring with this form of bait. The wobbler is moved with short pulls of the cord using the tip of the spinning rod, making pauses of various ranges, during which the free thread is reeled in with a reel.
Trolling for succession of fats. These quickly sinking baits are capable of digging the bottom with a blade, arousing genuine interest in the predator. These representatives of the wobbler world have their own low-frequency amplitude of play in addition to a leisurely wide stroke. The predator is attracted to the wobbler by the vibration of the bait and its sound effect.
Fishing with a wobbler, for those starting their practice in this exciting direction of fishing, should begin with cranks. The reason for this priority is the well-balanced and well-balanced performance of the bait under production conditions. Conventional wiring, which is based on uniform, monotonous winding of the cord onto a reel, animates the bait quite effectively. Here, the angler’s technique is largely unimportant; selecting a wobbler to suit the preferences of the fish is the main argument for success.
The jerkbait is designed for jigging types of retrieves. Having buried the bait to a certain level of the water horizon, it is carried out in steps, varying the time of pauses when stopping. The so-called pyological jig is initially aimed at trophy specimens, which is especially pronounced in the fall. The overwhelming majority of bites occur precisely during the pause, at the moment of the slow spontaneous lowering of the jerkbait to the bottom.
The popper's wiring is oriented, as with twitching, towards jerking movements. The only difference is that the popper is driven directly along the surface of the water, and this allows you to visually control the progress of the wobbler and the moment of attack of the predator. The sound effect, the so-called squelching, and a lot of splashes provoke even a passive predator.
Stability of wobbler play
Game stability is another important characteristic. It’s good if the wobbler maintains an attractive game in any conditions: in calm waters, in fast waters, and even at the edge of currents, and even with the fastest retrieve. However, in reality, not everything is so perfect. Some models are not suitable for fast currents; they are “swept” and thrown to the surface. Others get lost in the changing currents of water.
Although in such different conditions it is not worth demanding complete versatility from the bait, in my opinion. You just need to choose the appropriate model for fast flow or fast wiring. As a rule, long curved wobblers with a small blade work stably in the stream. And for variable jets, a compound is suitable; it will save the game in any whirlpools.
Adjusting the game of wobblers
It happens that the wobbler’s play needs to be corrected or changed. You can do this in several ways:
Adjusting the hinges
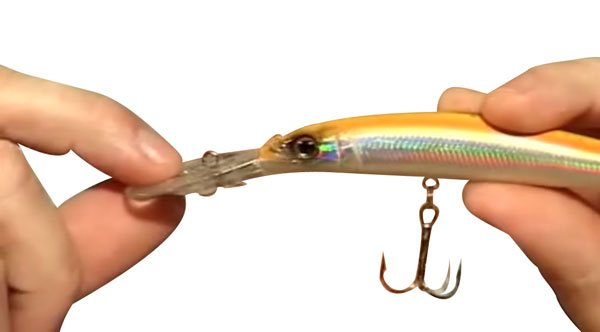
The simplest adjustment of the game is made by bending the loops. There are at least three such loops. In this case, the front loop sets the linear movement of the wobbler, the rest are responsible for the balanced position of the bait in the water. In a “correct” wobbler, all these loops are located vertically and strictly in a line (Fig. 2).
Fig.2. Checking the location of the hinges and blades.
However, within small limits it is allowed to bend the loops to the sides for better behavior of the bait in the water. It happens that when reeling in, the wobbler does not go straight towards us, but goes sideways - which means we need to bend the bow loop. If the bait goes in one direction, then the loop needs to be gradually bent in the opposite direction until the wobbler’s stroke is leveled out.
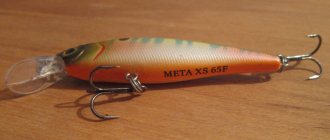
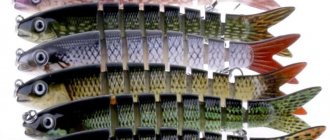
It is believed that even tightening the line at the top or bottom of the bow loop slightly changes the game: in the first case, the wobbler goes a little deeper and oscillates a little more actively than in the second. Therefore, if the nose loop is made of relatively soft wire, you can, if necessary, try to bend it up and down or tighten it accordingly. There are even special models that have two nose loops (Fig. 3).
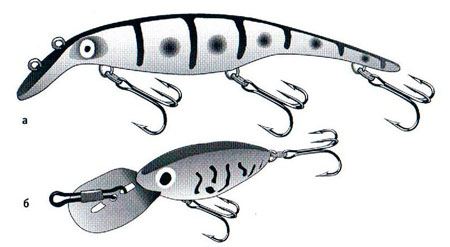
Fig.3. Wobblers with two nose loops: a) with two ears, b) with a reversible leash.
The lower and rear loops are equipped with hooks, which also serve as external loading. Therefore, if the wobbler leans to one side even in a calm position, let’s check and align all these loops strictly vertically.
One day I spent a long time trying to get the little “rattlin” to play using the front loop until I noticed that the bottom loop was noticeably bent to the side. At the same time, the hook also shifted from the axial plane, the lateral balance was disrupted, and the wobbler moved to the side when retrieved with an inclination. But all you had to do was straighten the bottom loop, and the game became perfect.
However, you need to bend the loops carefully so as not to spoil the bait, and do this only when necessary, if you are really not happy with something. As a rule, a good wobbler is already adjusted and ready for fishing.
Blade adjustment
The blade most influences the performance of the wobbler, so this method of adjustment is the most effective, but also the most unpredictable in terms of results.
The blade can be adjusted in only one way - by grinding with a file. Sometimes stitching is simply necessary. Unfortunately, there are still wobblers in which the blade is glued crookedly (Fig. 147b). In such cases, it is necessary to remove the “extra” material so that the blade becomes symmetrical relative to the body of the bait. If the difference is small, then the wobbler usually retains its working qualities.
It happens that the blade seems to be symmetrical, but the wobbler moves to the left, and no adjustment helps. Let's try to gradually grind off the edge of the left half of the blade - the wobbler will gradually “unfold”.
More often, the blade is “cut” specifically to change the game or the depth of the bait (in fact, both change). For example, a wobbler must be held over the “carpet”, and the bait goes too deep and collects grass. Or on a fast roll the wobbler plays too actively and alarms the fish. In both cases, you can adjust the bait by grinding down the blade.
Before you take a file, you need to imagine which part of the blade is responsible for what. Although when it decreases, the activity of the game always decreases and the depth of the wobbler decreases. But still, the lower part of the blade has a greater influence on the immersion of the bait, and the side parts - on the activity of its game.
Therefore, the blade can be ground in different ways (Fig. 4).
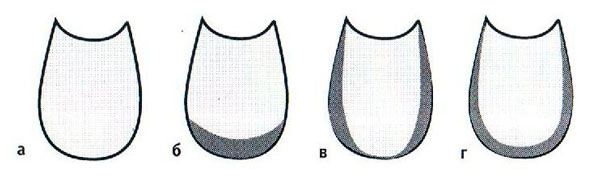
Fig.4. Grinding the blade: a) original blade, b) grinding from below, c) grinding from the sides, d) uniform grinding
If we need to reduce the immersion of the bait, we grind off the lower part of the blade. At the same time, the intensity of the game will also decrease, but not as noticeably. Conversely, grinding down the sides of the blade will result in noticeably sluggish play at almost the same depth. Uniform grinding of the blade will lead to a proportional decrease in both characteristics under consideration.
And for models with a lower groove, even replacing the blade is not excluded. Cutting out a new blade from plexiglass “with reserve”, gluing it in and adjusting it to the game is quite a feasible task for most of us. And when your designer specimen catches the first fish, you can rightfully consider yourself a real wobbler designer.
Balance change
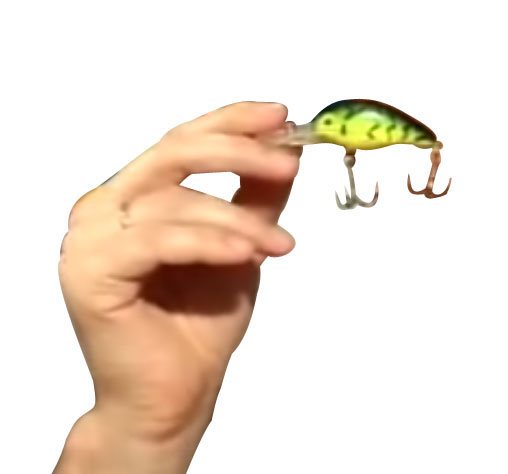
Each wobbler is designed for its own working position (Fig. 5). This position determines the correct balance of the wobbler, not only longitudinal, but also transverse.
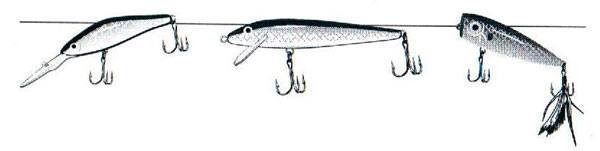
Fig.5. Balanced position for various wobblers: a) diving, b) floating shallow, c) surface.
Attaching a leash additionally loads the front part (lowers it) and can upset this balance. Moreover, the most noticeable changes occur in surface wobblers (poppers, walkers), which in their normal position swim with their tail down. Such lures with a heavy leader can fundamentally change the orientation and nature of the game. And vice versa, diving wobblers with their nose already down react less than others to the leash.
You can try to eliminate the imbalance (if it interferes with the game and proper wiring) by unloading the front part of the bait and loading the rear. Sometimes this is enough to change the hooks. For example, we replace the lower tee together with the winding ring with a lighter double, and the rear one with a heavier tee. True, even with a leash, the weight of the bait still increases, and the wobbler may change from floating to sinking, and the game may change. Therefore, such a modification can be recommended only as a last resort.
On some models, if necessary, you can remove one hook altogether. Once, while fishing for perch, my friend and I, out of curiosity, tried to investigate this issue. It turned out, for example, that a small wobbler without a rear tee plays noticeably more intensely, and perch bites on such a “cut-down” bait no worse, and sometimes even better. But without a bottom hook, the wobbler’s play usually becomes unstable; it often falls over and is brought to the surface.
Once, so that the hooks did not overlap, I removed the middle tee from the three-hook wobbler, leaving only the front and rear ones. It turned out that the bait was still catching fish. Therefore, sometimes it’s not at all harmful to experiment.
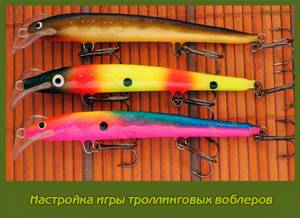
Setting up the game of trolling wobblers
We should keep in mind that in order to perfectly set up a trolling wobbler, we don’t need a huge aquarium or bathtub.
Many fishermen take a wobbler and drive it in the bathtub - it seems normal. They start trolling and don’t know why they don’t bite. The fact is that they did not test the wobbler under real conditions. In order to perfectly test a wobbler, adjust its performance, and check its capabilities, you need to drive it under real conditions: on a real fishing line, at a real speed. To do this, you need a GPS to measure the speed and see how it behaves in the water at different fishing speeds.
The first adjustment of the wobbler must take place precisely in such conditions. Based on this, we take all the wobblers, go to the reservoir, but do not catch fish, but simply test the bait. Let's say the wobbler works normally, but it tilts to the right. We make a loop on the shoulder blade and bend it slightly to the left. But if we bend it very far to the left, it will go to the left. Based on this, we obtain the position of the loop so that the wobbler goes straight. If the wobbler is made properly, if the manufacturer has proven itself worthily in the wobbler market, and everything is done correctly, there are no inaccuracies in the design, then the wobbler can easily be configured this way.
But the fact is that the diver is a difficult bait. And despite the fact that Chinese divers usually copy American, Finnish, Australian wobblers, it is difficult to achieve normal play from them, due to the fact that something is missing in the design. Based on this, in addition to the adjustment method by bending the loop, it is necessary to use other adjustment options.
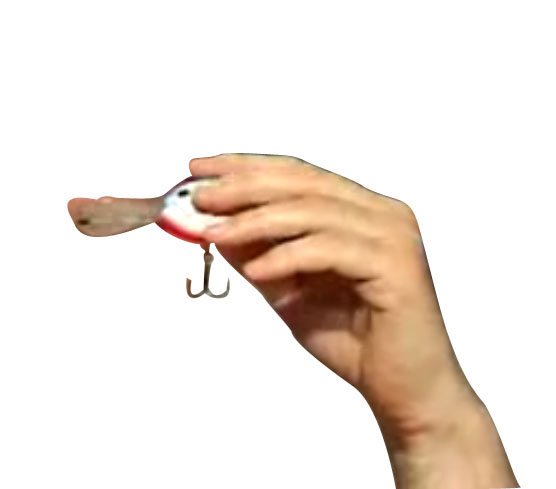
Rice. 33-13 One of the simple options for setting up the game of divers is to recognize the change in loading. For example, on the diver in Fig. 33-13 we riveted a piece of lead to the bottom of the paddle, which changed the diver's game and became more stable. In addition, the diver began to dive little deeper.
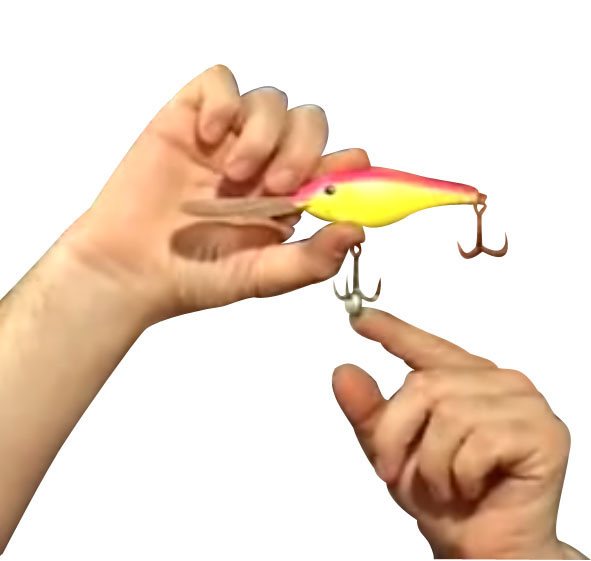
Rice. 33-14 The next option for transforming the game. We solder a lead pellet onto the lower, abdominal tee from below (Fig. 33-14). Thus, we slightly shift the center of gravity of this bait, and the bait is played more stable and reliably. Before you change your diver's game in any way, try the simplest methods. One such way is to lightly weight the bottom tee. It is possible to wind solder onto the lower tee - pick up the solder in the form of a wire and wind it, thereby making the central tee heavier. This usually helps. Based on this, you first need to check this method.
Rice. 33-15 The next option for transforming the diver's game. As you can see, the diver has a loop and a long spatula on it (Fig. 33-15). The loop can be bent not only to the left or to the right, it can be bent slightly up or down. This usually also helps and changes the game. If we bend the loop down a little, then the diver becomes more high-frequency, but the stability of the game decreases slightly. If we bend the loop slightly upward, closer to the body, the diver gets a more aggressive game, makes wider swings when diving, but works more stably. Otherwise, he dives a little shallower.
It is possible to change the diver's game more radically if we rearrange the loop. The fact is that there are wobblers in which the loop is soldered directly into the blade, and there is no wire axis passing through the loop. Usually the game for a wobbler can be improved only if we rearrange the loop. We drill a sequence of holes along the axis of the loop, in the center. We drill below with a gap of a millimeter and above with the same gap. It goes without saying that it is optimal if you have a couple of copies of this wobbler model, then you will practice on one, find the optimal placement of the loop, and later equip all wobblers in the same way.
Much more often, when making wobblers, manufacturers make mistakes with the placement of the loop: they place it either too close to the body of the wobbler, or too far from it. We either leave this loop or remove it, drill holes, then take a burning machine and burn a hole along the axis, resulting in a recess in one plane. We make a recess so that the loop holds better. We burn with one and another. Later, we take a wire 8 mm thick, for example, piano metal wire, bend it in the shape of the letter “P” and insert it into this hole. Moreover, when we drill a hole, we should take into account that the thickness of the drill should be approximately equal to the thickness of the wire multiplied by two.
In other words, if we use 0.8 wire, multiply 0.8 by 2, and the drill should be 1.6 mm. Folding the wire into a “P” shape and bringing the ends together, we insert it into the hole; it enters in that direction with slight hardening. On the reverse side, bend the ends of the wire left and right, then add superglue or fill in epoxy. Thus, we install the loop tightly. At first glance, such a loop creates a feeling of unreliability, but we took a weight weighing 16 kg, tied it to this loop and controlled it. It turned out that such a rearranged loop can withstand quite a significant weight. Such loops can be installed along the entire length of the blade. But, in most cases, if the wobbler is not played, it is better to move the loop 1 mm closer to the body, much more often this will help.

Rice. 33-16 We intend to shift the loop of some normally playing wobblers in order to change their game. Thus, we get a wobbler like the one in Fig. 33-16. This wobbler has two loops. Initially there was only a bottom loop on it, it played normally, but we took it away and put another loop a little higher. Thus, having one wobbler, we acquire two variants of the game - high-frequency and low-frequency. In the lower position of the loop, the wobbler dives a little deeper, in the upper position of the loop it goes a little higher, but withstands enormous retrieve speeds and has a wide amplitude of oscillation. For greater stability, we riveted a piece of lead at the bottom of the spatula. Thus, we have one wobbler replacing two wobblers, due to the fact that depending on the point at which we attach the fishing line, we get a different game.

Rice. 33-17 Along the axis of the wobbler blade in Fig. 33-17 holes are drilled. Before installing the loop in the position in which it is currently located, we made sure at each hole that the wobbler would be played reliably, and using a skillful method we found out the optimal position of the blade loop.
Rice. 33-18 Wobbler in Fig. 33-18 in the lower position of the loop, the worker at which it was bought did not play very well. It was necessary to remove the old hinge and move it to a more correct position. In this position the wobbler plays great. You can see how the loop is installed, how the wire reinforcement of the loop passes through the transparent blade, and the ends are bent at the bottom. This wobbler is fully functional, it has already been tested in real conditions at different speeds, and can easily withstand speeds of up to seven kilometers/h with a battery. After we have configured all the wobblers, they work at different wiring speeds, up to seven kilometers per hour.
Now we need to do laboratory work and find out to what depth any wobbler can dive if all conditions are met when using this multiplier braided fishing line and the reel that is wound on this reel. For example, we will drive all wobblers at a speed of 4 km/h and control how deep any wobbler can go. For this we need a navigator and an echo sounder, a felt-tip pen and a notebook. We take a wobbler, hook it to the fishing line and begin to let go. Boat speed – 4 km/h. We choose a bottom with a uniform depth so that the boat always floats at a uniform distance from the bottom, and begin to release the fishing line. They released it at 5 m along the lines of the line laying machine, at 10, 15, and 20 m. At 25 meters, the wobbler suddenly knocked on the bottom with a shovel. We write this down in a notepad.
The boat moved a little deeper, and we sailed on. We release the wobbler even further and observe how deep the wobbler can dive. The fact is that the diving depth of a wobbler largely depends on the thickness and length of the fishing line. There is a wobbler release range at which the wobbler stops diving. So, for example, if we release the wobbler more than thirty meters, then it will stop diving, and it will also rise a little, due to the fact that the fishing line begins to sail and lifts the wobbler a little. Having done this laboratory work, we can find out the long release length of the fishing line.
For example, when fishing on a river, in most cases, the greater length of the release should be about thirty meters, maximum 40 m. Many fishermen, speaking about the distance at which they release the wobbler, call the numbers 60, 70 m. But it must be stated that that, according to our point of view, this is easily a fairy tale, 70 m is too much for a long distance. Much more often, having released the wobbler approximately 30 m, they say that it is 70 m. Or, for example, they throw a wobbler with a spinning reel, so it is very difficult to find out the real distance at which the wobbler is located, so these numbers appear. It’s best to test all wobblers on the river, and it doesn’t make sense to release them further than 30-40 m.
For example, we drove all domestic wobblers on a line release of 30 m and made sure of the reliability to what depth any wobbler dives on a given braided diameter. Later we take wobblers and write down on them with a waterproof felt-tip pen their greater diving depth, for example, “4.5 m”, “5 m”, “6 m”, etc. And then, having arrived at the river, we, looking at the echolocator screen, select a wobbler with the required diving depth, according to the number of runs of the line layer, we release it to this distance, and it dives absolutely correctly to the required depth. It goes without saying that if we tested a wobbler on a stagnant body of water at a speed of 4 km/h, then on the river it is necessary to take into account the real speed relative to the shore and relative to the river flow.
So, we take into account the speed of the boat current and the speed of the river. One such laboratory work later brings profits for many years. You clearly understand and very quickly navigate the depths. The second background depth was sent, soon they took out another bait, released the wobbler along the line guide to the required distance, and it worked near the very bottom. If you change the diameter of the braid, then when switching to a thicker wobbler, the wobbler will dive a little shallower, and when switching to a narrower braid, it will dive a little deeper, this also needs to be taken into account. It must be stated that the inscriptions about the diving depth of the wobbler are very ergonomic. You should not think that they will somehow scare the fish.
Knowing the real diving depth of a given wobbler, it is possible to fish very effectively by trolling. Many people also take it and write on the side of the wobbler: “Eat me”, or “To Berlin”, for fun. Speaking about wobblers for trolling, we should take into account that on the river we need to have wobblers that can sink to different depths. Usually we need a wobbler that dives only 1 m. For example, a wobbler with a small small blade does not dive deeply, but at shallow depths it can be the most effective.
Rice. 33-19 If we need a slightly larger depth, we install a wobbler, which, for example, dives up to three meters (Fig. 33-19). Each depth has its own wobbler and its own length of line release. And, clearly knowing the depth and perfectly navigating the wobblers, selecting the wobbler according to the diving depth for the fishing conditions, you will begin to catch most effectively. Based on this, when going out to the river, keep in mind that your box must necessarily contain wobblers that cover the whole range of depths that you can encounter on the river - from the smallest to the most enormous. If you already understand this range perfectly, then you can play with the size of the bait, the color, and the nature of the game. But this is already the second stage of mastering trolling.
When talking about the working area of a wobbler on a river, much more often we mean the bottom area. The fact is that a river is a complex organism, and the speed of water flow in the river is not the same. It is only thought that the water at the surface, in the water column and at the very bottom moves the same way. In fact, in hydrodynamics there is such a thing as a velocity diagram. So, in accordance with this speed diagram, the highest speed is in the thickness of the flow, the lowest speed is at the bottom, and the slightly higher speed is at the surface of the water. The fish are constantly looking for places where there is the least need to fight the current. And because, being at the very bottom, each predatory fish spends the least amount of effort in order to fight the current, it is for this reason that a wobbler placed at the very bottom brings tremendous results on the river.
Speaking about the nature of wobbler wiring for different types of fish, we want to highlight two main types of wobbler wiring. If we catch, for example, pike, then the most effective wobbler wiring is easy bottom wiring. Moreover, it is not necessary for the wobbler to touch the bottom. If we have done laboratory work and know absolutely correctly that our wobbler goes, for example, 4 m, and according to the echo sounder the depth is 4.5 m, then the possibility of a pike biting is quite large. When catching pike perch, on the contrary, you should take into account that if the wobbler touches the bottom and knocks out fountains of turbidity from it, this has an irresistible effect on the pike perch. Based on this, you need to try so that the wobbler sometimes touches the bottom. It is for this reason that it is extremely important that the wobbler is perfectly tuned, because a poorly tuned wobbler, when it hits the bottom for 2-3 seconds, is knocked out of play, and at that moment, at a time when a bite is possible, it not happening. In addition, each river has its own type of wobbler, size, depth and diving pattern.
One wobbler model may work great on one river, and a second one on another. Moreover, this rule works no matter what the depth is in a given place, due to the fact that any river has some average depth, and there is always a wobbler that is better than others in all respects and falls exactly into the average depth. Many fishermen, who also do not have an echolocator, can easily see what kind of wobbler an advanced troller is using, take the same wobbler for themselves, without remembering the peculiarities of fishing, and catch fish very effectively. This, of course, is not very interesting and really not sporty, but, in principle, it works. If you are floating along a river without an echolocator, but are fishing with a wobbler that is perfect for a given body of water, then it will certainly come across the conditions in which it performs well, and as long as it is constantly in the working area, it can be very effectively catch fish.
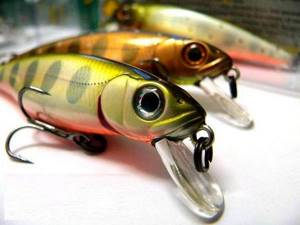
Speaking about the color of the wobbler and the influence of the color of the wobbler on the bite, keep in mind that this is far from the most important indicator that you need to focus on when choosing a wobbler. First of all, you need to focus on the diving depth of the wobbler, secondly on the size, thirdly on the oscillation frequency, and only in the fourth case should you take into account the influence of color. The influence of color on the bite of fish is a very important study, and it is possible to talk about it only superficially. But we will now tell you about the main trends that exist regarding the influence of the color of the wobbler on the bite. If we are fishing at shallow depths, the water is clear, and the day is sunny, then, of course, there is no alternative to a bait that has a natural black color. Such baits are the most effective; they best imitate the natural food of a predator and cause the least suspicion in it.
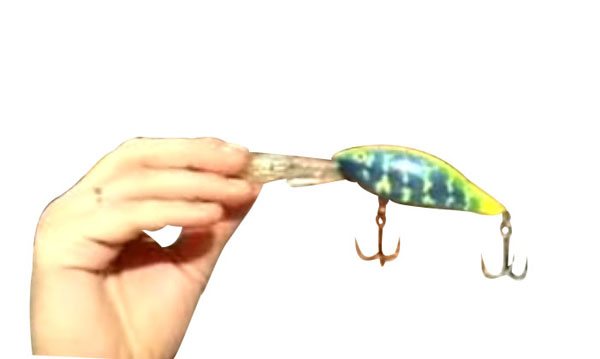
If we fish in conditions of insufficient visibility, we fish at enormous depths - more than 4 m, for example, 6 m - or on a cloudy day, early in the morning, late in the evening, then we need to pay attention to catchy colors. In most cases, divers who dive to great depths are colored like parrots, and are very eye-catching. The coloring is perfect, and the wobbler does not look like a fish, but, however, fish are caught with it perfectly. In addition, when choosing a color, keep in mind that the most universal color of a wobbler is black. A black wobbler works great in both clear and muddy water, and also in the dark, a dark wobbler works best because it has the most contrast. Based on this, many American trolling wobblers are completely painted black, and there are very few second colors on them, for example, the eyes are tinted, or there is a bright red spot on the belly. But the main, background color is dark. Thus, the colors of wobblers can be divided into natural, provocative and natural, universal color - dark.
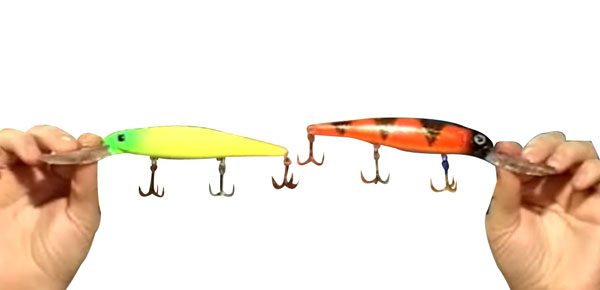
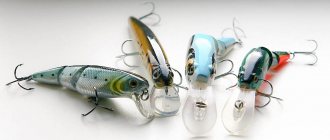
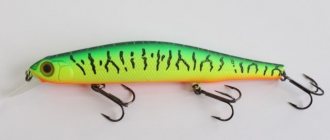
Rice. 33-20 Wobblers in Fig. 33-20 are obvious provocateurs, and they are clearly visible at enormous depths. These are divers, they dive deep and have very catchy colors. Such baits are very promising, and in arbitrary conditions. In addition, on a bright sunny day, light reaches enormous depths very poorly, and flashy colors will always be preferable.
Speaking about the bright colors of wobblers, keep in mind that there are so-called simple colors, and there are fluorescent colors. So, divers paint fluorescent colors much more often; they are very catchy. But keep in mind that not all flashy colors are true fluorescents. And in order to really check what color the wobbler has, whether it will be perfectly visible to fish at great depths, you need to look at it in ultraviolet light. True fluoro colors will glow very brightly in ultraviolet light without losing their natural color that we see in daylight.
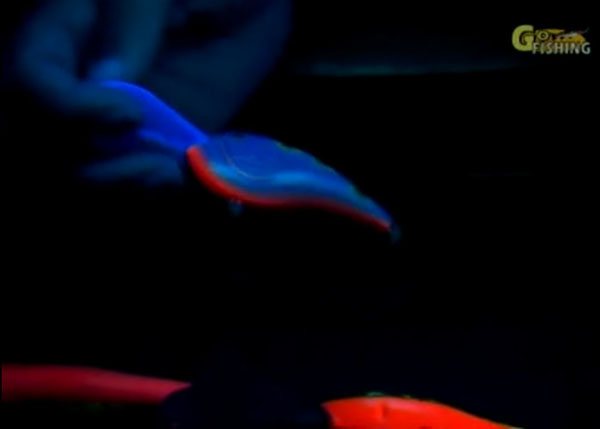
Rice. 33-21
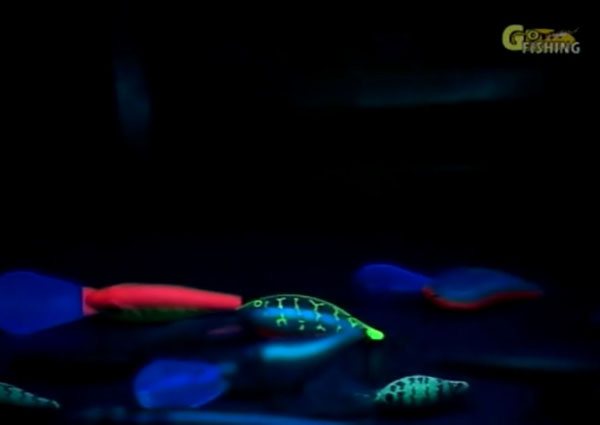
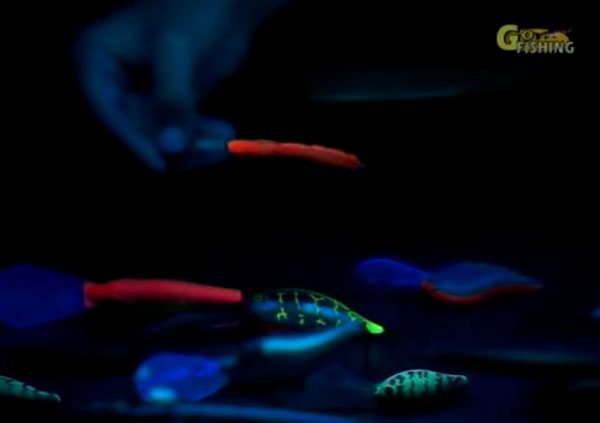
Rice. 33-22 And those baits that have a false flashy light, a false fluorescent color, will remain black in the dark.
Rice. 33-23 The effectiveness of trolling fishing largely depends on the condition of the wobbler hooks. In most cases, expensive trolling wobblers are equipped with low-quality hooks, due to the fact that the bait itself is initially expensive, and it is expensive for the manufacturer to install very expensive hooks on it; in addition, this leads to an increase in the price of the bait. Based on this, we strongly recommend that you do not skimp on the quality of hooks, and if you really want to catch effectively and have no problems, it is better to constantly change hooks. Try to replace hooks also on the most successful models.
Rice. 33-24 For example, on the wobbler in Fig. VMC hooks cost 33-24, they can be replaced with OWNER or GAMAKATSU, but they must be replaced with hooks comparable in size to these hooks, due to the fact that a wobbler is the right bait, and changing the size of the hook can affect its game. In addition, during trolling, the hooks of the bait always come into contact with some kind of water obstacles, be it shell rock, all kinds of sticks that lie on the bottom and to which the hooks of the wobbler cling from time to time. The hook may become unusable and become dull. Based on this, a good troller always carries a diamond file with him. And at the end of each contact of the bait with some obstacle, the hooks should be controlled. This is easy to do. We run our fingers along the hooks, and if the stings stick to the fingertips, then everything is fine. If it doesn’t, then most likely the tip is either bent, or broken, or, and you need to carefully sharpen it with a needle file.
Rice. 33-25 I would also like to draw your attention to baits that have overly wonderful hooks. Bait in Fig. 33-25 – remarkable in itself, large, intended for catching important fish, judging by the hooks. But much more often such wonderful hooks are not necessary, due to the fact that when hooked, the bait will inevitably break. Not a single braid will bend such a hook, even with a strength of up to ten kilograms. Based on this, we recommend replacing such hooks with similar ones, but made of narrower wire. In most cases, the narrower the hook wire, the easier it will penetrate the fish's mouth, and a hook made from narrow wire will invariably hook fish better than one made from thick wire. In order for a thick wire to penetrate perfectly into the mouth of a fish, for example, the same pike perch, it is necessary to make a very remarkable hook, and the hook can go halfway through the sting and not go further. While a hook with a narrower wire will hook fish significantly better, you should not forget about it.