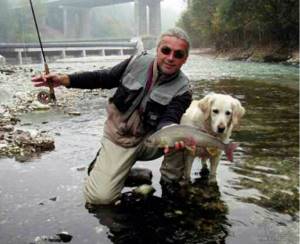
Artificial flies have been used as bait for quite some time. But recently, the popularity of flies has begun to gain momentum. They are used not only in fly fishing, but also in spinning fishing, or as an addition to spinners in winter fishing, in short, this bait is becoming more and more in demand. There is a large assortment on sale. You can buy the necessary fly for fishing and not very expensive. Or you can do it yourself. Often the desire to make a fly with your own hands is dictated not by savings, but by the opportunity to create the ideal bait and please the fish.
Since the art of fly tying has been known for a long time, many models of such baits have already been invented. Exact instructions have long been described according to which you can make almost any insect. There are specific names for various parts of the front sight, with the help of which a description of a particular model is made. Among those who knit flies, each model made by hand is a piece of goods, so homemade flies are highly valued.
Cheap store-bought flies made of polyethylene, rubber, and plastic are immediately recognized by fish, and they do not react to them. Therefore, flies made from natural materials are highly valued.
Pros and cons of using simulation
Do-it-yourself imitation baits in the form of fishing flies are very popular and this is not surprising, because they have a large number of advantages that distinguish them from other options.
Here are some of the advantages of baits in the form of flies:
Versatility when fishing. Such baits are of particular interest to any type of fish. Using them in the fishing process allows you to get a varied catch.
A high-quality fly of any format will serve the fisherman for a very long time, which eliminates additional expenses.
Ease of production and subsequent use also distinguishes homemade flies from store-bought products. DIY winter flies are just as easy to use.
As for the shortcomings, they are also present in this case. The main and biggest drawback for many when making flies on their own is the long time it takes to tie them. This requires perseverance, which not everyone is endowed with.
But this drawback is mostly covered by the fact that fishermen by nature have perseverance, otherwise the fishing process would be uninteresting and completely boring for them.
HABITAT AND BEHAVIOR
In most rivers and lakes where fish of the salmon family live, mayflies make up a significant part of the total biomass of water bodies. About 250 different species of this order are known in Europe alone.
As you can imagine, for this reason it is very important for fly fishing enthusiasts to have a clear understanding of the life cycle of these interesting insects. Throughout its life, the mayfly undergoes several metamorphoses, of which three are the most important in fly fishing. These are the three most important stages of transformation:
1. Imago (the last stage of insect development after all metamorphoses). 2. Nymph (larva). 3. Rising nymph.
How to make flies for fishing with your own hands
Since ancient times, fishermen have used baits for fishing that imitate various insects or bugs that inhabit rivers, lakes, ponds and other bodies of water. As a rule, such insects are the main food of many fish, and they are perfectly caught on imitation baits . Such baits are called flies, and they are quite catchy. The presence of flies will give the fisherman the opportunity not to think about where and how to purchase bait every time he goes fishing. Moreover, with a little practice, you can constantly tie your own flies, thereby providing yourself with catchy baits.
Using this fishing method, you can catch any fish, such as perch, roach, ide, grayling, pike, etc. In the summer, the fish feed on insects that fall into the water, as well as various types of mayflies and worms that are found in the silt of reservoirs. You can use flies all season, from spring to late autumn.
MAYFLY

One of the most famous and widespread representatives of the mayfly order is the common mayfly (lat. Ephemera vulgata), which represents only a small part of the numerous families of this order.
For us fly fishermen, it is not necessary to know about the behavior and life cycles of all existing species of these winged insects separately, so we will pay special attention only to the most characteristic signs and behavioral features of the most commonly encountered species. First of all, this is necessary in order to create an imitation of the insect as accurately as possible and correctly present the fly being used.
The most important distinguishing feature of the adult mayfly (the final phase of insect development) is the V-shape of folded wings at rest.
Natural insects can float calmly downstream in a river without making any movements at all, so this crucial point must be taken into account when presenting a fly that must drift motionless across the surface.
Due to the fact that many species of the mayfly order, such as caddis flies, for example, are very demanding on the quality of water and the degree of its pollution, their number in European water bodies has decreased slightly over the past few years. But, despite a rather unpleasant trend, representatives of this ancient order of winged insects, which includes about 1,500 species, are widespread throughout the globe, including in the rivers and lakes of Europe. Therefore, when going to a pond with a fly fishing rod, you must definitely put flies that imitate mayflies in a box with various samples.
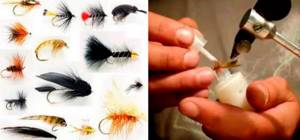
Necessary materials and tools for making flies
To learn how to make flies with your own hands, you should stock up on certain materials and tools. Tying flies is not very difficult and can be done by any amateur fisherman. As a rule, the fisherman already has most of the necessary tools, because it is impossible without them.
To tie flies you will need the following tools:
- vice;
- needles;
- knotweed;
- overexposure;
- scissors;
- threader;
- bobbin thread holder;
- tweezers;
- magnifying glass;
- mirror;
- lamp;
- mortar;
- brush.
To do this you will need the following materials:
- Hooks. For tying flies, you should purchase special hooks, but you can also use regular ones: for dry flies, use hooks made of thin wire, and for other types of flies, thicker ones.
- Bird feathers. As a rule, rooster feathers are used.
- Dabbing.
- Wool.
- Lurex.
Tools and materials
Many amateur fishermen ask the question: how to make a fly for fishing? First of all, you should familiarize yourself with the tools and materials needed to make a grasshopper.
Tools:
- vice (static fixation of the hook to “build up” the body of the bait);
- device that holds the spool (knits the thread with the spool);
- feather clip (a device that holds a feather on a hook during fixation);
- knot tying device;
- thread, fishing line;
- scissors;
- pliers;
- needle; tweezers.
Materials:
- hooks;
- fishing line, mounting threads;
- Lurex;
- fiber, fur of animal origin;
- feathers (of various birds);
- cork material;
- polyethylene;
- metal wire.
Today, on the shelves of theme stores are kits for making your own baits. Tool sets are also available in a wide range.
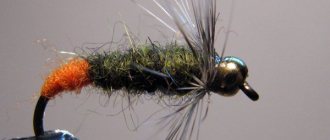
DIY dry fly
To make a simple fly, you will need several brightly colored hairs, about 5 cm long. It is preferable to use a bright black or bright orange tint. The hook is removed from the spoon and the hairs are threaded through the ring, which are fixed on the hook using a cambric. After fixing the hairs, they can be fluffed using a needle or other sharp object.
This is the simplest fly that requires a minimum amount of time and a minimum of materials used. It can be made directly while fishing or before going fishing. The use of bright colors allows you to increase the catchability of the bait. This fly can be used for catching perch, as well as pike at shallow depths.
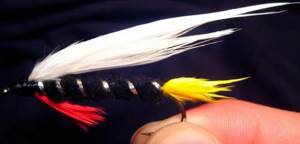
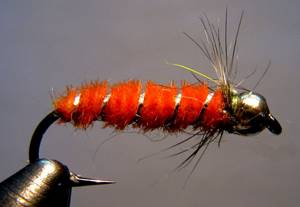
DIY pike streamer
In the summer, aquatic vegetation grows rapidly, so many reservoirs become overgrown, making it impossible to use conventional baits. In this case, non-hooking baits are better suited, which increase the chances of catching fish, since most species of fish prefer to be in thickets of aquatic plants. Some hide in the thickets from predators, while others ambush representatives of peaceful fish. Many anglers use a pike streamer, both with a regular hook and with a non-snag hook. Such baits can be used in tackle with a Sbirullino float or in regular tackle. To facilitate the casting process, it is worth securing the appropriate weight on a separate leash.
The basis of any fly is a hook, somewhere around size 9 or 10.
It is possible to use a special hook that has protection against snagging .
In addition to the hook, you will need wool and a piece of lurex. First, a piece of lurex, about 5 cm long, is wound to the shank of the hook. After this, the lurex must be fluffed using a needle or other sharp but thin object. Using the same thread, a rooster feather is attached on top of the lurex. You can use wool of different colors, but no more than five, since the presence of a large number of shades on the bait can scare away the fish. After this, the thread should be secured with nail polish. After fixing the product, the hairs are fluffed out using an awl or needle. The bait is ready for use.
This streamer catches perch perfectly if you additionally attach a certain weight to it. This bait will please the amateur fisherman with its effectiveness when catching pike or perch in the middle of autumn.
Disadvantages and advantages of artificial flies
Artificial flies have a number of advantages compared to other types of bait. They are simple, reliable and, at the same time, versatile, which allows them to be used for catching almost all types of fish. Moreover, flies are durable, so you can provide yourself with such baits for a long time if you make them yourself.
Another factor that is decisive when making them yourself is the low quality of flies purchased in the retail chain. Of course, you can find branded copies of well-known companies, but they are quite expensive, although they are catchy. Many fishermen buy store-bought products, but most try to make them themselves, especially since, apart from a hook, nothing in short supply is required. All that is required is desire and perseverance, since making some flies takes quite a lot of time. In addition, you will need a creative approach, otherwise you will not be able to tie a good, high-quality fly.
Artificial flies have one single drawback , which boils down to the fact that you need to spend a lot of time learning how to tie really catchy baits. Despite the apparent simplicity, one initially gets the impression that everything is really very simple. Unfortunately, it’s just everything for those who do nothing. As for fly tying, it is responsible, meticulous and hard work. In addition, this process is quite interesting, just like the fishing process itself. Real enthusiastic fishermen prefer baits made with their own hands in a home workshop. Oddly enough, such baits are more catchy than some specimens, especially cheap copies that are sold in fishing stores. This speaks of a creative approach and high craftsmanship, especially since every fisherman is very interested in seeing how his work of art works.
Making bait at home is not very expensive in a financial sense, so it is accessible to almost every fisherman who wants it. The main thing is to be patient and allocate some of your personal time.
DOWNSTREAM FISHING TECHNIQUES WITH FLIES IMITATING IMAGOS
Casting "Parachute"
The downstream fishing technique is one of the most uncomplicated and accessible of all existing presentations of artificial flies. This technique has undeniable advantages, allowing the angler to better control the drift of the fly on the surface of the water as it moves with the flow of the angler. The most important thing in this case is to take into account the strength of the current and ensure a sufficient supply of cord to ensure the natural movement of the artificial insect imitation.
For this method, the already familiar “parachute” cast is again excellent, as a result of which small loops are formed at the end of the cord. Thus, without making unnecessary movements with the reel and without freeing additional meters of line, you can deliver the fly to the fish’s location without arousing any suspicion in it.
Casting with braking
The so-called casting with braking offers wider possibilities. To correctly perform such a cast in its final phase, it is necessary to stop the movement of the rod at the “12 o’clock” position and try at the same time to move the hand with the rod back to “2 o’clock”. After performing such fairly simple operations, after some practice, the cord lies on the surface in a relaxed state, which ensures free movement of the front sight, and therefore a more natural presentation. All you have to do once the line hits the surface of the water is follow the direction of the current with the rod tip and the fly will automatically move freely without being affected by the current.
After the cord is stretched under the influence of the current, you can start the next cast with the same length of cord without wasting precious time and effort.
Flies - what are they?
Flies, or streamers as they are also called, are artificial bait that is used to catch fish using fly fishing or spinning fishing.
Flies are insect imitators. They can swim both on the surface of the water and in a certain layer of it.
Such baits have the following features:
- they perfectly imitate food, which many predatory fish look for at the very surface of the water;
- such baits, unlike plant and animal baits, can be used repeatedly, and at the same time do not lose any of their attractiveness to fish;
- flies are very easy to store and transport, since they do not require certain temperature conditions;
- flies can be very different, which gives the fisherman the opportunity to use his imagination and do experiments when making them.
You can use flies at any time of the year, but they are considered the most effective in the summer, when there are many live insects and the fish, knowing this, collect them on the water.
According to buoyancy, flies are divided into the following types:
- Flies floating on the surface that do not sink at all. They are commonly used for fly fishing. These flies are made from very light materials: plastic, hair, foam and feathers. Besides. Float flies can be divided into two categories: sliding flies and poppers. Sliding baits glide across the surface of the water as if on ice, and poppers, when in the water, make sounds that are very similar to the noise of crickets.
- Floating flies that sink when pulled through. They also have another name - divers. Fishing with such baits can be done in any body of water at any depth, which makes them very convenient and practical.
- Sinking flies that float in layers of water. They are also often called "swimmers". These baits can come in a variety of sizes, weights and colors, so fishermen can safely use all their imagination when making them.
- Sinking flies that sink very deep into the water. They swim almost at the very bottom of reservoirs, attracting especially large predatory fish.
You can use flies to catch the following types of fish:
Make it a rule, on every fishing trip, the first thing you do is start.
In addition, flies can be classified according to their varieties:
- wet;
- dry;
- nymphs;
- emergers;
- streamers.
- Wet flies are baits that look like a drowned beetle or insect larva. They have a thin body and attached legs and tail, which adds to their natural appearance. Wet flies are commonly used to catch salmon and grayling. They are fished from summer to late autumn.
- Dry flies look like flies or wasps that have fallen onto the surface of the water. They are made from lightweight materials that float well on the water, so such baits can “sit” on the water for a long time and not sink. Dry flies are used to catch chubs, roaches, sabrefish and other types of fish.
- Nymph baits are artificial insects at certain stages of underwater development. Most often they are used for catching perch and trout. To make such a bait, you must strictly follow the recommendations for the required color and size of the fly.
- Emergers are baits that imitate an insect that is just beginning to transform from a larva into an adult.
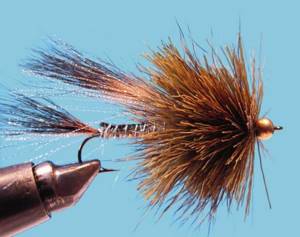
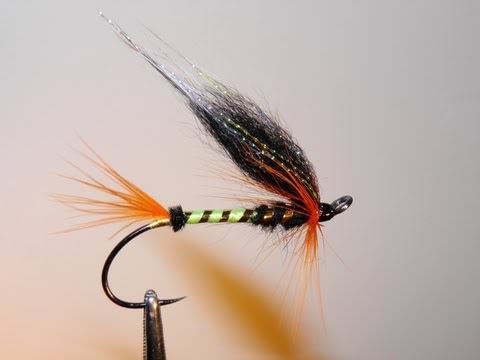
- Streamers outwardly hunt small fish or large beetles. They are the most difficult to manufacture among all other types of flies. Most often, streamers are used to catch asp.
Let us now consider the technology for manufacturing artificial flies.
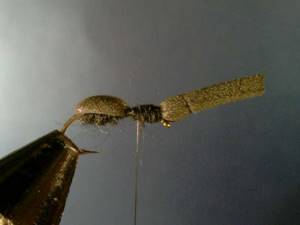
Mayfly
do as follows. A nickel-plated hook No. 6-8 with a fairly long fore-end is slightly bent in the middle of the fore-end and clamped into a vise with the tip down (Fig. 150, a).
A white thread (floss or silk) is wound around the hook, starting from the middle of the back of the head, and secured 1-1.5 mm from the loop. Two or three awns of a large white flight feather (Fig. 150, b) or two or three pieces of thin fishing line, previously rubbed with fine sandpaper, are wound under the initial turns. Animal hair can also be used.
If the fly is made in the “wet” version, then a layer of white threads is impregnated with light grades of BF-2 or BF-4 glue. They also use tsaponlak or another nitro varnish (it dries faster), but the fly glued together with them is less durable.
From half of a small white feather near the loop, frill fibers are made (Fig. 150, c). To do this, half a feather is tied by the tip with a pale yellow or green-yellow thread. The thread is not cut, since the head of the fly is made from it and the abdomen is colored (Fig. 150, d).
The tied half of the feather is wound around the shank of the hook and secured to glue with the same thread. The formed frill brush is slightly directed forward and, if necessary, secured. The same thread is used to wrap the head of the fly with a diameter of 1.5-2 mm; the thread is tied.
Two small white feathers (or two pieces of a large feather) are placed on the glue on the sides of the fly and tied with thread. They should be located at an angle of 60-80° to the body of the fly (Fig. 150, e). If the wings are made from part of a large feather, then proceed as follows. Part of the pen shaft is impregnated with BF glue and, when the glue is almost dry, it is cut into separate pieces (Fig. 150, f). They will serve as wings. Placed on BF glue and tied to the body of the fly with thread, the wings are held very firmly.
The thread with which the frill was attached was used to make the head and wind the wings; they were wound along the entire length of the body of the fly in increments of 1.5-2 mm to imitate a segmented abdomen. The thread is secured with a knot at the end of the winding at the tail. The wet fly is once again coated with glue (varnish), except for the wings and tail. The dry fly is coated with duck or goose fat.
Previous page Workshop Next page
Articles about fly fishing.
Do it yourself
To make flies you should use the following tools:
- scissors;
- vice or clamps;
- feather holder;
- needles;
- threads;
- spool holder;
- tweezers;
- brush;
- lapma;
- magnifying glass or magnifying glass;
- mirror;
- mortar.
The most commonly used materials for making flies:
- hooks (especially for flies, they are thinner than regular ones);
- feathers (from rooster, goose or duck);
- wool;
- Lurex;
- glue;
- thread for installation (it is better to use silk);
- dabbing.
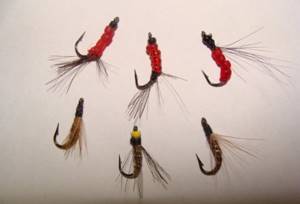
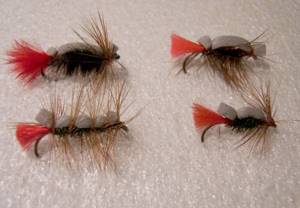
Most often, flies depict the following insects:
The general principle of making flies looks like this:
- Remove the hook from the spoon and pull a few hairs through the ring.
- Using a cambric, secure the hairs in this position.
- Place the cambric on the hook ring.
- Using a needle, fluff the hairs so that they become more voluminous.
Flies for different fish
To make a fly for perch, you should take the following materials:
- hook number seven;
- one bright feather;
- a small bundle of woolen threads up to four centimeters long;
- nail polish;
- nylon rope.
- Wrap the thread around the hook several times.
- Attach the feather by its tip to the hook using nail polish or regular glue.
- Attach wool threads.
- After the varnish has dried, use a needle to fluff the fly.
- If the threads turn out to be very long, then they need to be trimmed a little with scissors.
To make a fly or wabik for an asp you will need:
- four thick hairs;
- glue;
- needle;
- hook number four.
1. Wrap the hairs to the shank of the hook closer to the ring. 2. Secure them with glue. 3. Fluff the wabik with a needle.
Wabik takes no more than four minutes to make, so fishermen can make large quantities of them. In addition, such a front sight lasts a very long time.
To make a pike fly or streamer, you will need:
- weight (weight no more than three grams);
- hook number ten;
- lurex bright;
- multi-colored hairs;
- rooster feather;
- threads;
- glue.
- Tie lurex thread to the hook.
- Glue the rooster feather.
- Using a needle, fluff up the lurex and the bait is ready.
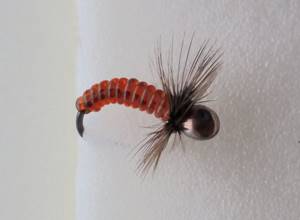
Pillow flies. Gray caddisfly
Fishing with artificial flies using a spinning rod, sbirulino, reverse catamaran and from ice is more than accessible, especially if you learn how to tie these baits yourself.
This fly is easy to make and is an excellent bait for catching fish. With the appropriate hook size, it perfectly catches grayling, chub, lenok, asp, roach, trout, rudd, sabrefish and other fish.
Materials
A thread. Let's start with the threads. You can use so-called “silk threads” as a mounting thread. Go to any haberdashery store and buy Polyester Filament threads, you can use the most ordinary cotton threads, but such savings are already too much. The cotton threads in the water will begin to fall apart. To make an imitation “brown mayfly,” purchase black thread. Looking ahead, I will say that in the future this will be the most popular color.
Hooks. I will not hide the fact that I am against saving on hooks. If you buy little-known cheap products, you will find that when knitting, 5 percent break in a vice.
The same percentage have an incorrect or misaligned tip, or no tip at all. They rust quickly and in a fight with a large, strong fish, they give the fish, not you, a chance to win.
But there are also advantages - if you are just starting to knit and are not ready to pay serious money... Then this is a good choice. A high-quality and proportional front sight will not be achieved right away. In the beginning you will do a lot of substandard work. And if a large fish bites and breaks your hook, then this will be the best incentive to switch to Cannelle, VMC, Kamasan...
Feather. Now we come to feathers. Without a feather, it is impossible to make a great classic artificial fly. The best economically sound decision would be to buy a colorful rooster. You will only have to turn to friends, acquaintances or people who know how to carefully remove the skin. It can be even simpler. Take your favorite pillow and gently open it while there are no witnesses at home to malicious damage to property. Take a handful of feathers.
To make legs, you need a feather with short and stiff hairs. Find a feather of brown or rusty colors. These feathers are common and will not be difficult to find. But since today we are tying a wet fly and its ability to swim does not matter to us at all, we can simply take the narrowest feather that we could get from the pillow.
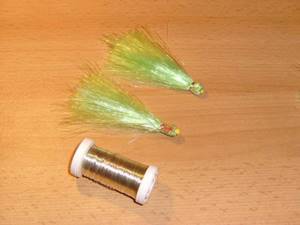
Lurex. You should also purchase silver-colored Lurex from a haberdashery store to make decorative windings.
Dabbing. You will need dabbing. Does this terrible word make you afraid? Don't be afraid... Dubbing is just a layer of fur or a mixture with fur or synthetics.
We start searching through the cabinets again. I’m more than sure that you have an old rabbit hat or a moth-eaten collar lying around somewhere. You are unlikely to wear them, and one hat will last you more than one year. Everything else is in progress.
Knitting
Take a single hook and bend it as shown in the photo. We fasten it in a vice by the bend, with the tip sticking out and protruding beyond the jaws.
And we fix our mounting thread. For this imitation, you can use long-shank hooks Nos. 28 to 8. However, I advise you to use hooks Nos. 16 to 8 for fishing with sbirulino, boat and spinning rods. You will collect less small items. For ice fishing, no more than number 14, although there are exceptions.
We cut off the excess and wrap the hook with a mounting thread towards the bend (prying) of the hook. Now we need a wool thread to form the base of the body of our future fly. We fasten the thread in the center of the forend. You can, of course, wind the warp using a mounting thread, but this takes a long time. Moreover, this is a very tedious task. It's easier. We wrap it, thickening the base in the center and closer to the hook ring, giving it a spindle-shaped shape. Next, we cut off the excess of our wool thread and attach the lurex.
If for some reason you were unable to find Lurex, then you can use ordinary copper wire from a transformer. The smaller the hook, the thinner the wire.
Then we wrap the base crosswise with a mounting thread and move it towards the hook. In this lesson we are making an unloaded caddis nymph, but if you want to fish in winter, like with a jig, or fly fishing, then the base of the body should be wound from ordinary copper wire from a transformer. The tighter you lay the coils and the thinner the wire, the heavier your nymph will be. There is one thing... Be sure to cover the base of the body with rubber glue, wait until it dries, and only then continue with all the operations of the lesson. If you don't do this, the dabbing thread will slide on the copper wire and you won't be able to make the body.
Now you need to tear out one or two such pinches from the rabbit skin. And stir the pile of dabbing well until smooth. This only takes a minute. We take half of our mixture and place it on the mounting thread.
To simplify the work, you can pre-coat the thread with an adhesive pencil, which is also sold in any office supply store. We dump it a little around the mounting thread. How to do it? Imagine that you are about to clap your hands. The thread will end up between your fingers. Now rub your palms a little. You will roll up the dabbing thread. Next, we make one turn around the shank so that the dabbing thread is secured to the hook.
Now we twist the thread counterclockwise and create a body by wrapping the forearm away from us. You shouldn’t take a lot of dabbing at once. It will be inconvenient for you to work. It's better to add some dabbing again and continue shaping the body. We add a new portion of dabbing until we reach the end.
Now we make a couple of knots and secure with varnish. Apply a drop of varnish to the knot. You can use absolutely any varnish! You can quietly steal nail polish from your wife or sister. Or go to a hardware store and buy regular PF varnish.
Now we take a black alcohol-based marker in our hands and color the back. The front sight looks terrible with these hairs sticking out in all directions. But don't even think about cutting them off! In all larvae, the back is always slightly darker than the abdomen. Do not be afraid of such a sharp boundary between the back and abdomen. After the fur has completely dried, the borders will have a smooth transition, and the colors will become dirtier and less saturated. Believe me, dirty shades are better accepted by fish, unlike bright and poisonous ones.
Now we will have to perform the most difficult operation in making this imitation. Now we wrap the body of the fly with lurex in the opposite direction. When making artificial flies, the materials are always laid in opposite directions. This is a rule designed to better secure materials. We shaped the body with movements away from ourselves. This means we make the decorative lurex winding ourselves. At the same time, by wrapping the body with lurex, we create segments of the caddisfly’s body, and with our left hand we smooth all the protruding hairs towards the underwear. The operation is not the easiest, but with a little patience, everything will work out. We fix it with a knot. We cut off the excess lurex. Now you can trim off any stray hairs.
Now we come to making the legs. We clean the spine of the feather, which we prepared at the beginning, by about 5 mm. We attach the assembly thread to the cleaned spine and wrap the hook two or three times and form a large head.
But don't get carried away. The head should not be larger than the body. We cut off the excess thread and coat the head with varnish in two passes. The first layer will be absorbed and secure the entire structure. The second coat will add shine. In this case, the black paint was very absorbed. If the same thing happens to you, then take the marker again and carefully touch up the back. That's all. The fly is ready.
Epilogue
At the beginning of the article, I promised to prove to you that it is not difficult to make a working bait using available materials. I hope you find this tutorial helpful and proves that fly fishing and making these realistic lures is inexpensive. The most important thing is to set a goal and move towards it, even if you don’t have high-quality materials and tools!
I admit, now I only use Metz feathers, hooks from the best manufacturers, and I have long ago thrown the bench vise, in which I tied hundreds of flies, into the closet. But in the early 80s I also pulled rabbit fur. I tied this fly for the first time at the age of 6 under the supervision of my father. Of course, it turned out haphazardly at first. But grayling and perch willingly sat on the hook.
With this fly you can safely experiment with the color of the legs and abdomen. Always make the back either black or brown. Also, don't be afraid to use different sizes of hooks. Let me just say that in the middle zone I and the members of our club “Reverse Boat” fish with such a fly tied on hook No. 10.
Making Tips
- To make dry types of flies, you need to use stiffer and more elastic feathers.
- To make wet types of flies, you should use soft and fluffy feathers.
- It is best to use the following colors for flies:
- brown;
- red;
- green;
- white;
- yellow;
- brown;
- crimson.
- It is better to use feathers from an old rooster as they are of better quality.
- The best feathers are considered to be narrow feathers that are not fastened together with synchronous edges.
- The size of the flies should be used depending on the type of fish they will be used on. For small fish, the size of the fly should not be more than three centimeters. To catch large fish, the size of the fly can reach six centimeters.
Features of making flies
Making flies has the following features:
- When making flies, you should avoid large knots or make them as invisible as possible so that the fish cannot see them.
- If you are making a fly with legs, then they need to be placed at the same level so that they are as similar as possible to real insect legs.
- Already made flies need to be washed in water with added soap. This will remove the glue smell.
- It is better to use thread in dark shades so that when wet it does not show through and does not create the impression of an empty, inanimate insect that the fish will not peck at.
- During the warm fishing season, it is better to use bright colors of flies that will attract fish from afar.
Sources:
https://fishingadvice.ru/izgotovlenie-mushek-svoimi-rukami/ https://fishingday.org/mushki-dlya-rybalki/ https://prostokaras.com/snasti/mushki.html