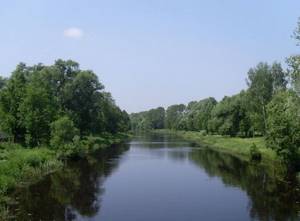
Greetings, dear fishermen. Today’s article is about choosing a place to fish with a feeder on a river in an unfamiliar place. It happens that when you arrive at a reservoir, there are no external landmarks indicating a promising place.
Usually the first thing we look for is traces of civilization. These could be various spears left by fishermen, any anomalies on the surface of the water, and other signs of a fishing spot.
Today I will tell you how to effectively probe the bottom topography and study the fishing area with an accuracy of up to a meter, well, let's go.
What you will need
To determine the relief we will need:
- Paper, definitely a checkered piece of paper
- A pen, or better yet a pencil
- Marker weight
- Well, actually the feeder
If you’re not going fishing alone, it won’t hurt to ask a friend to help with your notes.
I also advise you not to choose a place right away, perhaps we won’t find the relief we need here. In this case, you will have to cross 50-100 meters upstream or downstream, in general, in any direction.
You also need to know how much line your reel winds in per turn of the handle. To do this, just turn off the stopper and pull out the line, following the handle, and then measure. This condition is not necessary, but any angler must know his gear by heart. And if they suddenly ask at what distance you caught so many fish, it will be easier to answer in meters.
Feeder rigs for summer
Anglers do not have a unified approach to making feeder equipment. Some make installation directly on the main line, while others make removable elements at home.
- You can make a simple installation right while fishing, which is called a Gardner loop. It is knitted on the main line and consists of two knotted loops. A small loop is intended for attaching a leash; it is located at the end of the fishing line. A large loop is made 10-15 cm from it; a feeder will be attached to it in the future. The Gardner loop is considered a universal feeder rig with which you can fish in rivers and lakes.
- Loop systems are more sensitive. They come in two types. The symmetrical loop has proven itself perfectly when fishing in still water or on rivers with weak currents. It is knitted from a piece of monofilament or fluorocarbon 0.3-0.4 mm long, about 1 m. The fishing line is folded in half, and a small loop is made for attaching the leash. The feeder is mounted on one of the pieces of equipment. An asymmetrical loop is distinguished by the fact that one of the sides of the loop is 10 cm longer. The feeder is attached to a longer segment.
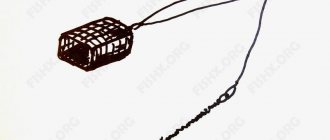
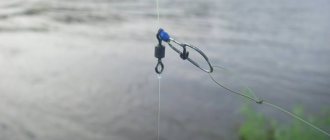
- Installation with an anti-twist tube is common. To attach the feeder to the anti-twist, there is a swivel with a carabiner. The main line is pulled through a curved tube and secured with a damper.
- A further development of the equipment with a tube is the combine. The feeder is attached to the anti-twist through a piece of fishing line 10 cm long. With this installation, in the event of a dead hook, only the feeder comes off.
- The helicopter rig involves a fixed attachment of the feeder to the end of the main fishing line. The leash is mounted above the feeder at a distance of 5-20 cm. The movement of the leash along the fishing line is limited by beads. During casting, the leash rotates around the main line, hence the name of the equipment. Recommended for very long casts.
- The inline rig is based on the main line. A camel with a carbine is attached to it for mounting the feeder. Movement along the line is limited by a damper. The leash is attached to the end of the warp through a knotted loop.
Recommendation! When fishing on a muddy bottom, it is better to install the helicopter, combine and Gardner loop rigs. And for long casts, inline and helicopter are suitable.
Let's start studying the terrain
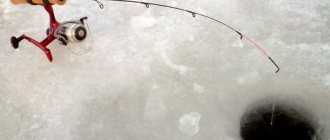
To begin with, we assemble the tackle almost into working position. Some fish with a shock leader, some without, in general, it’s a matter of habit. We hook on a marker weight, select a landmark on the other bank, and cast as far as we can.
Having thrown the load, we fix the line in the clip (we won’t touch this clipped line anymore), and pull out our load. Now we cast again until the clip stops the sinker, and from the moment the weight hits the water we count the seconds of the fall.
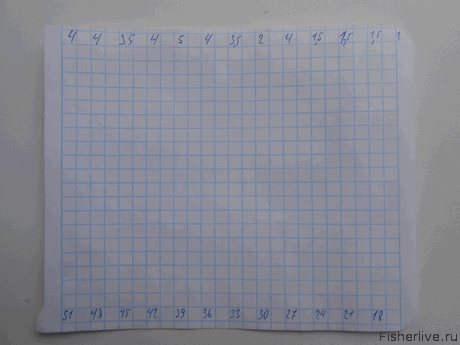
You can find out that the load has reached the bottom by the receding tip of the feeder. After this, we write down the number to which we counted at the top of the piece of paper.

We make 3 turns of the reel handle (it can be 2 or 4 turns, depending on how accurately you want to probe the bottom), and again fix the fishing line in the clip without removing the previously fixed one.
Now we unwind our load from the water and count the turns of the handle. I got 48 turns, I add 3 turns that I wound up, and write 51 at the bottom of the piece of paper under the first number. The lower numbers can be added to the end of the sheet in increments of 3 turns (or however many you will do).
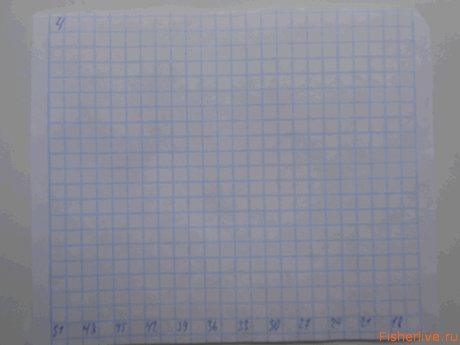
As you can see, I didn’t have all the numbers, so you take a larger piece of paper.
Next, we throw the load again, count the seconds of the fall, and record it. After that, we pull the line out of the clip, make 3 turns again, clip it, and do it all over again.
Feeder on the river
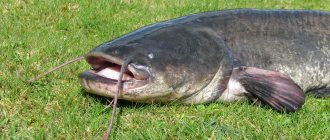
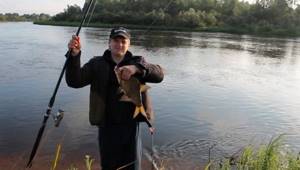
Summer feeder fishing on the river is an exciting activity. River fish differ from lake fish in sharper manners and confident behavior. Its bites are clearly expressed, and self-hatching when fishing with a feeder on the river is a common occurrence.
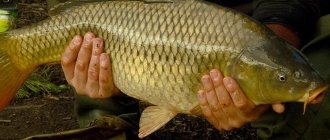
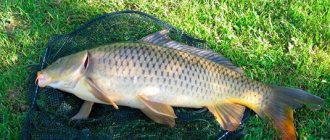
The most typical representatives of the ichthyofauna of rivers in the middle zone and the south are roach, bream and carp. Going to the river with a feeder for the first time and not having clear ideas about the nature of fishing, you need to be fully prepared to meet this particular fish
But then let’s take catching a 2-kilogram bream as a basis. This fish is a typical representative of lowland rivers, and also a desirable trophy for fishermen.
Periods of active biting of river fish
The beginning of summer is a great time to catch both bream and carp. The post-spawning feeding period of these fish, which occurs in June, is the most active and longest. If a fisherman managed to catch the dawn on the river, when the June fish began to actively feed after spawning, then he is unlikely to ever forget it.
In mid-summer the bite decreases noticeably. Before the beginning of autumn, there is a slight increase in fish activity, but its time is not the same for different rivers, and the duration depends on weather conditions and the rate of cooling of the water.
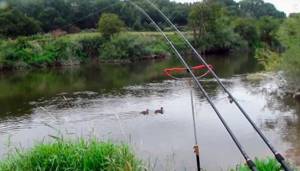
Choose a fishing spot
On small rivers, choosing a fishing location is fraught with difficulties, since there are generally fewer fish here, and they are grouped in a certain area that needs to be searched. This search can be greatly simplified by a visible clue - the concentration of anglers in a small section of the river.
Joining their company is not always advisable, and if you don’t want to do this, you will have to look for catchy edges and shallow waters near the holes yourself.
On a large river, there are much fewer difficulties in choosing a place. Even if you fish in a random place - where you can conveniently drive up and sit down, then in principle there is nothing to worry about - most likely you will not be left without a catch. On a large river, it is enough to throw the feeder closer to the main channel and the local fish will come up to take a closer look at your food in more detail.
Choose a rod and equipment
- For a large river and long casts towards the riverbed (and you can cast at 80 - 100 meters), you need to choose a feeder rod of an extra heavy class. The load on the current must be very significant to keep the equipment in place.
- For fishing in a quiet bay of the same river, with distances of about 30 - 40 meters, you will already need a rod of average power.
- For shallow water, in the coastal zone of this overgrown bay - where it is possible to encounter not only bream, but also decent silver carp or large roach - you already need an ultra-light class rod.
Therefore, it is recommended to always have a set of feeder rods with you for different fishing conditions. If something happens, a rod of the next power class can be used as a backup option.
Reel and line
The selection of a feeder reel is a separate topic; here we can only note that the reel simply must fit the class of the fishing rod used, be comfortable and light, and have a gear ratio close to 6.
On the river you will have to use braided fishing line, maybe with the exception of the smallest fishing distances. This fishing line, firstly, due to its inextensibility, normally transmits the fish’s bite to the nod, and secondly, it is stronger than monofilament, so for the same conditions the diameter of the braid can be selected smaller.
And since the thickness of the fishing line used will directly affect both the casting distance and the windage of the fishing line under the pressure of the current, the gain in every tenth of a millimeter is important.
It is necessary to use the lightest possible gear and the thinnest fishing line possible, for specific conditions.
Selection of fishing line diameter
For a super-heavy feeder, a braid with a diameter of 0.12 millimeters will be used. You can use it to cast heavy river feeders with virtually no fear of cliffs. On a line with a diameter of 0.1 mm, you already need to be more careful when swinging the rod forcefully during casting and limit the weight of the feeder to no more than 100 grams.
During the current, the issue of line sailability is always solved by installing the rods on stands almost vertically in order to reduce the length of the line in the water. This significantly reduces the weight of the required cargo.
The leash for fishing with a feeder on the river can be made quite thick. The fact is that in the event of catching a trophy, an unfortunate break in the leash will “ruin your life” (and fishing for large fish on a braided line is always riskier), and the not shy river fish forgives a thick line. For a feeder leash, monofilament with a diameter of 0 18 is quite suitable.
Hooks can also be used not from small ones - number 12. They will make it possible to cope with large fish and attach large baits.
Feed the fish what they deserve
The rules of feeder fishing dictate to us: “If you want to catch a big fish, feed it as it deserves.” Therefore, the integral components in bait for catching medium and large fish with a feeder on the river are steamed pearl barley, millet, and wheat. If you want to hunt for carp, then corn (canned sweet corn) is a must.
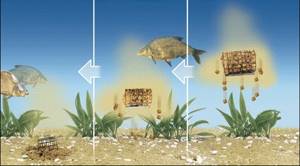
But feeding during the current has its own characteristics. The bait is quickly washed away by the water and spread down the river. Large and heavy components can remain in place, and dusty components quickly turn into an elongated, fragrant, cloudy cloud of water.
But this dust is needed in the bait. Smells and turbidity will gradually pull the fish to the fishing point from a large area. Small fish attracted by such bait will be the best indicator for taller relatives that this place is feeding.
Example of feeding
First, several portions of finely dispersed bait are sent to the fishing site, not very moistened, and quickly washed out. This will give the initial scent field.
You should immediately switch to feeding with a large fraction when the bites of small fish “suddenly” stopped and everything froze, or the bite of a large fish has already occurred. If you don’t feed the large fish at this time, then most likely, after collecting the remaining food in five minutes, it will leave the point. In the future, portions of the same fine bait must be periodically sent to the fishing site, only now more moistened, and therefore more resistant to the current.
If the bite of large fish is confident, then to keep the fattening school in place, you need to feed only the large fraction. If the bite is uncertain or periodic, then you need to maintain a cloudy cloud and feed more “dust”; in this case, the sluggish fish will not get enough to eat, and the aromas at least somehow maintain its interest.
There can be no mathematical accuracy and percentage of what bait and when to load. Only the experience of a fisherman will help to deal correctly with bait in a specific situation, and with each cast, determine how much small bait should be and how much large bait.
Fishing tactics
If you come for a multi-day fishing trip, do not rush to feed the place. First, find out all the nearby fishing spots, watch the water, and do several test fishing operations. Then you can feed the selected area with long-lasting bait in clay balls from a boat or using a slingshot.
The nozzle must be part of the bait. To the previously listed composition of the bait, you can add rolled oats, pasta, small bloodworms and maggots. To catch large river fish, you also need a bait of the appropriate size, which would not get lost in the spilled bait. All kinds of sandwiches work well - worm with pearl barley, maggots with pasta...
Don't miss
If the feeder casts are not accurate, then there will be no catch. You can only catch random fish, which will not linger at the fishing spot. The more misses you make when casting, the fewer fish you end up with.
It is better to immediately fix the range with a clip (the feeder reel should be equipped with it). You can also mark the distance on the fishing line with a marker. Learn to accurately cast at a landmark on the opposite bank.
If a mistake occurs, then in order to prevent the bait from forming a false feeding point, it is better to immediately begin reeling. You will lose some of the bait, but it will be scattered over a large area and is unlikely to have a negative impact on the main fishing area.
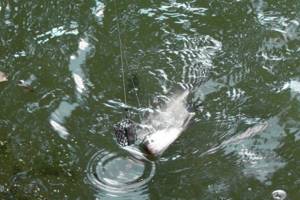
Hooking and retrieving
River fish bite slightly aggressively, and in almost half of the cases they catch themselves, trying to escape with the bait in their mouth. Therefore, there are no special requirements for hooking and tracking the nod. The hooked fish must be carefully fished out by raising and lowering the rod (pumping out), trying to hold it in an underwater position, since on the surface the fish has a greater chance of breaking due to its somersaults and sharp pulls.
If you come across a really worthy specimen, then first of all you need to remember that braided fishing line has little stretch. If monofilament could easily stretch by 10% (and this is, let’s say, 7 meters for a good distance), then braided line does not provide these meters. All shock absorption falls on the flexibility of the rod, the reel's clutch and the angler's shoulders.
First of all, try to loosen the clutch as quickly as possible to allow the fish to make its first jerk. Then brake the clutch “in tension”, so that when the fish jerks, it reels in the line, and then you can pump it out - that is, reel in the line at the moment the rod is lowered.
Use the technique of holding a slightly slowed spool with your finger and using that same finger to release the spool when you need to let the fish reel in the line.
The fish is placed over the landing net, the landing net is raised and taken ashore for photography and further release to its native element...
Determining what's at the bottom
When we reached the shore, our paper looked like this:
This is only half the battle, we need to find out what is at the bottom, sand, shell, stones, etc.
To study the contents of the bottom, you need to be able to read it. It’s very easy to learn this, just drag the load along the shore and see what it gives to your hand and how it affects the tip.
Again we throw the load to the farthest point and begin to probe the bottom. To do this, we drag the load with the rod, then reel in the fishing line, and so on until we have twisted the handle 3 turns.
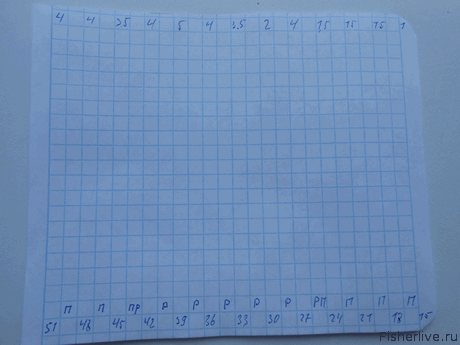
After that, we write down the result, for example, I felt sand between marks 51 and 48, the load moved smoothly as if on sandpaper, did not get stuck or knock. Let us denote the sand with the letter “P” and write it between the lower numbers.
The letters can be combined, for example, if you find a transition from sand to a shell, you can write “PR”, I think it’s clear. We do the same with the remaining intervals, pulled, recorded, etc. As a result, I got this picture:
Now we know where the edges are and where everything lies on the bottom, but for clarity, let's draw the bottom topography and mark where everything is.
Feeder. Choosing a place and feeding
For starter feeding, a few feeders are usually enough, usually 5-7. While feeding, you should not use a leash, as it will only get in the way. Having filled the feeder, form a small ball of bait and throw it near the shore, this will be a kind of indicator of the blurring of the bait, and you will know approximately when to pull out the feeder.
After feeding, you can proceed directly to fishing. Remember that it is very important to hit the same point; if you accidentally throw it in the wrong place, it is better to immediately pull out the feeder before the food is washed out, so as not to disperse the fish.
23' 00'' Before starting fishing, it is customary to make several (5-10) initial casts without bait. A bait spot is created at the bottom. Then they start fishing in the usual way. But they often make a mistake.
After the starting feeding, there is no need to take long pauses between casts. The fish may not come to the point during the initial casts. It is necessary to further increase and maintain the bait spot on the bottom, making casts every 2-3 minutes.
27' 00'' It is better to make casts every 2-3 minutes, until the bites begin after casting. After this, the pace can be reduced, but do not forget to maintain the stern spot.
Drawing the bottom relief
In order to clearly see what kind of relief is in this place, let's draw a straight line here:

This will be the surface of the reservoir from which we will count our top numbers. We count down and put dots in the right places:
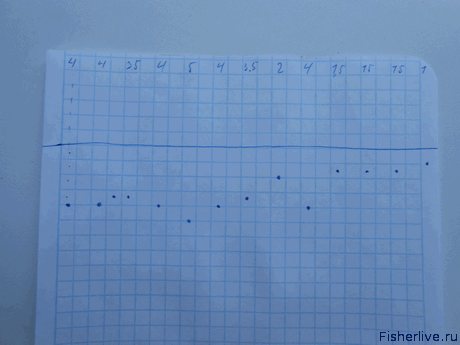
All that remains is to connect the dots and we will get a finished picture of the bottom.
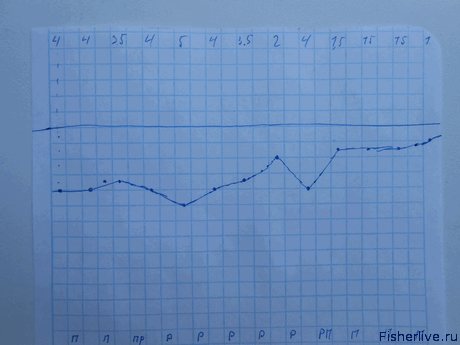
Here is our bottom, in full view. We can already select two fishing points, at 39 revolutions and at 27. Let's finish our bottom map and label the coverage:
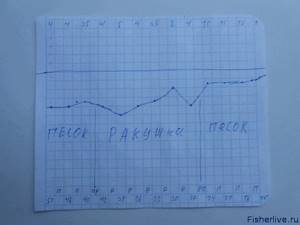
Now it’s generally great, if we talk about where it will be more promising to fish, then everyone decides for themselves.
At point 39 there is a good hole; fish will probably stand here during the daytime. At point 27 there is an excellent deepening, but the rise is too sharp, there is a risk of catching the feeder.
How to accurately hit the chosen fishing point
Now I’ll tell you how to work with this scheme. For example, I chose point 39 for fishing. Remember the fishing line that we clipped at the very beginning and didn’t touch anymore? So, it was clipped on the 51st turn of the handle, subtract 39 from 51, and get 12.
Again we throw it at 51 turns, fortunately we have it clipped there. We begin to reel in the load, counting 12 revolutions, and lo and behold, we find ourselves at point 39. We clip on, hook up the equipment, and start fishing, as you can see, everything is simple.
That's all, dear fishermen. This method of studying the relief is quite long, but having felt the bottom relief in this way, you will discover your place, which you can return to again and again from year to year, and enjoy fishing. See you again!