What elements does the tackle consist of?
Assembling the gear is not difficult even for a novice fisherman. It requires very little installation and is inexpensive. Read below what we need for this:
- Rod . An excellent option would be the simplest and cheapest spinning rod (telescope) or an affordable feeder rod - their brands and production do not matter. It is important that the test be from 40 g and above, the running ones are 40-60 g with a length of 2.1-2.7 m. In the presence of a large current, the test is increased to 100 g. The test means what the total mass of a feeder filled with bait should be. Do not overload the rod again, this will lead to breakage of one of the legs.
- Reel _ Inertia-free will come in handy. The optimal spool size is from 2500 to 4000; most often, size 2500 is enough; it can hold 100 meters of fishing line. It is desirable to have a friction brake in the “meat grinder”; it will be extremely useful when fishing for large specimens of carp or carp. Preferred does not mean required, choose according to your budget.
- Main line . Braided cord is often used as the main fishing line, since with a smaller diameter it has a higher breaking load. The diameter of the braid is 0.10-0.12 mm. For monofilament 0.16-0.20 mm. In the case of fishing on paid sites (where the chance of catching a trophy increases) use 0.30-0.35 mm.
- Feeder . It is selected and equipped depending on the fishing method and the chosen location. For the current, choose a larger mass (100 grams or more together with food) of a rectangular shape. For standing water, 40-60 g is enough, any shape is possible: rectangular, round, without corners, etc.
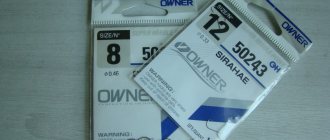
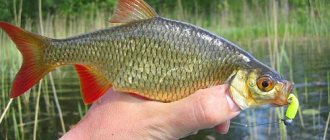
- Hooks . They are selected depending on the type of fish on which the emphasis is placed when fishing. The most popular are No. 10-14 (roach, bream, bream) with a short shank, this is an excellent option for fishing with pearl barley or maggot. When fishing with a worm, choose a hook with a long shank No. 6-8; if it has several barbs on it, even better. The long forend is convenient because the worm fits perfectly on it, and the notches prevent it from slipping off the hook.
- Retractable leash . It is important that it be smaller in diameter than the main line. Materials: monofilament with a diameter of 0.10-0.12 mm, fluorocarbon with a diameter of 0.12-0.13 mm. Thanks to the retractable leash, the tackle becomes more delicate (thin, invisible). Its length varies from 0.5-1.5 meters, depending on the caution of the fish and the current. The more careful the fish and the stronger the current, the longer the leash is needed.
- Bite alarm . Convenient because when using it there is no need to closely monitor the tip of the rod. It can be in the form of a simple bell, or electronic, with tension sensitivity settings.
DIY production, necessary materials
- The spinning rod is as long as possible and preferably stronger.
- A spinning reel capable of holding at least 50 m of fishing line.
- The fishing line itself, with a diameter of 0.2-0.3 mm. Both monofilament and braided are suitable.
- A feeder, weighing up to 50 g, of the “cage” or “method” type, and possibly a spring.
- A handle, quite sharp and preferably imported, about number 6.
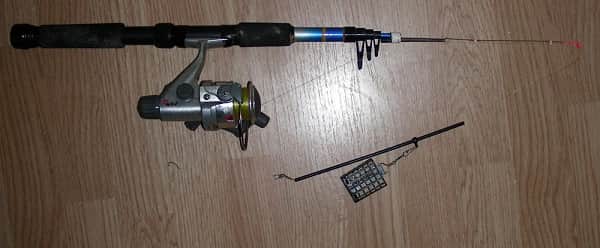
The main stages of assembling a bottom fishing rod
- A reel is attached to a spinning rod.
- The fishing line should be wound on the reel.
- A fishing line is threaded through all the rings.
- The next stage is knitting the equipment. For beginners, you can choose a paternoster.
- Attaching the leash to the equipment, which has a smaller diameter than the main line. Recently, fluorocarbon, which is not visible in the water, has been used as leashes for fish.
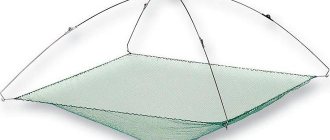
Types of feeders and their purpose
In a bottom fishing rod, one of the main components is the feeder: its size, weight, shape, material and its openness. The feeder performs several main functions:
- Delivery of complementary foods to the fishing site
- Weight for long casting
When choosing a shape and weight, take into account the fishing location. As has already been said, in the absence of flow, it practically does not matter what shape the cell will be.
While if it is present (especially strong), be sure to choose a model with a square cross-section, or with additional ribs - all this is necessary so that the feeder does not get carried away by the current. There are several basic designs:
- Open
- Closed
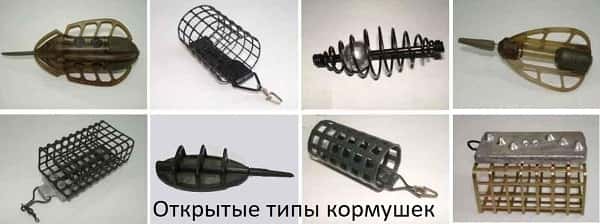
The open type is used on lakes, reservoirs or rivers with minimal flow. The essence of the design is that the bait is washed out of the cage in the optimal amount of time.
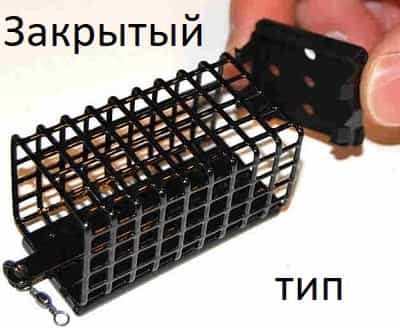
The closed type is used on rivers with a current. Due to the fact that the bottom of such a feeder is closed, the bait is not washed out in a short time, allowing you to do it more slowly. Available in any form:
- Cylindrical
- Rectangular
There are also several manufacturing materials:
- Metal
- Plastic
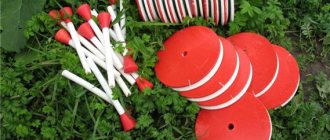
You can only find out which one is better in practice, choosing the appropriate option for yourself. But the material itself is not fundamentally important for a beginner, it makes absolutely no difference what it is made of. Returning to open feeders, it is worth saying that there are many more types. The two most common open types are spring and method.
A spring is a metal spiral mounted on a rod. The bait is prepared to such a consistency that you can take a handful and stick it to the spring, filling it. It is possible to use several feeders connected in series.
The method is a lead plate to which a plastic frame is attached, similar to a greenhouse frame. The beauty of this type is that when casting, the feeder lowers the plate to the bottom, thereby leaving food accessible to the fish, so you don’t have to worry that it will be difficult for it to find food.
Complementary foods are prepared more densely so that they stick well. The bait (usually the live type) is fixed on top of the groundbait, thus swimming up to the smell and finding its source, the fish finds it faster.
All these types and shapes, regardless of the material of manufacture, are attached by the feeder to the bottom through a winding ring or swivel. By experimenting with the type, bait and groundbait, you can achieve good and frequent bites, so if there is no bite, re-cast the bottom fishing rod with a new bait or groundbait.
Installation of the feeder
Donkey feeders come in open and closed types and are made of plastic and metal mesh. The classic version of the open feeder is the triangular feeder method, with a metal weight, used both in current and in still water.
Spring feeders are also of the open type, they are cheaper and “hold” the bait well. Closed mesh feeders are used in reservoirs with a current, since the bait is washed out of them longer and attracts fish from all horizons.
When using closed feeders, animal components are added to the bait:
- chopped worm;
- maggot;
- bloodworm;
- insect larvae.
Feeders can be sliding, with a tube in the middle, or with a solid fixation using a swivel, and it is not difficult to figure out how to tie the feeder correctly.
In order to equip the donk method you need to prepare:
- a piece of icecore 30−35Lb;
- feeder method 35−80g;
- leash made of soft leash material 15Lb, with a hook number 6-10 according to the European classification;
- swivel 4, with an additional soldered ring.
The procedure for making the tooling method:
- a swivel is tied to the end of the ledcore;
- the method is put on the ledcore, and the swivel is recessed into her body;
- a leash is tied to the ring of the swivel;
- the second end of the leadcore is tied to the main fishing line using a loop-to-loop method.
This is a blind rig method, since the swivel is fixed and the feeder does not slide along the line. For cautious fish, it is more effective to use the sliding method. It is knitted in the same way as the blind one, but below the feeder, a mounting bead is put on in front of the swivel, preventing it from entering the body of the feeder. A rubber stopper or another mounting bead is placed on the top of the ledcore.
When a fish bites, the feeder slides along the icecore to the upper mounting bead and rests against it, self-notching occurs. An additional ring on the swivel is necessary so that the leash is completely free and at the slightest touch of the fish to the nozzle, the hook “flies” into the fish’s mouth.
The donkey rigging method involves the use of viscous food, but to attract fish, dust-producing components are added to it:
- biscuits ground in a meat grinder;
- powdered milk;
- geyser;
- dry ground cereals.
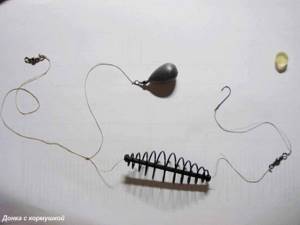
To install the donkey equipment with a spring, you need:
- a piece of monofilament fishing line 0.25−0.28, 50 cm long;
- loaded feeder;
- 2-3 leashes made of monofilament fishing line or braid with a diameter of 0.14-018 mm and a length of 5-10 cm;
- swivel number 4;
- 2-3 wire bends (one less than the number of leads);
- Rubber stoppers for match fishing.
A wire spring is cheaper than a feeder method and it’s not such a shame to lose it when shooting equipment, so fishermen hold this gear in high esteem. To make an installation with a spring you need:
- tie a swivel to one of the ends of the fishing line (lower);
- put the feeder on the fishing line;
- put the rubber stopper 5 cm above the spring feeder;
- tie a wire tap for the leash;
- tie another wire branch 10 cm higher along the fishing line;
- At the free end of the fishing line, tie a loop for fastening with the main fishing line;
- tie leashes to wire bends;
- tie the leash to the free end of the swivel.
Important! Wire bends are necessary so that the leashes do not get tangled when reeling in the tackle and casting. The spring should move freely along the line from the swivel to the stopper.
Methods of mounting gear
There are several equipment options: blind and sliding. There are many methods for attaching a feeder to a fishing line, but they all boil down to the following principles:
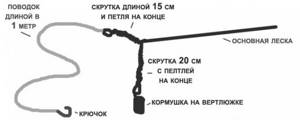
- Paternoster or Gardner's Loop. One of the most used and simplest installations. Easy to learn, does not require serious skills. A swivel is tied at the end of the main line, and a lead is mounted to it. Above the swivel, 20-25 cm, a loop 10-15 cm long is made, onto which the feeder is attached.
- Tube with anti-twist . More often than not, this gear is sold already assembled, which is a definite plus for a novice fisherman. A plastic tube with a 1/3 bend; a feeder is attached at the bend (via a swivel) - can be easily replaced with a different type or weight. On one side of the tube comes out a fishing line, which is attached to the main line; on the other side of the tube, coming out, the line is attached to a rocker arm, which has 2 outlet leads.
- Symmetrical and asymmetrical loops. Often used by professionals, they require more installation skills. They are often used when fishing in currents. You can view installation photos on the page about feeder equipment.
Baits and lures
Corn, barley, maggot, worm and foam are some of the most common baits in bottom fishing.
When using a feeder, not all attachments will be suitable, for example, semolina. Its main task is to securely hold it on the hook. The most used bottom baits:
- Hominy
- Maggot
- Worm
- Corn
- Pearl barley
- Barley shell
- Boyles
- Styrofoam
Photo of a donkey with a feeder
Note!

Fishing with a spring - rigs, baits, baits, gear and methods of fishing with a spring (80 photos)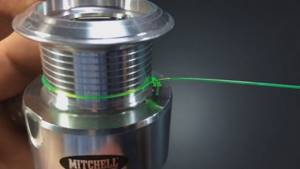
How to tie a fishing line to a reel - methods, tips on how to tie correctly and an overview of the most reliable knots (85 photos and videos)

Cuts for wobblers and spinners - how to make a simple homemade cut. 110 photos and videos of practical tips
Help the project, share on social networks 
0
Bait and its principle of operation

There are many recipes for preparing bait mixture. The main properties are viscosity, due to which leaching from the feeder will occur evenly, within 5-10 minutes. If the bait is too viscous, then after 10 minutes it will still be inside the cage. This is a huge mistake for beginner bottom fishers.
Because of this, the fish, when they come to the smell, do not find anything edible and quickly leave the fishing spot. If the bait is washed out, then a bait spot is created, and the fish swims up and begins to actively feed, staying at the point. The contents of the cell and its fraction are very important. The fish should not eat its fill, as it will then leave the feeding area.
Ideally, successive feedings would be enough to keep the fish in the fishing spot, but at the same time without feeding it. The small fraction is used when fishing for silver bream, roach, and crucian carp. The large food fraction is used when fishing for carp, bream, ide and other trophy species, otherwise it will not linger in the swim. There are various liquid additives that help speed up the digestion of fish. In other words, no matter how much she eats, she still won’t be able to get enough.
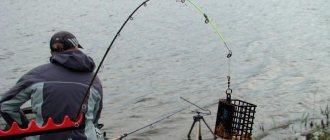
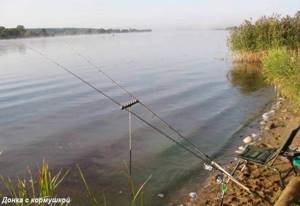
Technique and process of fishing with a bottom rod and feeder
Using our recommendations and following these steps, your chances of catching increase:
- When you arrive at a pond, the first thing you do is mix the bait. For complete readiness, it is advisable to let it brew for 15-20 minutes. During this time, continue to lay out your gear.
- Start studying the bottom topography. This is done using a marker float or using a marker weight. A marker weight is mounted to the bottom fishing rod and a cast is made. Next, the reel rotates, and along the line the fisherman observes where the holes are, their exits, dumps, “tables” and other bottom irregularities.
- Having found a promising fishing spot (for example, an exit from a pit), start feeding. Roll 5-6 tight balls in your hands and throw them into the fishing spot, or do the same thing, but when filling the feeder. After casting, reel out the line with a sharp movement. Sharpness is needed so that the feeder is instantly freed from the bait and that, in turn, remains in the feeding spot.
- Now you can start fishing with a donk. Having scored the cage, a cast is made, if there are no bites within 5-10 minutes, the actions are repeated. It is important that after 5-10 minutes the bait does not remain in the feeder. If this does not happen, then you should not pack it so tightly, or dilute it, making it more crumbly.
- If there is no bite for a long time, change baits, use dips of different smells to further attract the attention of the fish.
Tips for Beginners
To cast a bottom fishing rod to the same place, the following rules must be observed:
- After finding the fishing spot, put a rubber band on the reel. This way you will limit the line from winding up on the next cast.
- Always use a landmark on the opposite bank to aim for when casting. This will help you not to lose visual contact, and together with the rubber band you will always make your casts exactly on target.
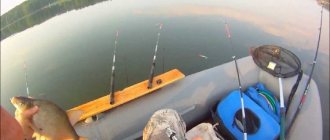
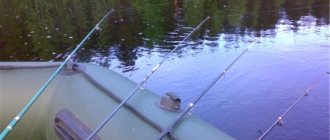
We hope that our article will be useful to the reader and that he will find a lot of useful material in it. You can catch almost all types of whitefish with a bottom fishing rod, at different distances, both from the shore and from a boat, so be sure to try this method in practice.