Loading…
Loading…
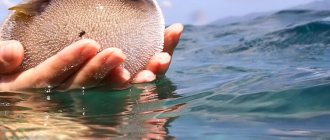
Surely every fisherman knows how to pickle bream. Any of them will say that this process is simple, it does not take much time and effort, and it does not involve hard-to-find products or special equipment. But the result is simply amazing and everyone, without exception, likes it. Well, if you don’t know how to pickle bream at home, then we will offer you several simple recipes. Read how to salt herring!
Where to start?
First of all, it is important to clearly understand why you need to dry at all. Initially, this is one of the oldest methods of storing meat and fish invented by people. During this process, the fish is deprived of excess moisture, after which it can be safely stored for a long time without much spoilage or visible loss of taste.
Fishermen have faced this problem for a long time. After all, after a successful fishing trip with a plentiful catch, something needs to be done. Especially on hot summer days, when freshly caught fish spoils as quickly as possible. Thus, the need for quick processing of the catch forced fishermen to use all the methods available to them to work with fish.
In the south of Russia, in the space between the Don and Volga, the same bream is dried in a simple (camping) way. The caught fish are gutted, washed, and then cut along the ridge and unfolded in the form of a “book.” Next, the flattened bream are rolled in a large amount of salt and hung on a rope in a freely ventilated place.
This is how the famous Tsimlyansky bream is prepared - quickly, efficiently and with not the worst taste result
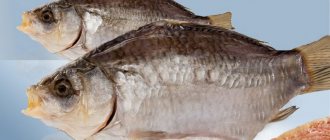
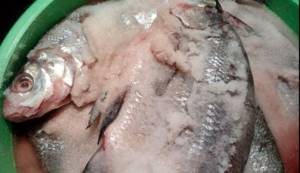
At home, it is better to dry bream in another way. First of all, you need to pay attention to the quality of the raw materials. You should choose only fresh fish for subsequent drying - first-class bream and bream.
The fish must be thoroughly cleaned: remove mucus, rinse well, then remove the internal organs and rinse thoroughly again. Small specimens and fish with caviar, as a rule, are not gutted. It is also not customary to cut off the head of bream; the gills must be removed.
Only after completing these procedures can you start salting the fish.
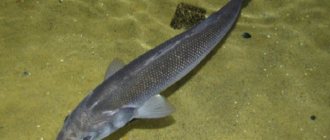
Types of fish for drying
Drying or drying is an ancient way to preserve food. Most often it is used on fish and meat. By slowly drying in a ventilated area or in the fresh air, the product acquires a piquant taste. Can all types of fish be subjected to similar processing?
According to experts, it is better to use the following types for drying:
- vobla;
- ram;
- saberfish;
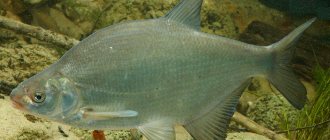
- silver bream;
- carp;
- perch;
- chebak;
- bream;
- rudd;
- crucian carp
Generally speaking, small-sized specimens are best suited for drying. Among professional fishermen, such fish are called low-value. But larger “brothers”, for example, catfish, bream or pike perch, may also be suitable.
All listed species are freshwater. They are the ones most often used for drying. But experts recommend not to give up seafood. You can use frozen fish for this. Flounder, herring, halibut and mackerel are also used.
It turns out better dried, which contains a large amount of fat. Therefore, for drying, it is better to take spring or winter catch before spawning. To get the best results, caught fish should be salted immediately.
In the northern regions, the bear-style drying method is often used. In this case, raw materials with a scent are used. But due to its taste specificity, this option may not appeal to everyone.
Dry pickling
This stage is rightfully considered the most important and is invariably present in any recipe for dried bream.
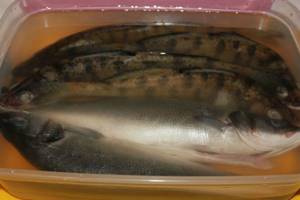
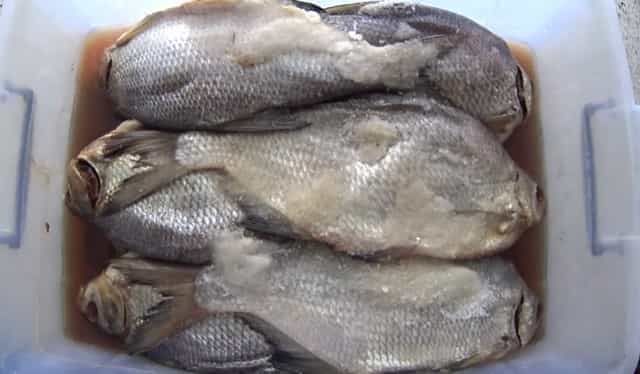
Available fish should first of all be weighed. For dry salting, a simple proportion is used - 250 grams of salt per 1 kilogram of fresh fish. Moreover, it is better to take coarse salt, since it most effectively “removes” excess moisture.
A good, spacious container for pickling will definitely come in handy. It should be doused with boiling water first.
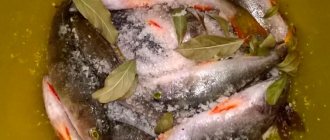
After gutting the bream, removing the gills, black mucus and weighing, you can begin the process itself. A portion of the measured salt should be poured onto the bottom of the container to form a uniform layer about 1 cm thick. The remaining amount should be thoroughly rubbed onto the fish carcasses both outside and inside.
How to properly wither a roach
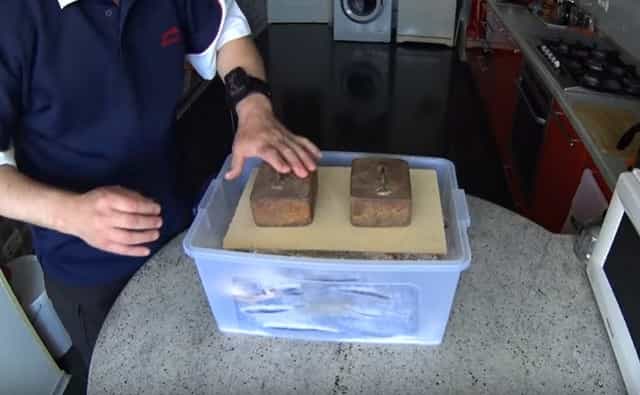
Next, the bream are placed in a container in dense layers, which are important to sprinkle with salt, and covered with something flat (a large plate, a cutting board). At the same time, the top fish are also covered with a layer of salt with a small addition of sugar in order to enhance the taste. It is very important not to forget to install some kind of pressure on top.
Oppression is important for several reasons. Firstly: this is the only way that dried bream will be dense. Secondly: when using oppression, air cavities will not appear inside the fish, in which harmful microorganisms love to accumulate.
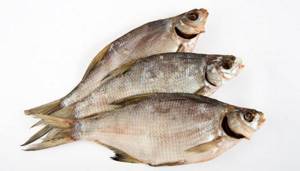
It will take two days for high-quality salting. The container with fish is placed where it is cool. Within a few hours, the bream will release juice, and it is in it that the fish will be salted for the entire allotted time. Properly salted carcasses will eventually become elastic, the flesh will acquire a gray tint, and the caviar will become reddish-yellow.
Recipes for making dried bream may vary slightly
Moreover, not the recipe - there is nothing special to change in it. Just add some spice. This is not for everybody. By carefully sorting out they find out what spices can be used to season the fish. Most connoisseurs of dried bream are convinced that any spices worsen its taste!
1. The dry (“Old Russian”) method is suitable for fish weighing more than a kilogram. The dry method is also suitable for salting small, ungutted bream. The fish is salted in wooden boxes with numerous holes made for the juice to flow out.
- The catch should not be washed: wipe with a cloth, removing mucus and dirt.
- A cut is made along the ridge and flattened.
- Clean out the insides.
- Pour salt there.
- Place belly up.
- Each layer is sprinkled with salt.
- They impose oppression.
- Place in a cool place for 4–7 days.
2. Wet method (in natural brine): salting is done in an enamel/plastic container. A centimeter layer of salt is poured onto the bottom. Whole carcasses are positioned so that the back rests on the belly of the nearby bream. Sprinkle with salt to form a smooth surface. Each new layer of fish is perpendicular to the previous laying. Oppression is placed on top. Excess juice is drained. Salted carcasses have a hard, slightly sunken back.
3. The brine method is suitable for small fish and low-fat fish that produce little juice. The white bream is strung on a fishing line and lowered into brine - a saturated salt solution. Keep for 2-3 days. (Checking the brine for strength: an egg floats in it.)
The drying process is complicated. The fish are hung out at night and kept in the refrigerator during the day. After 2-3 nights, each bream is wrapped in paper and placed on the bottom shelf of the refrigerator. There it reaches the desired condition for another 1-2 weeks, giving excess moisture to the paper. The wrappers are changed as they become damp to prevent mold from appearing. The finished bream turns out to be fatty and very tasty.
Soaking and drying
After two days, the resulting brine (brine) should be drained. Bream must be soaked in water to remove excess salt. There are different points of view on this matter. Some professionals advise soaking the fish for the same number of days as it was salted. There is a recommendation to soak for 10 hours. It is important to drain the water at least three times during the process.
Then comes the turn of the next stage - drying.
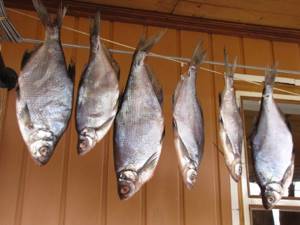
Bream should be hung in a cool room (basement, attic, balcony). A gauze canopy can be used as protection against insects.
Drying
The ideal time for drying is autumn. The bream accumulate “fat” and the weather becomes suitable. Fish can be freely dried on the balcony at natural temperature.
The total time is determined experimentally - it depends on the air flow of the room, the size and weight of the fish, and the established temperature.
The average drying time is from one to two weeks.
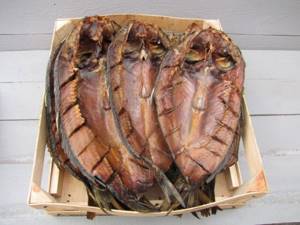
The readiness of bream is determined by a number of characteristics. The structure of well-dried bream is uniform, freely visible in the light. There are no visible traces of salt. The flesh is elastic with an amber color of meat. The aroma is pleasant.
To improve the taste, wrap the bream in thick paper and keep it in the refrigerator for a while.
Wet salting
This method of pre-processing bream before drying is good for small specimens (less than 30 cm in length). Such fish are not cleaned of entrails, but only the gills are removed.
For salting, it is necessary to prepare a salt solution with good concentration
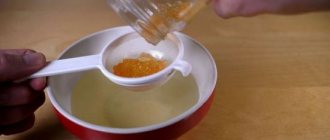
You need to dissolve enough salt in a container of water (bucket) so that the egg submerged in water rises to the surface.
Several fish are strung on a thick thread, fishing line or twine using a needle. Usually half a dozen carcasses are skewered on one thread. Then the bream are lowered into the solution with complete immersion.
After which it is important to close the bucket with bream tightly and put it in a cool place. The temperature there should not exceed 8 degrees Celsius. Salting will take 3 days. Readiness is determined by the elasticity and hardness of the backs. Then you can move on to the next stage.
Winter method
Dry salting of bream involves the following procedure:
- A layer of salt should be placed at the bottom of a suitable container.
- Place the fish on it (in a row), belly up.
- Cover it with spices, then lay out the next row. This should be done until the bream runs out.
- Cover the top layer generously with salt.
- Close the container with a lid and press down with stone pressure. The vessel should be moved to a cool place. At low temperatures the product is stored better. Salt penetrates the meat rather slowly, and where the product has not yet been salted, the cold reliably protects it from spoilage.
For salting fish to be successful, it is important to use only rock salt. How much spices do you need to cook bream well? One kg of product will require at least 125 g of salt. In general, the question of how much to salt bream for drying depends on the weight and, accordingly, the parameters of the fish.
It is important to keep the fish in brine for at least 7 days. On the seventh day you need to check the condition of the salt. If the surface of the bream is a bit soft, keep the fish in dry brine for a few more days.
At the end of the salting procedure, the fish should be soaked in cold water for a couple of hours before drying. Thanks to soaking, the bream will get rid of excess salt. The fish should be dried in a well-ventilated area. It is advisable to use the dry salting method in the summer when it is hot outside.
How long does it take to dry fish? We dry the bream in a suspended state for at least 10 days. To prevent flies from encroaching on it, you need to cover it with gauze, which can be sprinkled with a vinegar solution. The smell of the latter repels insects. If you need to dry fish quickly, use small specimens. Large bream can dry for up to several weeks.
If you regularly cook fish in this way, it is advisable to make a special drying tray. The latter is made in the form of a rectangular structure consisting of slats covered with gauze. Inside it, strings of fishing line are pulled.
The wet or, in other words, brine method of salting bream is suitable for preparing small river specimens. This method is important to use in winter. It differs from the previous method in that after the salting procedure the product does not need to be dried.
The algorithm for preparing fish using the wet method for the winter is similar to dry salting. It also needs to be rubbed and layered with salt. Consumption: for 10 kg of product take from 1.25 to 1.5 kg of spice (moderate salting). To make the meat more tender, add 1 more tablespoon of sugar to the recipe. Strong wet salting of white bream consumes up to 3 kg of salt.
To improve the taste of the product, you will need a few bay leaves, a pinch of coriander and red pepper. Spices should be added immediately to the marinade.
Already on the 2-3rd day the fish is covered with its own juice. The product is completely salted in 5–8 days (this depends on the size of the specimens). River bream can be consumed immediately after salting.
How to dry bream without gutting
For lovers of dried fish with caviar, you can suggest drying the bream without gutting, as a whole carcass.
For these purposes, only the freshest fish (less than 24 hours from the time of catch) is suitable. You need to immediately remove the gills from the bream, wash it and salt it. The salting process is the same as for gutted specimens. The only difference is the severity of the oppression. It is better to take something more massive, about half the weight of the entire fish.
After two days, the bream should be washed and then hung in a cool place (not higher than 10 degrees Celsius). A gauze canopy or mesh frame is required to protect against flies.
As for the benefits of dried bream for the body, it should be borne in mind that they contain a lot of fatty acids, calcium, and phosphorus. But there are also a lot of calories in such fish, as well as salt. Therefore, you should not go to extremes and eat exclusively dried fish. Everything is good in moderation.
Dried bream: salting at home - a recipe for salting and drying large fish without gutting
To get delicious dried bream at home, you need to go through several steps:
- Preparing bream for salting,
- Salting fish using dry salting method,
- Soaking the fish after salting
- Drying and drying bream
How to properly prepare bream before salting
First of all, after bringing your catch home, all the fish must be cooled. Put it in the freezer for a couple of hours.
This way your fish will be reliably preserved and odorless. And with this cooling we will get rid of some parasites if they are present in the fish.
How to properly salt bream for drying at home
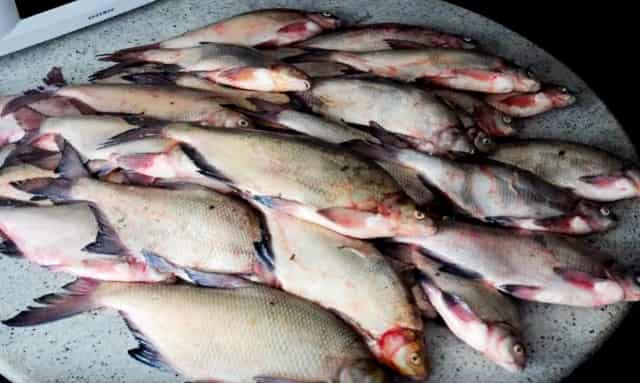
Salting bream is not difficult. It is necessary to start salting with large individuals.
Next, we proceed to salting the bream. To do this, you first need to select the container size you need.
Ikea and other mega-superstores sell plastic boxes with handles. They are just perfect for salting bream - large and deep.
First of all, pour some salt into the bottom of the box. Then we fill the gills with salt, since it is from the head that the fish begins to spoil (as you and I know well).
Some immediately remove the gills and make an incision in the abdominal part so that the fish is better salted. But I assure you that it will be salted just fine anyway.
For 1 kg of fish you need 150-200 grams of salt.
Next, we lay all the fish in layers “jack” (that is, head to tail, tail to head). Don't forget to sprinkle each layer with a little salt.
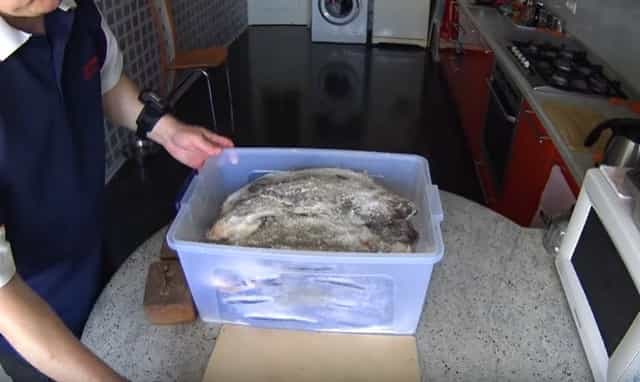
When all the bream is laid, take a piece of plywood or a board of the required size and place it on top of the salted fish. We press down with our weight and place pressure on top (load - the more fish, the heavier the load).
The load should be exactly half the weight of all the salted fish.
We put it in the refrigerator for a week - no less, or even 10 days. You can spend the first two days so that the fish gives juice without putting pressure on it. But every day you need to take the fish out of the refrigerator and press it again. This is necessary so that all the air inside comes out.
I don’t do quick salting, because it seems like the fish will pick up salt in a couple of days, but fermentation of the meat will not occur and it won’t be the same dried bream like store-bought.
If there is a lot of fish, then some can be left for drying and drying, and the rest can be packed in bags and placed in the freezer. And if necessary, deliver several fish.
I advise: How to salt red pink salmon fish at home?
How to properly soak bream after salting
After salting, any fish must be thoroughly soaked. This is done so that the excess salt is removed and we do not end up with over-salted bream.
To soak bream you will need a larger container than for salting. You can set aside a bathroom in your apartment for this (if your spouse and all household members do not mind).
First, we wash each bream under the tap. Then we place it on the bottom of the bath and fill it with cold water.
The water needs to be changed every hour. Soaking is enough for 20-24 hours.
In the summer, when it is very hot, you should put a few pieces of ice in the fish bath.
Interesting: How to cook fatty salted fish on a camping trip and at home?
The easiest way to dry and cure bream without gutting at home in summer and winter
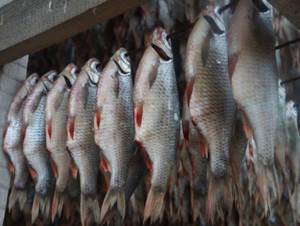
You can dry bream in an apartment, but the best place, of course, is in a private house, where there is somewhere to hang all the fish.
Drying should be done in a cool and well-ventilated area. Small bream should be hung by the head, and large bream by the tail.
It is advisable for the fish to be dried (dried) in a room where the temperature is 10-15 degrees.
For a quick effect, especially in isolated places, such as an apartment, it is better to dry and dry the bream under a fan.
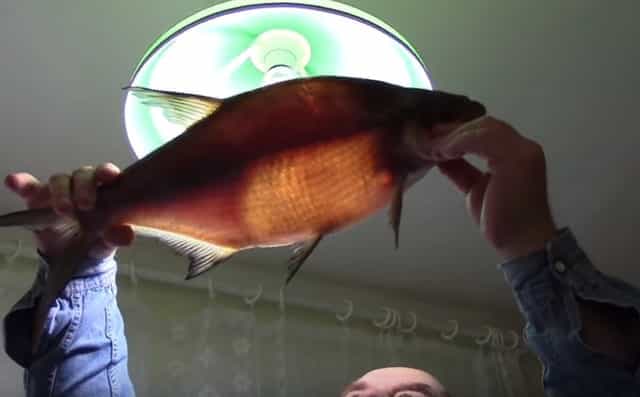
After drying, dried bream turns out to be very tasty without any odor, and when cut, the meat has an amber transparent color.
Useful: An interesting way to smoke fish on the go.