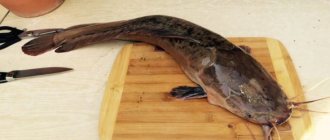
“What kind of caviar do you prefer - red or black?...” to this question the average person begins to shrug his shoulders embarrassedly, saying that the main thing is not quality, but quantity and its very presence. And all this happens only because even today caviar is still on the top list of expensive products that are inaccessible to ordinary workers. However, in an effort to purchase an expensive product from the best and noble “producers” (salmon, sturgeon, etc.), we forget that even ordinary fish (bream, perch, capelin, pike) produce caviar, and in larger quantities and to some extent, much better quality than sturgeon. In today's publication we will look at the option of salting bream caviar at home, tell you about some cooking secrets and simply share interesting information.
Salting caviar at home
Despite the fact that there are periods of spawning prohibition, amateur fishermen, depending on the fishing rules of a particular basin, are allowed at this time to do a little fishing with certain gear from the shore outside the spawning areas. And it happens that a fisherman comes across a fish with caviar . If you followed the rules when fishing, then with a clear conscience you can pickle caviar at home . This is an incredibly tasty and valuable dish. And it doesn’t matter whether it’s perch caviar, pike caviar, pike perch caviar, bream caviar or other fish. If you know how to properly salt caviar at home and have proven recipes for salting caviar , your pleasure is guaranteed.
What you need to know before salting caviar at home:
- Caviar for salting must be fresh, that is, extracted from freshly caught fish.
- The fattier the fish and the larger the caviar, the more enjoyable it will be for you to eat.
- First of all, recipes for salting the caviar of pike, pike perch, crucian carp, and bream are popular; you can pickle the caviar of perch.
- It is important to clean the eggs from the chaff: open the film and wipe with the back of your hand through an enamel colander - an aluminum colander is not suitable, because its sharp edges will ruin the eggs.
How to simply salt caviar at home - a universal recipe:
To salt fish roe at home, you will need an enamel pan, gauze, as well as water, salt, and seasonings (bay leaf, black and allspice). Pour three times more water into the pan than prepared caviar. Let the water boil and add plenty of salt and omit the seasonings. Next, you need to turn off the stove and pour caviar into the prepared water, remembering to stir. Let it stand under the lid for about 15 minutes, and then discard the caviar through cheesecloth. The cooled caviar is put into the refrigerator. Store for about a month.
Question answer
Many questions arise in connection with salting and drying. For example, why salt the carcasses heavily and then soak them, if you can immediately put less salt and dry them immediately without soaking. Yes, this is indeed how you can dry sea fish or freshwater fish caught in early spring. Summer and autumn catches are more often infected with parasites (opisthorchiasis, diphyllobothriasis). Therefore, the longer and steeper the fish is salted, the less the risk of infection.
The carcasses should be rinsed and placed in a large container, such as a bathtub, filled with cold water and changed every hour. After a day, the fish is ready to dry. It is better to soak large specimens for 2 days.
Bream meat, in addition to proteins and fats, contains the necessary vitamins and microelements:
- potassium;
- calcium;
- magnesium;
- sodium;
- phosphorus;
- chlorine;
- iron;
- silicon;
- vitamins E, PP, group B.
The energy value of dried bream is 220 calories. The product is useful to use for bone strength, improve heart function and brain activity, increase red blood cells and increase performance.
Important. Excess salt (NaCl) indicates that the product should be consumed sparingly, especially if you have kidney disease.
First you need to stretch the carcass, as if breaking it in different directions, so that the skin moves away from the flesh. Then separate the head, dorsal and pectoral fins. Along the hollow formed on the ridge, tear the skin along its entire length, carefully remove it towards the belly at the same time from both sides of the carcass. In this case, the insides of small fish will remain on the skin. It is advisable to cut the belly of large bream.
If the fish is very dry, it can be kept in the freezer and then thawed at room temperature. This will make it a little softer and easier to clean. By the way, it is also convenient to store dried fish in the freezer, packing it in several bags and taking it out as needed.
Every true fisherman must be able to not only catch fish, dry it and dry it, but also salt the caviar himself. After all, properly salted fish roe is a real delicacy. In addition, homemade caviar is very healthy due to its naturalness and high nutrient content. In this article we will talk about the technology for salting fish roe at home and provide several detailed recipes that will help you prepare an amazingly tasty appetizer.
How to properly remove caviar from fish
You can use caviar for salting only if the fish is fresh enough.
Preparing caviar for salting
Recipes for salting caviar - preface
The simplest recipe for salting caviar, known to all fishermen, is to place the caviar in a bowl, add salt, stir and let it sit for a while. After this, the caviar is considered ready for consumption. But do not forget that freshwater fish can be infected with various parasites, which will happily settle in the human body. And there are especially many of these parasites in fish caviar! Therefore, eating caviar salted according to this recipe is very risky for health. Another disadvantage of this cooking method is the smell of fresh fish in the appetizer. To avoid all this, it is necessary to follow a special technology when salting, which will not only protect you from parasites, but also make the caviar very tasty.
First we need to prepare the brine. Rapa is a special salt solution for washing fish eggs. The proportions of standard brine are 100 g of salt per 1 liter of water. Bring the solution to a boil and pour the caviar into it while hot. Stir the caviar with a fork for about 3 minutes so that the hot solution covers all the eggs. Then we drain the brine and prepare a new one to repeat the procedure. A total of 3 fills are required.
The first two times the water turns out cloudy, but the third time it should be more transparent and clean. Then you need to free the caviar from excess moisture. To do this, put it on a sieve and wait 10-15 minutes until all the water has drained. If there is no sieve, the caviar can be spread on a flat surface in an even layer of 3-4 cm and placed for a while at a slight slope. This method will help the water drain no worse than through a sieve. After this, take a glass jar with a volume of approximately 1 liter and pour 2 tablespoons of vegetable oil into its bottom. Pour caviar on top, but not to the top, but about 75% of the jar. Add a full teaspoon of salt and mix well with a fork. Then fill the rest of the jar with caviar and pour sunflower oil on top - about a 5 mm layer. We cover it all with a plastic lid and let it stand in the refrigerator for several hours, but it’s better to leave it overnight.
In the morning you can already enjoy sandwiches with delicious crumbly caviar of light amber color. The appetizer tastes lightly salted and does not smell of fish at all. Total cooking time is only about 30 minutes. If, when preparing caviar in this way, you sterilize all utensils (jars, sieve, lid, fork, spoon), then unopened caviar can be stored in the refrigerator for a very long time - more than 1 month.
To salt caviar according to this recipe, we will need an enamel pan. Pour water into it - the volume is approximately three times greater than the volume of existing caviar. Add salt to the water (as for boiling eggs) and bring the saline solution to a boil. Add various spices and herbs to boiling water to taste: bay leaf, ground black pepper, black peppercorns.
Then remove the water from the heat and pour the prepared caviar into it. Cover the pan tightly with a lid and leave to steep for 15 minutes, no more. Strain the caviar through cheesecloth, allowing the water to drain completely. After the caviar has cooled, it is ready to eat. Storage in the refrigerator at a temperature of 0 -5 C is possible for a month.
After catching a good pike, you can pickle the caviar according to these recipes. You can make fish cutlets from the carcass. And from the head and tail, you can cook a good fish soup for nature.
As a result, you will have a fishing day.
This recipe features a special method of cleaning and washing the caviar. For 2 kg. caviar you will need: water; salt; colander; several deep cups; gauze; large saucepan. Bring 5-8 liters of water to a boil and pour it over the caviar, previously placed in a deep cup. Try to get boiling water onto all the bags of caviar. Under the influence of hot water, the film moves away from the caviar and curls up. In this way, we will be able to quickly and efficiently release the eggs from the shell. It is important to pour the caviar quickly so that the water does not cool down. You can also clean the caviar from the film using a meat grinder - when scrolling, the entire film remains on the knife. Next, we get rid of small film residues. Pour plenty of cold water over the caviar and mix it thoroughly so that each caviar is thoroughly washed. We carry out the washing procedure 10-15 times, changing the water all the time until it becomes clear. Particular attention should be paid to the color of the caviar - it should be brick or bright orange. If it is dirty yellowish, it means that steaming was not enough and additional heat treatment is necessary. In this case, pour boiling water over the caviar again. After thorough washing, making sure that the caviar is clean enough, transfer it to dry gauze and tie it in a knot. For complete drainage of water and easy drying, the unit can be suspended. Next, your actions depend on how long you want to store the caviar. If you eat it in 1-2 weeks, then in 400-500 g of caviar it is enough to add a large pinch of salt and mix well. After it has stood in the refrigerator for 1 day, it can be eaten. For longer storage, the caviar bundle is soaked in brine. The brine is prepared from cold boiled water to which salt is added (5-6 liters of water and 7-8 tablespoons of salt are enough for 1.5 kg of caviar). A gauze knot with caviar is dipped into this brine and kept there for 15 minutes. Then, to prevent the formation of salt, the caviar is washed once in a colander with cold water. After all the water has drained, the caviar is transferred to glass jars, closed with a lid and put in a cold place for storage. Caviar salted in this way can be stored for 1-2 months.
Video recipe No. 4 – I recommend it
In preparing this issue, I caught pike with caviar and at home made a video of a recipe received by inheritance. It is interesting to note that this recipe combines the features of several of the above-mentioned recipes and has its own individual secrets. I highly recommend watching it
Tips and little tricks
The fattier the fish, the tastier and healthier its caviar.
Spring caviar is most suitable for pickling. It is larger, more nutritious and can be stored for a very long time.
Do not use metal utensils.
The utensils for preparing caviar should be glass, porcelain, wood or clay.
It is possible to salt even frozen caviar.
For example, trout caviar, which is sold frozen.
To determine the readiness of the salt brine, you can use raw peeled potatoes. Place the potatoes in the water and gradually add salt, stirring. As soon as the potatoes float to the surface, the brine is ready.
Conclusion
So, now you can salt the caviar of any river fish yourself, making it the main dish of your table. All that remains is to stock up on 2-3 loaves of fresh bread and butter, since such a tasty snack is eaten very quickly. Both adults and children love her. Especially if the caviar is seasoned with finely chopped onions, spices and vegetable oil. I hope our recipes and tips were useful to you, and now you can delight your loved ones with this delicious delicacy all the time.
Did you like the article? Subscribe to the channel to stay up to date with the most interesting materials
While cleaning a rich catch or store-bought bream, housewives often discover that there is quite a lot of caviar in their bellies. This is especially true in the spring, when representatives of aquatic fauna begin spawning. There is no need to throw away the contents of the film casings, because this is an excellent ingredient for preparing delicious dishes at home. Next, you will learn how to prepare caviar for cooking, and also familiarize yourself with simple recipes that even a novice housewife can do.
- Selection and preparation of ingredients
- Recipes for cooking bream caviar Salting
- Fried in a frying pan
- Cutlets with egg and flour
How to salt pike perch caviar
Pike perch in itself is an excellent fishing trophy. And pike perch caviar is a source of easily digestible protein, vitamins B, C, A, E, amino acids, calcium, magnesium, zinc, copper, iron, nickel, manganese. home-salted pike perch caviar is no less tasty . To pickle caviar you will need:
- 800 g of caviar, 300 g of salt for solution, 3 liters of water for solution, 1 teaspoon of salt, 4 tablespoons of oil.
Recipe for salting pike perch caviar: Place pike perch caviar in a deep cup and chop it with a sharp knife. Pour a boiling solution of table salt from 1 liter of water and 100 g of salt and stir it well with a fork so that films wrap around it. Then drain the liquid, prepare a new solution from water and salt, taken in the same quantity, and pour pike perch caviar again. Repeat the manipulation with a fork, drain the brine again and remove the films. Pour the cleaned caviar one last time with boiling water and salt prepared from the last 100 g of salt and a liter of water. Mix thoroughly again and place in a fine sieve for 15 minutes. Pour 2 tablespoons of vegetable oil into a clean liter jar, fill it 70% with caviar, add a heaping teaspoon of salt and stir. Now fill the jar with caviar and pour another 2 tablespoons of vegetable oil on top. Close the jar with a lid and put it in the refrigerator, after 5 hours it can be eaten. The caviar turns out lightly salted, crumbly, and delicate yellow in color.
Now you know how to salt pike perch caviar at home.
How to salt pike caviar
Home-salted pike caviar is an exquisite delicacy. Pike caviar is in no way inferior in taste to recognized delicacies, and we can talk endlessly about its benefits. Unlike black and red caviar, it is considered more dietary due to its low fat content, but the benefits of pike caviar are its high content of protein, microelements and vitamins A and D. In Rus', pike caviar was eaten with pancakes, and it was highly valued. Every angler should have several recipes for salting pike caviar at home.
Recipe 1 To pickle caviar , you will need:
- pike caviar – 550 grams, salt – 2 tablespoons, vegetable oil – 10 ml.
Recipe for salting pike caviar: Rinse the pike thoroughly and carefully remove the caviar in bags. Rinse the pike caviar and remove the eggs from the bags, making sure that there are no remaining film residues in the caviar. Add salt to the caviar and whisk thoroughly with a fork until the salt has dissolved - approximately 20 minutes. Pike caviar is ready for salting as soon as a white foam appears. Now add 2/3 of the vegetable oil to the caviar and mix well. Place the caviar in a glass jar or saucepan, and pour the remaining oil on top. Cover the container tightly with a lid and refrigerate for 5 days. Pike caviar prepared according to this recipe is ready to eat in five days.
Recipes for cooking dishes from bream caviar
Bream caviar is an affordable product that is not inferior in taste to that obtained from valuable species of fish. A wide variety of dishes are prepared from it at home. Today, chefs have come up with many simple recipes for how to quickly pickle, make delicious cutlets and other excellent delicacies. Below you can familiarize yourself with some of them.
In pursuit of luxury, many people purchase expensive caviar from fish from the sturgeon family. But a select few know that there are other types of fish whose caviar is no less tasty and even more healthy. And you can cook it at home. If you have bream caviar, you will quickly figure out how to cook it.
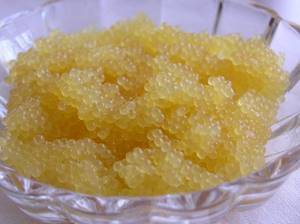
There are many recipes for pickling. Spice lovers will love the cooking methods using various spices. There are also opposite recipes that feature a small number of ingredients. How to prepare bream caviar, which in terms of taste is not inferior to sturgeon?
One of the simplest recipes for bream caviar will appeal to lovers of classic taste. The salt and vegetable oil that we are all familiar with in its composition will not cause rejection even in the most sensitive natures.
How to salt perch caviar
Perch is one of the most common fish in Russia. It is found in the fresh water of large reservoirs, ponds, rivers, and lakes. If you caught perch with caviar, try making salted perch caviar. To make it really tasty, you need to salt it correctly. To help you, simple salting recipes that will make perch caviar aromatic, tasty and healthy: perch caviar contains folic acid, potassium, phosphorus, omega-3 fatty acids and protein
Recipe for salting perch caviar with marinade
To pickle caviar you will need:
- caviar of one perch, 1 liter of water, 2 tbsp. l. salt, ½ tsp. ground coriander, 10 black peppercorns, 4 allspice peas, 2 bay leaves.
Recipe for salting pike caviar: Rinse perch caviar under warm running water. During the washing process, do not remove the caviar from the bags. Free the caviar from the film. To do this, arm yourself with a fork or spoon. These cutlery will greatly facilitate the process of separating the eggs from the film. Prepare the marinade. To do this, pour water into the pan and add salt. Add bay leaf, coriander, black peppercorns and allspice. Bring to a boil and cook for 20 minutes. Pour the hot marinade over perch caviar and stir vigorously. Let the caviar brew for 20 minutes. Drain the marinade using a colander. Make a water bath. To do this, pour water into a large saucepan and place a smaller saucepan in it. Place caviar in the last one. Boil it for 15–20 minutes. During the cooking process, caviar must be stirred with enviable regularity. Ready perch caviar should be crumbly and white. Such heat treatment will completely eliminate its specific astringency. Ready caviar can be slightly salted to taste. If it turns out to be dry, add a few drops of vegetable oil to it.
Description
Bream caviar is considered one of the best types of small fish caviar. This product is simple and unique. The caviar of this well-known representative of carp fish is in no way inferior to red caviar, which is considered a real delicacy.
This product, rich in vitamins and nutrients, is, in principle, dietary. Many representatives of the fair sex have wondered whether it is possible to eat this seafood without fear for their figure. It contains a large amount of protein with a relatively low calorie content of the product (142 kcal per 100 g). Therefore, eat bream caviar without looking at its calorie content. After all, it does not cause any harm to the figure.
How does the process of spawning occur in bream? It's quite simple. Spawning, the process by which fish lay eggs, begins when they reach sexual maturity. For bream it occurs at the end of spring - beginning of summer. At the same time, an external modification of the fish also occurs: an increase in black pigment leads to the fact that the scales of the bream become significantly darker and become covered with pimples, similar to a rash. The spawning process is divided into several stages, each of which lasts from six to nine days. Interesting fact: small individuals spawn first, and only then large ones. The most suitable places for spawning are those in which there is tall grass or even reeds, algae or any other vegetation. In rare cases, bream undergoes the spawning process in small bays or rivers. If the weather is favorable and clear, then the entire school goes through this stage in 3-4 days; in any other situation, the fish goes to depth, and the process is delayed.
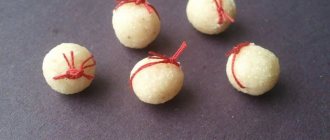
Externally, bream caviar looks like small regular yellow balls (see photo). Since bream belongs to a subspecies of prolific fish, during one spawning period it can lay on average about one hundred thousand eggs, preferring spring flood places for this.
How to cook bream caviar at home?
You can prepare bream caviar at home in various ways and using many recipes. Not all housewives know what to do with bream caviar and how to cook it correctly. Thanks to this truly healthy product, you get very tasty and delicious dishes that will become a real decoration for your holiday table. You can experiment with bream caviar in any way you like: fry it in a frying pan, salt it, or cook it dried. In any case, it will turn out extremely tasty and moderately healthy. Bream caviar dishes are unique works of culinary art.
Pickling
Salting is one of the most common options for preparing this seafood. Properly salted bream caviar is a delicacy with a truly unique and distinctive taste. Salted caviar is a completely ready-made unusual appetizer, but it can also be an addition to another dish.
The main stage of product preparation will be the process of freeing each egg from a kind of protective film. This process can be called in one simple word - punching. If you will not be using too much caviar for drying, then you can use a very ordinary colander; as an alternative, a sieve or even a vegetable grater will do.
One of the simplest and most common recipes for pickling bream caviar is to place it in a bowl, add salt, mix and let it sit for a while. When the process is completed, the caviar can be served. As you can see, salting caviar is not that difficult. Please note that this method of harvesting caviar may not be completely safe, because various parasites may remain in the product, which can cause harm to the body. So be careful.
Frying
Frying is another way to prepare this product. It is not as popular as, for example, salting, but nevertheless, some housewives prefer this method. Everything is quite simple here. The first step is to make sure that the caviar chosen for cooking is fresh and mature. This can be determined by its color, smell and shape of the eggs. Overripe caviar is not suitable for cooking. An unripe product will also not be able to reveal its true taste characteristics. After selecting and purchasing caviar, it is necessary to thoroughly wash it and remove unnecessary film. Well, then let’s turn on our imagination. You will determine the amount of fragrant spices and herbs yourself, focusing on your own taste. Don't be alarmed when the caviar changes color during frying. There's nothing wrong with that. The finished delicacy can be served either with a side dish or as a separate dish.
Drying
Drying is a rather labor-intensive and costly process. Due to the lack of experience, housewives' dried caviar may turn out too dry or, conversely, completely raw for the first time. But we know that this will not stop real gourmets. There is a certain drying technology, which, if desired, you can study and prepare real dried bream caviar at home.
Technology for drying bream caviar:
- Carefully cut the bream.
- Prepare coarse salt.
- Process the caviar under cold water and salt it, preferably in a ceramic or glass container.
- Leave the bream caviar to marinate for approximately 7 hours.
- Remove the caviar and place it on a metal grid. You need to get rid of excess moisture.
- To ensure that the salt is evenly distributed, you need to put the product in cold water again for 30 minutes.
- It is necessary to dry caviar outside, placing the product on a wire rack.
- The drying process lasts for 25-40 days.
- Around day 15-20, bream caviar is covered with a film of salt, so it needs to be placed in warm water (up to 40-50 degrees).
- At the end of this long and at the same time fascinating process, we put our amazing product back on the grill and bring it to full readiness.
Dried bream caviar is used in all kinds of works of culinary art of all peoples of the world. Dried bream caviar is a real treat for gourmets.
Salting bream roe
We are on social networks - subscribe to us on Facebook, Youtube, VKontakte and Instagram. Stay up to date with the latest site news.
Not only caviar obtained from valuable species of fish is a universally recognized delicacy. No less tasty is the caviar of the most common river fish - bream, roach, capelin, perch. Salting bream caviar allows you to get an excellent product that is instantly swept off the table, be it a festive feast or a regular meal. The fresher the caviar, the better it tastes.
Content:
Bream caviar at home
After purchasing caviar or removing it from the fish’s body, the processing process begins. The egg sacs are carefully washed, thoroughly removing blood and mucus.
The further process depends on how the caviar will be salted.
Two salting options:
- Pickling in bags
- Salting of caviar, freed from shells.
When salting in the second way, the caviar is freed from its shells. The easiest option is to rub the caviar through a sieve or brew the caviar with boiling water.
Main ingredients for salting:
For 300–500 g of caviar
- Salt - 100 g
- Water - 1 liter
Salting bream caviar in bags
If parasites are not scary and the specific taste and smell of the product does not scare you away, then do not undertake heat treatment. Caviar is salted along with the film in which nature packages it. Many people are convinced that large amounts of salt kill all parasites.
The caviar bags are placed tightly in a salting container. Sprinkle generously with salt. Then they put the second row and pour it again. Adding spices is optional. Usually the rows are lightly sprinkled with ground black pepper, but you can limit yourself to just salt. A rigid material is placed on each row.
The salted caviar is put in the refrigerator for a day. Then the excess salt is washed off, the pieces (flat dark-colored tiles) are slightly dried. After drying or wilting, they are ready to eat. It makes a delicious snack.
The easiest way to salt
Sometimes bream caviar, freed from films, is salted without heat treatment.
The shell is removed by any mechanical method: scrolled through a meat grinder, rubbed through a colander. Or the films are simply removed by lowering a knife, fork, or stick with knots or specially filled small nails into a cup of caviar. The gun is rotated through the mass of caviar, the film is torn and wound around it.
After removing the films, the caviar mass is washed with cold water, along with all the turbidity. The water is allowed to drain well, throwing the caviar onto a sieve or hanging it in a bag. The eggs brighten and become pleasantly crumbly.
All that remains is to sprinkle them with fine salt, let them stand and eat. Salts are sprinkled by eye, just like salting any dish. It is believed that three hours is enough for salting. It is better to leave it for a day so that the salt kills all the parasites.
Before use, vegetable oil and chopped herbs are added to the caviar to improve the taste. Eat with a spoon or serve as snack sandwiches.
Bream caviar, salted in a complex way
Remove films, wash, and let the water drain well.
Bream caviar at home is most often prepared in brine - a salt solution in which 100 g of salt is added to each liter of water. Water by volume in relation to caviar should be at least 1.5 parts, it is advisable to take 2-3 times more than caviar. You can use any salt - coarse or fine.
Boil the brine for 15 minutes until the salt begins to crystallize (a coating of salt appears on the surface). And immediately pour boiling brine over the caviar. Stir until the salt water is absorbed into the eggs. Keep in brine for at least 20 minutes.
You can fill the caviar with brine once. But it’s much tastier and safer (in terms of parasites) to pour fresh brine over the caviar three times. Hold for 7–10 minutes each time. Small film residues that have not been removed are drained together with the water.
Benefits and harms
The benefits and harms of bream caviar is a hot topic. Let's try to figure it out. Bream caviar contains a lot of useful microelements, primarily iron and phosphorus, which play a very important role in the functioning of the human body. No less important are fluorine with zinc and nickel, which in turn are responsible for combining with other metals. In addition, the product is rich in vitamins that help improve well-being and mood.
This type of caviar is prescribed as an element of the daily diet for those people who suffer from the following diseases:
- anemia and hypertension;
- diseases of the skin, hair and nails;
- problems with the gastrointestinal tract;
- mineral metabolism disorders and obesity;
- to rid the body of waste and toxins;
- with the deposition of salts and heavy metals.
However, remember that even the healthiest product in large quantities can cause harm to the body, so you should not overuse bream caviar. Allergic reactions may occur that are caused by intolerance to this product. This can significantly harm your health. The harm of bream caviar is small, but if you are allergic, please be more careful.
How to salt bream caviar at home?
“What kind of caviar do you prefer – red or black? “- the average person begins to shrug his shoulders embarrassedly to this question, saying that the main thing is not quality, but quantity and its very presence. And all this happens only because even today caviar is still on the top list of expensive products that are inaccessible to ordinary workers. However, in an effort to purchase an expensive product from the best and noble “producers” (salmon, sturgeon, etc.), we forget that even ordinary fish (bream, perch, capelin, pike) produce caviar, and in larger quantities and to some extent, much better quality than sturgeon. In today's publication we will look at the option of salting bream caviar at home, tell you about some cooking secrets and simply share interesting information.
Recipes for cooking dishes from bream caviar
Bream caviar is an affordable product that is not inferior in taste to that obtained from valuable species of fish. A wide variety of dishes are prepared from it at home. Today, chefs have come up with many simple recipes for how to quickly pickle, make delicious cutlets and other excellent delicacies. Below you can familiarize yourself with some of them.
While cleaning a rich catch or store-bought bream, housewives often discover that there is quite a lot of caviar in their bellies. This is especially true in the spring, when representatives of aquatic fauna begin spawning. There is no need to throw away the contents of the film casings, because this is an excellent ingredient for preparing delicious dishes at home. Next, you will learn how to prepare caviar for cooking, and also familiarize yourself with simple recipes that even a novice housewife can do.
- Selection and preparation of ingredients
- Recipes for cooking bream caviar Salting
- Fried in a frying pan
- Cutlets with egg and flour
Salting caviar: homemade recipes
So, if you bought bream caviar and don’t know how to cook it, then we offer two simple but very tasty recipes. First, let's look at a simpler recipe.
Required ingredients:
- caviar of one bream;
- vegetable oil – 4 tablespoons;
- salt.
Now let's start the cooking process. It looks like this:
- We thoroughly wash the perch caviar with water, removing the film. It is best to do this with a fork or spoon. It is not recommended to remove it with your hands, since the film is very thin and strongly sticks to your hands, deforming the eggs.
- Place the washed caviar in a deep plate or small saucepan. Add salt to taste and begin to beat with light movements, forming a white foam.
- After the formation of a thick white foam, leave the caviar for 10 minutes. Add 4 tablespoons of oil and beat again.
- Distribute the caviar into prepared jars, pouring a small layer of vegetable oil (about 5 mm). We put it in a cool place for a week.
This was a classic recipe for pickling bream caviar. Now we offer a more complicated recipe.
Drying bream
After the fish have been salted, they should be dried. For this:
- carcasses or half-carcasses are cleaned with a brush or cloth from the remains of brine and mucus;
- hang it on a strong string and take it out into the draft for 4 hours or turn on the fan for 2 hours so that the bream dries well on the outside; with the second method, the air flow will prevent flies from appearing;
- The best time to prepare dried bream is autumn, when the process can be organized on the balcony at a suitable temperature.
On a note! Since air humidity increases at night, it is better to bring the fish indoors after sunset, and again put it on the balcony in the morning.
Fillet can be dried in fruit dryers. To do this, the carcasses need to be cut into fillets, salted under pressure, washed for 1 hour, wiped with napkins, cut into strips and dried on mode 1 for 10-11 hours. Caviar is also dried.
How to Cook Dried Bream Safely
To make the product tasty, aromatic and safe for health, you should listen to the following tips:
- if the gills are not removed, then using the dry method, stuff the spice into the mouth and gills so that maggots do not appear;
- for the same purpose, the brine must be made strong, and the fish must be kept for at least 4 days;
- At all stages of cooking, flies should be prevented from appearing, for which purpose carefully cover the dishes during salting and make boxes from mosquito nets when drying and drying;
- for the same thing, after washing, the carcasses are dipped in a weak solution of vinegar and hung out to dry - the smell will evaporate after 2 hours, the scales will shine beautifully, be sure to dry completely;
- you can also mix vinegar with vegetable oil and rub the fish with it after chapping, before drying the bream;
- To avoid a musty smell, carcasses should be salted and dried in a cool place.
To improve the taste, the fish should be wrapped in paper and kept in the refrigerator for several hours.
How to dry bream without gutting
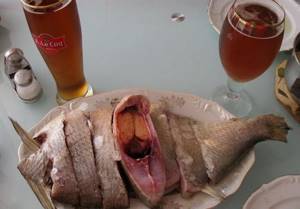
Whole fish should be dried head down, gutted or longitudinal halves should be dried up. In the first case, if the gallbladder is damaged, then only the head will be bitter; in the second, more fat is retained in the pulp, and it acquires a beautiful amber hue.
We recommend reading: Crucian carp baked in the oven
Recipe for dried bream with soy sauce and honey
For 1.5-2 kg boneless fillet you will need:
- 3 tbsp. l. soy sauce;
- 1 tbsp. l. mustard;
- 1 tbsp. l. honey;
- khmeli-suneli;
- red hot pepper;
- coriander;
- 3 buds of cloves.
First, pour coarse salt onto a baking sheet, place the fillet and generously sprinkle it with spice (about 1 tbsp) and sugar (1 tbsp). After 1.5 hours, remove the remaining salt with a knife. Then mix all the ingredients, dip the fillets in the mixture, pour in the remaining marinade, and put in the refrigerator for 6 hours. Then wipe with a cloth and hang to dry. When the product has reduced by 2 times in volume, cut and serve with beer.
Cooking caviar with spice marinade
For this you will need:
- caviar of one bream;
- water – 1 liter;
- salt – 2 tablespoons;
- spices (coriander, black pepper, bay leaf and allspice in equal proportions).
The cooking process looks like this:
- We clean the caviar from mucus and film in the same way as in the previous recipe, rinsing it under running water. Place in a colander with a fine mesh and let drain a little.
- At this time, prepare the marinade. To do this, take half a saucepan of water, add salt and spices. Cook for approximately 20 minutes over medium heat, stirring lightly.
- Place the caviar in the boiling marinade and leave for 20 minutes to salt.
- As soon as the bream caviar has changed a little in color, drain the water and put it in jars.
Homemade bream caviar will go perfectly with crackers, boiled eggs and butter. This dish is not only tasty, but also very healthy. And the low amount of calories makes bream caviar desirable on any table. Bon appetit!
