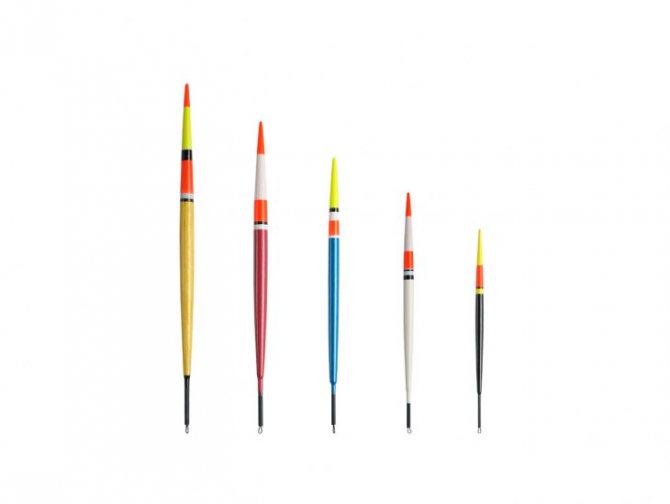
What does a float consist of?
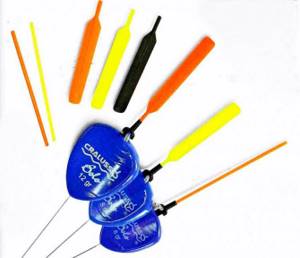
In general, all floats consist of three parts: the antenna, the body, and the keel. Even a “goose feather”, which is a hollow tube, can be divided into three parts.
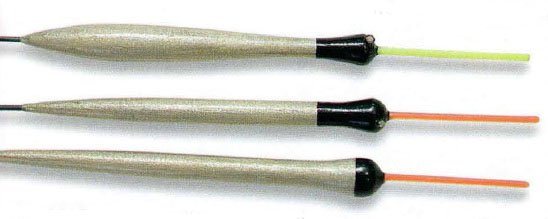
Antenna
In other words, the part visible to the fisherman, which is painted in bright colors and signals a bite. There are a wide variety of antennas:
- Thin and thick
- Hollow and solid
- Replaceable and glued
- Long and short
- Transparent and dyed
The thickness of the antenna is selected depending on the fishing range. The thinner the antenna, the more sensitive the float, but at the same time, if you are fishing at a long distance, then seeing such a signaling device will be problematic.
In this case, it is necessary to use floats with thick antennas, and if there is no wind, in favor of sensitivity, you can put a float with a thin, long antenna, at the end of which a foam ball is installed.
Hollow antennas are used for fishing in currents. Since they have positive buoyancy, when caught on small debris, such a float will most likely not react to this and will not provoke a false hook.
On some models, the hollow antenna of the float can be used to install a firefly for night fishing.
Full-bodied antennas are more common. They also have positive buoyancy, but this buoyancy is close to neutral. This type of antenna shows a bite better, but at the same time, when hooked, it easily goes under water.
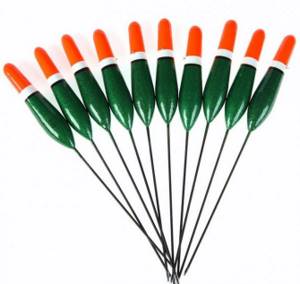
Floats with replaceable antennas are more versatile. You can fish with them in the evening, during the day, and even at night.
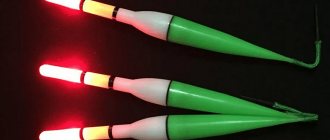
- During the day it is better to use an orange antenna color
- In the evening the green color is more noticeable
- Well, at night, instead of an antenna, they install a “firefly”
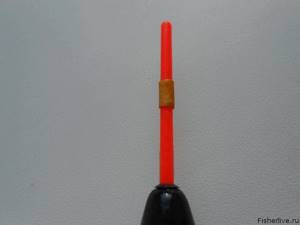
A glued-in antenna is more reliable; if you are not going to fish at night, it is better to install such a float. Its antenna will definitely not get lost when fishing (and this often happens with replaceable ones), and to increase visibility, you can put a cambric on the antenna.
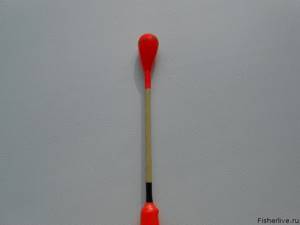
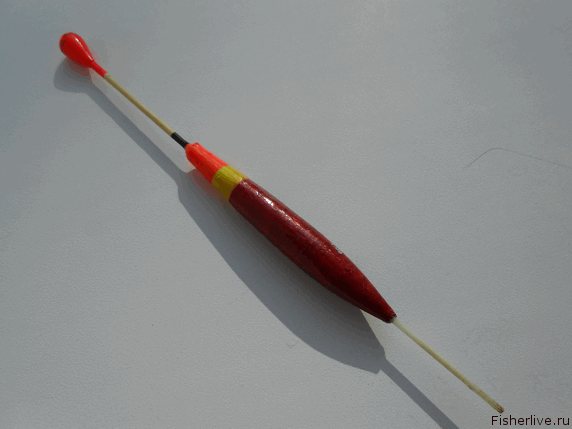
There are also floats with transparent antennas. Such models are very visible from a distance during daylight hours. The light passes through the transparent orange plastic and creates a glowing effect, as if there was a light bulb in the antenna.
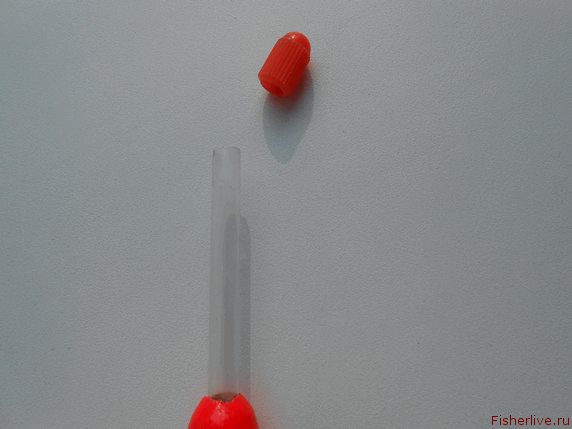
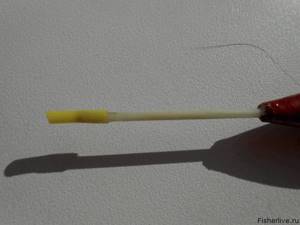
You can make a similar antenna yourself from the rod of a helium pen. To do this you need:
- Cut the required length of rod
- Paint the toothpick with varnish in the desired color
- Insert a toothpick inside
- Trim off the excess and apply super glue to the edges.
You can also find floats without an antenna. As a rule, they are used in stagnant bodies of water when fishing at short distances. The advantage of such a float is its resistance to wind, which allows you to catch cautious fish in windy weather.
Body
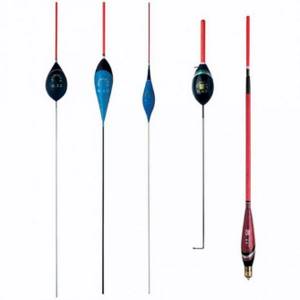
The body shape of the floats plays a vital role in the selection. Various forms were not invented by chance. Some are good in the current when fishing with a wire, while others are ideal for still water.
Universal shapes for flow are a drop, an olive, a ball, and something similar to a cigar. For standing reservoirs, the “goose feather” shape is good, that is, these floats have elongated shapes and are very sensitive.
Also, when there is wind and rough water, they do not jump along with the waves, which allows the bait to remain in one place. This is relevant when fishing for bream, carp, crucian carp, and other types of fish that do not like the movement of the bait.
When long casting is required, it is better to use a shape that has less wind resistance, this is the inverted teardrop and olive. And if high-quality wiring is more important to you, for example when catching cautious fish, it is better to take rounded shapes.
Keel
The float keel is designed to level the equipment and hold it in this position. A long keel is important when fishing in the current, as it allows you to make high-quality holds, in which the equipment does not move from side to side.
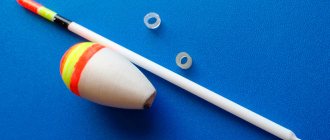
It is important to correctly install a float with a long keel. To do this, several cambrics are put on the line, depending on the length of the keel. The first cambric is placed under the float body. The second one is 5 centimeters lower, and the last cambric should not be put on all the way.
Depending on the length of the keel, there may be several intermediate cambrics. Their number is determined experimentally; the float must move along the line with effort, but at the same time not spoil the line.
A short keel is used when fishing in shallow areas of a reservoir with little current. When fishing in such conditions, a short keel is less noticeable to the fish, and therefore less alarming.
Keels can be made of iron or lighter materials. A float with a metal keel is more stable in the current, and due to its weight, it allows you to use less load. The disadvantage of such a keel is its material; bending such a keel makes it quite problematic to give it its original shape.
When casting long distances, there is a chance that the line will get caught behind the metal keel and bend it when hooking, so when fishing at long distances it is better to use plastic or carbon keels.
Choosing a float depending on the conditions and purposes of fishing
Floats must be installed in accordance with the conditions of use. Fishermen take into account:
- type of reservoir;
- fish size;
- type of fishing.
Choosing a Float
Some models are great for rivers, lakes and ponds. Others are suitable for the sea or ocean. A number of floats are designed for winter fishing, but some models are best used only in summer. The differences are significant.
Fishing on the lake
On the lake, a fisherman can catch carp, crucian carp, perch, pike, bream, bream and other types of fish. Fishing can be done with live bait, dough, maggot or worm. Sometimes a lure is also attached to the rod.
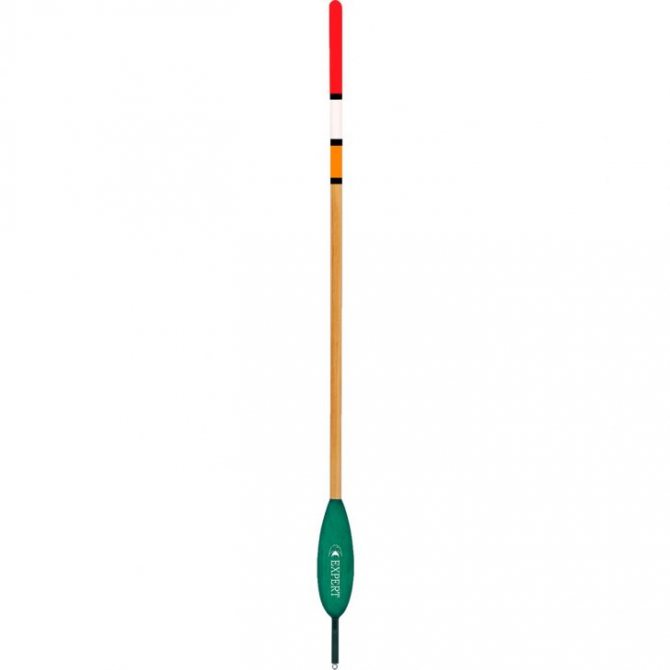
Straight and spindle-shaped floats
Fishing on a lake often involves 2 factors:
- cautious inhabitants;
- depth up to 2 meters.
Models with maximum sensitivity are suitable. Results can be achieved with straight and spindle-shaped floats. The teardrop-shaped body is suitable for windy conditions. However, the fisherman should take into account the factor of low sensitivity. It is more difficult to notice a bite from a cautious fish.
When inspecting a float for lakes, windage is taken into account. The smaller it is, the better. Fishermen use a sliding or blind installation of the alarm.
Fishing in a pond with a current
This fishing option must take into account certain factors. The alarms will not be in one place all the time. Due to the movement of water, they can slide along its surface. It will be difficult for the fisherman to set the float at a right angle. The likelihood of vertical maneuvers remains high. This will create the feeling of false bites.
When choosing a float for fishing on the current, these parameters must be taken into account. In such conditions, flat signaling devices have proven themselves.
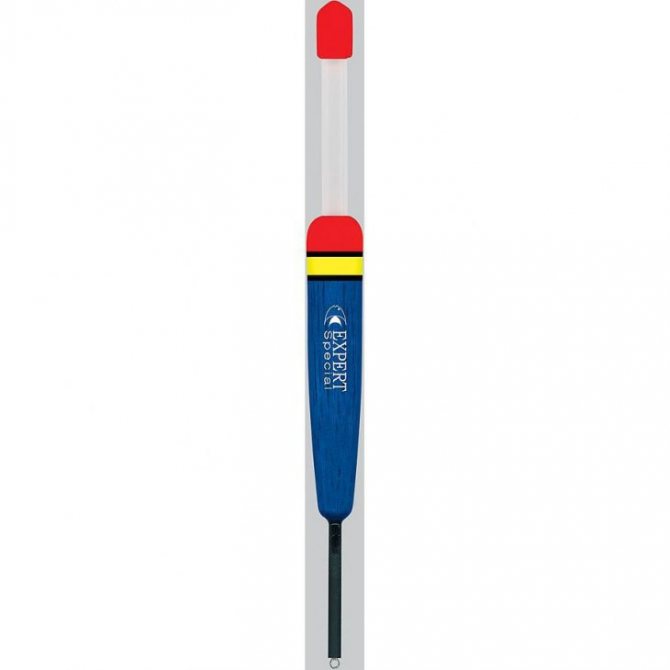
Torpedo float
The models are not suitable for long casting. It’s good if the length of the throw is equal to the length of the tackle. For fishing on the shore, use ordinary rods; for a bridge or a boat, use models with a power class of at least 5. Otherwise, it will be inconvenient to pull the fish out of the water.
It is better to use a two-color antenna for the signal. You can also make homemade alarms. It is enough to color part of the structural element with a marker of a different color.
A torpedo float is also suitable for fishing on water with current. The invention of the device is attributed to sports fisherman Karoly Klarik. The model floats on the surface in any current. The weight of the sinker is from 0.5 to 40 grams.
Catching small fish
For small fish (perch, white bream, goby, bleak) miniature floats are suitable. They can be used for young animals of larger representatives of lakes and rivers. The size of the alarm determines the scope of application.
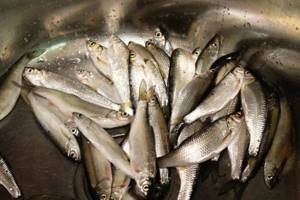
Catching small fish
The structures are not suitable for deep fishing. They are used at a depth of no more than 1.5 meters. It is worth paying attention to the choice of fishing rod. The total length should not exceed 4 meters. Float installation is blind. The weight of the sinker is no more than 1 gram.
Sea fishing
The types of floats for sea fishing do not differ from their freshwater counterparts. The fisherman needs to attach larger alarms. When searching, it is advisable to buy models with good stability. Floats will always be affected by sea waves. Alarms with insufficient stability may float on water.
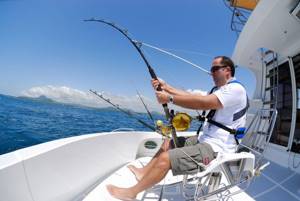
Sea fishing
Drift fishing with a float rod is no different. The only significant difference is the release of the nozzle several meters. For this type of fishing, large floats with special fastenings are used. This method of fixation will allow you to quickly remove the alarm. As a result, nothing will distract you from your work.
To catch mullet, you need a float with maximum sensitivity. The load capacity of the float is from 2.5 to 3 grams.
Fishing with live bait
Fishing with live bait is a popular type of fishing for pike. It can also be done using a float rod. However, before starting “work”, you should select a signaling device.
The best float for fishing for crucian carp differs significantly from the alarm for pike. The latest variations must meet 2 requirements:
- Timely signal about a bite.
- Keeping fish at a given depth.
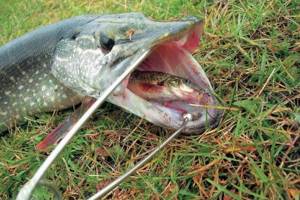
Fishing with live bait
Barrel-shaped models cope with the task. They hold the bait at the desired distance from the surface of the water. When bitten, these structures will not scare away the predator. When using floats, fishermen distinguish 2 types of fastening. The structure can be mounted on the fishing line with rubber rings or a sliding locking unit.
Your question to an expert
Leonid Grachev
Fisherman with a lot of knowledge and experience
Ask a Question
Sliding floats for long casting
Spindle-shaped models with an oblong shape are suitable for long-range shooting. Sometimes, to simplify casting, devices are equipped with swept tails. The design stabilizes the float during flight. These types of floats are great for windy conditions.
Manufacturers add a metal keel to the bottom of the float. The element improves stabilization and simplifies line fixation. With proper loading, it is possible to set good sensitivity.
How to choose a float for a fishing rod
The choice of float for fishing largely depends on the fishing rod used. Now we will look at which floats to choose for a particular fishing method.
For fly fishing
Based on the characteristics of the fly rod, it can be noted that fishing will be carried out at close range. In this regard, we can conclude that we need a float with a thin antenna, it will be clearly visible, and as a bonus, we will increase the sensitivity of the float.
Next, you need to determine where you are going to fish, on a current or in a still body of water, as well as the fishing depth. Let's consider several options:
- There is a current of great depth: With a long keel and a rounded body
- There is a shallow current: With a short keel and a rounded body
- No current deep depth: Elongated float
- No current, shallow depth: Small elongated models, or a small float with a diamond-shaped body and a short keel.
For Bolognese fishing
Since the Bolognese fishing rod is universal, the above floats can be used on it for exactly the same conditions with a slight amendment. If you fish at a considerable distance (let go far), you will need a thick antenna.
If fishing will be carried out using long-distance casting, you need to choose a body shape that will combine aerodynamic properties and resistance to flow. The golden mean is a float with an “inverted drop” body.
For match fishing
In match fishing, special floats are used - wagglers. The choice of match float largely depends on the fishing range and the depth of the reservoir. If the reservoir is deep-water, floats with their own weight are used.
When fishing in shallows, using your own weight is unacceptable, since when casting, the float will dive almost to the bottom and scare away the fish. In this case, you need to use models with a shortened antenna without its own load.
It is almost impossible to choose a universal float in match fishing, so you should have several models with you and select them depending on the conditions. There is no need to worry about wind and current, as the wagglers deepen the line.
Loading a float for fishing in windy weather
Strong wind interferes with fishing, the float will remain in place, and the waves will either rise above the antenna or, on the contrary, expose the body of the float.
Light winds don't hinder fishing much, but you can make any waves, even small ones, an advantage and take advantage of them.
It is enough just to underload the float a little, for example, for a ready-made equipment, reduce the weight of the pellets with tongs or scissors (which you don’t mind damaging a little on lead). This way, not only the antenna will be visible from the water, but also a small part of the float. Ideally, the float is not cone-shaped, but barrel-shaped.
Such equipment will allow you to play with bait on the hook during windy conditions, which will much better stimulate the appetite of capricious fish. You just need to lift the nozzle above the bottom. When measuring the depth, when the float is already up, make sure that you take into account the distance from the sinker to the hook (so that the hook is also lifted from the bottom).
Float rod for crucian carp - the correct equipment and technique for catching crucian carp.
Catching tench with a float rod - choosing gear, bait, baits.
Knots for hooks - an article with a set of the most durable and trouble-free ways to tie a hook to the main fishing line or leash.
Choice according to fishing conditions
Floats for standing reservoirs and for reservoirs with a current differ in their characteristics. Models for current will work poorly in still water, and on the contrary, floats for still water will not work at all in current.
For the current
On rivers, floats with a long keel are most often needed, as they stabilize the equipment. At the same time, the use of purlin-shaped floats is unacceptable, since snags often occur in the current.
It’s quite easy to distinguish current floats, here are their differences:
- Long keel
- Multiple attachment points
- Round body
Depending on the strength of the current and the casting distance, the shape of the float can be from diamond-shaped to spherical. The stronger the current, the rounder the body. From the universal and most common, you can choose the “inverted drop” shape.
This model has good aerodynamic properties, and at the same time holds perfectly when held.
For standing water
In still water there is no need for resistance to flow and you can focus on the sensitivity of the float. All models with an elongated body work in standing reservoirs. These are cigar-shaped floats and a goose feather.
Such body shapes have minimal resistance when biting and are loaded very accurately. Thanks to this, the fish do not feel our equipment, which naturally affects the catch.
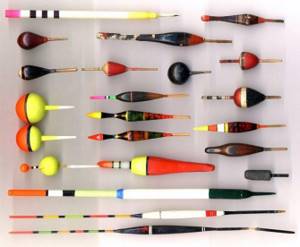
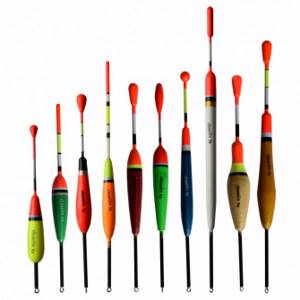
Types of floats
All float products perform the same function - they report a bite. Essentially, the principle of operation is the same. When the fish starts to bite, then the bite indicator reacts and begins to move or sink.
Floats differ in shape, weight, size, color and type of material from which they are made.
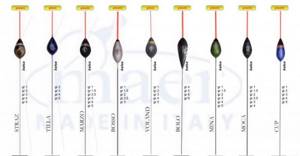
Conventionally, they can be divided into several types:
Teardrop-shaped. Very good for deep fishing. It has a low center of gravity, is very stable and shows a bite even in choppy water.
Spindle. This species is very sensitive and is needed for catching cautious fish. It is advisable to use only for fishing in still water (stakes, lakes, ponds) with a depth of no more than three meters.
Ball. Very stable in strong winds.

Straight. One of the most common. It has a rather simple shape. Suitable for fishing in good weather, in reservoirs with a depth of up to two meters.
Read here How to tie a fishing line to a reel - the best reliable knots and features of installing them yourself (100 photos and videos)
Inverted drop. An ideal choice for fishing at great depths with underwater currents.
Olive. Used under different fishing conditions: waves, wind, calm weather. A fairly stable float, and essentially universal.
Double sided cone. Suitable for fishing on canals with weak and medium water flow. Very stable due to the long keel.
How to choose a float for crucian carp
Why did I mention this particular fish? It's simple, crucian carp is considered the most cautious and unpredictable fish, and the float must meet certain requirements:
- Have excellent sensitivity.
- Show a bite on the rise.
- Have minimal resistance in the water when hooking.
Elongated models have these characteristics, but the goose feather has proven itself best.
This is where I’ll end the article about floats; if you have any questions, I’ll be happy to answer them. See you again, dear fishermen!
DIY float
Experienced float fishermen often encounter a situation where they cannot find the desired float on sale. In the sea of consumer goods there is simply not what you need - either there is no balance, or everything fits but the buoyancy is not the same, etc.
In this situation, only making a float with your own hands will help. How to make a float? — Let’s look at the recommendations given on this matter by the famous sports fisherman Andrei Yanshevsky. According to these recommendations, the process of designing and manufacturing a float is approximately as follows.
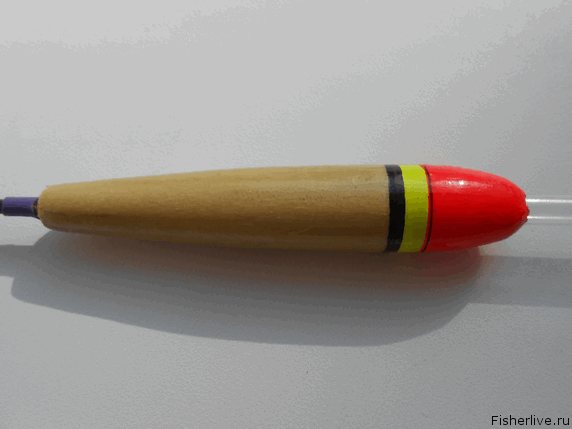
The float is based on balsa
Balsa wood is best for making a float. The material is durable, lightweight, and well processed. Balsa can be purchased in stores for aircraft or ship modellers. It is sold in the form of boards of various thicknesses.
It is important to choose a board with a uniform density over its entire area. Visually this can be understood by the structure of the wood. The more uniform it is, the easier it will be to process the material. Balsa with a density of about 0.11 - 0.12 g/cm3 is best suited.
Other materials for making a float
In the same store you can immediately purchase other materials for making a float.
- Straightened steel wire 0.5 - 1.0 mm.
- Rods made of carbon fiber or fiberglass with a length of 1.0 m and a diameter of up to 1.0 mm.
- Varnish called “Emalit” or nitrovarnish NTs222 or NTs228.
- 1 liter of urethane varnish (called “Yachting varnish” or “Yacht varnish”.
- Acetone, white alcohol.
- Glue "Moment" or similar.
- A little wire with a diameter of 0.2 mm for making rings.
- Acrylic paints of different colors in small packaging. They can be purchased in stores for artists, schoolchildren, and home crafts.
The average cost of materials for the manufacture of one float will be only 3 - 4 rubles. But if you stock up, with the expectation of making many floats, you can spend 1000 rubles.
Tools used
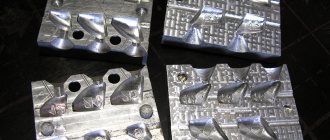
To process balsa, similar to how it is done on a lathe, you need an electric motor with a power of 90 - 200 W with a chuck. An electric drill can also be used as a motor, although it is quite noisy. If an electric motor is found, it must be mounted on a frame, for example on a wooden block.
The engine is converted into a lathe as follows. A piece of an ordinary pencil is fixed in the cartridge, onto which a silicone tube of suitable diameter is placed. The float blank will be inserted into this tube during processing. You will also need:
- sandpaper of various sizes;
- sharp knife;
- wire cutters;
- drills with a diameter of 0.3 - 1 mm.
Next, we will consider the design of the float and the selection of its components - the keel and the float antenna.
Keel selection
The keel of the float must have a certain length and mass. By selecting the keel, the float is balanced. By lengthening the keel or using thicker wire to make it, we increase its mass and shift the center of gravity down.
The general rules are as follows. The lower the center of gravity of the float, the better. But the downward shift of the center of gravity is limited by the length of the keel and other parameters of its buoyancy.
For floats with a buoyancy of 1.0 - 1.5 g, the keel mass, as a rule, should not exceed 20 percent of their carrying capacity.
As buoyancy decreases, this percentage increases. On very small floats, the keel mass can already reach 70 - 80% of the buoyancy. This is done so that with very, very light rigs, there remains the possibility of casting and manipulating the tackle. In this case, weight is added to the float itself in the form of a massive (relatively) keel.
To make the keel of light floats, fiberglass is often used rather than metal, so that with such low weights the diameter and length are not too small.
For metal keels, wire with a diameter of 0.5 - 0.8 mm is usually used. The thinner one is not used for the reason that it is not very strong and bends. On large elongated floats it is possible to use wires with a diameter of up to 1.5 mm.
It is necessary to plan a keel that is obviously longer than necessary, so that later it can simply be shortened when balancing.
Question about gluing a keel into a floating body
To what depth should the keel enter the floating body of the float? The general recommendation is that the keel should fit into the body of the float by about a third of its length. But naturally, for different forms of a floating body, this parameter can vary greatly.
For elongated floats, the gluing depth is reduced, but still should not be less than 20 mm. For spherical floats of low buoyancy (less than 0.5 g), the keel can also be docked with the antenna.
Selecting an antenna for a float
What is the best material to make an antenna for a float from? For very small floats, when fishing under the surface of the water, or with very careful bites, the antenna can be made of metal, i.e. it may be a continuation of the keel.
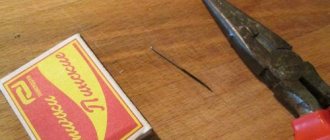
- To make a float antenna, you can also use fishing line of the required diameter. But first it needs to be straightened. Straightening the fishing line, i.e. Removal of internal stress occurs when it is heated.
How to straighten a thick fishing line? Bring some water to a boil in a frying pan. Then pieces of fishing line are placed in it. When heated, the line will bend from side to side as it floats in the water. But the water will soon evaporate. Therefore, it is necessary to determine the moment when there is no more water and the line has straightened. At this time, cold water is poured into the frying pan and the fishing line “freezes” in a straightened position.
- You can also use boar bristles to make an antenna, which is even better than fishing line. But both of these materials have one very significant drawback - they do not paint well.
- Bamboo is an excellent material for making a float antenna. It has more buoyancy than plastic, which is a good thing. On sale you can find bamboo toothpicks, as well as impressively thick grill skewers. Bringing bamboo sticks to the required condition is very labor-intensive. But this process is simple and it is possible to do it yourself.
As in the case of the keel, initially it is better to glue in the antenna with a margin of length.
How to make a balsa float body
First you need to cut the blanks from the balsa board. To do this, the board is drawn to the required dimensions and cut with a sharp knife. The result will be rectangular bars. Then the edges are removed from the bars with a knife, and they are given a rounded shape in cross-section.
After this, they begin to grind the workpieces with sandpaper. The float blank is tightly inserted into the silicone tube on the electric motor. The engine starts up and the workpiece rotates.
When starting, you need to hold the free end of the workpiece with your left hand so that it does not fly out of the mount. Processing begins with sandpaper from the free end in order to grind it down to a cone and get a second centering point there for further processing. In this case, the workpiece is held against beating with the left hand, and the processing is performed with the right hand.
When the cone at the free end of the floating body of the float is formed, they begin to grind the balsa along the entire length, giving it the desired shape. In this case, the left hand centers the rotating workpiece, and the right hand does the processing using sandpaper.
The workpiece is cut with either sandpaper or a knife. After such treatment, it will have a fleecy, rough surface, which makes no sense to clean; when priming, the pile will still rise.
Next, the process of drilling a hole for the keel in the end of the float body is performed.
The drilling itself is performed with a drill with a diameter 0.1 - 0.2 mm smaller than the diameter of the keel used, to the depth the selection of which was discussed above. The drill is carefully brought to the rotating workpiece and slowly centered. When drilling, the process of self-centering of the drill will already occur.
After this, the selected keel is lubricated with “Moment” type glue and inserted into the drilled hole. After the glue has dried, the keel is clamped in the chuck and the balsa is drilled under the antenna on the other side. In this case, the drill is selected in exactly the same way and the selected antenna is glued in.
As previously mentioned, it is better to select the keel and antenna with some excess length, so that they can then be shortened if necessary. The result should be an almost finished unpainted float.
Primary primer
For the primary primer, nitro varnish is used, diluted with acetone to the viscosity of water. The float is lowered by the antenna into a long and narrow container with diluted nitro varnish, and immediately slowly removed. In this case, air bubbles will be released from the pores of the balsa.
After priming, the float is dried until the varnish is completely dry. To do this, the keel is simply stuck into something suitable.
Now it’s time to remove the lint and polish the body. This is done with the finest sandpaper, very carefully and without pressure.
Then a ring for the fishing line is glued into the body of the float. It is bent from wire on a drill with a diameter of 0.5 - 0.8 mm. The drilling diameter for it is selected slightly smaller than the wire itself.
It is also useful to re-prime. If air escapes from the pores again, which is possible when using very porous and light balsa, as well as when the varnish is too diluted, then a third primer will be needed after the float dries again.
Priming and painting
For final priming, it is recommended to use a thinned urethane varnish. It can then be painted with nitro paint.
But you can also prime with acrylic paints. And then apply urethane varnish. True, in this case the paint layer will be thicker. Therefore, the method is not entirely suitable for very small floats.
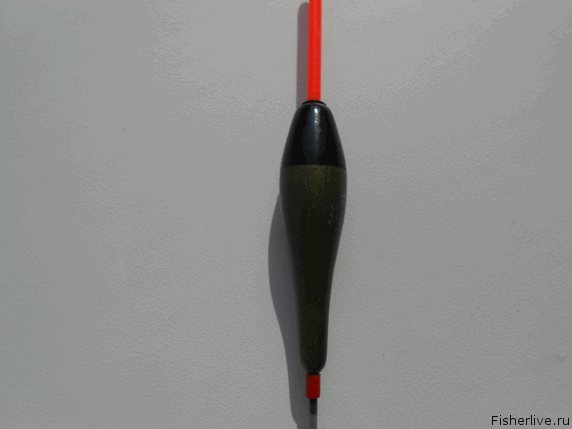
The following selection of paints by color is recommended. The body itself can be painted in soft colors - brownish or silver. But the coloring of the antenna largely depends on its depth during fishing. If the antenna is completely above the water, it is painted with bright colors along its entire length. If it goes deep, then the underwater part is painted black, and the surface part is painted yellow, orange, and red.
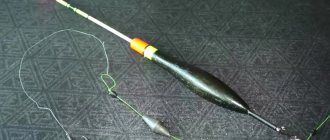
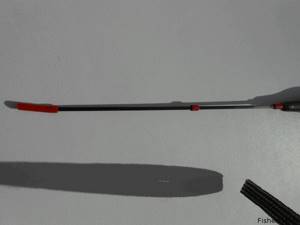
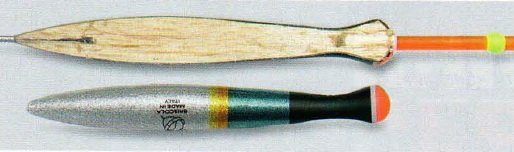
Balancing the float
Balancing is done after the paint has completely dried - when the mass of the float has already been established. The balancing process is performed by trimming the keel to the desired length. The figure shows a balanced float.

Another option for making a homemade float - this time a buoyant heat made from extruded polystyrene foam. Today, this material is already inexpensive and widespread (in any hardware store). Therefore, such floats are cheaper, but processing the material is more difficult...
Load Capacity Features
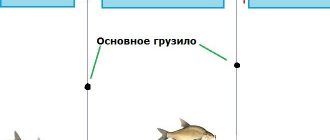
So, the essence of the float is to notify you of an ongoing bite. In this regard, at the time of its purchase, you need to be guided by the following parameters: minimum size with maximum load capacity. Often, a large float can provide strong resistance in the water, in particular on bites when diving. It is advisable to select the weight of the sinker in such a way that the line between the signaling device and the weight is as tense as possible. This facilitates a quick response to activity near the bait. Another nuance when choosing the weight of sinkers: it is worth considering the depth of immersion of the nozzle, which must be achieved in a short time, if this is assumed by the chosen fishing method. The presence or absence of current in a body of water also plays an important role. It turns out that the choice of a float used for certain fishing conditions depends not only on the shape of its body, but also on the carrying capacity. When choosing a signaling device, you should pay attention to the following points:
- type of fish;
- the diameter of the fishing line on which the equipment will be installed;
- depth at the fishing site;
- level of fishing gear, as well as fishing method;
- presence of current;
- weight and size of the bait (for example, when fishing with live bait).