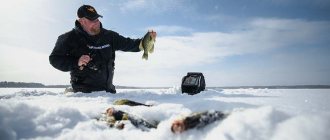
Winter girders are, perhaps, one of the simple, inexpensive, universal and accessible to every fisherman devices for fishing with live bait from the ice for pike, burbot and other predatory fish. Let's look at what types of gear of this modification exist, what are the design and application features of each of them, and also highlight the main nuances of increasing fishing success with their help.
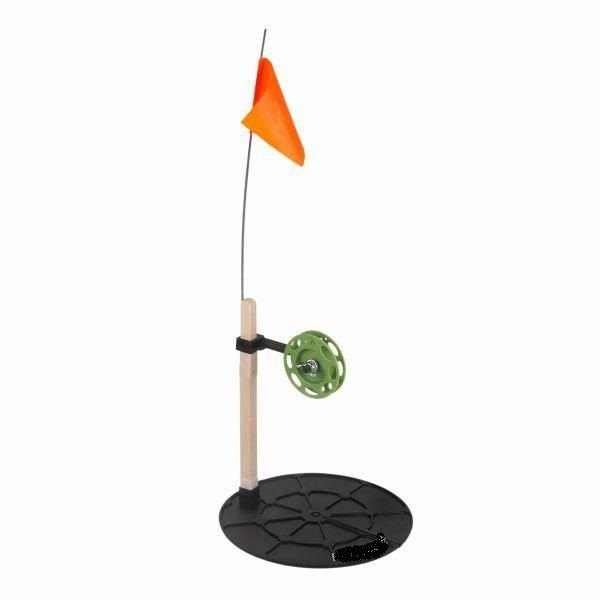
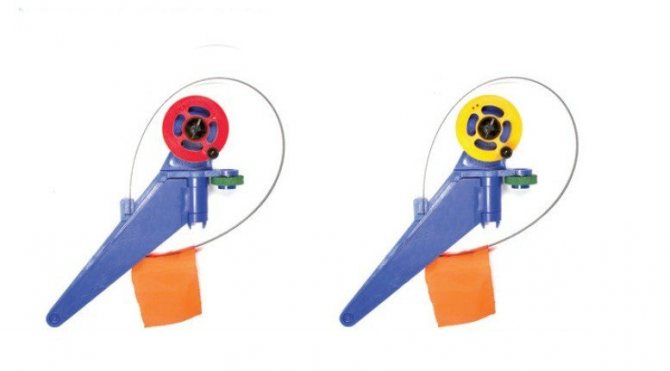
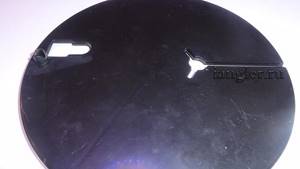
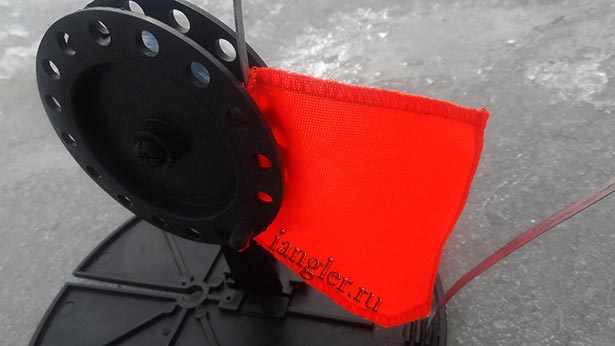
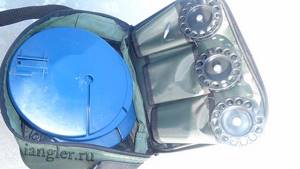
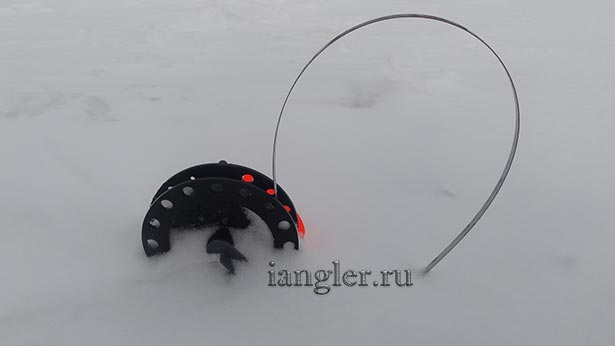
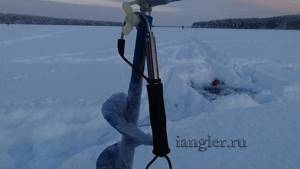
Installation of the TONAR vent
Types of girders for winter fishing
Girders for winter fishing are the following types.
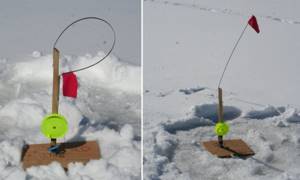
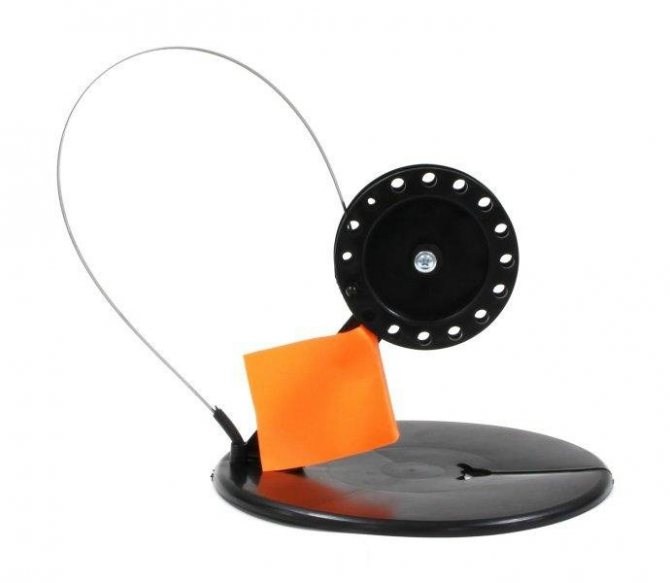
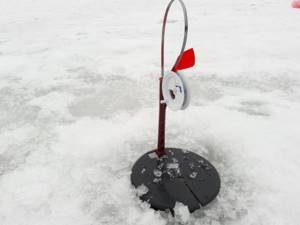
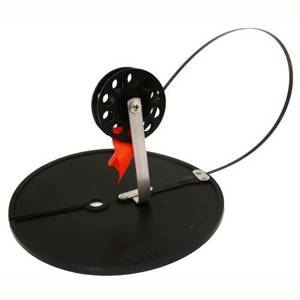
On the platform
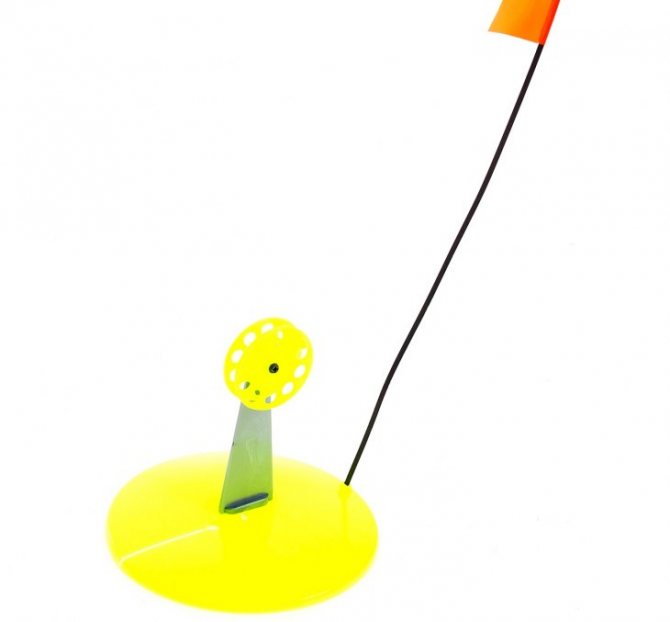
This design has the following components: the platform itself, which has a round shape with a slot for fishing line, a vertical stand with a reel and a flag on a spring.
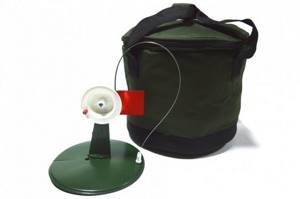
The platform vent is a universal design option that allows you to protect the hole from freezing or exposure to bright light. It is convenient to use it in a small area, or leave it overnight. But in a strong wind, the structure can be demolished, and in cold weather it freezes to the ice.
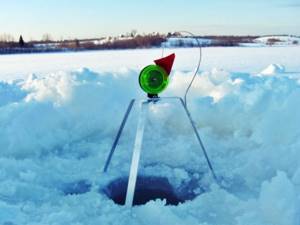
Vertical on a stand
The structure includes a stand that serves as a support. It is installed directly into ice or crushed ice.

The most common material for such structures is stainless steel or iron, which freezes to the fingers in the cold. In the spring, the ice around the structure begins to melt and it loses stability.
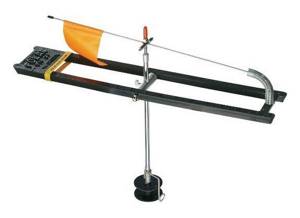
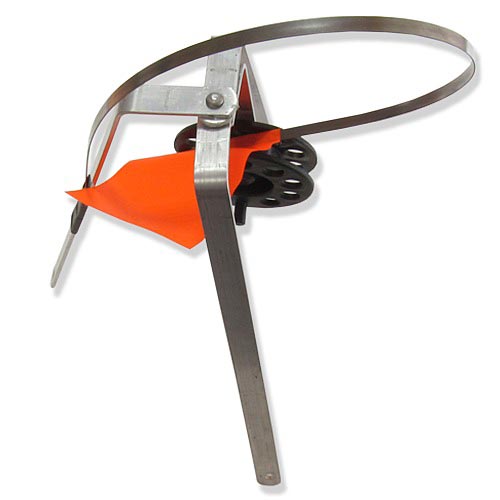
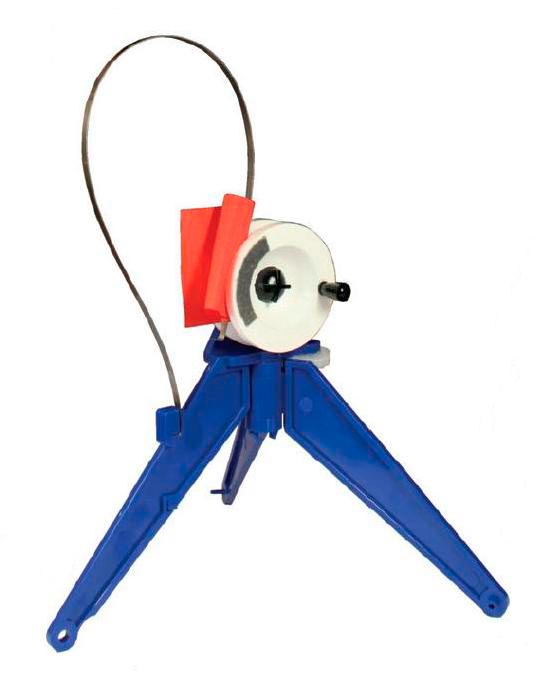
Tripod
The tripod rig includes a folding support on legs, a reel for fishing line, and a flag. It is installed directly above the hole.
This kind of fishing for girders is used on bare ice when there is no snow yet.
It is equipped with a bright flag that can be seen from afar. A strong bite or gust of wind can throw off the structure.
Horizontal on crossbar
The horizontal rail on the crossbar is a rail with a reel and a signal flag, which is equipped with a spring. When fishing, the signal flag is secured between two brackets using a loop of fishing line. The device does not involve the use of a reel, and the fishing line is laid out near the hole.
If such a trap is equipped with a spool, this will make it possible to use the design for actively catching predators.
When using such devices, please note that it cannot be left for a long time, as it freezes or is covered with snow.
Changeling
The shifter is a tube, on one end of which a fishing line is wound. A cross is mounted into the tube. At the moment when the predator swallows the bait, the tube dives into the hole, and the cross does not allow it to be completely immersed in the water and turns the structure over.
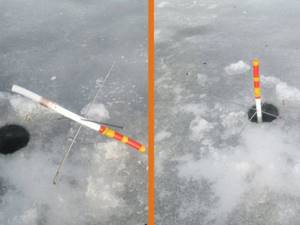
The top of the tube is painted in bright colors.
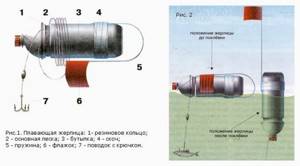
Sub-ice supply
The ice stand is suitable for installation at night or on a frosty day. Fishing line and equipment are wound onto a rubber hose. The structure is hung on a stick, which is installed across the hole.

When the fish bites, it pulls out the line and moves freely under water.
Samolovka
The self-trap device consists of a plastic reel, brightly colored, on which a nylon cord is wound. To prevent the rope from accidentally unwinding, it must be secured with an elastic band.
The fishing line is attached to the rope using a swivel. Live bait is attached to the hook, the bait is tied to a peg or stick and lowered into the water. When the fish swallows the bait and begins to move, causing the line to unwind and the reel to take on a bright color.
The principle of operation of ice fishing girders
The principle of operation of ice fishing poles is that live bait is attached to a hook and lowered into the water. A hungry predator grabs the bait and moves a little to the side in order to swallow it. At this moment, the fishing line begins to actively unwind from the reel, and a spring or other light signal is triggered.
For such a device to be effective, many factors must be taken into account. Large predators are not only inactive, but also very careful. Therefore, such gear does not include sound signals, which can scare away a predator with noise or crackling.
Classic summer vest
To make a simple but effective summer zherlitsa you will need:
- slingshot;
- fishing line;
- the sinker, as a rule, is sliding;
- triple/double hook and leash for it;
- devices for securing gear on the shore;
The fishing line is tied to the slingshot and wound crosswise. It contains a sinker, a leash with a hook and, in some cases, a float. Live bait is attached to the hook. After this, the tackle is attached on the shore to the branches of trees or bushes hanging over the pond, and to a special pole. If desired, the pole can be placed in the water.
Jerky from a bottle
Even if you are not properly prepared for catching pike, there is an opportunity to make up for lost time on the pond. A half-liter bottle is best suited for making a zherlitsa.
Manufacturing:
- Several meters of nylon thread are attached to the bottle and wound.
- The thread is secured with an elastic band.
- and a leash with a hook are placed on the thread
- To improve visibility, it is useful to paint the bottle in a bright color.
Such girders are installed and checked using a boat.
Self-cutting girders for winter fishing
Self-hooking girders for winter fishing provide an automatic jerk of the fishing rod or fishing line for hooking at the moment when the fish begins to bite. There are a large number of designs of self-hooking devices, but they all work on the same principle - when there is a bite, the line is stretched and the trigger mechanism is triggered, as a result of which the line is tightened or the rod is raised.
Sometimes the fish takes the bait in its mouth and holds it for a while without swallowing it. During this period of time, she can feel the tip of the hook and release the bait from her mouth. In order to avoid such a situation, you should cut.
Typically, a mechanism similar to a mousetrap is used for self-cutting. At the moment when the fish begins to bite the bait, the spring is slightly stretched until it reaches its limit. This provides catch resistance. When the line is tense, the spring is activated, the bracket is lowered, the rod with the line catcher is released, and with the help of the spring it rises sharply. In this way, the hooking occurs, and the hook digs into the body of the fish. In most cases, the fish cannot escape the hook.
Fishing with girders in winter (self-hooking) or fishing rods gives very good results, allows you not to miss the moment of a bite and is an indispensable assistant for people with disabilities. If the fisherman cannot react quickly and make the hook on his own due to poor eyesight or disability.
Lures for the girder
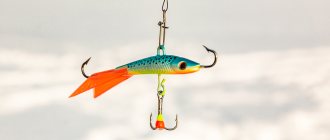
It is believed that only live fish, such as a minnow, gudgeon, ruffe, roach or small perch, can be bait for winter fishing. If the fish is passive, then the chances of a bite are random. The more actively the bait moves, the more the predator’s appetite is stimulated. The weight of the bait ranges from 15 to 30 grams.
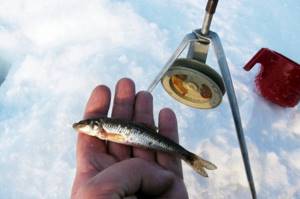
But some fishermen manage to catch the predator using ordinary frozen capelin. Also sometimes used are beef liver with blood, worms, meat or lard, and frozen minnows.
Types of girders for summer fishing
As can be seen in the photo of summer vents, according to their design features they are divided into:
- Postavushi.
- Hanging.
- Moored.

Each type differs not only in equipment, but also in the installation method.
«>
Winter fishing technique
The technique of fishing with girders in winter is that if a predator grabs the bait and slowly drags it into the shelter, the line will unwind, swaying periodically. At this moment, you should not make a hook. A sign that the fish was hooked on its own will be the rapid unwinding of the fishing line under strong tension. In this case, it must be fished out quickly, otherwise the fish may tangle the line. Small pike, for example, weighing up to 400 grams, are always hungry and often lose their vigilance. Therefore, they often swallow the bait completely. Spontaneous fishing, and the position of the fishing line along the shore is a sign that a young and inexperienced individual was hooked. A large predator drags its prey to the depths.
If you feel the fish moving when you pull out the fishing line, you should make a sharp and strong hook. The fishing line should not be pulled too tightly, held in a fist or wrapped around the hand. When fishing, you should be constantly ready to let go of the line, since a large predator can make a very sharp and strong jerk and break the tackle.
Even if the fishing line has a very high level of strength, you should not suddenly pull out large specimens. First, you should tire the fish a little by periodically tightening and loosening the line. It is also worth using a landing net for landing.
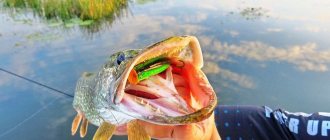
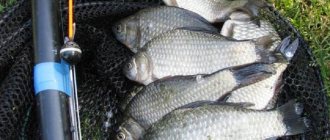
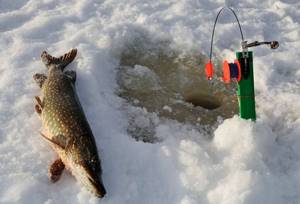
Using girders you can catch pike, catfish, pike perch, perch or burbot. If the target of fishing is perch, use small live baits and single hooks. For catfish, it is worth using very powerful gear and large baits, and also looking for places to place girders above deep holes. In winter, burbot lives in deep holes with springs.
Fishing for pike on girders
The season for catching pike on girders begins after the first ice sets in and lasts until January, and sometimes longer if the winter is warm. Typically, winter fishing for girders takes place in small reservoirs, ponds and lakes. The most successful are considered to be bays overgrown with grass, quiet water, places near reeds, and coastal breaks.
Fishing for pike in winter on zherlitsy occurs in this way: the zherlitsa is placed in different places - several pieces in shallow water, and several in depth. This technique makes it possible to determine a good place. If not a single bite has been observed in 2 hours, then it is worth changing the location. You should move more than 15 meters from your previous parking lot.
Experienced fishermen advise making holes in several places in advance - it is very difficult to find a place with a good bite the first time. Also, when fishing for pike, you should not place the girders above the pits.
You can install gear over flat areas with a small amount of snags, or where there are slight differences in depth.
The best girders for winter fishing
Zherlitsa automatic rifle Automatic Fiserman
The Automatic Fiserman device is designed for catching pike, trout, pike perch, whitefish, perch or salmon. The design includes the following elements: a supporting rod, a fishing rod holder and a guard, which is adjusted so that the fishing line has a slight slack. During a bite, this slack is pulled out and tipped onto the frame. The weight of the device reaches one kilogram. The material from which the tackle is made is plastic that can withstand low temperatures. If the automatic release system is set, you should not touch the fishing rod, otherwise you may get hit.
The line slack is adjusted to a specific type of fish. For active predators, the slack is kept to a minimum, and for passive and cautious individuals, a slack of 15 cm is left.
Zherlitsa Terminator
The Terminator holder includes a flat stand made of plastic that is resistant to physical impacts, a wooden block holder, and an anti-beard loop. The line is passed through a loop, which allows you to slow down the reel during sudden jerks and protects it from tangling. Birch bars are available in two sizes - 20 and 40 cm.
If the hole is used in conditions of very low temperatures, or is left overnight, then you should choose a higher bar and insulate the hole with a snowdrift. Also, high stands are used for fishing with a girder in thickets of grass or reeds. Even after heavy snowfalls, such flags can be easily detected.
Zherlitsa winter-summer “Cool”
The set of the winter-summer cooler “Cool” includes a base that does not sink in water. This makes it possible to use the structure not only on ice, but also on the surface of the water. The material for making the base is isolon, which prevents the hole from freezing and does not allow the vent to freeze to the ice.
Also included is a reel with a bracket and a spring-mounted clamp equipped with a flag. This is a comfortable and stable harness that does not create problems when carrying or using.
Stinger Snow Visor
The Stinger Snow Visor device is an analogue of the American frame Frabril. It is made of bright plastic that is resistant to low temperatures. In addition to the standard configuration, the device has a guide ring near the coil.
This prevents the line from twisting. The surface has been treated with an anti-icing agent. There is a 40 cm scale on the case to measure the length of the trophy.
Stinger Thermal PRO
The Stinger Thermal PRO tackle is ideal for fishing in low temperatures. The diameter of the base is 25 cm. This makes it possible to prevent the hole from freezing even at – 30°.
The zherlitsa folds up and is transported without any problems. There are also holes in the base designed to accommodate fishing rods when carrying them. The mechanism is coated with a substance that prevents icing.
{banner_vnutri-kontenta-3}
Apico-Fish "Aelita"
The Apico-Fish "Aelita" device kit includes a base made of frost-resistant plastic, a rubber retainer, a volumetric reel and a volumetric alarm that opens when bitten. The line comes off smoothly, in rings, which prevents the loops from getting tangled or interlocking.

Special cases allow you to transport gear without damage or snags.
Pierce IVF
A simple pier ECO on a tripod, convenient for carrying and installation. It is made of materials that are resistant to low temperatures.
The high height and bright flag allow you to detect the tackle at a great distance. The reel has a free adjustable stroke.
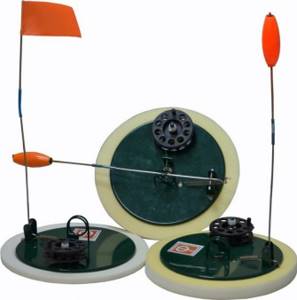
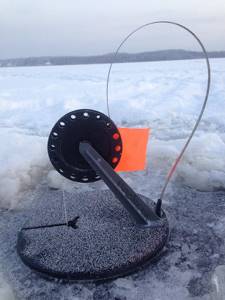
Zherlitsa Three Whales
The Three Whale zherlitsa is on a round platform or three legs, which consists of a coil and a flag on a spring. Installing such a girder is not particularly difficult.
This kind of girder is easy to assemble and disassemble. Designed for fishing with live bait in winter.
Zherlitsa Kursk
The Kurskaya Zherlitsa is made of plastic that is resistant to low temperatures and does not crack in the cold. They have a stand and a high stand, thanks to which the girder can be seen from a great distance.
The equipment includes a metal leash, fishing line, weight, tee hook. There is also a special crossbar for hooking the hook while winding the fishing line.
Zherlitsa Growth
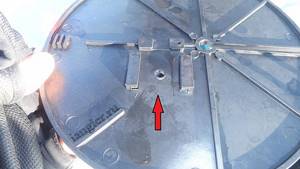
The set of the Rost zherlitsa includes a circle, a stand, a reel and a flag, which makes a clap when triggered.
In order to install the girder, you need to secure the stand with the reel and flag in special fasteners, the fishing line must be placed in the slot, and the flag must be bent and inserted into the groove.
Types of girders and their equipment
With the onset of the winter season, all fishermen switch to winter types of fishing. Among these fishermen there are many who like to fish with girders. This article is intended for those who have decided to join the jigging fanatics. Fishing stores today offer a large selection of fishing rods from different manufacturers. There are many manufacturers of girders, but they all look almost the same. Despite this, each manufacturer has its own design features with, accordingly, its own advantages and disadvantages.
Based on my own, although not extensive, experience, I will try to talk about some of the features when choosing and purchasing girders.
Almost any store will offer you a choice of different options for girders, which can be sold individually or as a set. Sets vary in the number of vents and can be equipped or not. Sets are usually sold in a special bag. The price of equipped and not equipped girders does not differ much due to the fact that the equipment, as a rule, is made of not very high-quality materials. Therefore, I advise you to buy unequipped vents and equip them yourself. This is not so difficult and we will talk about this later, but now let’s move on to directly choosing the design of the vent itself.
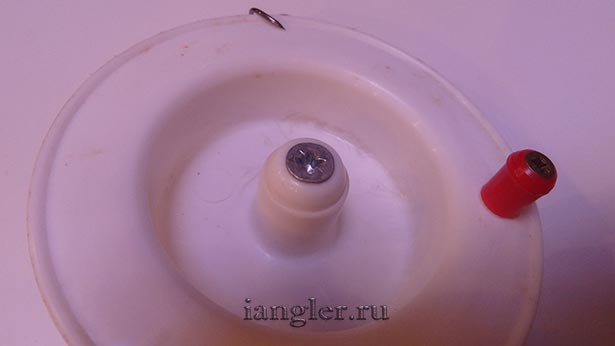
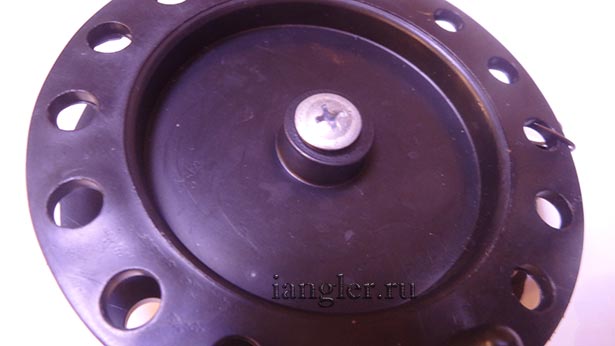
All girders consist basically of the same parts:
- disk;
- stand with reel;
- checkbox;
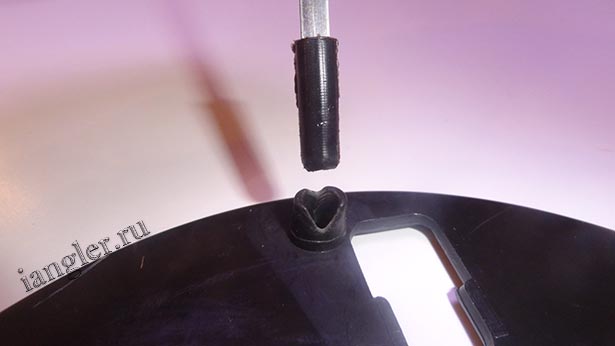
A stand and a flag are fixed to the girder disk, and when choosing girders you need to pay attention to the method of attaching the parts to the disk. Pay attention to the protruding parts of the fasteners on the disk. The more they protrude, the more space the discs will take up in the bag when folded. Also, strongly protruding parts can fail faster due to impacts during transportation.
There are models of vents without disks that are mounted on a tripod, but I don’t really like them because of their poor stability. The disk also plays an important role in blocking the hole from daylight. You can, of course, cover the hole with snow, but there are situations when there is no snow, and sunlight entering an open hole can scare away the fish.
Let's look at several common options for attaching a stand with a reel to a disk.
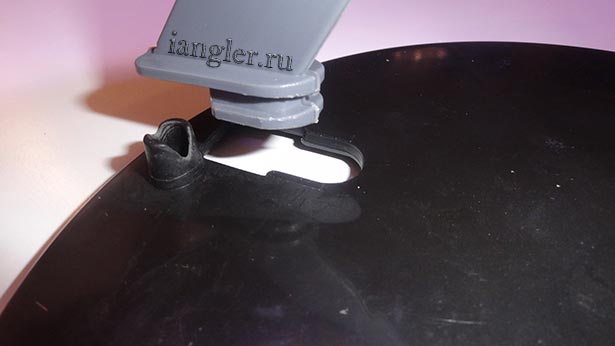
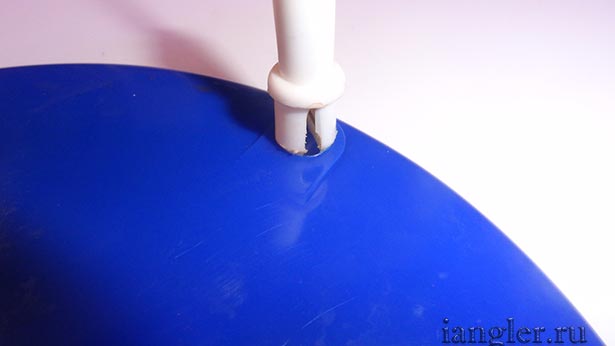
An example from a set (10 pieces) of girders from. Not a bad mounting option. There are no parts on the disk other than the hole and the stand is secured in the disk with a slight movement, while ensuring reliable fastening. It is very important when disassembling that it is easily and conveniently removed in the reverse order.
The next option is also from the kit (6 pieces). The disc has fewer protruding parts and can be easily stacked, taking up minimal space. The rack fastening is very fast and reliable, and can also be disassembled very quickly.

The plastic is quite soft and durable and behaves very well in the cold.
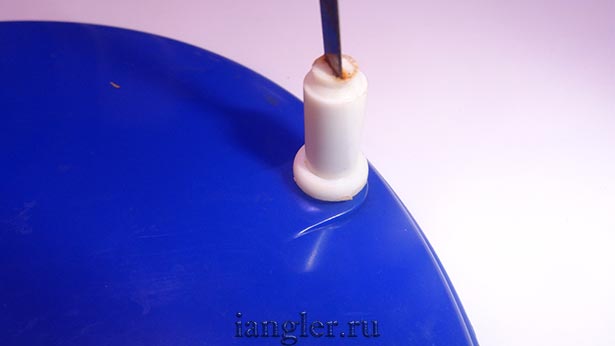
The next version of the girders I don’t know the manufacturer, but they look like Chinese ones. Unfortunately, I couldn’t find any photos of the stand. These girders are lying around in my garage. But take my word for it. Inserting the drive into the rack is not that easy. And it’s also not easy to pull it back out; the disk often breaks, especially in the cold.
I also don’t know the manufacturer of the next option; the mounting method is not bad, but it’s not so quick to install. It also has many protruding elements on the disk that break due to not very high-quality plastic.
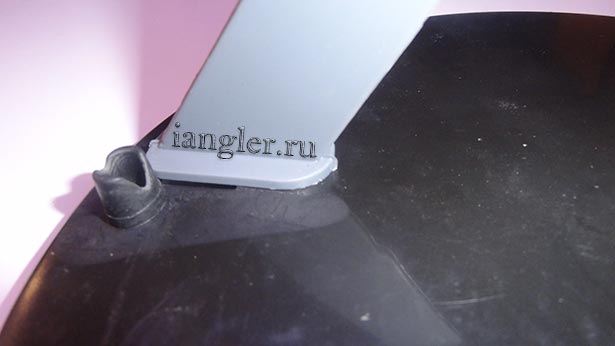
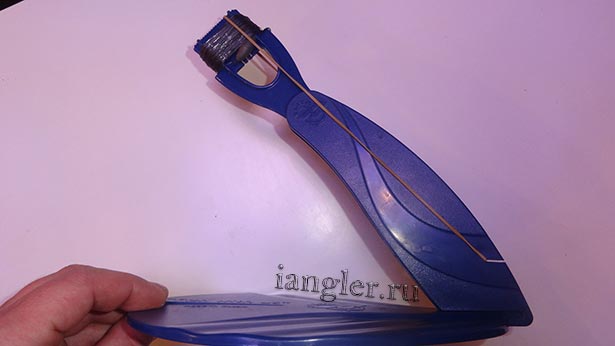
The next version of the girders is from the A-elita company. I will focus special attention on them, because they have been advertised a lot lately, and I fell for the advertising when I bought a set last year.
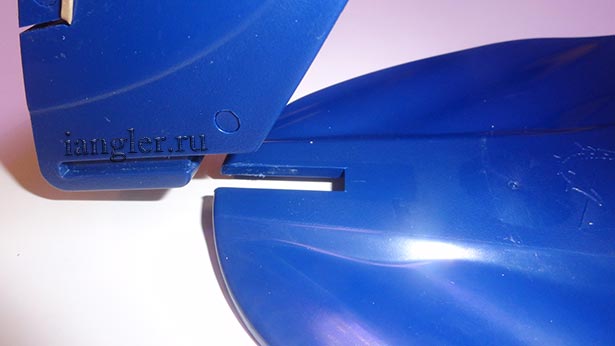
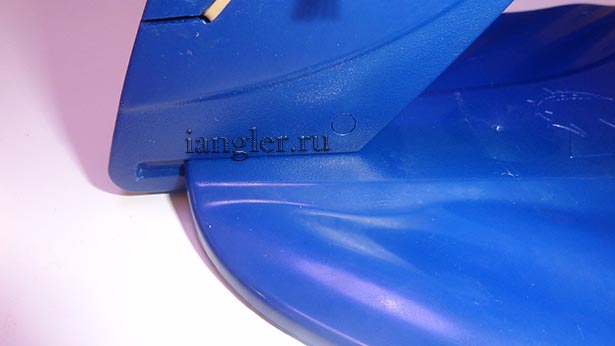
As for the design, these poles have a combined stand with a flag, and it does not have a coil. A very compact version of the vents, the disk does not have any protruding parts.
To install the stand on the disk, you need to very accurately get into the groove, which is not always possible the first time. And most importantly, the groove on the parts fits very precisely, and if you forcefully insert the stand into the disk, then you will spend a very long time tearing it back out.
The first time I suffered for a long time and even one disk eventually cracked. Therefore, if you decide to buy such racks, do not be too zealous when assembling, just fasten the rack into the disk with minimal effort, without driving it into the groove completely.
There are several other mounting options, but when choosing, you need to understand that the fastenings must be reliable and, most importantly, easy to assemble and disassemble; this takes a lot of time, which is so lacking when fishing. Try assembling and disassembling the vent in the store, and keep in mind that the plastic hardens in the cold.
The next element that we must install on the vent is a flag. In fact, all the flags for the girders are the same and differ only in how they are attached to the disk and the flag itself, usually red, attached to the end of a springy steel plate.
However, each flag is attached to the disk differently. In the first version of the vents, at the end of the plate there is a cap made of some material. Something between plastic and rubber. It is quite soft in warm weather, but in the cold it becomes very hard.
It attaches quickly to the disk and holds quite firmly during operation. At least, my flag never jumped out of the disk when biting. The only drawback is that this cap is not secured to the plate in any way and often falls off in the bag during transportation. The manufacturer guessed about this and included three spare ones in case of loss.
On my last fishing trip, which took place this year, I already lost the first one when folding the poles. When I lose more and have to invent something, you won’t get such accurate ones anywhere.
The next mounting option is more successful. A plastic tip is very securely attached to the end of the plate, which has a cut to compress it, and it is very firmly inserted into the disk.
It is also not difficult to remove it back by pulling straight on this tip. Not a bad design, I like it better than anyone else.
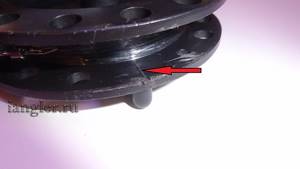
The next option is the worst. There should be a cut in the three sides where you need to insert a spring, which, accordingly, should be bent accordingly. This has to be done with quite a bit of effort; first you need to get into a thin cut and then push it through three sides. Since the plate has sharp edges, it constantly cuts into the plastic.
And on the girders that Vitalik, with whom we often go fishing together, bought this cut, there was no such cut at all. Instead, there is a hole through the disk, but this way the flag is practically not secured and constantly flies out of the disk. The photo shows Vitalik’s vent.
Also note that the stand with the reel is inserted into the disk from the reverse side, this is due to the fact that the line on the reel is wound in the other direction, we will talk about this a little later.
The next fastening option is more reliable and simple, but I still don’t like it when metal needs to be inserted into plastic, and as you can see from the photo, the place where the plate is inserted will soon crack and fail, but this is more a question of low-quality plastic, and not of the method fastenings
There is no need to attach any flags to the A-elita racks; the flag is built into the rack itself and everything together looks very compact.
Now that we've sorted out the attachment of the flags, we need to pay attention to the flags themselves. The plate is usually the same for everyone, but the fabric itself from which the flag is made is different. Different in color, size, and quality of fastening.
But this fact should not particularly influence the choice of the zherlits themselves. You can or even need to make the flags yourself. A high-quality, bright, large flag is very important when fishing, especially in bad weather or in the dark.
The color is not necessarily red, the main thing is bright; I have seen homemade flags of a poisonous green color. It is very convenient to determine from afar whose vent has worked during a dense installation, when there are many people interested in one area. And this often happens on our reservoirs.
Several times we arrived early and occupied the territory, but an hour later a crowd arrived and unceremoniously placed their gear practically between ours.

Before each fishing trip, check the reliability of the flag and its condition. After they have been lying in a bag after fishing, the material may shrink and you will no longer be able to smooth it out before installation. And such a flag is very difficult to see from a distance of 50m.
The best option is to buy high-quality material, perhaps even reflective, and order your wife these high-quality flags with machined edges for long-term use.
The A-elita flags cannot be altered, the only thing is that the kit includes spare ones in case of breakage. The flags are plastic and quite bright, but one of the serious drawbacks is that they are not visible at a distance of more than 50 m. Or poorly, but visible under good conditions.
The next element worth paying attention to is the coil. The reel must rotate freely without effort, otherwise the fish will feel and spit out the bait.
The coil size should not be small. This is of course my opinion, but this is how I judge. When a fish of decent size bites and drags your bait at a decent speed, a reel with a small diameter will rotate much faster. And when the fish stops, since most of the reels on the girders do not have any devices for stopping the reel, it will continue to spin and you will end up with a lump of line on the ice.
The reel is usually attached to the stand using a regular screw, but you still need to check the quality of the fastening. Using this screw, you need to adjust the coil to rotate evenly without effort, but so that the coil does not dangle.
In the first option, there is a part between the screw and the coil that acts as a spacer and ensures good rotation adjustment.
It is also necessary to pay attention to the quality of the reel itself. Due to cheap production, reels often have burrs and irregularities in the places where the line is wound. In the presented version, I even had to cut off the large protrusions with a knife; the fishing line was constantly clinging to them, including during bites.
Before winding the fishing line, look at the reel and sand any irregularities.
At one time, remove the jumper on the cut of the disk, if there is one on the new vents, and process the edges. Then you won’t have to worry about assembling and disassembling the girders.
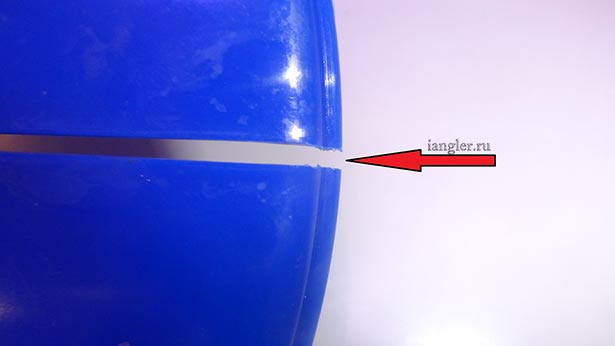
The assembled girders look approximately the same.
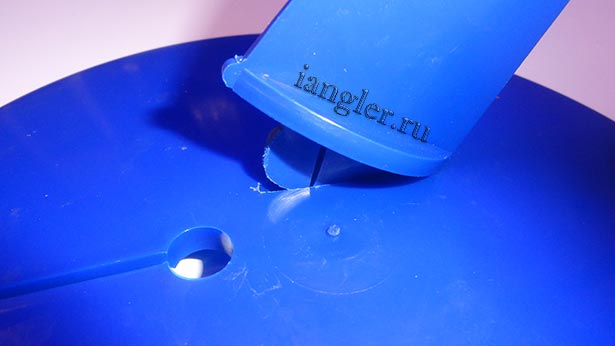
In the upper version, the hole in the disk is made in such a way that you can pass the tee with a load through the hole, but pulling it back out is not so easy, you will have to use a cut.
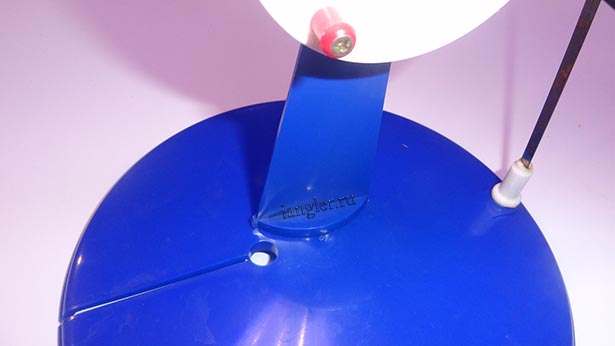
At first glance, the A-elita cord is ideal, but when installing, you need to take into account that when triggered, the fishing line does not end up being passed through the elastic band.
Therefore, first we lower the line and cock the elastic from below, and not through the top, from the positions as in the photo.
When installing girders with a regular flag, it must be slightly bent, according to the shape of the reel, in order to reduce false alarms due to wind or jerks of live bait.
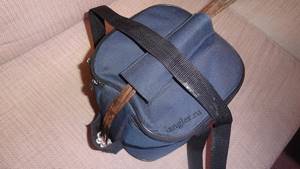
Also, when choosing vents, you need to think about how you will transport them to the installation site. If you buy girders individually, then you need to purchase a bag for transportation.
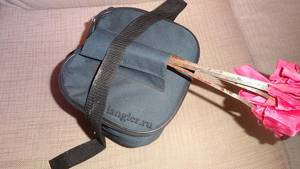
Nowadays, many girders are sold in sets of 5-6 or ten pieces already in a bag from the manufacturer. The bag is also worth paying attention to. The most bulky items are the flags. They are just long and don’t fit into compact bags.
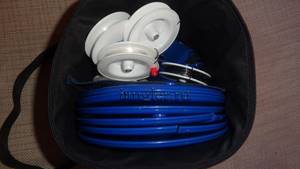
In the “Three Pillars” girdle set, the bag has an oblong shape and there is a separate pocket for flags, which is very convenient.

Each spool stand has a separate pocket, which is also very convenient.
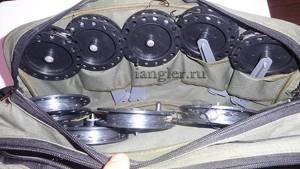
There is also a separate compartment for discs, plus an empty compartment for spare leads, fishing line and hooks, in general, everything that is needed
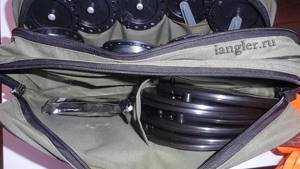
The disadvantage of all the vents is the lack of a way to secure the tee. That's why they constantly cling to the bag.
If the size of the tee matches the thickness of the coil, then I attach the tee - like this.
The next version of the bag is more compact, but the flags ruin everything.
During transportation, the flags constantly get caught on everything and fall out, so I transport them separately.
Reels with discs are in different compartments, but the reels just lie in a heap and in the absence of fastening tees, the fishing line often unwinds and gets tangled.
Other bag options have similar disadvantages. No space for flags, or compartments for each rack.
In this regard, A-elita vents have a great advantage. There really is nowhere to attach the hooks either.

But a set of six girders in a bag is very convenient and compact.
If you noticed, up to this point I have talked about these vents practically only with advantages, with the exception of the very tight connection of the rack to the disk. Basically, all the advantage ends with the absence of various parts that could have disadvantages even in a very compact design. Let's talk in more detail about these zherlitsa.
The next drawback that adds to the compactness is the lack of a coil. If everything is simpler with summer zherlits on a slingshot, then I couldn’t do anything. The fishing line, once wound around the girder, turned into a spiral and did not want to straighten out.
At first I thought that I just reeled in cheap, low-quality fishing line, and bought more expensive fishing line. But it did not help. Then I bought a very high-quality winter soft fishing line for 1,500 rubles, but you can see the result in the photo.
I tried to wind good and thin fluorocarbon, but this also did not help, moreover, due to the fact that it is rigid, it constantly spontaneously flew off the vent during transportation and got tangled.
All this was especially evident in the cold in warmer weather, around zero it was a little easier. There are no special problems in installing the girders, even in cold weather, but when biting, the fishing line often falls off the winding.
Now let's look at the triggered vent. The end with the fishing line tilts down towards the hole, pay attention to the distance between the winding and the disk, at this time the reverse part with the flag flies up to the top.

And everything would be fine, but let’s imagine a situation when it’s snowing and after an hour all the vents are covered with snow. For an ordinary fishing rod there are no problems; when biting, the flag will fly up, and the snow will prevent the hole from freezing and the fishing line from freezing, and no problems at all.
What will happen to the A-elita train? It will rest against the snow and the line will not rewind. In this case, the flag will not fly up, and you will not notice this situation.
Therefore, these zherlits are collecting dust in my garage; I was disappointed that I fell for advertising videos about these zherlits, which are still found on the Internet. Moreover, it is not the company that advertises these girders, but ordinary fishermen, in their stories. I don't know, maybe I'm doing something wrong? You decide.
There are several other types of girders, but I can only tell you about them based on information from friends and the Internet. Although advertising from the Internet may not be reliable.
I know for sure that the version of the vents called “Kursk-1” in the photo below is not a bad one.
The mounting to the rack is good and simple, the disk has no unnecessary parts, just holes. The flag is height adjustable, the reel does not look bad and has a stopper.
The following options for girders are on a tripod, the first of them, as far as I know, is also called Kursk, and is famous for its instability and frequent capsizing.
The next example is called “PIRS”, it looks compact, but I don’t really trust this design of the vents, and maybe in vain. I can't say for sure until I try. I didn't see it in our stores.
There are also imported zherlitsa in stores, including ours in St. Petersburg. Mostly American. The cost of one zherlitsa exceeds the cost of a set of ordinary ones. For this reason, I see no point in purchasing them. The fish won't bite on them, that's for sure.
All the advantages are in the quality and good assembly of parts. The disadvantages that I know of are the small reel and the fact that it is usually placed under water. In our frosts, it will simply freeze into ice.
Well, we’ll probably move on to equipping the vents.
To equip the vents, a minimum set of materials is required:
- Fishing line;
- Weight;
- Leash;
- Tee (double);
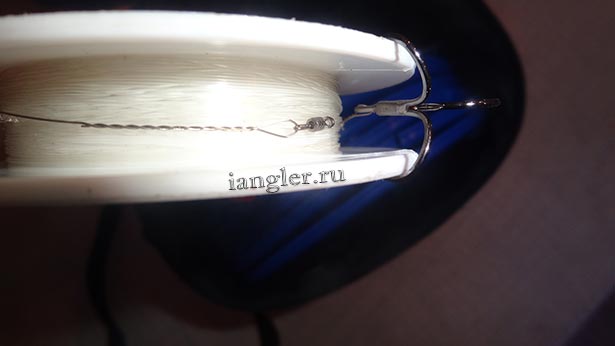
The first thing you should do is wind the line onto the reel. Before winding, install or simply figure out how the stand is installed on the disk, and decide in which direction you need to wind the fishing line.
Attach the line to the reel very securely in order to avoid the possibility of the line unwinding completely and losing a decent fish. The amount of fishing line wound onto the girder depends on the expected depths of the reservoirs where you are going to fish.
Usually this is 10 m, but on my reels 15 m are wound. When we fished on Lake Kopan, the depth was just ten meters, but after installation there should be at least five meters left on the reel. But if you are fishing at shallow depths, I advise you to limit the amount of fishing line you unwind to avoid tangling with neighboring vents.
You can use the most common fishing line, with a diameter of 0.2 mm to 0.4 mm, depending on the expected size of the fish that may be caught. On mine the fishing line is 0.3 mm.
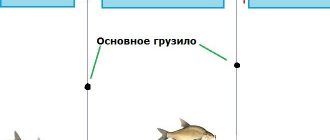
Next, you need to put a weight on the fishing line so that it slides freely along the fishing line. The shape of the weight is not important; its task is to lower the bait to the bottom and not allow it to rise. We select the weight depending on the depth and strength of the current.
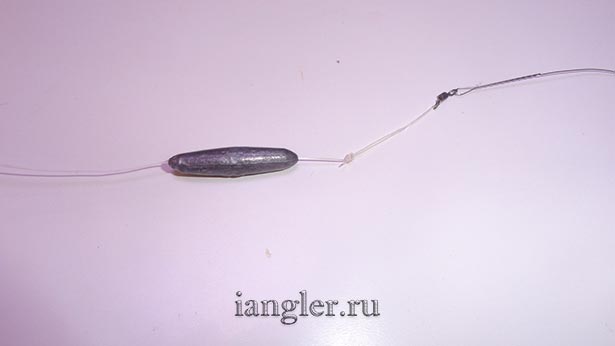
After this, we make a loop at the end of the fishing line, with a knot into which the weight will rest. You can tie a swivel instead of a loop or immediately tie a leash, which, as a rule, already has its own swivel.
The fewer additional elements, the better. One of the most important elements of equipment is the leash.
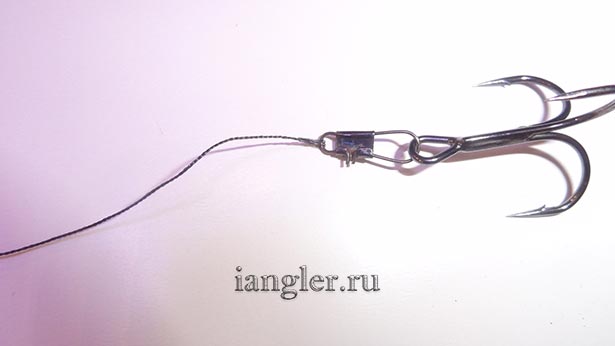
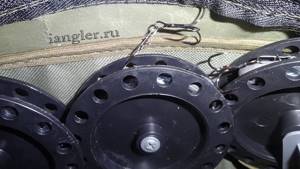
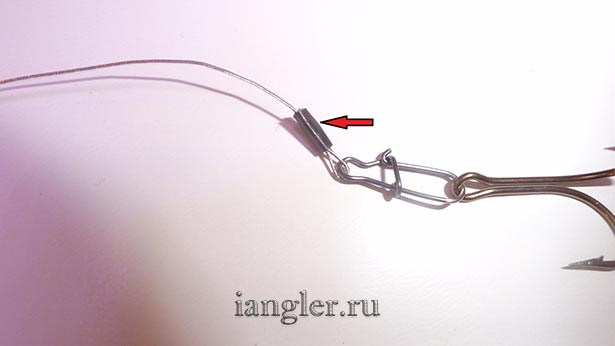
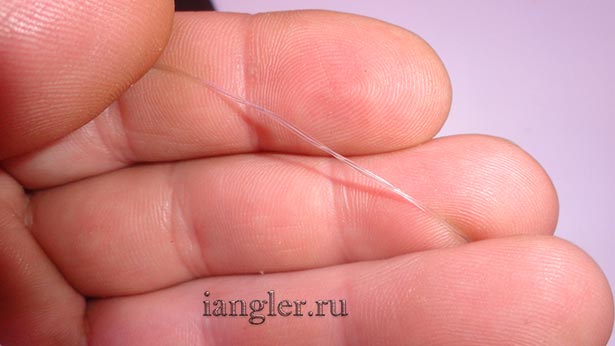
Its quality determines whether it can resist the teeth of a predator. We all know that the main trophy for fishing is pike. And the pike has very sharp teeth and can chew through even a very strong leash. In addition to the leash material itself, pay special attention to the carabiner that is installed on the leash. The next photo shows a not very reliable carbine. If your trophy is over two kilograms in size, such a carbine may simply unbend.
The following photo shows a reliable carabiner and a titanium braided leash. On my last fishing trip, he let me down. The carabiner held up, the leash did too, but the crimp tube did not. As a result, the pike swam away along with the tee and carbine.
The most reliable in this regard is a simple string. This leash is one of the cheapest and most reliable, it is devoid of unnecessary parts that can fail. The downside is its rigidity and visibility in the water. Because of this, there are fewer bites on such leashes. But when the pike is active, such a leash does not particularly affect the bite.
Recently, fluorocarbon leashes have become very popular, they are hardly noticeable in the water and guarantee a greater number of bites. If you look at a leash designed for a weight of up to seven kilograms, then in appearance it does not inspire confidence. He can pull out a pike worth a couple of kilograms without any problems, but I don’t think it’s likely that he’s worth seven.
I am more inclined to make homemade twisted leaders from fluorocarbon, or just regular monofilament fishing line.
The costs are minimal and the reliability is no worse than any store-bought fluorocarbon leash. The leash does not have any parts, it’s just a fishing line and that’s it, and due to its twisted shape, it is very resistant to the teeth of a pike.
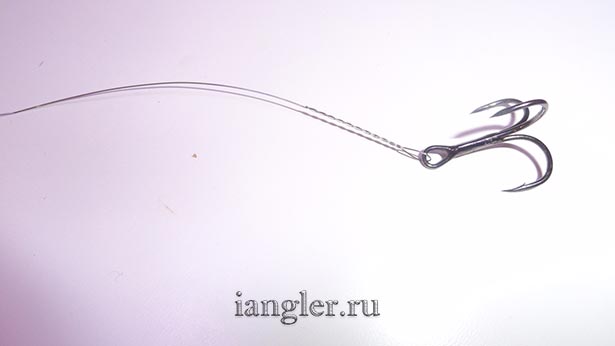
The last element of the equipment is the hook. You should not skimp on this element. The hook, whether it is a tee or a double, must be of high quality and reliable.
I usually use trebles, doubles are considered less noticeable and increase the number of bites. In my experience, I didn’t notice a difference, but the tee hooks the fish more reliably.
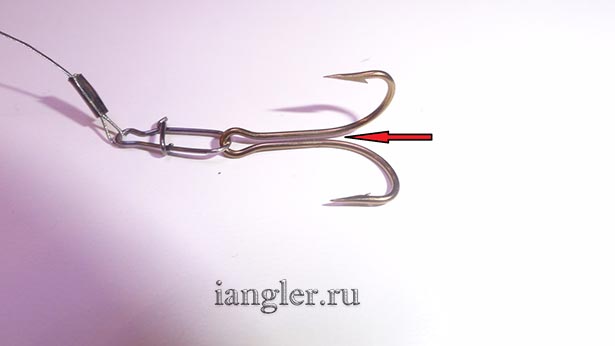
If you decide to use a double, don't use cheap doubles like the example below.
The double must be soldered and not be bent. An ego can be made from a tee by biting off one hook.
If you take into account all of the above, then you will not be disappointed in the loss of a serious trophy. After all, we all dream of catching a huge pike.
If you nevertheless decide to purchase equipped girders, check the quality of all equipment elements and, if possible, replace all low-quality elements.
That's all for questions, write, I'm waiting for comments.
At the end, a few words about what may be useful to you when fishing with girders. In addition to the girders, first of all you will need live bait. Of course, you can catch it on the spot, but it is better to prepare it in advance.
As live bait, I prefer roach or perch, and last but not least, crucian carp. Crucian carp is of course a very popular live bait, but its advantage is only in its survivability. It can even be used several times. After removing it from the hook, release it into the can and put it in the refrigerator. And after a week you can put it on the hook again.
Perch also survive well. And, as a rule, you can catch it while fishing close to the shore. Roach is a good baitfish, but it dies very quickly and is not enough for two fishing trips.
Although crucian carp is characterized by increased vitality, it is not active in cold winter water and attracts predators less.
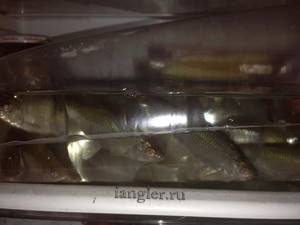
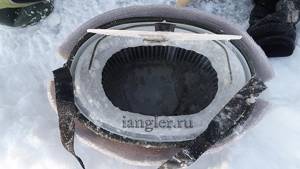
It is very convenient to store and transport live bait in bags filled with oxygen. You won’t be able to put it on from a bag and for this you will need a rope. For transportation, you can use a regular five-liter bottle, but it’s also inconvenient to use because of the narrow neck.
In my opinion, the commercially available canas are useless if they can only be useful for summer fishing. I tried to insulate it, but it was no use.
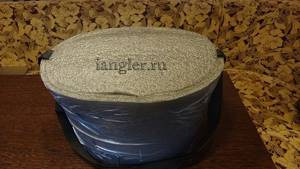
In the cold, this can freezes and turns into an ordinary bucket for a hundred rubles. It is not possible to transport fish in it; it is not airtight. It is very convenient to use a plastic canister with a wide screw-on lid as a can; after insulating it, you get an excellent can.
A very important element in winter fishing is the hook. There are a great variety of them, choose any one you like or make it yourself. But keep in mind that if you come across a serious trophy, it will be very difficult for you to get it onto the ice without a hook and the help of a friend.
That's all. Good luck on your fishing trips.
Similar articles:
There are no similar articles.
Please rate the article
( 11 ratings, average: 4.45 out of 5)
DIY zherlitsa
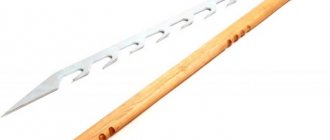
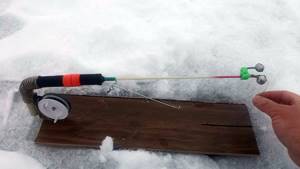
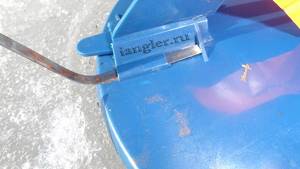
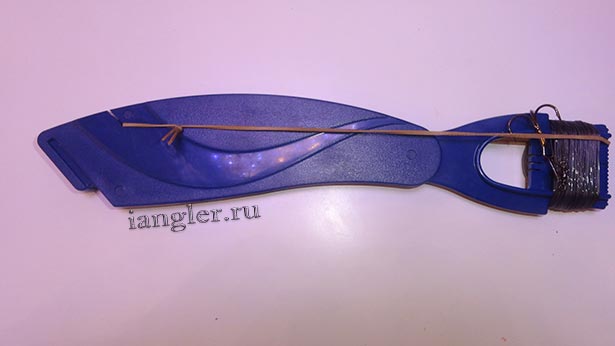
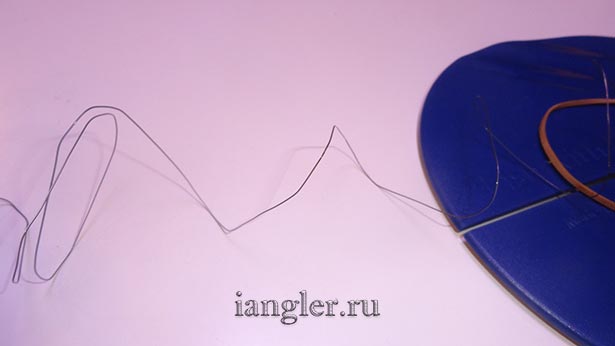
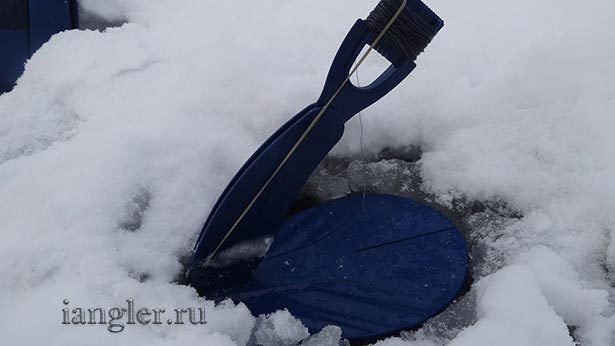
You can choose girders for winter fishing on the Chinese trading platform aliexpress, but we suggest making the girders yourself with your own hands. To do this, you need to prepare a board for the base, a reel, a fishing line, a sinker, a hook, a steel leash with a snap hook, a flag and a thin metal plate or wire about half a meter long. Self-tapping screws, clamps and tools are also useful for making the device.
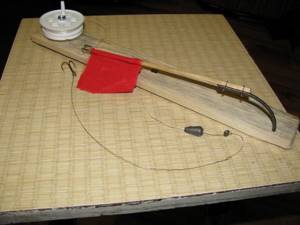
A 10 mm hole is made in the board, and two 4 mm holes are made in the coil. The coil itself is attached to the board with self-tapping screws. The installation of the reel should ensure that the line unwinds from below.
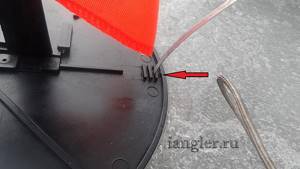
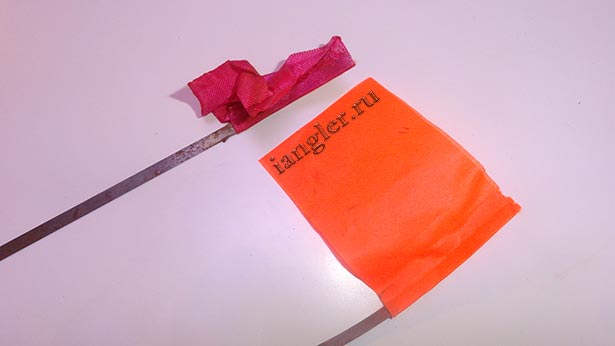
To install the flag, the edge of the steel plate is bent at a right angle and secured with clamps and self-tapping screws. The flag should be easily removable and positioned vertically. A piece of red fabric is placed on the top.
A weight and a hook are attached to the end of the fishing line. The do-it-yourself girder for winter fishing is ready.
Equipment for homemade winter girders
The main part of any winter fishing rod that directly catches fish is the equipment with a hook, sinker and line. Do-it-yourself winter rigging for pike is done in the same way as for store-bought tackle. Rigging in winter is a separate big topic of conversation.
It would seem that everything is simple, a fishing line with a leash, a sliding sinker, a hook. However, details are important in this matter - the weight of the load, the length of the leash, the size and type of hook. The equipment is formed depending on the conditions of the reservoir and the behavior of the predator in it. More details at the link above.