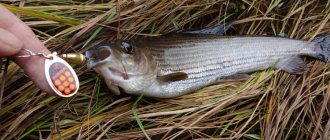
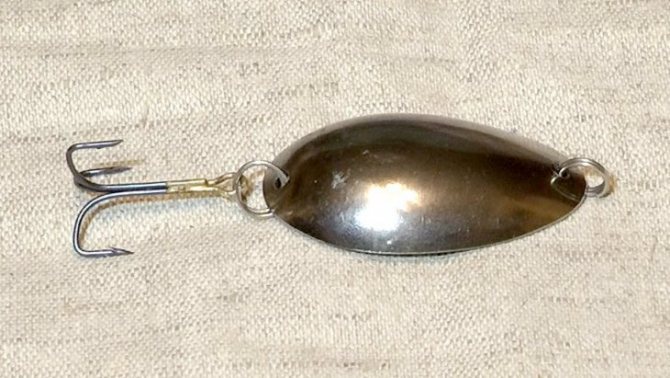
Experienced fishermen who use spoons (including homemade ones) to catch fish can talk about frequent cases of them breaking due to hooks. After all, as a rule, there is only one option in this case: grab the line as close to the spoon as possible and pull it until it comes off, which naturally leads to the loss of the spoon. And it can be very disappointing if the lost lure was made with your own hands at home and had good “catchability”. In order to reduce the percentage of lost spinners, you need to slightly improve their design as described and shown on the drawing of a homemade spinner below.
Read more about oscillating spoons at the link
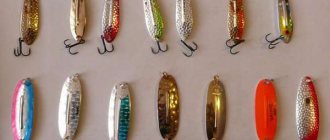
There are several ways to make loaded spinners. The simplest is to add lead to the inside of the petal. But the spinner has an untidy appearance. It is better to cast spinners in special molds. For this purpose, gypsum, cement, graphite (the inner surface of the latter is metalized with copper), and metal forms are used.
Materials for making spinners
For the manufacture of spinners, sheet metal with a thickness of 0.5-3.5 mm is most often used.
The best metal for making spinners is copper and its alloys: brass, tempah (golden color) and cupronickel (silver-white color). Tombak and cupronickel are especially good.
In addition, a bimetal, which is soft iron coated with a layer of copper, or less often tin and zinc, can be successfully used.
Elastic grades of stainless steel are less suitable. Soft varieties are quite acceptable, but require processing. At an annealing temperature of 200-250° C, stainless steel acquires quite a variety of colors.
Aluminum and its alloys are unsuitable materials due to their lightness.
For casting spinners, it is most advantageous to use lead, adding tin or zinc to it if necessary. Lead is first poured into the mold, and then, when the lead has cooled, tin is poured, or vice versa. To increase the strength of the junction, the mold is additionally heated to the melting temperature of lead. Since lead spoons fade quickly, there are the following methods for finishing their surface.
The easiest way is to paint the lure “gold” or “silver” using the so-called “serebryanka”. There are sets on sale with varnish and bags of bronze or aluminum powder; After painting, it is advisable to sprinkle the spoon with mica crumbs.
Another method is galvanic tinning with the composition (in grams per liter of water): tin sulfate - 40-60 g/l, sulfuric acid - 45-90 g/l. First, tin sulfate is diluted in acidified water, and then the remaining acid is added. Treatment is carried out at room temperature of the solution. Power: coin cell or two coin cell batteries for flashlight; plus - tin plate, minus - bait.
There are other methods for finishing the surface of spinners.
Spinner thickness
The thickness of the spoon is closely related to its size and purpose. The thicker the spoon, the less mobile it is and vice versa. Thin spinners have easy mobility, while thick oscillating ones have good, stable movement.
The division of spinners into light, medium and heavy is determined by the degree of their mobility, depending on the thickness and regardless of their weight.
As a general rule, it is recommended to make spinners from thin sheet metal, ranging from 0.5 to 1.2 mm, and oscillating ones from thick metal, ranging from 1.2 to 3 mm.
As already mentioned, the thickness of the spoon is closely related to its size and stamping shape. Therefore, although changing the thickness is acceptable, it must be approached with great caution, since with a change in the thickness of the spoon, the nature of its play also changes.
It is not recommended to use spinners with a thickness of less than 0.5 mm, since very thin spinners, especially small ones, work unreliably and often “stick”, that is, they do not give play, and large and thin ones flutter a lot when casting. Likewise, small but thick spoons perform poorly, while large and thick ones will be too heavy to cast.
If it is necessary to have spinners weighing 40-45 g, their thickness should be in the range of 2.2-2.3 mm. It is best to take the thickness of the spinners according to a well-tested sample. If you have a good sample of a spoon and it is desirable to build the same spoon, but of a larger or smaller size, then their thickness should be taken in direct proportion to the area, i.e., how many times the area of one spoon is smaller than the other, the same number of times its thickness should be be smaller. In the case of using dissimilar materials, an amendment is made to the thickness of the spoon: by how many times the specific gravity of one metal is less than the other, the thickness of the spoon should be greater by the same amount and vice versa. If this rule is not followed, the spinners will differ in the degree of ease of their play.
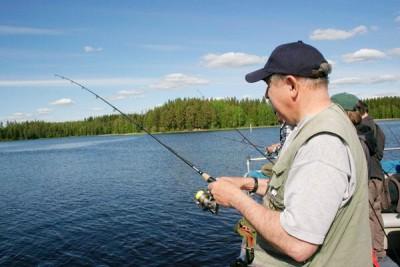
Lure fishing
Using the sheer trolling technique is quite simple. The metal plate should reach the bottom surface, and the tip of the tackle, meanwhile, should make periodic short strokes.
After throwing the bait, you should observe a short pause (about 4 seconds). At the first bite, the spoon should lie on the surface of the bottom and, after a couple of seconds of calm, move slightly. Such behavior will only arouse the predator’s interest.
If the striped predator is sufficiently active, uniform wiring shows excellent results. To do this, after casting the bait, you should reel it in the opposite direction, maintaining a horizontal position. The speed of the retrieve directly depends on the fishing conditions.
With a relatively clean bottom surface, the game is played at an average pace, but in overgrown windows it is more advisable to reel in quickly.
The next most popular is the wiring called stop and go . This game is played in the style of reeling, alternating with minor stops. Another jerk - another stop. Frequent pauses contribute to disruption of the established course and provoke a chaotic fall of the bait to the bottom surface. This wiring will not leave any striped predator indifferent.
The procedure for making a homemade spinner with your own hands
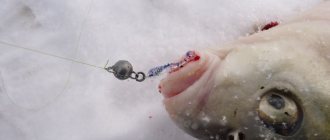
From a large oscillating spoon, it is necessary to remove the winding ring connecting the spoon to the tee. Using a line of smaller diameter than the main line, tie the tee to the second winding ring. Attach the forend of the tee with soft copper wire (0.4-0.7 mm in diameter) to the spoon through the lower hole for the winding ring. Cut off the excess ends of the wire and separate them a little. The specified fastening will not affect the play of the spinner and will reliably ensure the integrity of the “tee-spoon” structure during casting and small efforts when hooking onto small and not very strong obstacles on the bottom, and at the same time, in the case of a “dead” hook, it will allow you to preserve the spinner, having lost only the tee.
You can read more about the equipment of spinners in the material “Equipment of scaffolds”
Recommendations for choosing the diameter of the main line and leader:
| Characteristic | Spinning reel type | Fish caught | ||
| pike | zander | perch | ||
| Line diameter, mm: main (leash) | Inertial Inertialess | 0,6-0,7 (0,5) 0,4-0,5 (0,35) | 0,5-0,6 (0,4) 0,4-0,5 (0,35) | 0,35-0,4 (0,3) 0,3-0,35 (0,25) |
| Lowest breaking load of fishing line, kg: | ||||
| basic (leash) | Inertial Inertialess | 10.5 (7.5) 5,3 (4,0) | 7,5 (5,3) 5,3 (4,0) | 4.0 (3.0) 3.0 (2.1) |
When using fishing lines and leashes according to this table, the safety margin of the main fishing line compared to the leash is on average 25-30%. This is quite enough to prevent the loss of the spinner when hooked, losing only the tee.
Homemade vibrator
Oscillating spoons are considered very effective. This bait can be made in the following way:
- Mark the material according to the sketch. You need to get a diamond-shaped blank.
- Cut out the workpiece.
- Determine the minor axis and bend the part along this line.
- Solder a triangular metal plate to the part. The smaller it is, the better.
- Attach the hook to the plate, also by soldering.
- A ring will be fixed at the top to which the fishing line will be attached. First you need to make a hole for the ring.
- Sand and polish the bait to give it an attractive shine.
Homemade babbitt spinners
It is problematic to stamp spinning lures at home; for this, at a minimum, you will need a press. Cast lead spoons are less complicated to manufacture, but require galvanic coating with copper or other metal to create the necessary rigidity, which is also impossible without the appropriate equipment. In addition, such spinners are heavier than factory ones and therefore unsuitable for light spinning reels.
However, at home you can make simple cast homemade spoons from babbitt - an anti-friction alloy based on tin or lead, intended for use in sliding bearings. Babbitt spinners are cast in the same way as those made from lead, and the model is taken from a factory spinner or a plasticine imitation of any design. The mold for casting the spinner is made of gypsum (withstands up to 50 castings) or cement (M400-M600, withstands several hundred castings). The surface of the finished product requires only minor processing and sanding.
How to make a homemade spinner from babbitt
- Take (or glue) a cardboard box 6-7 cm high (the dimensions of the box should exceed the dimensions of the model by 1-2 cm).
- Fill the box halfway with a solution of gypsum or cement (the consistency of sour cream).
- Cover the model with a thin layer of Vaseline and carefully lower it into the solution so that it lies at the same distance from the edges of the box (in a factory lure, you must first cover the holes with plasticine). Lightly tap the box until the model is immersed in the solution to the desired depth.
- After the solution has partially hardened (25-35 minutes for gypsum and 24 hours for cement), remove any streaks of solution from the surface of the model.
- After complete hardening (after 2 hours for gypsum or 3 days for cement), grease the upper surface of the mold and model with a thin layer of Vaseline, then pour a new portion of the solution to the top of the box.
- After the solution has completely hardened, divide the mold, remove the model, and use a file to make a channel for casting (sprue) and air outlet in each half.
- Dry the mold well (7-10 days), otherwise during casting the process of vaporization and eruption of metal through the sprue may begin.
- Melt the babbitt in a container with a narrow “spout” (in an aluminum tablespoon), remove carbon deposits during the melting process and lighten the surface by periodically adding powdered ammonia. Try to avoid overburning the babbitt (pronounced blue color of the melt), which makes the product brittle. It is preferable to use Babbitt-83, which contains 83% pure tin, which does not tarnish and always has a silver tint.
- Pour the melt into the mold, shaking it slightly so that the babbitt spreads evenly, and remove the finished spoons after cooling. In the resulting castings, drill holes for the winding rings. Smooth out any unevenness on the cast spoon with sandpaper or a file.
Spoons made in this way usually do not require silvering, but if the homemade spoon is dark in color, it can be silvered.
You can get a silver spinner if you immediately pour melted babbitt into the mold. If you keep it on the fire a little longer, it will become golden in color, and the spinner will take on this shade. Keep it on the fire even longer and you will see the babbitt turn blue; the spinner will be of a bluish-olive tone. This type of lure does not require a sinker; it can be quietly cast “under the nose” of a perch or pike.
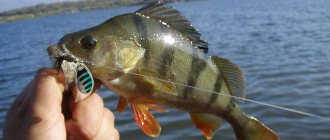
Posting spinners for perch
The simplest wiring, accessible to all beginners and experienced spinners, is to work with a reel normally. After casting, it is necessary to reel in the line at the same pace.
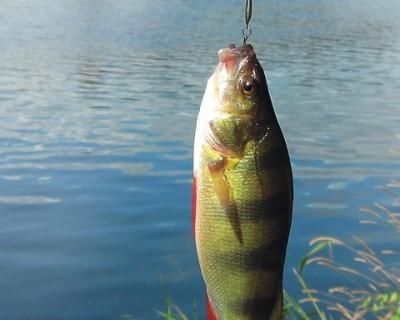
With such a simple game, you will be able to first examine the reservoir for the presence of snags and areas of vegetation invisible from the shore. In this case, you can quite count on a perch bite.
If a spinner is used, then in order for it to start working, it must be started.
If you simply reel in monotonously, the petal will remain motionless, and the bait will drag behind the fishing line, without attracting the attention of the fish.
To do this, you need to make several quick rotations of the reel, after which a slight vibration will be felt on the rod, indicating that the petal has wound up. After this, you can reduce the speed, making it minimal, but feeling the speed limit, below which the petal will stop.
Complex postings
Often it is complex wiring that forces the perch to rush to the spoon. They are quite difficult for beginning spinners, and at first bites are extremely rare. With experience, the play of the spinner in the hands of the fisherman acquires the necessary rhythm and bites become regular. There are different types of wiring:
wavy;- stepped;
- twitching.
Wave-like wiring is used when the perch is highly active. It is especially good if you manage to spot a place where a flock of striped predators is chasing fry.
Having cast there, you should reel in the line at an average speed, while either pulling it up or letting the rod go. As a result, the bait will swim in waves, changing the depth. The line should not weaken.
Such wiring is also possible using a slightly different technique, when the end of the blank moves left and right, causing the spinner to roll from side to side.
Stepped wiring involves changing the speed of rotation of the coil. The bait bounces up and smoothly sinks to the bottom, imitating the behavior of a fish looking for food. The perch usually grabs the spoon as it falls.
You should experiment with the speed of rotation and the number of revolutions per lift.
You can even work with a turntable this way. This will happen if the petal starts easily and only needs a few moments to start rotating again.
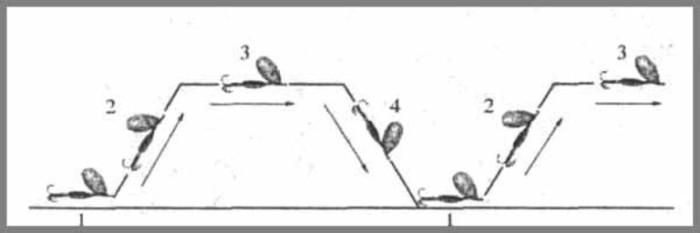
Flashing technique
Twitching resembles wave-like wiring, but the movement of the form is accompanied by periodic twitching. The jerks are made through a certain number of revolutions of the coil. In this case, you can use pauses. The repetition algorithm should be changed, achieving the most successful one on a particular body of water. You can do more pauses than jerks and vice versa.
Features of wiring in autumn
Autumn is the golden time for catching perch with a spoon. The fish is located mainly at the bottom at depth. And the easiest way to reach such conditions is with heavy spoons, because they sink well. Their weight and aerodynamics make it easy to throw far, where pits, edges and pits are usually located.
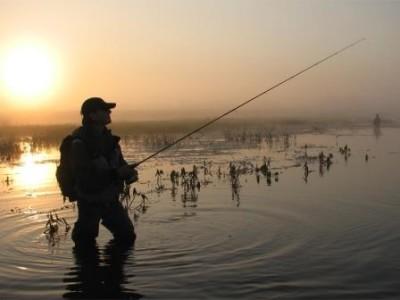
Most of all, spinners are ahead of other baits in terms of catchability starting in October.
In November, when the fish gather in large schools, moving along the bottom works very well. The rotation speed is a little slower than in summer.
Acceleration should be done only a few revolutions so that the spoon does not rise high. The cast is aimed at areas 5-10 m deep.
On small bodies of water, the wiring goes near the steep shore. At this time, the best bite is observed in cloudy weather without wind.
Oscillating spoon "Leningradka"
According to the dimensions indicated in the figure, cut a blank from sheet metal 3 mm thick, make two figured cutouts A and B with a depth of up to 4 mm in it. After this, stepping back 20 mm from the head part, use an emery wheel to grind the workpiece along its entire remaining surface so that its thickness towards the tail part reaches 1 mm. Next, bend the workpiece as shown in the figure, equip it with winding rings and a hook.
In addition to the holes in the head and tail parts, you need to punch a hole in the protrusion of the upper figured cutout (the diameter of all holes is 1.5-2 mm). It happens that it is useful to equip the spoon with an additional hook - then it is attached to the figured cutout.
For fishing at a depth of 1.5-2 m, the assembled weight of the spoon should not exceed 32-36 g.
Thanks to the bending of the spoon and the shift of the center of gravity to its head, the play of such a bait attracts a predator. If you attach red hairs to the tee and in the hole of the upper figured cutout, they prevent the spoon from quickly sinking to the bottom, which allows you to move the spoon slowly at the desired depth.
Spinner-spoon
Very often this spoon is used when fishing for perch and you can easily make it yourself. Below we will similarly explain how to make a lure for perch with your own hands:
- Take thin sheet metal, steel will do just fine, if not, then you can take an ordinary tin can from any drink. Cut a square sheet with metal scissors and straighten it, this will make it easier to draw the contours of the bait.
- Our bait will be in the shape of a diamond, use a permanent marker to mark the dimensions on the sheet.
- Using metal scissors, cut out the prepared layout.
- Calculate where the minor axis is located, along it you need to bend the metal gradually giving the shape of the bait.
- After giving the workpiece a shape, you need to solder a small triangle of copper, this can be done using a soldering iron.
- Then the hook is soldered to the copper plate.
- You will need to secure a ring at the top of the triangle; it is necessary for attaching the fishing line. To do this, drill a hole, it is advisable to wet the drilling site, otherwise you may damage the drill or part.
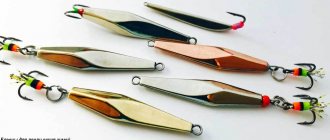
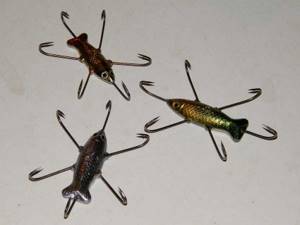
- Finally, we need to sand our vibrator and then it will be ready for use. Below you can see photos of do-it-yourself spinners.
Read here Fishing boat - principles of use and secrets of catchability. Essence, effectiveness and features of use (125 photos)
Good homemade spoon
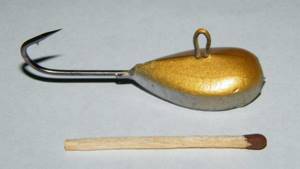
V. Sadikov offered the following homemade spoon. What’s new about it is not so much the lure as the hook (it’s homemade, there are no such things on sale). It is made from a needle or steel wire.
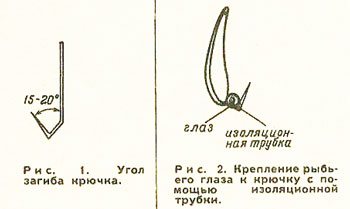
A hook of this configuration (Fig. 1) is unnoticeable and tenacious. The spoon is easily grabbed by fish. Placed on a hook and pressed with an insulating tube (Fig. 2), the fish eye film is hardly noticeable and does not interfere with the play of the spinner. The hook is bent immediately from the end of the spoon or released 2-4 millimeters. The neck with the sting is retracted at an angle of 15-20 degrees. The back of the hook also has a characteristic shape (Fig. 3). For a large spoon, you can also use a factory hook with a barb, after first releasing it on the fire and giving it the desired shape.
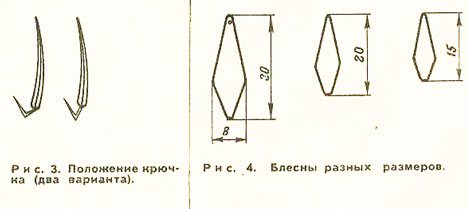
All sizes of the spoon decrease in proportion to its length.
Hooks for such spinners are made from sewing needles. They can withstand large fish, do not bend or break, are unnoticeable, very sharp, and make it easy to remove fish, which is important in the cold.
To make such hooks, you need to have steel sewing needles of different numbers:
- for small perch, roach, grayling - No. 3-4, sometimes even No. 2;
- for large fish (whitefish, large perch, ide, etc.) - No. 5-6.
The needles must be driven, their length does not matter. Hooks are made using small pliers, one of the planes of which is rounded by 2-3 mm. A special bend made from the eye of a thick needle driven into a wooden handle is also suitable for this. Anneal the needles in the flame of a match or candle. Start annealing near the thick end of the needle and observe the color of the tarnish. Stop annealing when the blue stripe that appears when heated approaches the thin tip of the needle.
After this, the tip of the needle is clamped with tweezers to the required length of the sting and bent around their flat antennae. Using the rounded side of the tweezers, the fore-end is slightly bent and a hook blank is obtained. Then, along the required length of the hook, a hook ring is bent around the rounded tendril of the tweezers, which should be perpendicular to its plane. The hem is first made in the direction opposite to the future ring, and then it is completely bent around it.
It is very important to configure the hook exactly as shown in the picture, otherwise it will not work well. These hooks must be tied with the point up, so that the fishing line is located at a right angle to the hook.
Non-snagging lure
For fishing in reservoirs with a large number of snags and grass, you need to use non-snag hooks. They usually do not cling to obstacles, so they do not break off.

How to make antiseptic with your own hands: the best instructions for making antiseptic at home + photo reviews
DIY medical mask - TOP 100 photos and step-by-step instructions with diagrams of the best ways to create
- How to embroider icons with beads - a review of the best ideas with photos and examples from masters
Made this way:
- Solder the hook to the lure. Use any suitable hook to suit your needs.
- Attach the antennae inside the spoon so that they cover the sharp parts of the hook.
- Solder the workpiece to the wire.
You can make your own antennae from springy wire or purchase ready-made ones. They will protect the tip of the hook, preventing snagging.
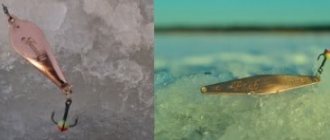
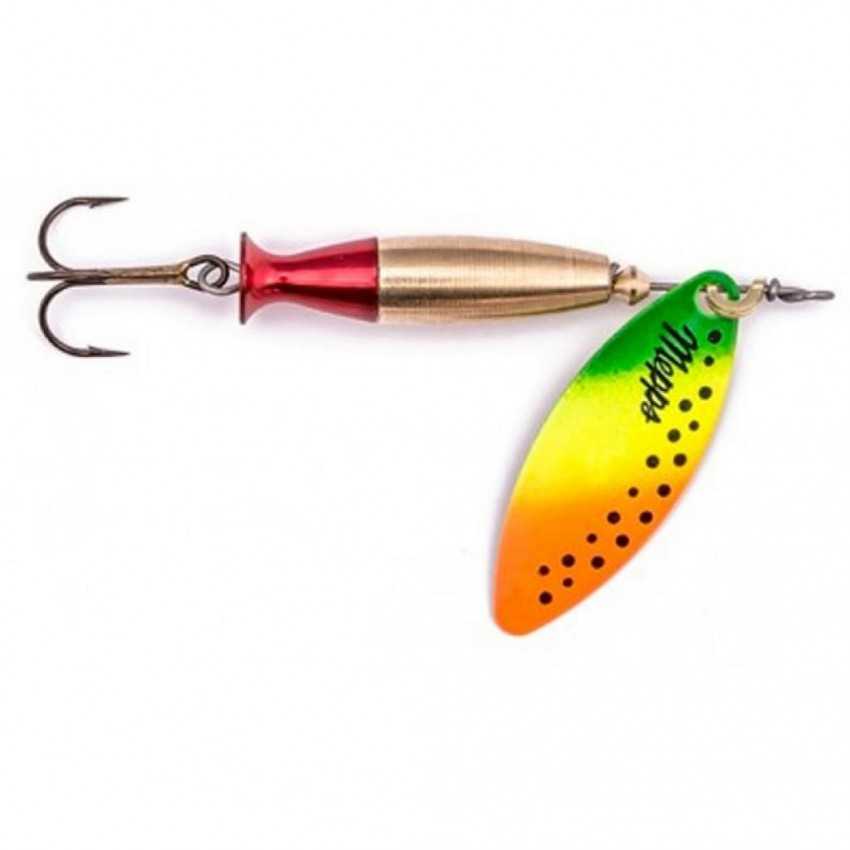
Drawing of a homemade spinner “Norway”
, the lower half is slightly curved both in the longitudinal and transverse directions. The peculiarity of the transverse bend is that at first only its edges are bent - the back remains flat. The nature of the transverse bending is clearly visible in figure a, where the cross sections of the spoon are given every 5 mm. The dotted line in this figure indicates the beginning of the bend of the edges of the spoon. The bending of the edges of the edges starts from 30 mm. The width of the edge, barely noticeable at first, gradually increases towards the tail. The longitudinal bend begins at 40 mm (counting from the top edge of the spoon) and gradually and smoothly descends to the tail (Fig. c). “Norway” belongs to the group of spinners with a low vibration frequency; due to its slight convexity, it is inactive. To increase mobility, the spoon is made thin, no more than 1.2 mm thick. For fishing in fast currents, thicker lures will probably be suitable. The surface of the spoon is nickel-plated; on the concave side, half of the spoon in the longitudinal direction is painted red. The main color of the spoon and its coloring may be different. The spinner is equipped with an oscillating type: a winding ring and a swivel (carabiner) are placed in the head part, and a free-hanging tee hook is placed in the tail part. The weight of the spoon with equipment with a length of 66.5 and a thickness of 1 mm is 14 g. To build a spinner of a different size, you need to multiply all the dimensions indicated in the figure by any one constant number (more or less than one). Winter options There are spinners designed, for the most part, for vertical fishing. Of course, this does not make them only winter baits, since they can be used quite successfully when fishing with wire, but their main advantage is vertical play. Hatchet This type of spoon is most often used in winter, but even in summer it can boast good catchability when fishing from a boat. However, to make it you need a set of tools, which not every angler has. So, to create a spinner you need: Three plates made of different metals: copper, brass and stainless steel, with a total thickness of 8 millimeters. Hook. Soldering iron and solder. Hacksaw. Electric emery. Drill. When working, it is very important to observe the dimensions to maintain high-quality play. To make a hatchet spinner, you need: Clean and solder three plates together. Saw them diagonally. According to the presented drawings, shape the workpiece using sandpaper. Using semicircular files, finalize the shape and make selections on the side edges. Make a cut in the sharp end and solder a hook there. Using electrical tape, center the spoon and drill a hole in the ground edge so that the hatchet is perfectly balanced. Adjust the balance using a file and polish the surfaces. Cicada This type of spinner can be effectively used both for spinning fishing and for vertical fishing. They are made in various shapes, so the easiest way would be to use the factory model you like as an example. To make a cicada spinner, you need: Trace the factory shape of the bait onto a copper plate. Cut the workpiece along the contour and sand it with sandpaper. Drill holes at the bottom for attaching hooks and at the top for a carabiner in the same way as on the original spoon. Polish or paint the workpiece. Thread winding rings and hooks into the holes. For better balance, you can load the bait with a pellet weight, clamping it on the lower edge of the plate, or use small bolts for this. Fishing rod for winter trolling When fishing with such baits from ice, use a winter fishing rod for trolling. You can buy it in a store or make it yourself. It is very simple to make such tackle with your own hands. To do this you need: Grate the stopper for the handle. Coat a tube of a comfortable thickness with glue and roll it over the cork chips. Wait for it to dry and repeat step 2 until the desired thickness is achieved. Clean the surface with sandpaper. Seal the openings front and back with champagne corks. Secure a small reel to the handle using tie clamps or electrical tape. Drill a hole for the whip in the center of the front plug. As the latter, you can use the upper leg of a telescopic fishing rod or a feeder whip. We insert it into the hole and fix it with glue. All that remains is to reel in the fishing line, and the winter fishing rod is ready. Homemade foil spoon V. Shebyakovsky proposed the following option for making homemade spinners. In a block of hardwood (beech, oak), cut a recess in the shape of a spinner. The edges (the outline of the spoon) should be recessed by 1-1.5 mm. The stamping depth can be no more than 6-7 millimeters. Place strips of foil 0.05--0.2 millimeters thick on the mold, and on top of the foil - rubber 7-10 millimeters thick and squeeze in a vice or clamp. When the blank of one half of the spoon is ready, you need to trim off the excess foil along the contour. The second half of the spoon is prepared in the same way. After this, the internal parts of the blanks should be tinned and filled with lead. The filled halves can be bent in one direction or the other. Solder both halves, clean and polish the surface of the spoon. You can also make two-color spinners. Blitz tips <strong>When choosing the width of the bait,</strong> you should remember that the perch's mouth is small, so the spoon should not be too large. <strong>The outline of the metal plate</strong> should resemble an oval petal. It is precisely these outlines that can create the noise effects necessary for catching a predator. <strong>When choosing a paint shade,</strong> you need to rely on bright red tones. The predator becomes aggressive when contemplating such bright colors. In order for fishing to bring the much-desired hefty catch, you must imitate as accurately as possible the movements of the fry during retrieval. If the game is bad, the predator may suspect something is wrong and leave the fished part of the water area. Do-it-yourself catchable spinners Externally beautiful spoons, despite their complete resemblance to natural fish, often turn out to be unsuitable due to poor play. One of the most catchy baits turned out to be the spinner of the famous Russian fisherman I. N. Komarov. Any amateur fisherman with minimal plumbing skills can make it at home. A mold is made from clay, plaster, limestone or wood. Wood is the most accessible for home production, since a piece of wood can be found anywhere at any time, while even clay can be difficult to get, for example, in winter. The best tree for these purposes is linden, but you can also use birch, oak, pine, etc. A small rectangular block must be planed and its surface leveled. Then use a pencil to draw the contours of the future spinner on it. Using a knife or chisel, cut out the outlined shape. The notch should be smaller at the edges, and gradually deepen by 4-5 mm towards the middle. The width of the head is 10-12 mm, length is about 50-60 mm. On one of the edges of the mold, where the head of the future spinner is supposed to be, make a shallow cut. When the notch in the wooden block is ready, you need to insert a medium-sized hook (No. 6-8) into the cut, but certainly with a ring, which will allow the tin to connect more firmly to the hook shaft. Then, in a spoon, heat a piece of pure tin (without any impurities), slightly larger than needed for a spoon, over the fire, and pour the molten metal evenly, without stopping, into the prepared recess to the brim and even a little more, so that the tin rises somewhat above the surface of the mold. When the tin hardens, the spinner blank should be removed from the mold with a file or knife, remove all irregularities, and give it its final shape and bend. On the edge of the spoon opposite the hook, drill with the tip of an awl or use a thin nail to punch a hole for the winding ring. You can tie a spinner without a ring, directly to the fishing line. In order for the spoon to be impeccably shiny, it is scraped clean with the butt of a knife and polished (for example, on the boot of a felt boot; this manipulation is repeated before each catch, since tin becomes dull from water). The advantage of a tin spoon, devoid of a hard lining of foil or steel, is the ability to change its shape and bend during the fishing process, if the need arises. Thus, increasing or decreasing the curvature of the tin “fish” allows you to change the nature of the game. The “snake” spinner designed by the famous Khimki fishing master L.S. Nikolsky also turned out to be very tempting for predators. Perch, pike and pike perch grab it equally greedily. Made of tin and curved in the shape of a snake in one plane, it is lined on the outside with brass foil. In the water, the spoon not only plays superbly, but also, apparently, “reliably” excites vibrations in the environment, similar to those that arise during the movement of small fish. This assumption can be confirmed by successful trolling with a “snake” at great depths, where the illumination of the water is very low and predatory fish detect the movements of their “preys” only with the help of the lateral line and auditory organs. Flashing perch in the shallows in spring A homemade spoon for spring trolling of perch at the end of winter in shallow water is shown in the picture. And catching perch in the spring with light vertical baits can be effective from thick ice, but in a slightly different way. Moreover, the lure of perch in early spring is also in the shallows, where predatory fish, following the fry, approach fresh streams of melt water. For the process of trolling in thick, loose ice over a shallow coastal area of a reservoir, I drill a hole with a drill, from which I remove most of the slush. Then, using the handle of a slotted spoon or a thick knot in the crushed ice, I pierce a hole and make short upper and lower runs of a light spinner, which can be combined and alternated. First, I lure the perch almost under the ice, which by spring becomes loose, but remains quite thick. To do this, I make a short upper retrieve of a perch spoon 20-25 centimeters long from the bottom and wait 20-30 seconds. The pause when trolling between retrieves should be long; in the spring, a revived perch in the shallows becomes noticeably shy. Therefore, we wait for the humpback whale to come up to suck the bait. Then the perch shallow-water spoon is dropped almost to the bottom and again there is a long pause. Spring trolling of perch in the shallows With the classic method of trolling perch in the shallows in the spring, we perform a short “toss” of the spoon, followed by dropping the bait vertically to a level 4-5 centimeters above the bottom. The trolling of perch in this way is also carried out with very long pauses between the cycles of upper and lower retrieves. A bite can come at the most unexpected moment, and a large perch on a bright spring day at shallow depths is always on the alert, so with the spoon in its mouth it sharply moves to the side, after which abrasions appear on the fishing line due to friction on the lower edge of the hole. I lure perch in spring in shallow water with a light lure tied to a monofilament with a diameter of 0.14 - 0.16 mm, and if the fishing is successful, I tie the bait up to 2-3, or even more times per day. Other perch spoons for shallow waters In addition to the light vertical lures presented on this page for trolling perch in spring shallow water and on the first ice, there are also so-called “dying” very light thin winter perch lures. When lowering in the water column, their vibrations resemble the movements of an autumn leaf sinking in the water. But I’ve never fished with them, and I don’t know how. That's why I never soldered. Anyone interested can learn how light lures of the simplest shapes are soldered to lure perch in spring, winter, and summer in the topic How to make a winter lure with your own hands. Homemade spinners “Swallow” and “Poprygunya” by L. Borisovets For many years he used homemade spinners “Lastochka” and “Poprygunya”, which he highly recommended for catching asp. Their weight is 37-45 g. When retrieved, they fussily jump out of the water, which always attracts the asp. The “Swallow” and “Poprygunya” spinners are made of silver-plated or tinned brass, 1.5 mm thick. First, according to the dimensions shown in the figure, you need to cut out the blanks and drill the required holes in them with a diameter of 4 mm. The Swallow blank should be bent along the dotted line at an angle of 90°. Rivet two double hooks No. 12 to the “wings” of the spoon tightly with copper rivets with a diameter of 4 mm. A strip of tin should be soldered into the groove of the “Swallow” spinner to bring the weight of the spinner to 35-40 g. The “Jumper” blank must be bent as shown in the figure, and the “wings” of the spoon in the bow must be bent upward at an angle of 40°. In the tail part, pour a lead ball with a diameter of 12 mm. This is easy to do in a plaster mold. Then you need to install the winding rings, carabiner and tee No. 14. Spoons should be cleaned with coarse sandpaper, but not polished. Polished lures repel fish with their glare. Lures are attached to the line without a leash. Their weight allows you to cast up to 70-80 m. “Swallow” and “Poprygunya” were tested in the Volga, Syr Darya, Neman and Western Dvina basins. The asp always pecked at these spoons very actively. Decoration of spinners This is an important factor in the catchability of the bait. The bright surface with a hidden hook will be of interest to any predator. There are many good design options for spinners: paint scales, bright stripes, fish eyes on the surface with varnish; equip the tee with colored threads and tinsel plumage; put parts of silicone baits, vibrating tails, etc. on the hook. The photo shows an example of decorating the tee of a spinner with red threads. With high-quality decoration, the lure plays completely differently, which significantly increases the chances of catching a worthwhile trophy. Spinner M. Schwartz proposed the following design of a rotating spoon. The spoon is made of metal. The workpiece has the form of an ellipse-shaped plate (Fig. 1). The plate is bent in the longitudinal direction along a helical line (Fig. 2). The edges of the plate have two sections: 1, 2 and 3, 4, which are bent in pairs in opposite directions. So, section 1 is bent in one direction, section 2 in the opposite direction. Sections 3 and 4 are also bent. In relation to the transverse axis of the spinner, the bent sections of the edges are asymmetrical. For example, sections 1 and 3 are longer than sections 2 and 4. The amount of edge bending may vary. There is a hole at both ends of the spoon, into each of which a winding ring is placed. When the spoon is immersed in water and while being retrieved, it rotates and this attracts predatory fish. The more elongated the ellipse, the less rotation it has and vice versa. Spinner for pike perch To catch pike perch, they use special spoons, which you can also make yourself. For this you need: paperclip or thin wire; metal plate; treble hook; beads; soldering iron Making a lure for pike perch yourself: Apply the drawing to the sheet material. Even tin from a tin can will do. Cut out the product and sand it thoroughly. Drill 2 holes at opposite ends of the product. Thread the wire through these holes and secure the hook so that it hangs freely. Attach a small bead to the axle. Cover the product with shiny paint. The vessel prefers bright, eye-catching baits. Spinner - balancer This type of spoon is intended for vertical trolling from a boat or in winter when catching predatory fish from the ice. The spoon imitates a juvenile fish and therefore attracts a predator. The balancer can consist of an ordinary tube, about 5 cm long, at the ends of which hooks are attached, and in the center of the bait there is a hole for attaching to the main fishing line. You can make a balancer in another way: cast it in a plaster mold using lead. Before pouring, hooks are installed into the mold, after which the lead is melted and poured. After cooling, the workpiece is processed with a file and emery cloth. Finally, the body of the spinner is painted in a bright color and varnished. Such baits are mainly used for winter fishing.")